Wildly Happy and free style painting in today’s Sunday blogpost.
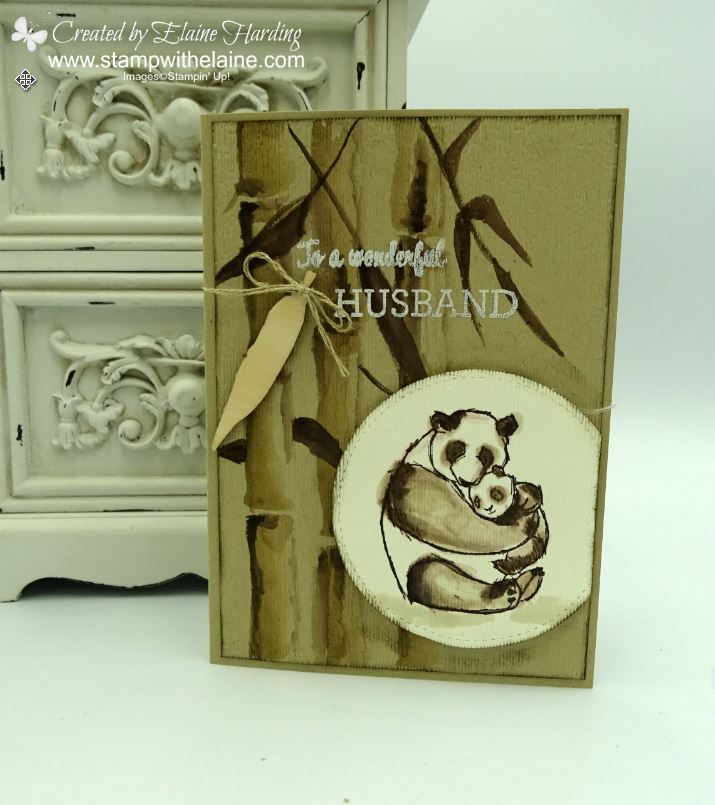
I made this card for my hubby’s birthday last month and was really stumped because there weren’t any bamboo images in any of Stampin’ Up!’s current catalogues. Then I had a light bulb moment and thought I could paint my own with the aqua-painters. These come in two sizes in a pack, a larger brush and a smaller one, but before I begin, a little explanation on why I continued the “brown” theme is needed.
Factoid
You might be wondering “is there such a thing as a brown panda”? Here’s a little factoid for you – The Qinling panda is a sub-species of the giant panda which was discovered in the 60s, but not recognised as a sub-species until 2005. A brown panda called Qizai is the only one in captivity. He was found in a nature reserve in Qingling Mountains in Central China abandoned by his mother at two months old weak and neglected. His mother was black and white, so Qizai’s brown and white coat is a conundrum. Scientists believe it was due to some genetic mutation. He’s alive and well and turned 9 last year.

I wanted to continue the “brown” theme, so I stamped the Pandas in Early Espresso, and used Crumb Cake and Early Espresso as my palette to colour the pandas. Then I die cut it with the next to largest stitched shapes circle die and embossed it with the Subtles 3D embossing folder also.
Using clear blocks as a palette
The new style ink pads are rather hard to squeeze with my arthritic hands, so I’ve been picking up ink directly from the ink pad on to a clear block (any size will do, I usually use an A block which is the smallest of the range by Stampin’ Up!). Whenever I need to change inks, I simply clean that block and use the same block to pick up the next colour.
Embossing
Use an embossing buddy to prevent static. Stamp “To my wonderful Husband” in Versamark ink. Sprinkle white embossing powder over this and heat set. With hindsight, I should have done the stamping and embossing before I ran it through with the die cutting machine!

Inside card
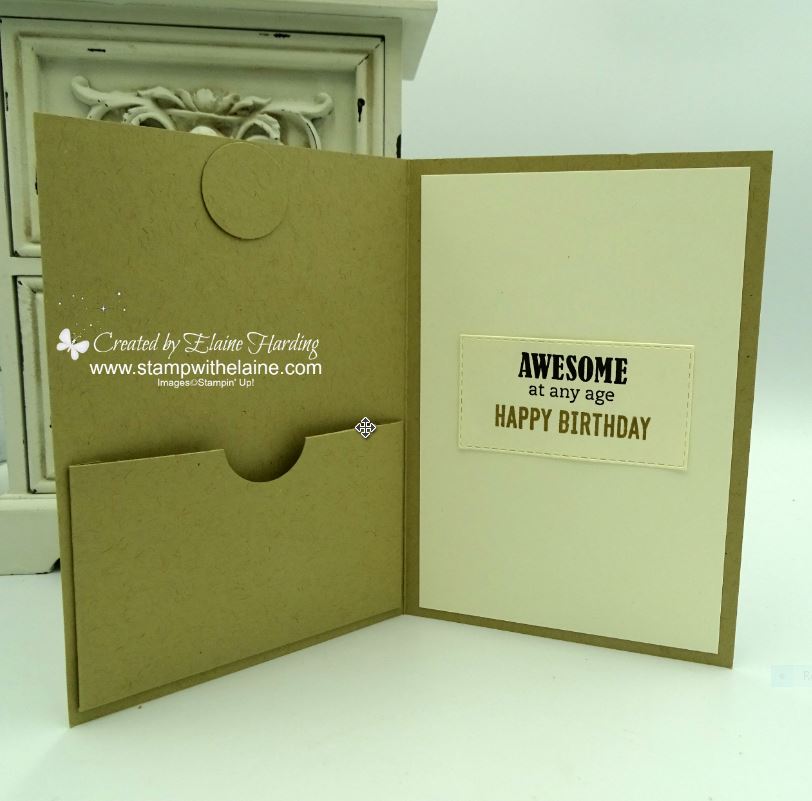
I created a little pocket on the left to hold money, and punched out a 1″ circle which is partially glued so that you could tuck one end of the money underneath the circle to keep the money from falling out.
Hand painting/embossing
I painted the bamboo directly onto the Crumb Cake layer and then once it was dry, I sandwiched it in the Subtles 3D embossing folder to add texture. The edges were sponged in Crumb Cake before being adhered to the card base.
Finishing touches
The sentiment is from “Itty Bitty Birthdays” and I’ll let you into a little secret…. I stamped it crooked! So for a quick fix, I stamped it again on some scrap, cut it out with the Stitched Rectangle dies and adhered it on top.
Once I finished the card, I felt it was missing something and discovered that if you flip the Tags & Feathers elements round the other way, it could be made to look like a bamboo leaf. I used some pliers to cut away the jagged edges and created this look and finished it off by tying some linen thread round the end. Job done!
I’m thrilled with the result, and rather chuffed with my bamboo painting – something I’ve never EVER done before! Just goes to show, if you challenge yourself, you will be surprised at what you can achieve!
Enjoy the rest of your Sunday and thank you so much for visiting!

- SHOP ONLINE – EARN 10% REWARDS ON ALL PURCHASES OVER £20
- PURCHASE A STARTER KIT : Get £155 worth of products for only £99. Choose from current catalogues and any specials available. Free Shipping. Read more
- Subscribe to my Video Tutorials – click here


