A few weeks ago I had posted an inverted “W” fold using the Whale Done stamp set. I had a special request to do a video tutorial on it, so I’ve incorporated it as one of the projects in my Twelve Week Countdown to Christmas Series. So welcome to Week 2 of Countdown to Christmas 2020.
The reason I posted the Whale Done card as a blogpost rather than a video tutorial was because there are a lot of layers to cut and just writing down the measurements alone would take some doing!
I’ll break it down into sections for the card front, card back, and inverted “W” bridge section underneath each photo. Well, actually an inverted W would be an “M” wouldn’t it? I just like the sound of an inverted “W”!!
You can make it with less layers too, of course, but I was working with a 6″ x 6″ (15.2 x 15.2 cm) DSP, and I really didn’t want to waste precious pretty paper just for the one card and wanted to make it stretch as much as I could. Plain card stock is much cheaper even if I had to use more of it! winks!

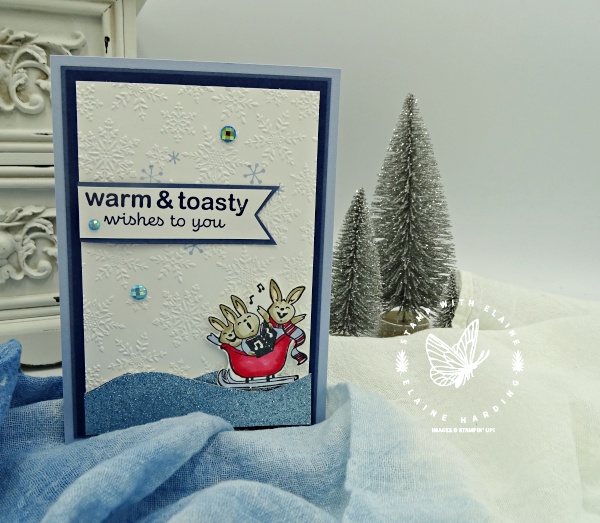
Card Front – Imperial
| Description | Qty | Measurements |
| Card Front Base – Seaside Spray | 1 | 4-1/8″ x 5-7/8″ |
| Mat Layer 1 – Misty Moonlight | 2 | 3-7/8″ x 5-5/8″ |
| Mat Layer 2 – Night of Navy (1 for front of card front, 1 for embossing for back of card front) | 2 | 3-3/4″ x 5-1/2″ |
| Mat Layer 3 – Whisper White standard * *stamp first before embossing | 1 | 3-1/2″ x 5-1/4″ |
| Balmy Blue Glimmer paper | 1 | 2″ x 3-1/2″ |
Card Front – Metric
| Description | Qty | Measurements |
| Card Front Base – Seaside Spray | 1 | 10.5 cm x 14.85 cm |
| Mat Layer 1 – Misty Moonlight | 2 | 9.8 x 14.3 cm |
| Mat Layer 2 – Night of Navy (1 for front of card front, 1 for embossing for back of card front) | 2 | 9.5 x 14 cm |
| Mat Layer 3 – Whisper White standard * *stamp first before embossing | 1 | 8.9 x 13.3 cm |
| Balmy Blue Glimmer paper | 1 | 5 x 8.9 cm |
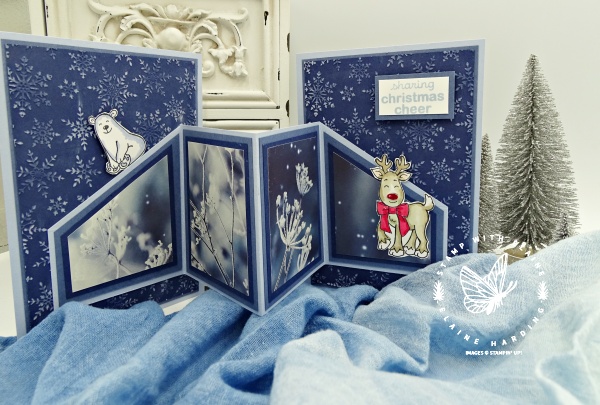
When you open up the card, there is an inverted “W” fold which links the card front to the card back.

Inverted “W” bridge section
Imperial Measurements
Bridge Piece
| Description | Qty | Measurements |
| Bridge piece: Seaside Spray | 1 | 3-1/2″ x A4 length – Fold in half, then each half in half again creating 4 equal panels |
End Panels
| Description | Qty | Measurements |
| Mat Layer 1: Misty Moonlight | 2 | 2-3/4″ x 3-1/4″ |
| Mat Layer 2: Night of Navy | 2 | 2-1/2″ x 2-7/8″ |
| Mat Layer 3: Feels Like Frost DSP | 2 | 2-1/4″ x 2-7/8″ |
Centre Panels
| Description | Qty | Measurements |
| Mat Layer 1: Misty Moonlight | 2 | 2-3/4″ x 3-3/8″ |
| Mat Layer 2: Night of Navy | 2 | 2-1/2″ x 3-1/8″ |
| Mat Layer 3: Feels Like Frost DSP | 2 | 2-1/4″ x 2-7/8″ |
Metric Measurements
Bridge Piece
| Description | Qty | Measurements |
| Bridge piece: Seaside Spray | 1 | 8.9 cm x A4 length – Fold in half, then each half in half again creating 4 equal panels |
End panels
| Description | Qty | Measurements |
| Mat Layer 1: Misty Moonlight | 2 | 7 cm x 8.2 cm |
| Mat Layer 2: Night of Navy | 2 | 6.4 cm x 7.3 cm |
| Mat Layer 3: Feels Like Frost DSP | 2 | 5.7 cm x 6.4 cm |
Centre panels
| Description | Qty | Measurements |
| Mat Layer 1: Misty Moonlight | 2 | 7 cm x 8.6 cm |
| Mat Layer 2: Night of Navy | 2 | 6.4 cm x 7.9 cm |
| Mat Layer 3: Feels Like Frost DSP | 2 | 5.7 cm x 7.3 cm |
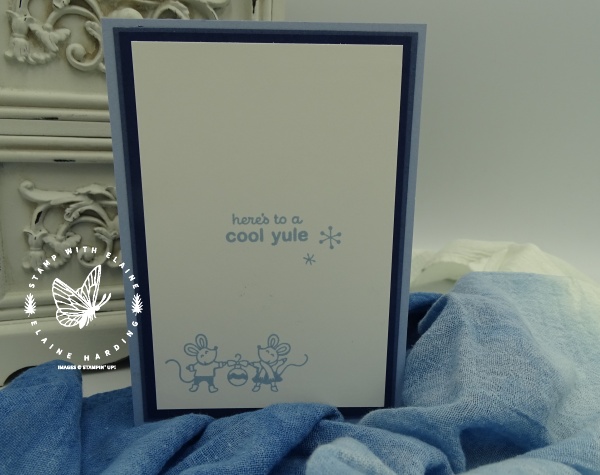
Here’s the back of the card.

Card Back – Imperial
| Description | Qty | Measurements |
| Card Back Base – Seaside Spray | 1 | 4-1/8″ x 5-7/8″ |
| Mat Layer 1 – Misty Moonlight | 2 | 3-7/8″ x 5-5/8″ |
| Mat Layer 2 – Night of Navy (1 for front of card front, 1 for embossing for back of card front) | 2 | 3-3/4″ x 5-1/2″ |
| Mat Layer 3 – Whisper White standard | 1 | 3-1/2″ x 5-1/4″ |
Card Back – Metric
| Description | Qty | Measurements |
| Card Back Base – Seaside Spray | 1 | 10.5 cm x 14.85 cm |
| Mat Layer 1 – Misty Moonlight | 2 | 9.8 x 14.3 cm |
| Mat Layer 2 – Night of Navy (1 for back of Card Back, and the other for reverse side of Card Back for embossing) | 2 | 9.5 cm x 14 cm |
| Mat Layer 3 – Whisper White standard | 1 | 8.9 x 13.3 cm |
Bear in mind that this card is rather bulky – so postage might be an issue, and personally I wouldn’t produce this en mass but make it for someone special or hand delivered.
This card looks complicated, but it really isn’t. You just need to be methodical and take it a step at a time to avoid getting in a muddle with so many bits of paper to hand! I would suggest you do it in sections just as I’ve listed in the cutting guide. Make up your card front, then the card back and lastly tackle the bridge section. Whatever you do, have fun!

- SHOP ONLINE – EARN 10% REWARDS ON ALL PURCHASES OVER £20
- PURCHASE A STARTER KIT : Get £155 worth of products for only £99. Choose from current catalogues and any specials available. Free Shipping. Read more
- Subscribe to my Video Tutorials – click here


