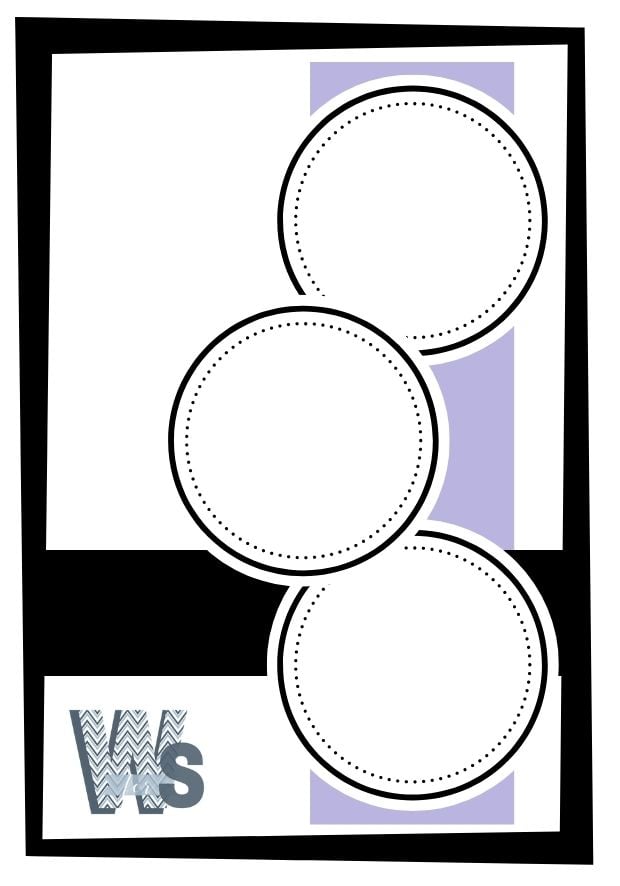
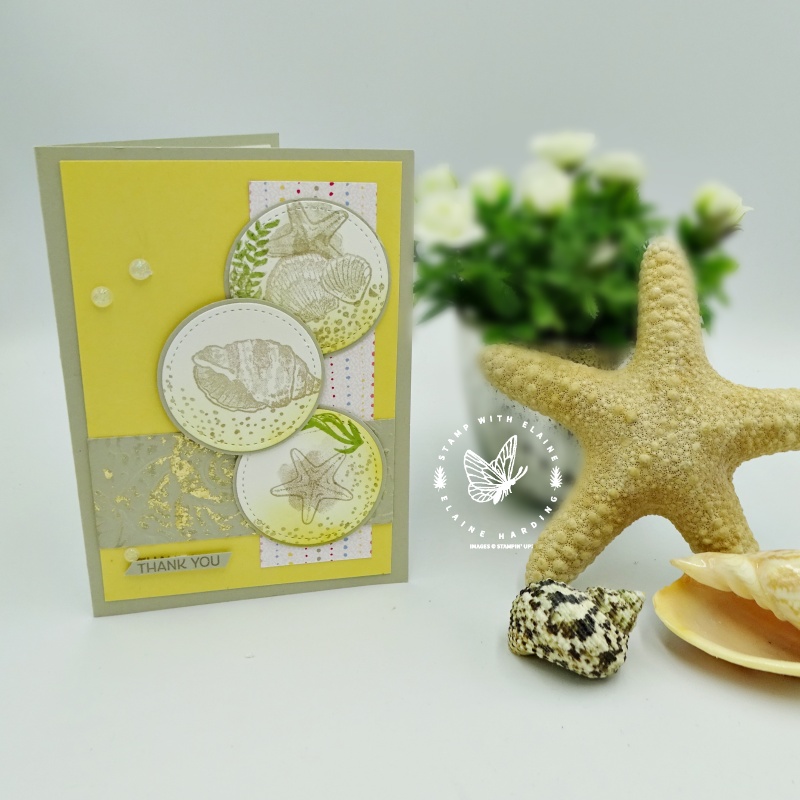
Happy Sunday! I created a “Thank You Card” using the same card sketch created for the Tech 4 Stampers Blog Hop which I took part in last week. Card sketches are a relatively new genre for me. Following a sketch saved me a lot of time. The placement of the elements had already been worked out.
How to interpret the sketch
- Black denotes the card base layer.
- White is a mat layer which is cut smaller than the card front. Adhere this to card front.
- Purple represents the strip of paper which could be patterned paper, or different coloured card stock from the card base and should be adhered next.
- The black strip should be cut in the same colour card stock as the card base and should be adhered on top of the purple strip.
- Next, die cut or punch out 3 circles to use as mat layers.
- Cut 3 smaller circles for stamping your images on and adhere these to the larger circles.
- Position two of the circles and adhere them to the card front as shown on sketch.
- Raise the third circle (the one in the middle) on dimensionals and adhere it between the two other circles.
- Stamp the sentiment on bottom left to complete card front.
- It goes without saying, that you can do whatever you wish for the inside of the card to complete the project.

A stepped up interpretation of the sketch
So here’s the card with a few little extras, a stepped up version, if you like. My card base is in Sahara Sand and the strip going across the width of the So Saffron card front layer was embossed with the Seashells 3D embossing folder. I ran a Versamark ink pad over the raised embossed bits. Then I sprinkled it with Heat and Stick powder and pressed the gilding flakes on top and brushed off the excess.
I used a masking technique for one of the circles. Both cockle shells were stamped on post-it notes on the sticky part and cut out as masks. This makes the images appear from behind after stamping. The sandy sea bed was created by using a blending brush in So Saffron ink.
At the last hurdle, I stamped my sentiment crooked! Darn! Have you ever done that? There’s always a solution – simply stamp the sentiment again on another piece of card stock and adhere it on top of the crooked one! After all that work, you don’t want it to end in the bin!
Would you like to see the original card I made for this sketch? It was a masculine card and the sketch was created by the lovely Sara Sayers for the blog hop. No embellishments added in the original. Click HERE to see it.

Supply list:
Product List
- SHOP ONLINE – EARN 10% REWARDS ON ALL PURCHASES OVER £20
- PURCHASE A STARTER KIT : Get £155 worth of products for only £99. Choose from current catalogues and any specials available. Free Shipping. Read more
- Subscribe to my Video Tutorials – click here


