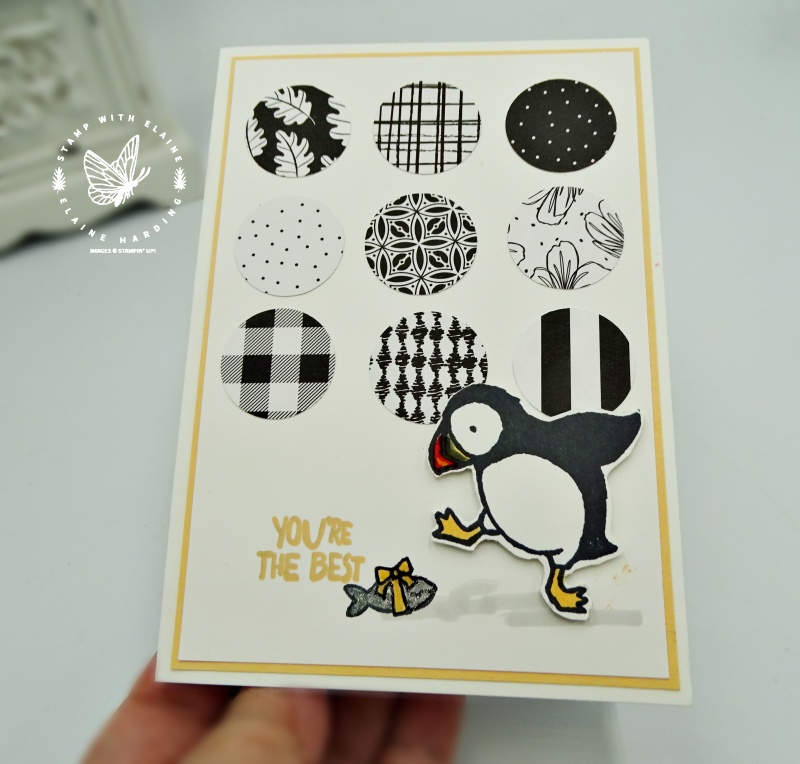
Today I’m going to show you how to create a grid of circles with patterned paper. If you have trouble trying to line up shapes or images in a straight line, then creating a template will save you time. You can use it time and time again for future projects requiring the same technique.
I used the 1″ circle punch to punch out several circles of patterned paper. Sadly, the 1″ circle punch has retired, but there are some staple tools one is compelled to hang on to, and this is one of them. However, if you don’t have a 1″ circle punch, the layering circle dies will do the same job. This patterned paper are 12″x 12″ (30.5 x 30.5 cm) sheets called “Pattern Party”. They are not for sale, but can be earned through qualifying Party Sales as a Host Reward. Its retail value is £29.00 and consists of 4 each of 12 double sided designs. The reverse is all black and white which is the side I used. Of course you can substitute this for any patterned papers in your possession.

For a pop of colour, I added a Pale Papaya mat layer so that it would tie in with the Puffins webbed feet and the bow on the fish. You’ll find these adorable puffins on page 67 of the new May 2021 – April 2022 Annual Catalogue.
The puffin was stamped on a separate piece of Basic White card stock and fussy cut. It was raised on dimensionals for a 3D look.
Press play to see how the grid works.
If you’d like to see another puffin creation click HERE to see “mama” puffin feeding her baby.
List of supplies:
Product List
- SHOP ONLINE – EARN 10% REWARDS ON ALL PURCHASES OVER £20
- PURCHASE A STARTER KIT : Get £155 worth of products for only £99. Choose from current catalogues and any specials available. Free Shipping. Read more
- Subscribe to my Video Tutorials – click here


