
I thought I’d do a Soft Pastels 101 and as there are so many ways to apply them I’ve split them in a Soft Pastels 101 – Part 1 for this week. The following Friday, I will publish Soft Pastels 101 – Part 2.
Please bear with me as I haven’t edited the video yet, and don’t know how long it is! With five techniques to cover, I doubt if I can keep it to a 10 minute bite size! In Part 1, I cover some background information on pastels and showcase five ways on how you can apply them.
Technique 1 – Direct to paper/aquapainter & Technique 2 – Direct to paper/finger blending
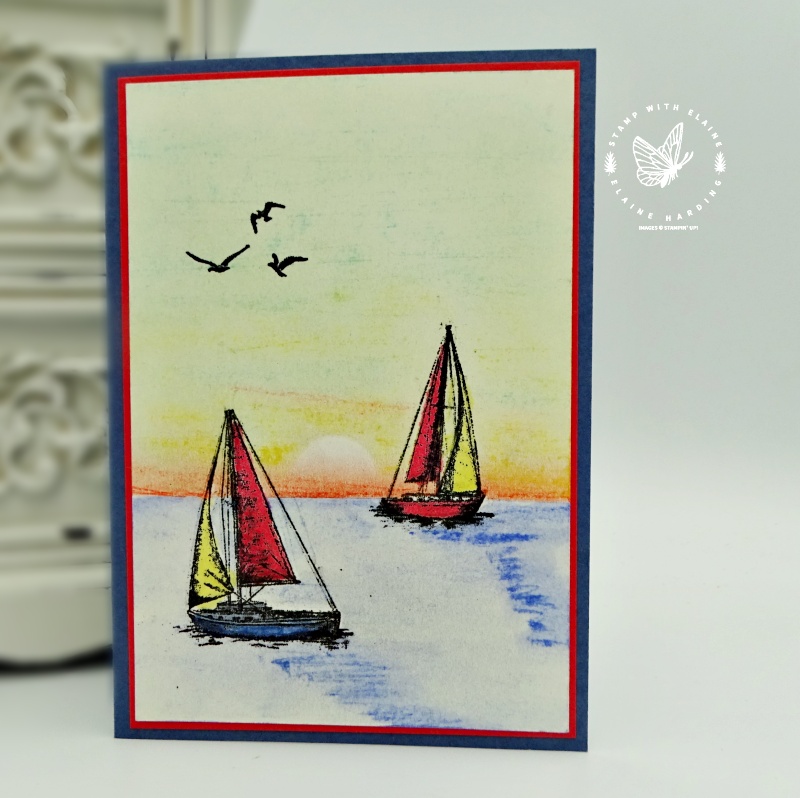
There are two application techniques on this Sailing Home card. It was stamped in Stazon Black ink. Stazon Black ink is waterproof and won’t smudge. The first technique was to apply the pastel pigment direct from the stick to the Shimmery White card stock. Afterwards, I used an aqua painter to colour wash the pigment and sped up the drying process with a heat tool. Once dry, I added more pigment to create the ripples, and blended those with my finger tips.
The second technique for the upper portion, I applied pigment direct to paper using Poppy Parade, Mango Melody, Daffodil Delight and Coastal Cabana. The sails, yachts, sea and also a 3/4″ circle for the setting sun were masked before I added the pigments. This upper portion was blended with my fingertips only.
Technique 3 – Painting with pastels
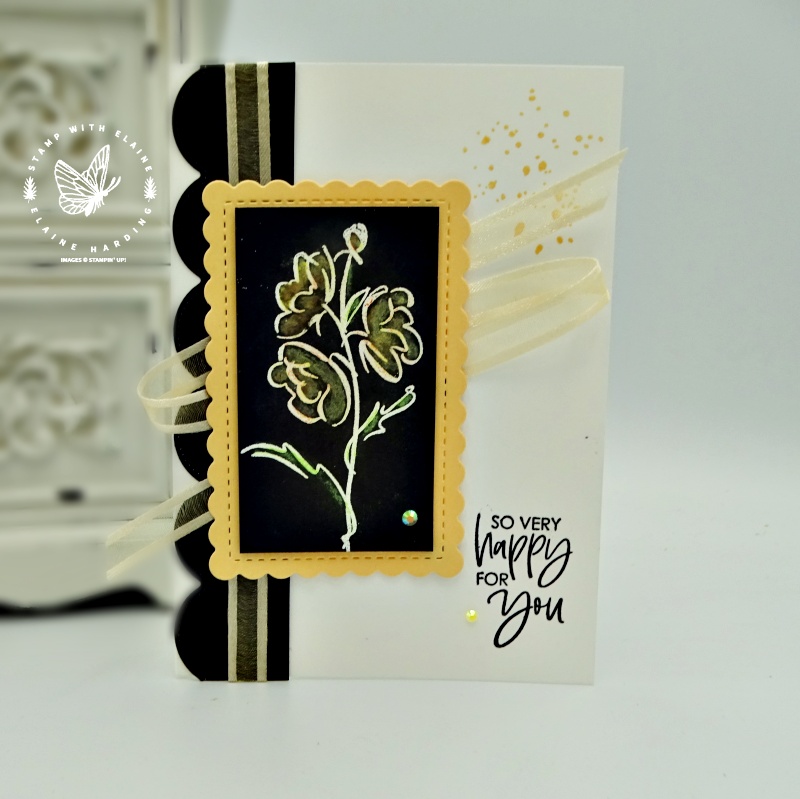
This was painting pastels onto a white embossed image on Basic Black card stock using the Color and Contours bundle. If you want to preserve the square shape of your soft pastel stick, pick up the pigment from the end of the stick rather than the long flat surface of the stick. To speed up the process, you can create some pigment dust by scraping the end of the stick. Use the palette end of your Take Your Pick tool, or the edge of your scissors. You can also scribble on a scratch piece of paper, but I find that wasteful and it blunts the end of your stick. I like to keep the ends sharp in case you want to do some fine detailed work.
Technique 4 – Application tools eg, sponge daubers, Q-tips, make-up brushes and Technique 5 – Blender pen on stamped images on Shimmery White card stock
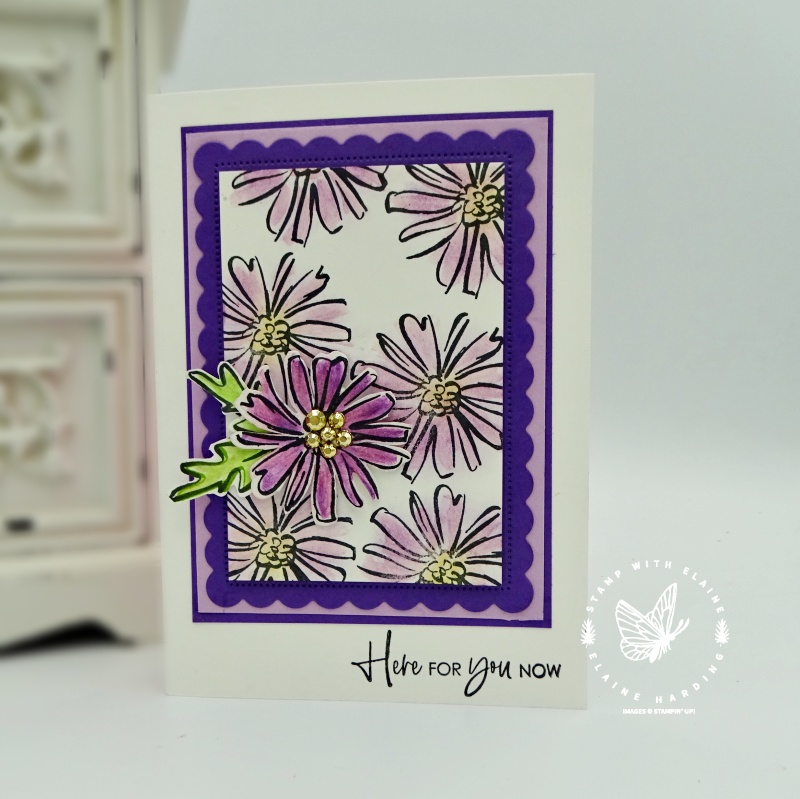
I stamped several flowers randomly on Basic White card stock in Tuxedo Black Memento ink for the background piece. If you’re not water colouring the images, it’s okay to use Tuxedo Black Memento ink. In the video, I demonstrated the three different types of applicators you can use. The method I used for this card sample was a sponge dauber.
For the fifth technique, I’d stamped the floral image on Shimmery White card stock. I didn’t use Stazon on the photopolymer stamp because Stazon can only be removed with Stazon cleaner which can be harmful to photopolymer stamps. If you do use Stazon on photopolymer stamps, when you use Stazon cleaner on the stamp, do it as quickly as possible and wash and rinse of with some detergent immediately.
Check out the video – it’s much more self-explanatory!

")


 Open Weave Ribbon")

- SHOP ONLINE – EARN 10% REWARDS ON ALL PURCHASES OVER £20
- PURCHASE A STARTER KIT : Get £155 worth of products for only £99. Choose from current catalogues and any specials available. Free Shipping. Read more
- Subscribe to my Video Tutorials – click here
Pingback: Anniversary card with pastels - Stamp with Elaine