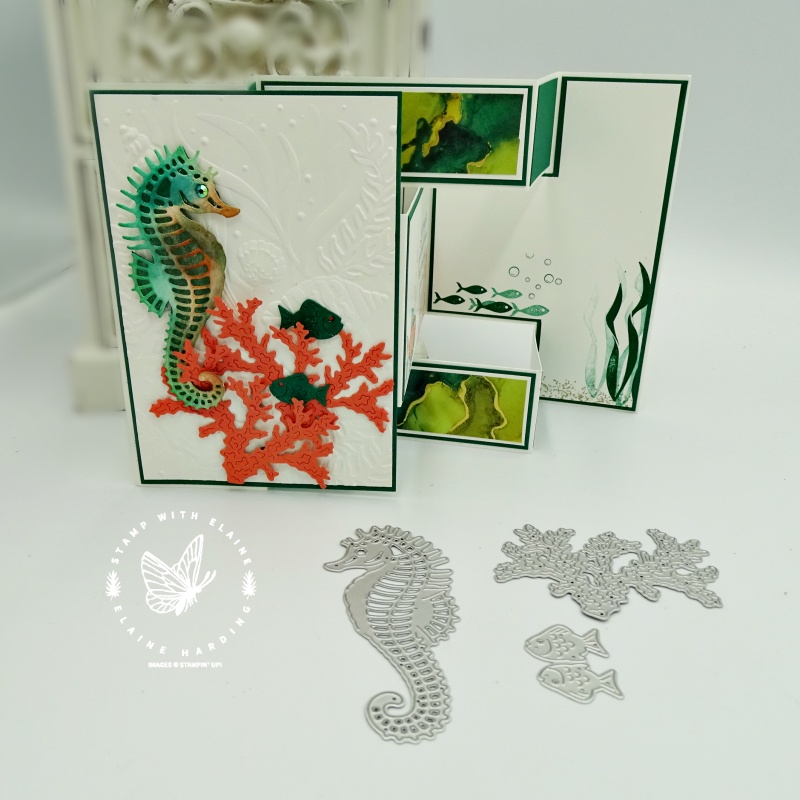
When I first started crafting, the Tri-fold Shutter Card looked really daunting and then adding a blending technique on top would have sent me over the edge! Thirteen years on, it’s really not difficult when you know how. Having said that, if you want pretty layers, then this involves a lot of itty bitty pieces of card stock to cut and glue!

Start with a piece of basic white card stock 5-3/4” x 12”. You’ll need a trimmer to cut two parallel lines running parallel to the long side of the card. Orient your card stock with the short side on top. Align the right edge of your card stock at 1-1/2″ to the right of the cutting groove and cut from 2″ down to 10″ for your first cut. With your card stock in the same orientation, align the left edge at 1-1/2″ and repeat cut for the second cut.

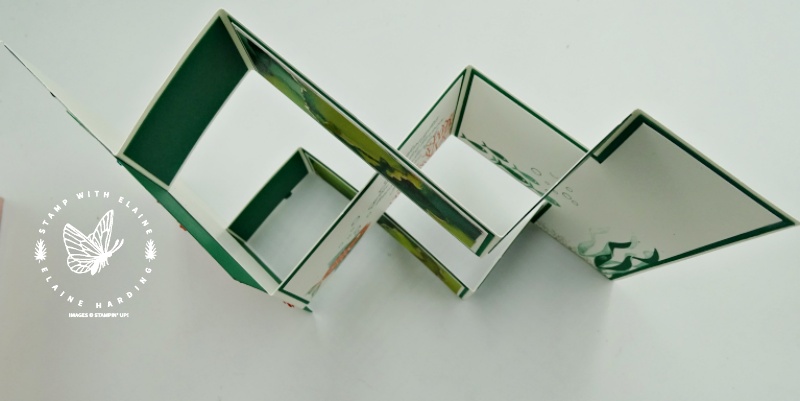
On your score board, orient the card stock with the long side at the top. There is some partial scoring on the outer edges of the cut lines at 2″, 10″. You omit scoring the section in between the cut lines where your cut line starts and finishes. Score from top all the way down to the bottom at 4″ and 8″. Once you’ve burnished your score lines, a series of Mountain and Valley folds to close your card will look like the picture above.

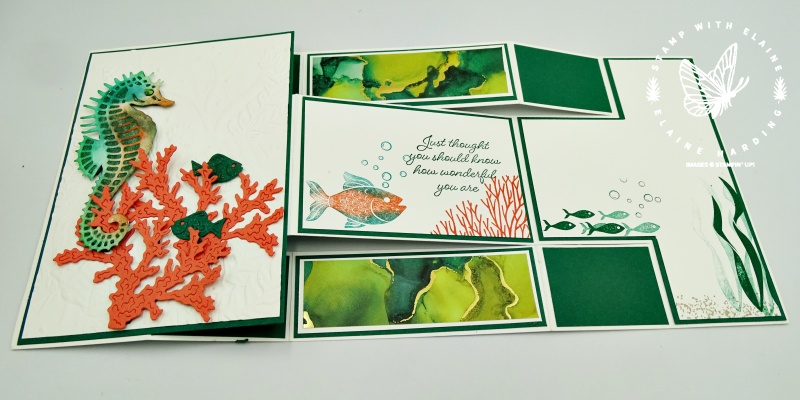
Laid out flat, you can see more clearly the various mat layers used to build the card. Do press play and watch the video. The measurements for the card stock is listed below. For instructions on how to cut the card stock please refer to the video. You can stop and start it as many times as you want!
Imperial Measurements cutting guide
| Description | Qty | Measurement |
| Card Base : Basic White | 1 | 5-3/4″ x 12″ |
| First Panel Mat Layer 1 (with Seahorse) – Shaded Spruce | 1 | 3-7/8″ x 5-5/8″ |
| First Panel Mat Layer 2 (with Seahorse) – Basic White for embossing | 1 | 3 3/4″ x 5 1/2″ |
| Mat Layers for small rectangles – Shaded Spruce | 4 | 1-7/8″ x 1-3/8″ |
| Mat Layer 1 for middle section, top and bottom – Shaded Spruce | 2 | 3-7/8″ x 1-3/8″ |
| Mat Layer 2 for middle section, top and bottom – Basic White | 2 | 3-3/4~ x 1-1/4″ |
| Mat Layer 3 for middle section, top and bottom – Expressions in Ink Specialty DSP | 2 | 3-5/8″ x 1-1/8″ |
| Mat Layer 1 for middle section, centre panel – Shaded Spruce | 1 | 3-7/8″ x 2-5/8″ |
| Mat Layer 2 for middle Section, centre panel – Basic White (for stamping on) | 1 | 3-3/4″ x 2-1/2″ |
| End Panel Mat layer 1 – Shaded Spruce (for cutting into a T shape) | 1 | 3-7/8″ x 5-5/8″ |
| End Panel Mat Layer 2 – Basic White (for cutting into a T-shape and for stamping on) | 1 | 3-3/4″ x 5-1/2″ |
Metric Measurements cutting guide
| Description | Qty | Measurement |
| Card Base : Basic White | 1 | 15 cm x 30 cm |
| First Panel Mat Layer 1 (with Seahorse) – Shaded Spruce | 1 | 14.5 cm x 9.5 cm |
| First Panel Mat Layer 2 (with Seahorse) – Basic White for embossing | 1 | 14 cm x 9 cm |
| Mat Layers for small rectangles – Shaded Spruce | 4 | 4.5 cm x 3 cm |
| Mat Layer 1 for middle section, top and bottom – Shaded Spruce | 2 | 9.5 cm x 3 cm |
| Mat Layer 2 for middle section, top and bottom – Basic White | 2 | 9 cm x 2.5 cm |
| Mat Layer 3 for middle section, top and bottom – Expressions in Ink Specialty DSP | 2 | 8.5 cm x 2 cm |
| Mat Layer 1 for middle section, centre panel – Shaded Spruce | 1 | 9.5 cm x 7.5 cm |
| Mat Layer 2 for middle Section, centre panel – Basic White (for stamping on) | 1 | 9 cm x 7 cm |
| End Panel Mat layer 1 – Shaded Spruce (for cutting into a T shape) | 1 | 14.5 cm x 9.5 cm |
| End Panel Mat Layer 2 – Basic White (for cutting into a T-shape and for stamping on) | 1 | 14 cm x 9 cm |

- SHOP ONLINE – EARN 10% REWARDS ON ALL PURCHASES OVER £20
- PURCHASE A STARTER KIT : Get £155 worth of products for only £99. Choose from current catalogues and any specials available. Free Shipping. Read more
- Subscribe to my Video Tutorials – click here


Pingback: Brilliant-blending-for-tech-4-stampers-blog-hop - Stamp with Elaine