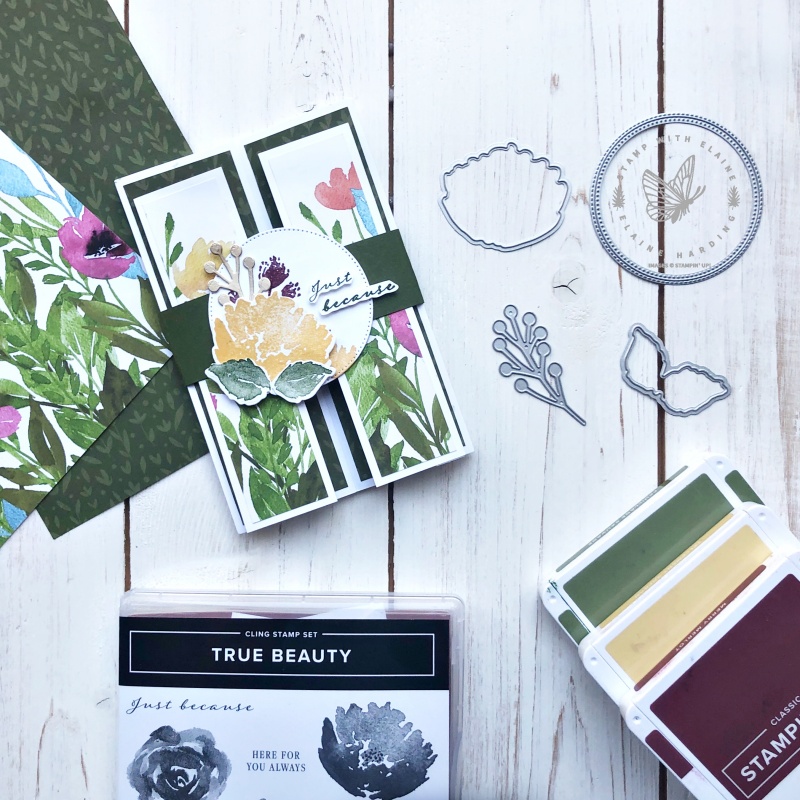
Today’s fun fold card has a double floating panel using the products from the Awash with Beauty Suite in the 2022-2023 Annual Catalogue on pages 66-67. To keep the card closed, there is also a belly band.
There are quite a few pieces to cut, but once it’s assembled, it’s worth it!

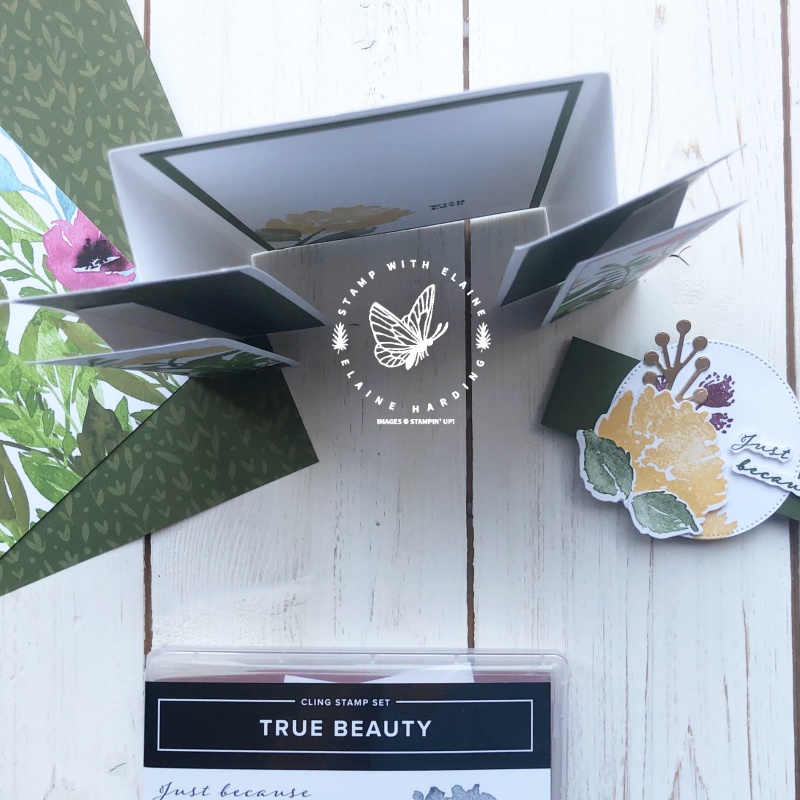
This is what it looks like from the top. The first, larger size floating panel is attached to the main card base. However, the second smaller floating panel is attached independently so there is a separate mechanism. The card base, large and small panels were all cut from Basic White Thick, but the mechanism is cut from Basic White because I didn’t want the hinge mechanism to be too bulky.
The papers I used are Awash in Beauty 12″ x 12″ (30.5 x 30.5 cm) DSP from the Suite of the same name.

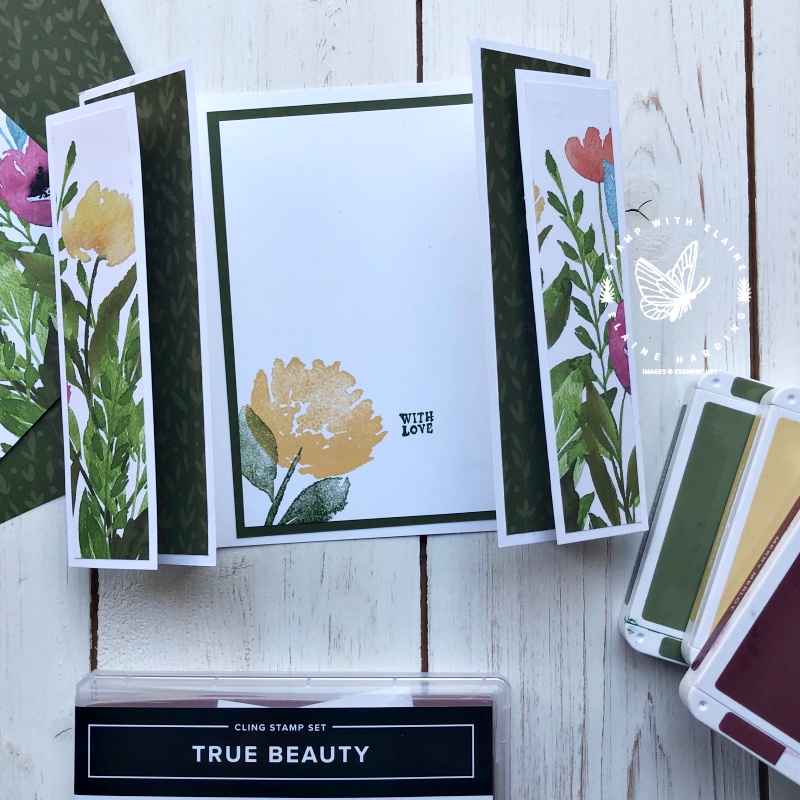
Here’s the inside of the card. The mat layer is in Mossy Meadow to coordinate with the colours in the DSP and a little bit of stamping so that it would tie in with the front of the card.
With double floating panels, the card is quite bulky when closed. Hence the need for a belly band to keep it closed when posting it in the mail. The dies I used to cut the various elements are the Organic Beauty Dies which coordinate with the True Beauty stamp set. If you purchase the stamps and dies together, you’ll save 10%.

Cutting details
Metric measurements are in brackets.
- Card base : Basic White Thick 7″ x 5-7/8″ (18 cm x 14.85 cm). On the long side, score each end at 1/2″ and 1-1/2″ (1.5 cm and 4 cm). Orient c/s to short side and make a mark at 1/2″ top and bottom (1.5 cm). For cutting instructions please refer to video.
- Large front panels : Basic White Thick – cut 2 pieces 2″ x 5-7/8″ (5 cm x 14.85 cm)
- Smaller front panels : Basic White Thick – cut 2 pieces 1-1/2″ x 5-1/2″ (4 cm x 14 cm)
- Floating mechanism for smaller front panels : Basic White c/s – cut 2 pieces 1-1/2″ x 4-3/4″ (4 cm x 12 cm). Orient c/s with short side on top for the imperial, score at 1/2″ and 1″. [For the metric score 1.5 cm, and 3 cm. (Please note that one of the panels will be more narrow. When attaching the mechanism to the large panel, ensure that you adhere it with the narrow panel) ].
- 1st Mat layer inside card : Mossy Meadow 3-5/8″ x 5-1/2″ (9 cm x 14 cm)
- 2nd Mat layer inside card: Basic White – 3-1/2″ x 5-3/8″ (8.5 cm x 13.5 cm)
*Important note: When adhering the floating mechanism for smaller front panels – they should pull out in opposite directions
Designer Series Paper
I used Awash in Beauty 12″ x 12″ (30.5 x 30.5 cm) DSP. Some of the measurements in metric are quirky, but bear with me, it has to be to keep the aspect ratio.
- Large front panels : *tip – use a nondescript pattern cut 2 pieces 1-3/4″ x 5-5/8″ (4.5 cm x 14.3 cm)
- Smaller front panels : **cut 2 pieces with bold pattern 1-1/4″ x 5-1/4″ (3.5 cm x 13.5 cm)
**For the smaller front panels, if you wish to have a continuous pattern, then cut the DSP at 2-1/2″ x 5-1/4″ (7 cm x 13.5 cm) as a whole piece. Then you can cut it into two pieces to each measure 1-1/4″ x 5-1/4″ (3.5 cm x 13.5 cm).
Belly Band
- Cut a strip 1-1/2″ (3.5 cm x A4 length in Mossy Meadow
- Stylish Shapes circle die – 2nd largest – cut 1 in Basic White and 1 in Mossy Meadow
- Basic White scrap for stamping and die cutting leaves, sentiment and floral image
- Gold foil for die cutting sprig
Video Tutorial
To see how this all came together, press play.
Supply list
Listed below is the supply list. Just click on the picture to take you directly to the item in my online store.
Product List
- SHOP ONLINE – EARN 10% REWARDS ON ALL PURCHASES OVER £20
- PURCHASE A STARTER KIT : Get £155 worth of products for only £99. Choose from current catalogues and any specials available. Free Shipping. Read more
- Subscribe to my Video Tutorials – click here


