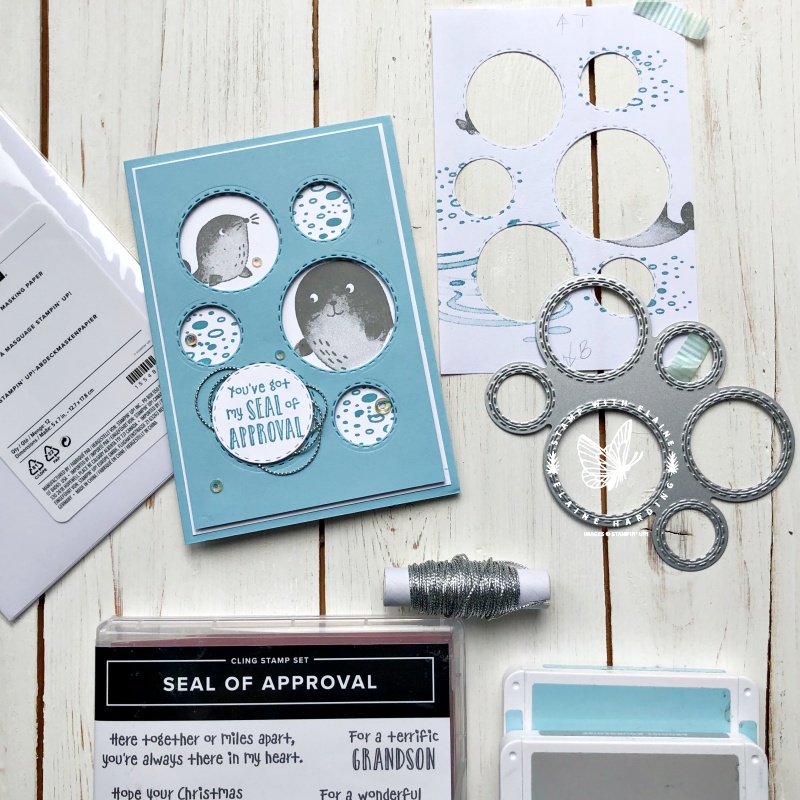
I made this card with a masking technique with the Seal of Approval cling stamp set. The masking papers is a new product line from Stampin’ Up! The masking papers, like the adhesive sheets has backing sheets which you can remove as and when required. There are 12 sheets in a pack and they measure 5″ x 7″ (12.7 x 17.8 cm).
Masking paper is so useful. You can create stencils to build layered scenes, do reverse masking, protect stamped images while you add colour with Blending Brushes around the image, or use it for colour blocking. The Stampin’ Up! masking paper eliminates having to use a myriad of post-it notes which resemble a patch-work quilt because they’re big enough to cover the whole of a standard card front.

In my card today, I’ve demonstrated a reverse masking technique. I wanted the images to appear where the apertures have been die cut with the Picture This die. By leaving this mask in place, you can stamp through the circular spaces and not worry about it encroaching on the other circles where you don’t want a stamp to show. Neat, huh?
Video tutorial
I’m a visual person, so I’ve created a video tutorial rather than write an epistle, so press play and see how this card was created.
Supply list
Listed below is the supply list. Just click on the picture to take you directly to the item in my online store.
Product List
- SHOP ONLINE – EARN 10% REWARDS ON ALL PURCHASES OVER £20
- PURCHASE A STARTER KIT : Get £155 worth of products for only £99. Choose from current catalogues and any specials available. Free Shipping. Read more
- Subscribe to my Video Tutorials – click here


