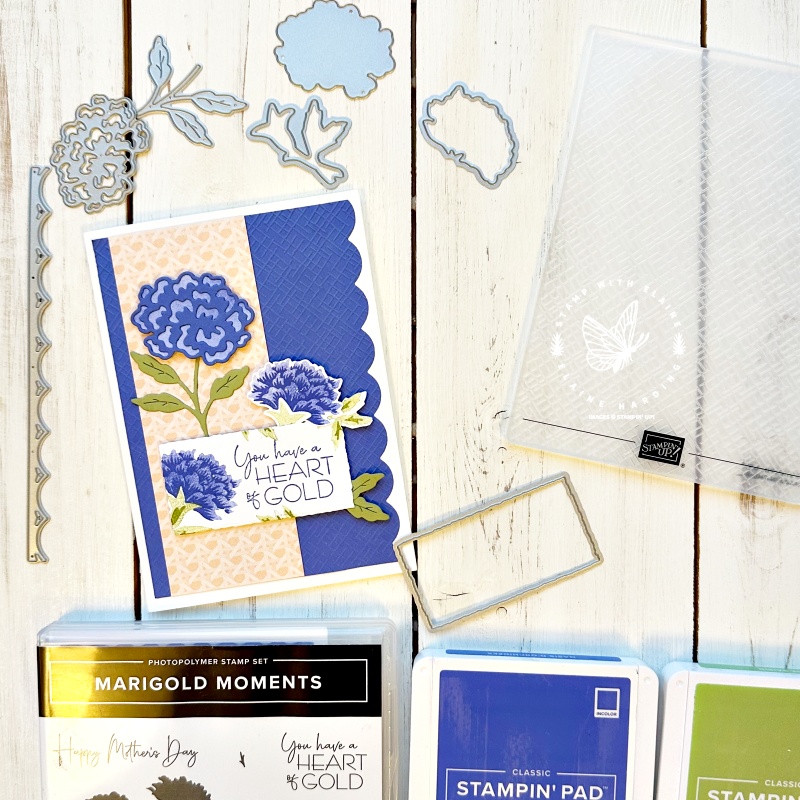
If you’re a newbie to paper-crafting you’ll probably wonder how to make a layered card. We need some basics first, that’s card stock, pretty paper, stamps and ink, some scissors and adhesives and a paper trimmer. The longer you craft, the more tools you’ll acquire, like a die cutting machine which can die cut as well as emboss. One thing’s for sure, it’s a hobby which can become pretty addictive. What better way to give people a paper hug.
For all you seasoned crafters, you will no doubt know all about layers and lots of other tips and tricks. I forget sometimes, that like driving, we were all learners once and have to start from the beginning. So this post is for newbies.

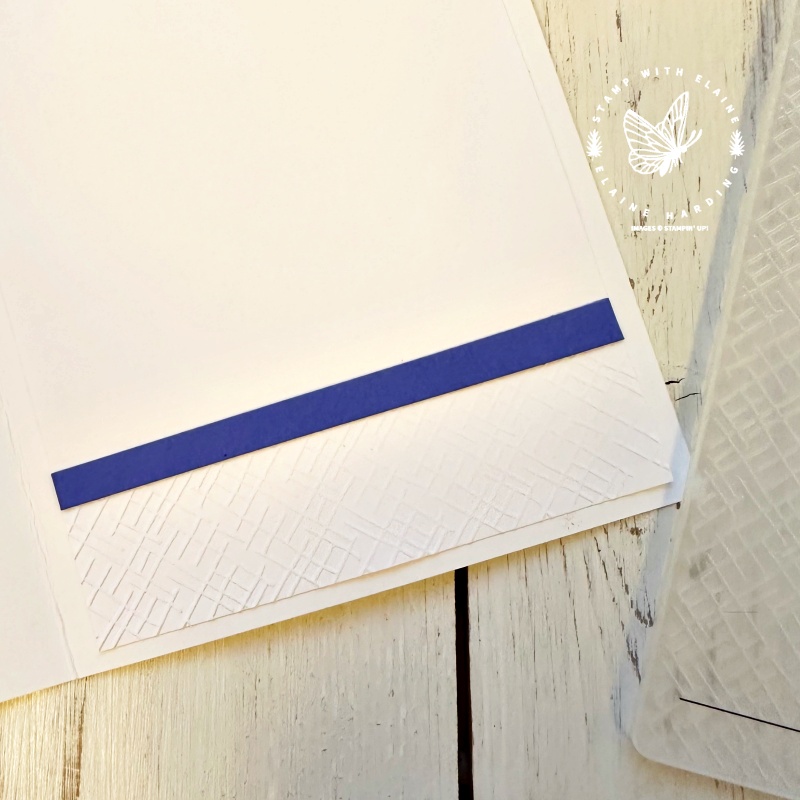
Here’s the inside of the card. It was partially embossed and I adhered a strip of Orchid Oasis card stock to separate the embossed area from the un-embossed area.

How to create the layers
Start with a card base, that’s usually half an A4 sheet and fold it in half. In Europe this will measure 5 ⅞” x 8 ¼”. This is your foundation on which you can build the card.
Mat layer 1
There’s also a choice of how you want this layer to look. You can use coloured card stock or use tone on tone card stock, e.g., white on white or blue on blue and so on. If you’re an experienced paper crafter, you may have more tools and resources. An option is to die cut a pretty edge, or you could emboss the whole sheet. I chose to do both, by cutting a scalloped edge and embossed it with one of the new Basic 3D embossing folders currently available as an Online Exclusive.
Mat layer 2
This layer should be smaller than Mat layer 1 and is usually cut in Basic White so that you can stamp on it.
Another option for your second layer is to cut a narrow strip of DSP (designer series paper). DSP have patterns on them.
Inside layer
For the inside of the card it’s advisable to have a layer in Basic White. The reason for this is that if you make a mistake, you can turn it over and use the other side or just replace it with another piece of Basic White.
You can have more than one layer, of course.
Sentiment label
You can add a sentiment on a label or stamp directly on the card. The label can be punched out of card stock or die cut from a plethora of dies which come in different sizes.
Supply list
Listed below is the supply list. Just click on the picture to take you directly to the item in my online store.
Product ListThat’s all for today. Thanks for visiting!

- SHOP ONLINE – EARN 10% REWARDS ON ALL PURCHASES OVER £20
- PURCHASE A STARTER KIT : Get £155 worth of products for only £99. Choose from current catalogues and any specials available. Free Shipping. Read more
- Subscribe to my Video Tutorials – click here


