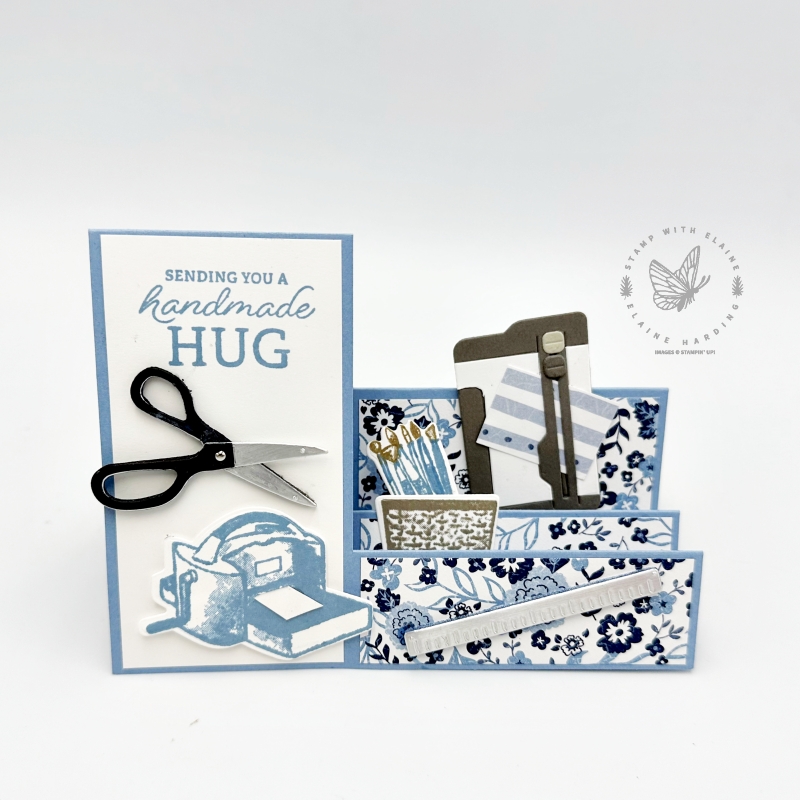
Welcome to episode 2 of 4 in my Crafting with You Series. This is a lovely bundle covering a variety of crafts from sewing, knitting, to paper craft and an artist as well. In today’s episode, I created a side step card to feature the paper-crafting aspect.
I adore the image of the Stampin’ cut & emboss machine! Currently, the mini version of this machine is available in Boho Blue as an online exclusive while stocks last. In addition, there is the most darling trimmer that looks like Stampin’ Up!’s trimmer.
There are two baskets to choose from in this die set. One is for a stamped image one, and the other is a stand alone die which embosses and die cuts at the same time I used the stamped image basket to put the paintbrushes in.

Interactive surprise
What I’m most proud of is making the scissors interactive! How? I inserted a brad through the pair of blades and handles. One blade is static, but the other can move up and down!
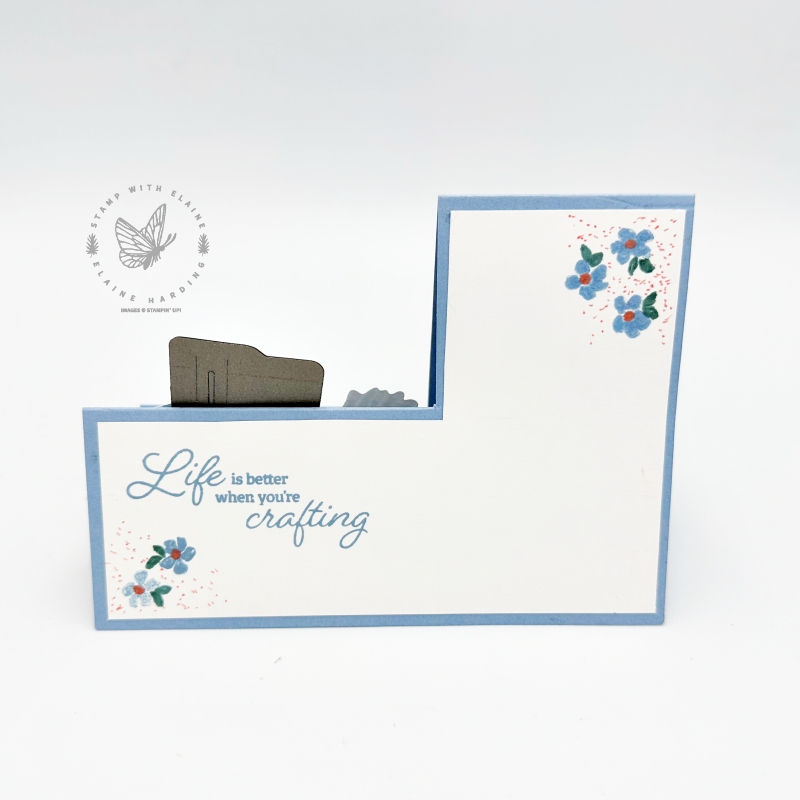
Back of card
As you can see, a side step card leaves little space for addressing the recipient and to say who it’s from so I solved this problem by cutting a Basic White piece ¼” smaller than the card base at 3 ¾” x 5 ½” which was then trimmed into an “L” shape to fit on the back of the side step card.

Cutting guide
Scraps of Basic White, Pebbled Path, Black and Crumb Cake and Silver foil required. Also note that scoring for Imperial and Metric is different.
Imperial measurements
- Card base Boho Blue : 8 ½” x 5 ¾” .
- Orient card stock so that short side is on top – align at 2 ¼” and cut from 2 ¼” down to 7 ¼”.
- Turn card stock so that narrow section is at the bottom nearest you and the long side is at the top. Partially score up to cut line at 2 ¼”, 5 ¼”, 6 ¼”, 7 ¼” and all the way down at 4 ¼”.
- Mat Layer for back of card Basic White : 5 ½” x 4”. Please view video tutorial to see how to cut this into an “L” shape to fit back of card.
- Front of card left side : Basic white cut 1 piece at 2 ⅛” x 4 ⅛”.
Metric measurements
- Card base Boho Blue : 21 cm x 14.5 cm.
- Orient card stock short side on top – align at 6 cm and cut from 5,5 cm down to 18.5 cm.
- Turn card stock so that narrow section is at the bottom nearest you and the long side is at the top. Partially score up to cut line at 2.5 cm, 5 cm, 7.5 cm, 10 cm, 15.5 cm.
- Flip card stock over so that the wider section is at the bottom and the first 2.5 cm score line is on the left and partially score at 10.5 cm to cut line.
- Mat Layer for back of card Basic White : 14 cm x 10 cm. Please view video tutorial to see how to cut this into an “L” shape to fit back of card.
- Front of card left side : Basic white Cut 1 piece at 5.5 cm x 10 cm.
Designer Series Papers
I used Countryside Inn 12″ x 12″ (30.5 x 30.5 cm) but you can choose your own.
Imperial measurements
If you want a continuous pattern cut DSP 3 ¾” x 3 ¼”. Long side on top, cut strips as listed below.
- First front step DSP : Cut 1 piece at 1 ⅛” x 3 ¼”
- Middle step DSP : Cut 1 piece at ⅞” x 3 ¼”.
- Back step DSP : Cut 1 piece at 1 ¾” x 3 ¼”.
Metric measurements
If you want a continuous pattern cut DSP 9 cm x 8 cm. Long side on top, cut strips as listed below.
- First front step DSP : Cut 1 piece at 2 cm x 8 cm.
- Middle step DSP : Cut 1 piece at 2 cm x 8 cm.
- Back step DSP : Cut 1 piece at 5 cm x 8 cm.
Video Tutorial
Here’s a visual aid to see how the card comes together.
Supply list
Listed below is the supply list. Just click on the picture to take you directly to the item in my online store.
Product ListLeave me a comment and let me know whether or not you liked the moving scissors! Thanks for stopping by and pop back for episode 3 in my Crafting with You Series next Wednesday!

- SHOP ONLINE – EARN 10% REWARDS ON ALL PURCHASES OVER £20
- PURCHASE A STARTER KIT : Get £155 worth of products for only £99. Choose from current catalogues and any specials available. Free Shipping. Read more
- Subscribe to my Video Tutorials – click here


