
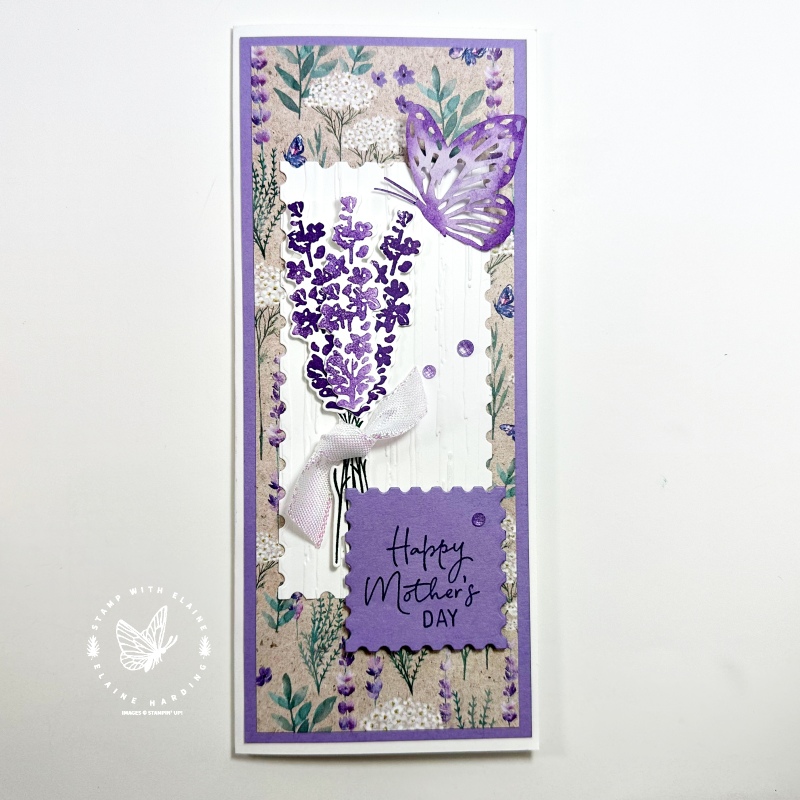
Mother’s Day card with Painted Lavender. I also used the Perennial Postage bundle. Both these bundles are from the Perennial Lavender suite in the January-April 2024 mini on pages 22-25. The Painted Lavender stamp set only contains images and all the sentiments are in the Perennial Postage stamp set. By getting both you will qualify for two £45 or one £90 Sale-a-bration products.
A new selection of products from the current catalogues have been added in addition to the ones in the current Sale-a-bration brochure. Click on link to see the latest additions in the More to Sale-a-brate! flyer pdf. Just remember to use the special codes in the flyer as a Sale-a-bration item and not the normal catalogue codes as you will be charged for the latter.

Long slim card
I chose to create a long, slim Mother’s Day card so that as much of the pretty Perennial Lavender 12″x 12″ (30.5 x 30.5 cm) DSP would show. There are laser cut white paper butterflies in the Suite which you can colour with blending brushes in any colour. On each sheet, there are 5 different butterflies in varying sizes and profiles. The one on the left was my original, and the one on the right was the one I created for the video. Which do you prefer?
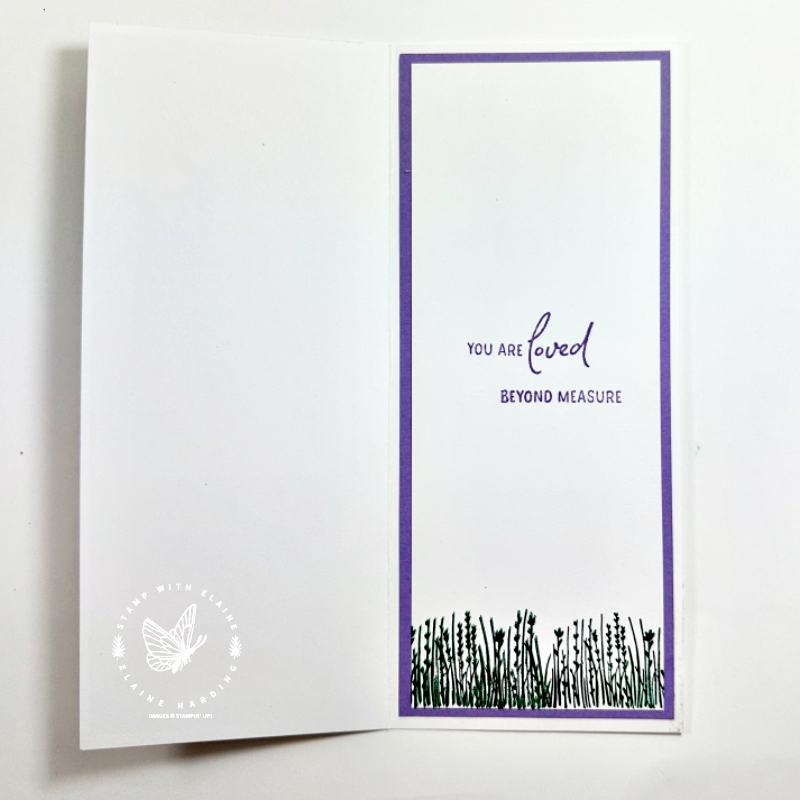
Inside card
The inside of the card also had a Highland Heather mat layer because the card base was Basic White and I wanted to make the stamped Basic White mat layer “pop” too. There’s method in the madness, it helps to balance the weight of the card because the front had so many layers.
Cutting guide
- Card base : Basic White Thick 7” x 8 ¼” folded in half (18 cm x 21 cm)
- Highland heather mat layer #1 for front and inside card : 2 pieces cut at 3 ¼” x 8” (8 cm x 20 cm)
- Front of card : Basic White & Highland Heather scrap for die cutting layers with Perennial Postage dies
- Perennial Lavender DSP mat layer #2 front of card : 3” x 7 ¾” (7.5 cm x 19.5 cm)
- Inside card Basic white mat layer #2 : 3” x 7 ¾” (7.5 cm x 19.5 cm)
- Scraps of Basic White to stamp lavender heads and stem
For assembly instructions, please refer to video tutorial.
Video Tutorial
Supply list
Listed below is the supply list. Just click on the picture to take you directly to the item in my online store.
Please note that the Stripes & Splatters 3D embossing folders I used for this project is one of the new items which have been added to the Sale-a-bration list. I have used the Sale-a-bration code for this particular project because by purchasing both the bundles in the Perennial Lavender Suite, it qualifies for 2 free £45 order products. You can choose another free product from the More to Sale-a-brate! flyer pdf. but I’ve only used one of them.
Product List
")


 Sheer Ribbon")
 Designer Series Paper")


- SHOP ONLINE – EARN 10% REWARDS ON ALL PURCHASES OVER £20
- PURCHASE A STARTER KIT : Get £155 worth of products for only £99. Choose from current catalogues and any specials available. Free Shipping. Read more
- Subscribe to my Video Tutorials – click here