
Today I’m going to show you how to make alternative cards with the Painted Wishes Kit. In the main, you can make up the cards per instructions as shown in the kit but you can also stretch the supplies to make extra cards. Simply by adding minimal supplies like the pre-cut and scored Notecards and envelops, sentiment stamp set and punch, you could easily make 3 cards from 1 of the cards and envelops in the Painted Wishes kit.
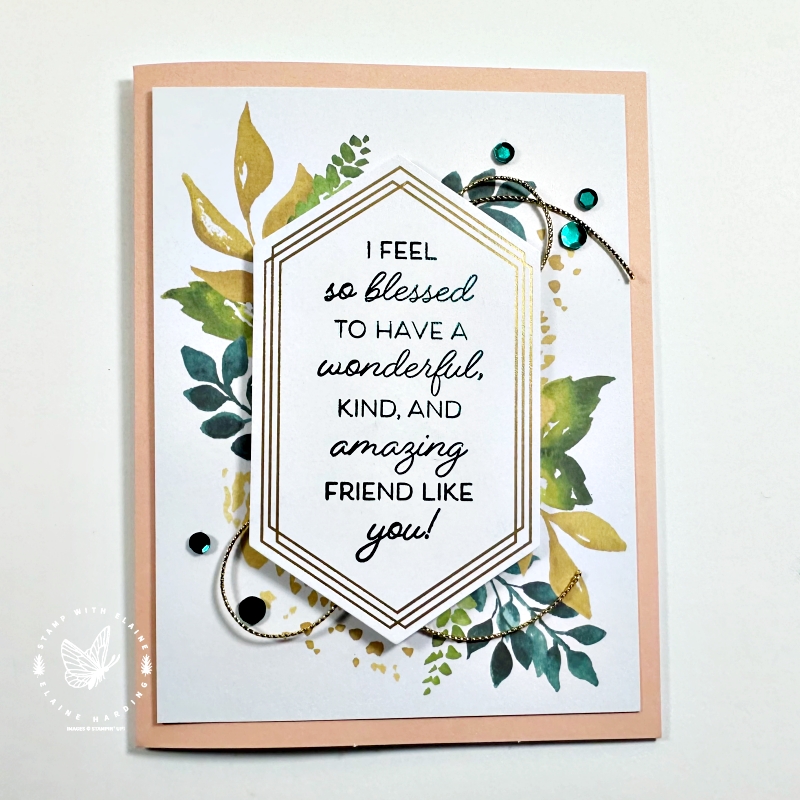
Cards created per instructions from Painted Wishes Kit
There is sufficient materials in the kit to make 3 each of each of the 3 designs. It is available in four languages, English, Dutch, French and German so you simply pop out the laser cut sentiments in the language of your choice. They are pretty quick to assemble. No stamping required. It is just gluing and sticking!
Alternative cards made with Design 3 (far right) and envelop
I challenged myself to create 3 alternative cards in a smaller size. We have Notecards & Envelops pre-cut and scored in a pack of 20. The folded cards measure 5″ x 3 ½” (12.7 cm x 8.9 cm).
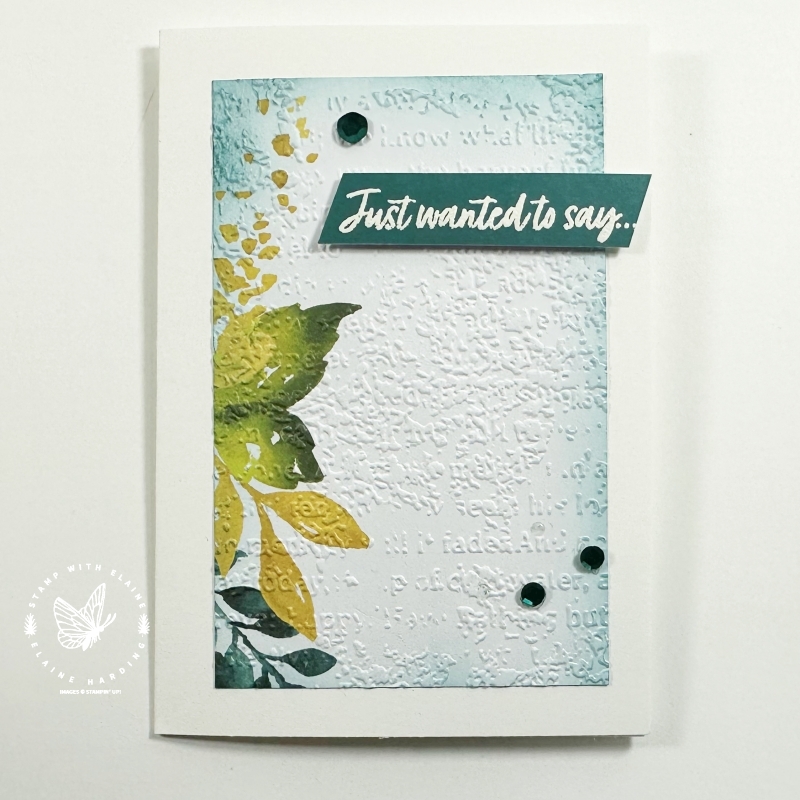

Altered Notecard 1 from envelop
- Trim patterned side of envelop 2 ¾” x 4 ¼” (7 cm x 10.8 cm)
- Emboss with Timeworn Type 3D embossing folder
- Use blending brush to lightly add a touch of Pretty Peacock around the edges.
- Trim a leftover piece of scrap from the envelop flap [First trim a piece 1 ¾” x 4 ¾” (4.5 cm x 12 cm) for the middle card and set aside].
- Stamp “Just wanted to say” from Country Bouquet stamp set in Versamark and white emboss.
- Lastly add 3 sequins as a finishing touch.
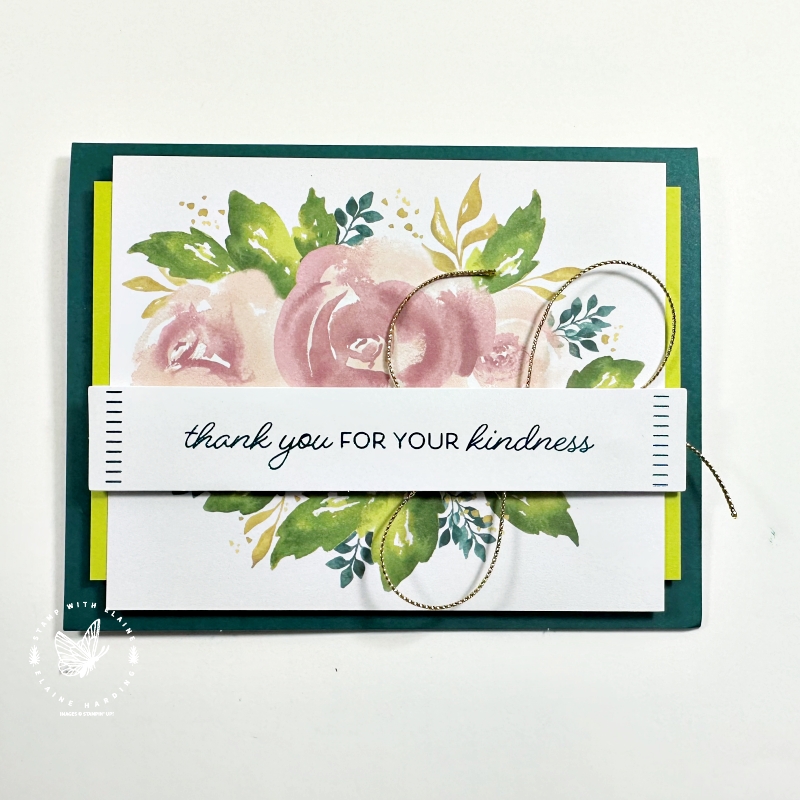
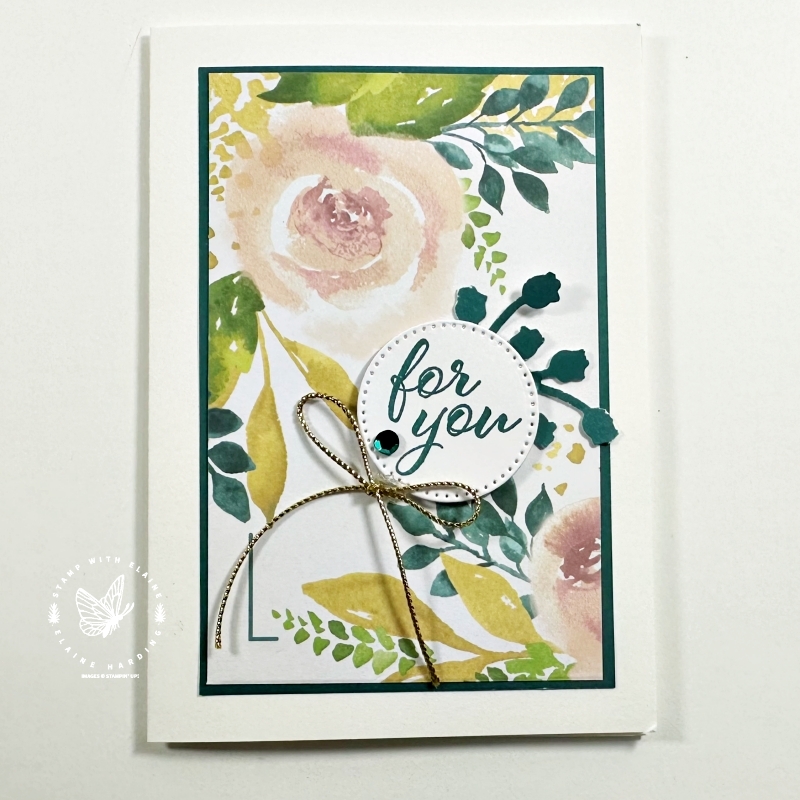
Middle Notecard 2 from card front
- Cut the Basic White floral design card in half. Reserve the inside of the card for stamping your sentiments.
- Floral card front cut into 2 pieces 2 ¾” x 4 ¼” (7 cm x 10.8 cm)
- Adhere trimmed Pretty Peacock 1 ¾” x 4 ¾” (4.5 cm x 12 cm) to left of notecard first.
- Adhere one of the cut card fronts on top.
- Stamp and die cut sentiment from Layered Layers with Stylish Shapes dies.
- Adhere punched out leaves from inside the mat layer for the third card.
- Tie a bow with gold cord and adhere with glue dot.
- Attach a single sequin to the label tag.
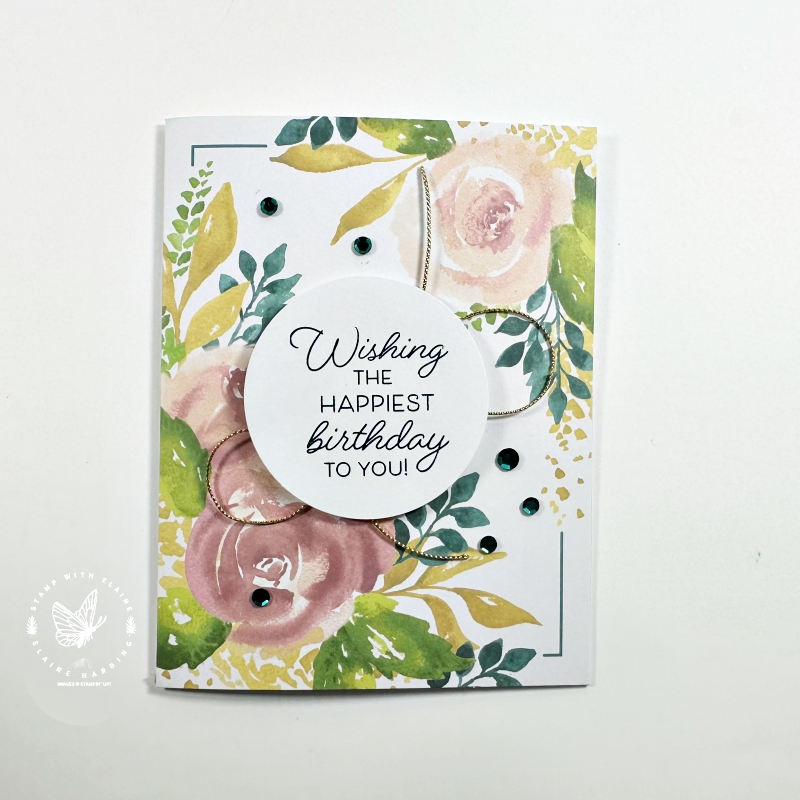
Far right Notecard 3 from card front
- Trim the back of the Pretty Peacock envelop as a mat layer 2 ⅞” x 4 ⅜” (7.3 cm x 11.1 cm).
- Before you adhere it to card front, punch out two sets of Bough leaves from the Bough Punch.
- Adhere 2nd card front on to the gutted Pretty Peacock mat layer.
- Stamp sentiment from Layered Leaves and die cut with the 2nd to smallest Stylish Shapes circle dies.
- Adhere the punched floral berries under the sentiment.
- Add dimensionals to circle and adhere on top.
- Tie a bow with gold cord and adhere with glue dot.
- Attach single sequin to label to finish.
Video Tutorial
Supply list
Listed below is the supply list. Just click on the picture to take you directly to the item in my online store.
Product List
")
")


- SHOP ONLINE – EARN 10% REWARDS ON ALL PURCHASES OVER £20
- PURCHASE A STARTER KIT : Get £155 worth of products for only £99. Choose from current catalogues and any specials available. Free Shipping. Read more
- Subscribe to my Video Tutorials – click here