
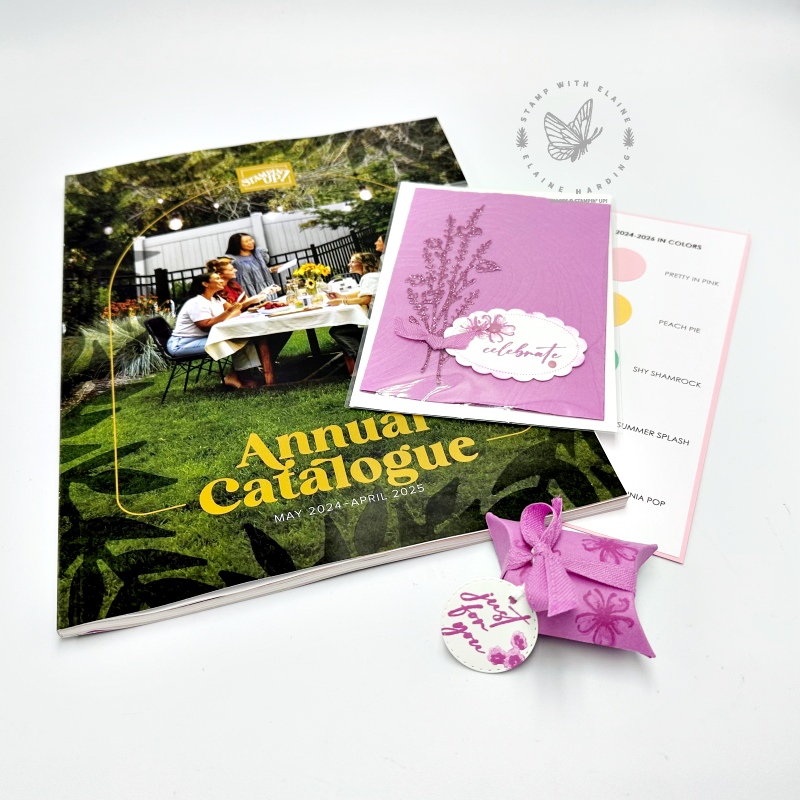
New Annual Catalogue launch day! The 2024-25 Annual Catalogue has finally arrived! If you have placed an order with me in the last 6 months, a personal copy of the new Annual Catalogue should be winging its way to you. This is a long-ish post, so bear with me, grab a cuppa because I do have a card sample to share toward the end!
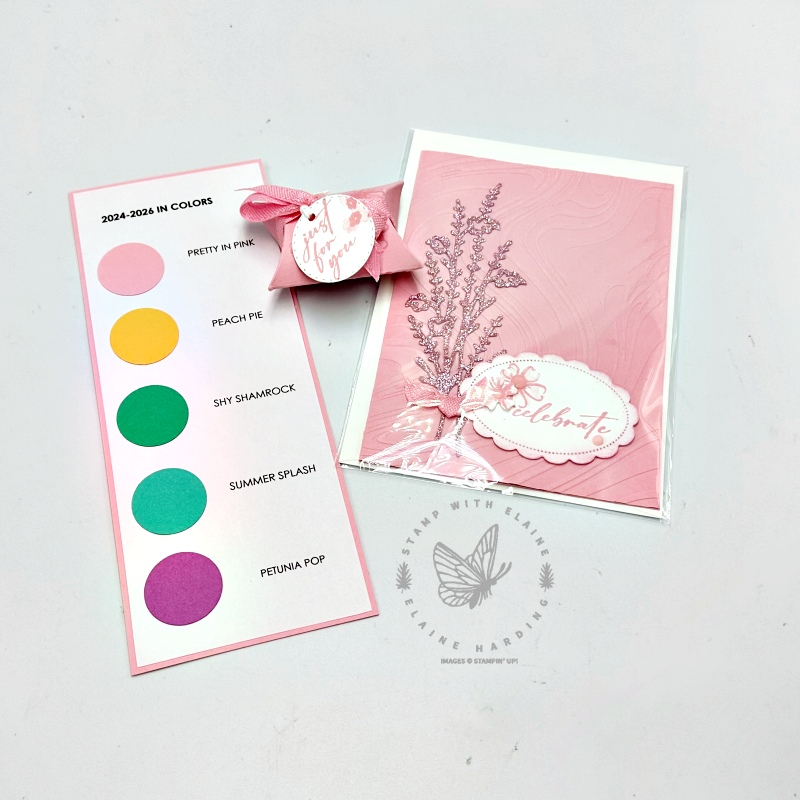
Hopefully Customers who have purchased from me in the last six months will have received their personal copy by now. I included card stock samples of the new In Colors which can be used as a book mark also. It was a lottery as to who would receive which In Color. You can see the other new In Color cards in a previous post HERE. Pictured on the left is Petunia Pop, and on the right, Pretty in Pink. The cards show cased the new size embossing folder So Swirly and my favourite Suite – Unbounded Beauty. I also made a teeny tiny pillow box to hold some candy – it’s all about the presentation, right?
New Catalogue Layout
The catalogue has had a makeover – so the layout is quite different from Annual Catalogues of yore. Personally, I think the catalogue is easier to navigate with lots of ideas and hints and tips broken down into categories.
- Step by step crafting : P. 4-11 These are the kits collections, paper crafting with all the supplies and full instructions to help guide you.
- Quick & easy options : P. 12-29 Topics on your top 10 crafting essentials, easy product coordination, Basic card design with sketch ideas for a novice to be inspired by, and lastly, reasons to craft e.g., memory keeping or gift tags.
- Creativity your way : start from scratch or go the whole hog with Suite Collections, Bundles, *Encore products (products which have carried over from the previous catalogues) and stamping techniques such as water coloring, masking, creating texture, embossing or flawless blending.
- Other categories in the Creativity your way have been grouped in their own sections instead of dotted randomly as in previous Annual catalogue publications for example – special Million Sales Achievement stamps are on pages 92-95.
Another useful category is Reasons to craft from pages 96-109 i.e., showing appreciation, memory keeping, celebrating the year, crafting with children or for your children, invitations or for gift wrapping such as gift tags or home decor.
The Encore Section (pages 74-80) refers to stamps, dies, punches which have been carried over from previous catalogues. The stamp set and coordinating dies are pictured side by side and all the dies are in Pool Party colour.
Colour Theory
You might also find the Colour Theory section on pages 132-133 useful. There is a colour wheel with hints and tips on how it works and in the following pages from 134-139 you’ll find the usual Colour Collections with all the colour families and In Colours.
QR Codes, Call outs, Color theory icons, sketch icons
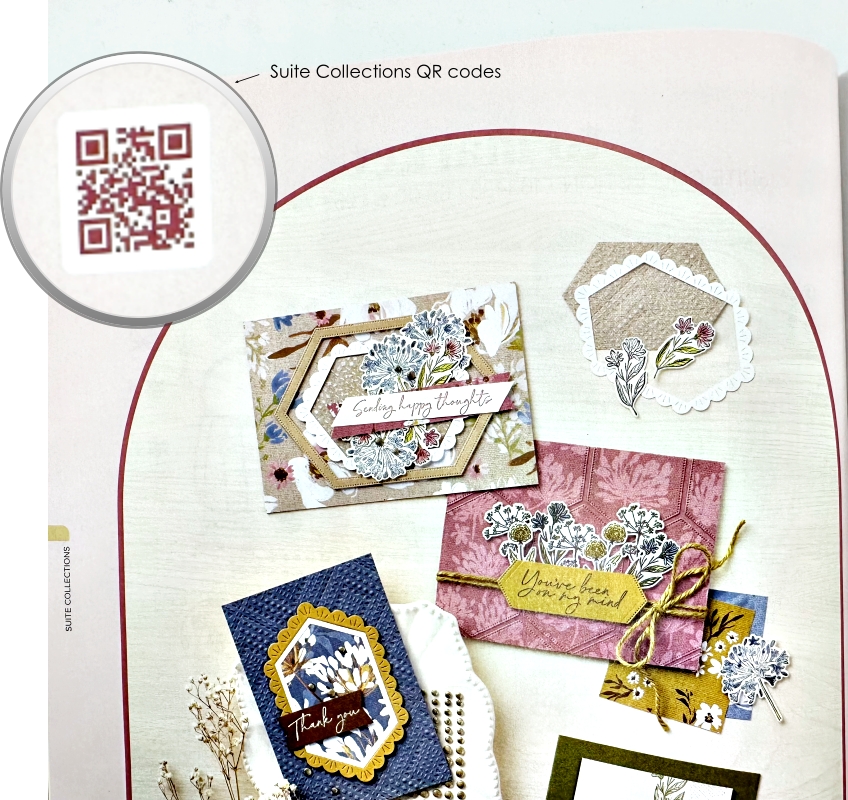
There are QR codes throughout the catalogue. As an example, in the Suite Collection section, watch out for the QR codes (magnified on my photo) on the pages where an arched frame with the samples from each suite is displayed. You can scan these codes with the camera on your phone. I have an iphone so when you bring the camera close to the QR code, a yellow frame pops up. Centre the frame around the QR code and in the bottom of your screen a message “Open in Chrome” against a yellow background will pop up. Tap on “Open in Chrome” and it will take you directly to Stampin’ Up’s website online store where you can find products pertaining to that QR code.
Also, watch out for the colour wheel icons and/or card sketches used in some of the samples. These are dotted around the catalogue.
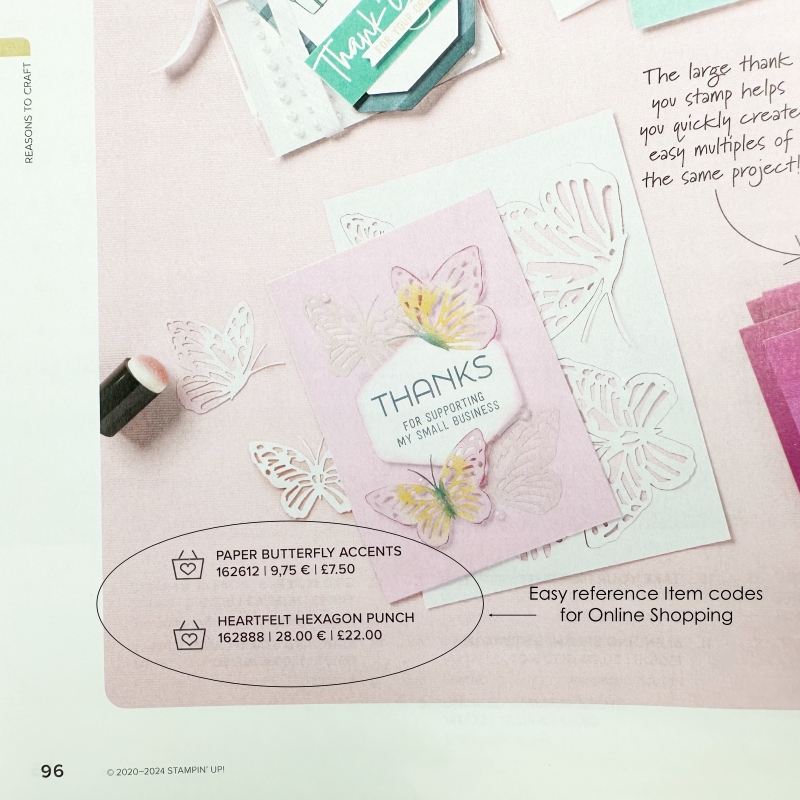
Last, but not least there are little icons of a shopping basket with a little heart in the middle. While the actual photo of the product used is not shown in full, the shopping basket with the heart depicts easy reference to the item codes for the product which you can make a note of when you’re shopping online. These icons appear throughout the catalogue.
Let’s not forget that all important Index which you’ll find on pages 141-142. That’s it in a nutshell so I hope you enjoy perusing its pages for plenty of ideas to enjoy paper-crafting at whatever level you’re at, whether you’re a newbie, or an experienced and avid Crafter.
New die/punch options
By the way, there are 2 bundles in the bundle section which gives you both options of selecting it as a die, or a punch. The dies and punch are exactly the same price. You’ll find this on pages 58 & 59. The stamp set is called Labeled with Love, and the other is Keeping Tabs.
Example of Quick & easy options (new)
Now for the fun bit! Something new that hasn’t been provided before is this section, on page 22, which are card sketches. There are plenty of card sketches here to help inspire you so I’ve cropped a sample to show you below. Sketches shows you how you can layer a card, a card map, if you like. I chose the top right sketch to create my card. Remember that these sketches are a starting point. So you can add to it, or take away a layer or shape according to what you have in your stash.
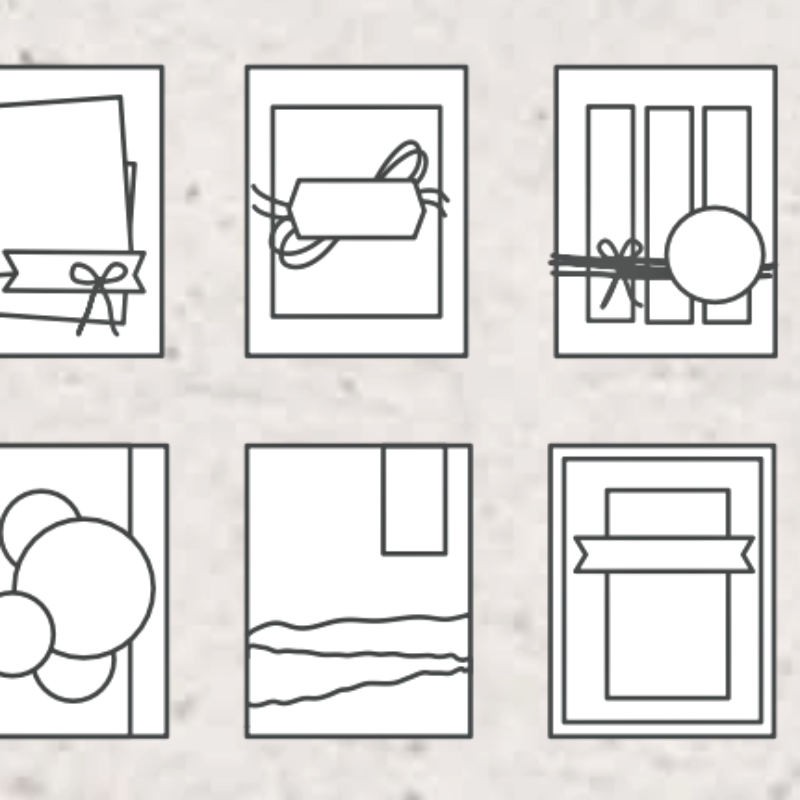
Using the card sketch
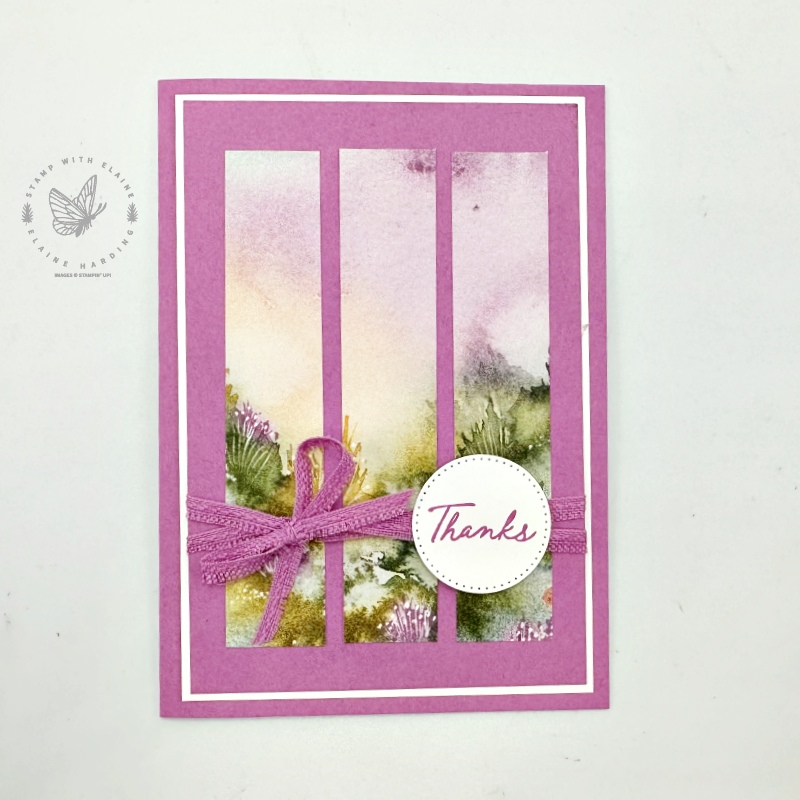
You can use a card sketch as inspiration to create a layout for your card. The sketch indicates Baker’s Twine or ribbon wrapped around the card several times.
It’s difficult to wrap twine or ribbon round a card base because of the fold in a standard card. Consequently, it’s best to cut a layer smaller than your card front so that you can wrap the twine or ribbon around it. I chose to cut this in Petunia Pop layer, the same colour as the card base. Petunia Pop is one of the new 2024-2026 In Colors.
If you’d like to make the layer “pop” or stand out, cut another layer in a contrasting colour ⅛” (0.3 cm) larger than the Petunia Pop layer – I chose Basic White.
Cutting guide
- Card Base : Petunia Pop ½ an A4 sheet folded in half
- Basic White layer for card front and inside : 2 pieces cut at 3 ¾” x 5 ½” (9.5 cm x 14 cm)
- Petunia Pop layer : 3 ⅝” x 5 ⅜” (9.2 cm x 13.7 cm)
- Thoughtful Journey 6″x 6″ (15.2 x 15.2 cm) DSP -*3 strips cut at ⅞” x 4 ½”(2.2 cm x 11.5 cm) *If you want a continuous pattern, cut a piece 2 ⅝” x 4 ½” (6.6 cm x 11.5 cm) then cut them into ⅞”(2.2 cm x 11.5 cm) strips.
- Petunia Pop ribbon, long enough to wrap round Petunia Pop layer twice with extra length for tying bow. Use scissors to cut down the middle of the ribbon to make it narrower.
- Scrap of Basic White to stamp sentiment in Petunia Pop and die cut with 2nd smallest stitched circle die from Stylish Shapes dies or if you don’t have the dies, you could use a circle punch.
Card assembly
- Centre and adhere one of the Basic White pieces onto the card front of Petunia Pop card base.
- Adhere the 3 strips of DSP evenly spaced on the Petunia Pop layer. *Tip, adhere the two end pieces first, then adhere the centre piece to get even spacing.
- Wrap split Petunia Pop split ribbon twice around the Petunia Pop mat layer and tie bow.
- Apply dimensionals either side of ribbon and attach the “thanks” circle as shown in pic.
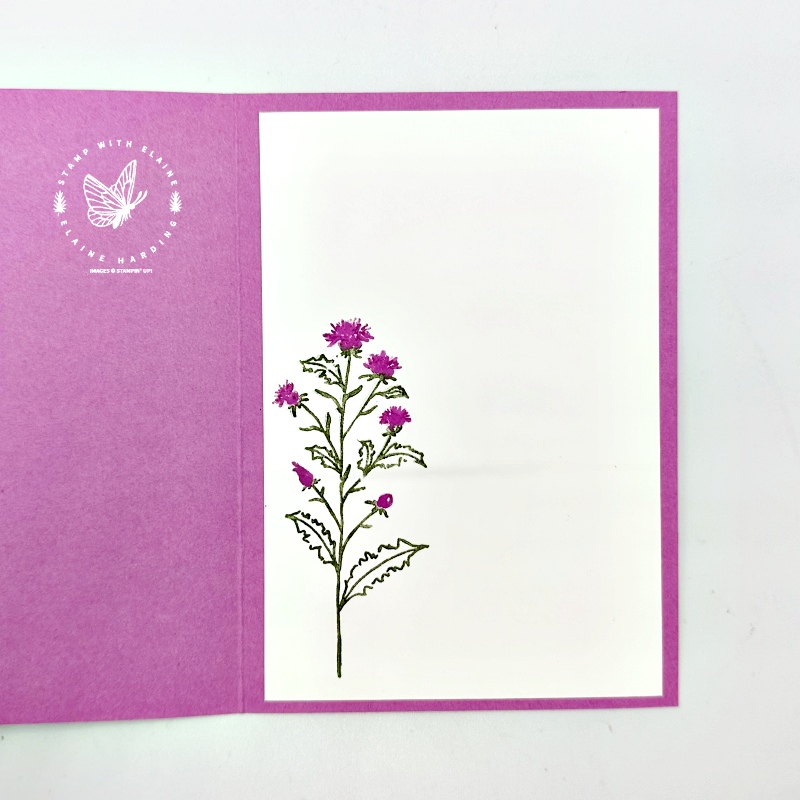
- Use Stampin’ Write Markers in Mossy Meadow and Petunia Pop to colour in stamp. Huff on it before stamping to remoisten stamp onto 2nd Basic White mat layer. Adhere to inside of card.
Supply list
Listed below is the supply list. Just click on the picture to take you directly to the item in my online store.
Product List")


 Bordered Ribbon")

- SHOP ONLINE – EARN 10% REWARDS ON ALL PURCHASES OVER £20
- PURCHASE A STARTER KIT : Get £155 worth of products for only £99. Choose from current catalogues and any specials available. Free Shipping. Read more
- Subscribe to my Video Tutorials – click here