
Mini slim slider card – Attention Shoppers. Initially I’d dismissed the Attention Shoppers bundle but I couldn’t resist the cute shopping trolley or the little images which practically covers all occasions. You can find it on page 69 of the new 2024-25 Annual Catalogue.
I copied and shrunk the product images and printed these out on Basic White card stock then fussy cut them. Guess what – I even copied and printed the little 2024-26 In Color refills! Arrange the fussy cut images in the shopping trolley as desired.
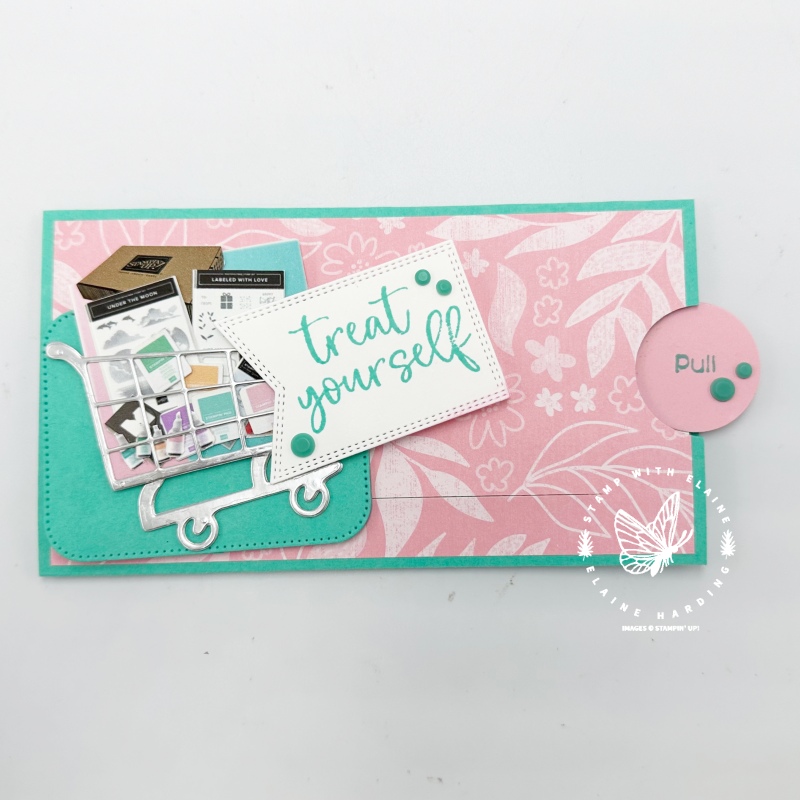
It seemed logical to make a slider mechanism so that the trolley could “move” along. In the photo below it shows the card pulled out. The “pull” sentiment is from Hooray for Surprises. Additional supplies I used were the Nested Essentials dies, a 1 ¼” circle punch (retired) or substitute it with Stylish Shapes smallest circle Dies.
Decorate inside of slider as desired – I stamped a sentiment in Tuxedo Black Memento ink. On a separate scrap of Basic White card stock, I stamped and coloured in the bag that has tissue at the top with Summer Splash and Pretty in Pink Stampin’ Blends combos. The bottom of the bag was trimmed off before adhering to inside piece so that it wouldn’t overlap the Pretty in Pink pull tab.

How to make the card
Optional Shrunk Stampin’ Up! product images
- If you want to duplicate my card, then select some Stampin’ Up! product images and shrink the images and save in an A4 document
- Print out on Basic White card stock and fussy cut images.
- Die cut the shopping trolley and its wheels out of Silver foil. I cut 4 trolleys to make it sturdier. (tip – put adhesive sheet on the back of the foil to make gluing trolleys together easier)
- Arrange fussy cut images as desired and glue trolley and wheels on top.
- Die cut the largest rectangle from Nested Essentials Dies in Summer Splash.
- Adhere the shopping trolley to rectangle.
- Stamp and die cut sentiment “treat yourself” and attach to rectangle as pictured.
or simply stamp your choice of images from the stamp set and put those in the shopping trolley.
Cutting guide
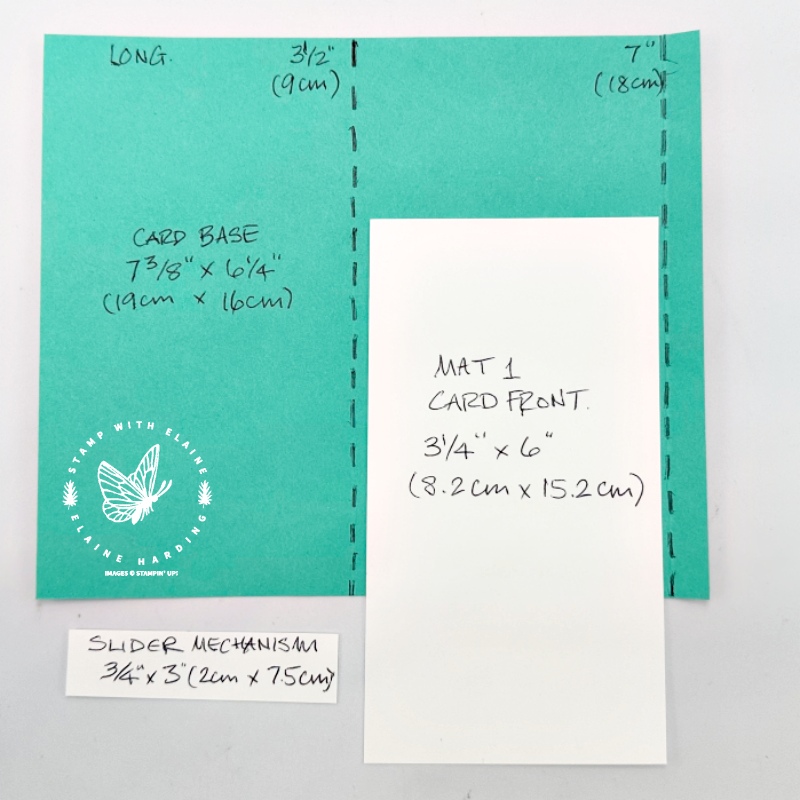

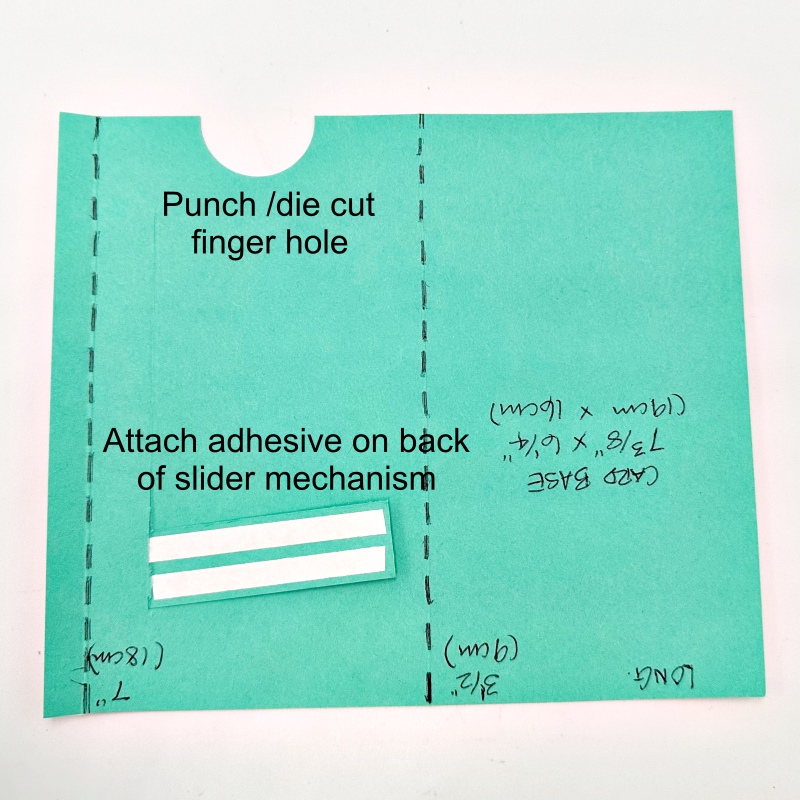
- Card base Summer Splash – 6 ¼” x 7 ⅜” (16 cm x 19 cm) – long side on top score at 3 ½”, 7″ (9 cm, 18 cm)
- 2024-26 In Color 6″x 6″ DSP – 3 ¼” x 6″ (8.2 cm x 15.2 cm). Adhere on the panel next to the narrow ⅜” (1 cm) flap.
- Cut slider mechanism in Summer Splash – ¾” x 3″ (2 cm x 7.5 cm)
- Middle picture – Cut a Pretty in Pink mat layer : 3 ¼” x 6″ (8.2 cm x 15.2 cm)
- Next cut a Basic White layer: 3″ x 6″ (7.5 cm x 15.2 cm). Adhere this to the Pretty in Pink mat layer leaving ⅛” (0.3 cm) border on either side.
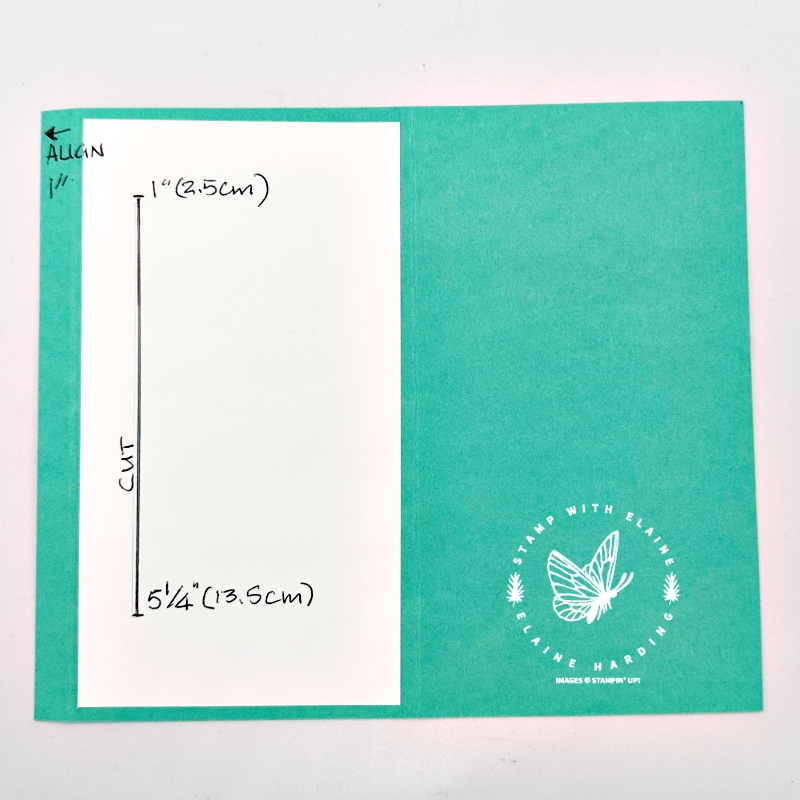
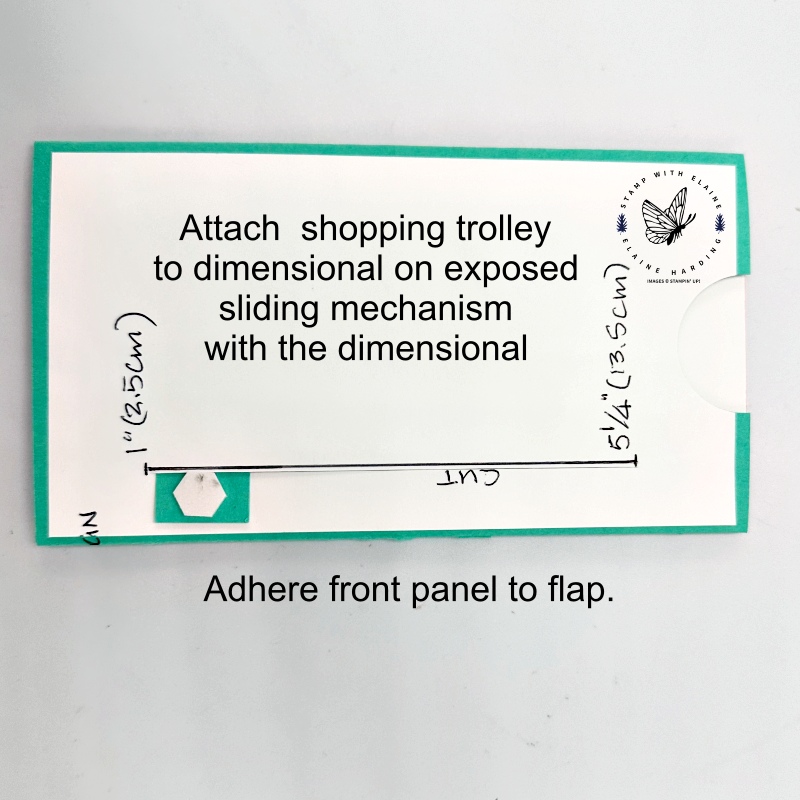
- Third picture – Adhere DSP to panel next to narrow flap. Orient card stock on the long side so that the ⅜” (1 cm) flap is on the left. Align at 1″ (2.5 cm) and cut from 1″ down to 5 ¼” (2.5 cm down to 13.5 cm)
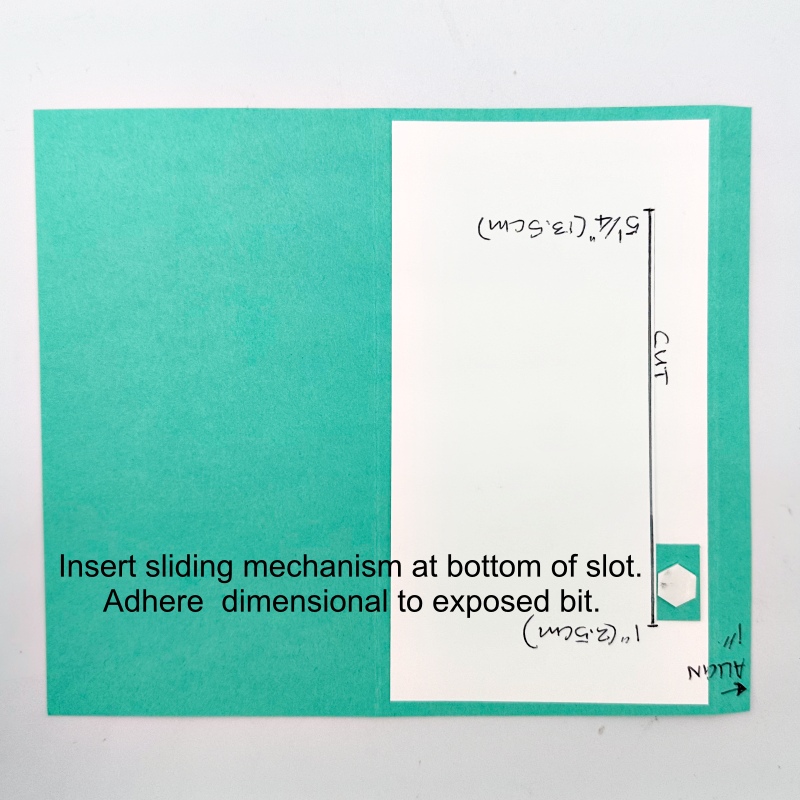
- Orient card stock so that the ⅜” (1 cm) flap is on right with the DSP panel next to it. Insert the slider mechansim through the slot and ensure that it is at the bottom but leaving ⅜” (1 cm) sticking out so that you can attach a dimensional to it.
- Punch or die cut a finger hole on the DSP side only. I used a 1 ¼” circle punch (retired), but you can use the Stylish Shapers smallest circle to do this. However, remember to punch/die cut finger hole before you adhere the inside of the card. Apply tear n’ tape adhesive to the slider mechanism. If you are using wet adhesive, it is important you don’t get any glue seeping beyond slider mechanism otherwise it won’t slide freely.
Inside card

- Remove backing paper from sliding mechanism. Align the adhered inside pieces with the Basic White side face down flush with the top of the card base and centred in the middle. Adhere to sliding mechanism. If using wet adhesive, allow it time to bond. Check that the inside of the card slides freely.
- Die cut 2 circles in Pretty in Pink and attach one on the front and one on the back as shown in picture of completed card at the beginning of the post.
- Stamp inside of card before sealing the front panel of card to flap.
- Once card is closed, attach the Nested Essentials rectangle on top of the dimension on the slider mechanism.
- Complete card with finishing touches using 2024-26 In Color Resin Dots.
Supply list
Listed below is the supply list. Just click on the picture to take you directly to the item in my online store.
Product List")
")


 Designer Series Paper")
 Specialty Pack")


I hope you like this project. It’s probably the easiest slider card I’ve ever done! Thanks for stopping by! Happy stampin’

- SHOP ONLINE – EARN 10% REWARDS ON ALL PURCHASES OVER £20
- PURCHASE A STARTER KIT : Get £155 worth of products for only £99. Choose from current catalogues and any specials available. Free Shipping. Read more
- Subscribe to my Video Tutorials – click here