
Today I’m going to show you how to step up a card featuring the Hearts & Hugs bundle. There are three stages, at beginner, casual and avid levels. The beginner level are crafters who are new to the hobby and only have limited supplies. For the casual crafter they have more than the basic supplies and who craft more often. The avid crafter will have been crafting for a long time and accumulated the whole gamut of crafting tools and paraphernalia with which to make very detailed cards.
Beginner
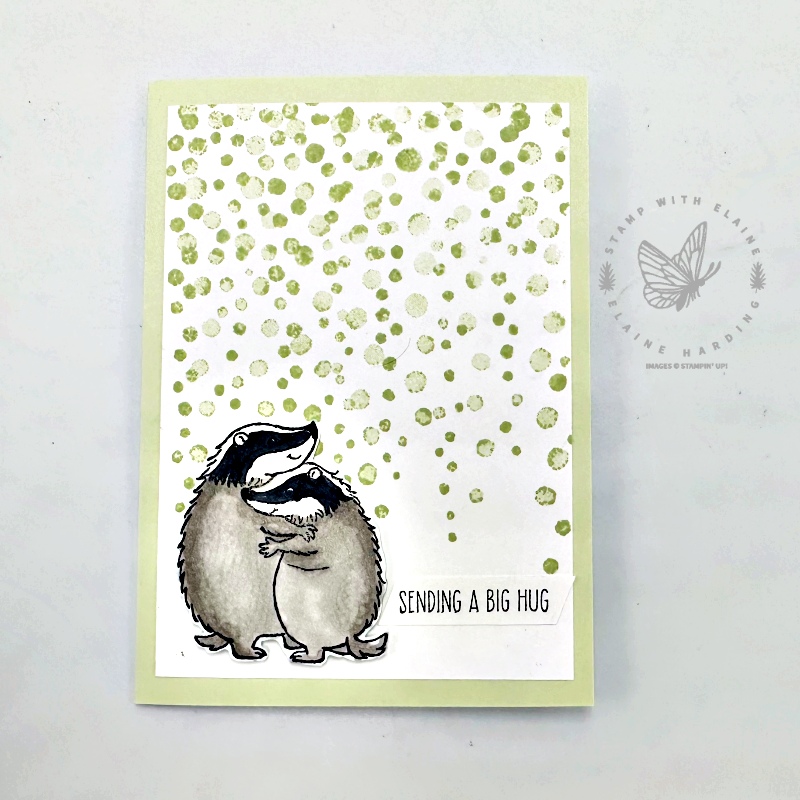
This is just simple stamping with card stock, the stamps and some ink. In addition to the Hearts & Hugs stamp set, I used the Drizzling Droplets background stamp which is an online exclusive.
My card base is a standard card using half an A4 sheet of Soft Sea Foam folded in half. The Basic White layer is ¼” smaller than the card front. The badgers were stamped on a scrap of Basic White and fussy cut. The Stampin’ Blends I used were Basic Black and Gray Granite combos.
Casual
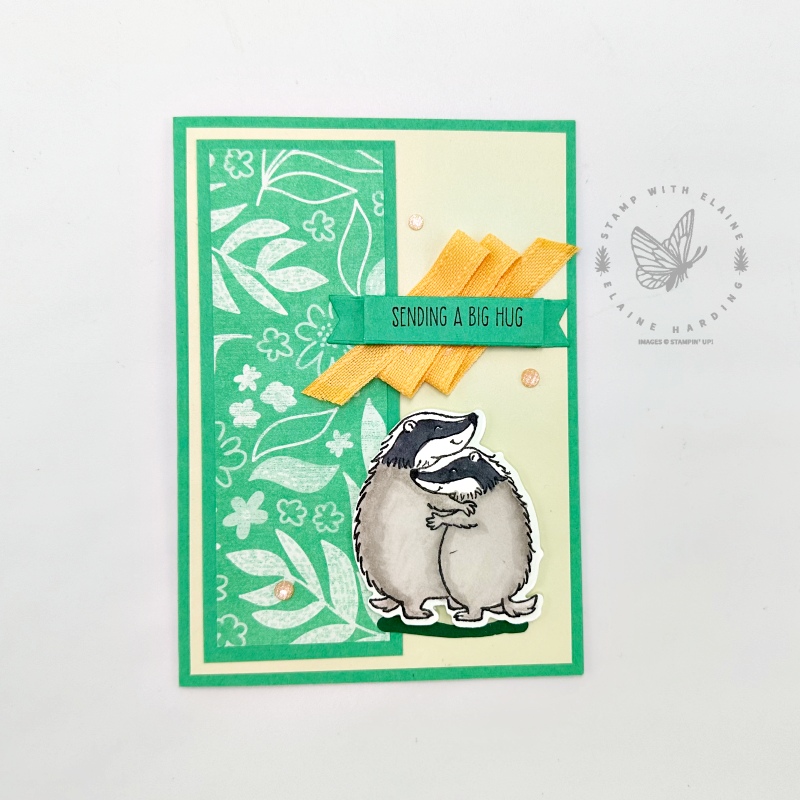
- Shy Shamrock as the card base 5 ¾” x 8 ¼” (14.5 cm x 21 cm)
- Soft Sea Foam mat layer cut at 3 ¾” x 5 ½” (9.5 cm x 14 cm)
- 2024-2026 In Color 6″x 6″ (15.2 x 15.2 cm) DSP cut 1 ¾” x 5″ (4.5 cm x 12.5 cm)
- Adhere DSP to Shy Shamrock layer cut at 2″ x 5 ¼” (5 cm x 13 cm) then adhere to left of card base leaving an even border on the left side and top and bottom.
- Die cut double flag end label from Hearts & Hugs dies and stamp sentiment in Tuxedo Black memento ink.
- Optional : Score label at ½” and ⅝” at one end. Rotate 180 degrees and score other end also at ½” and ⅝”.
- Adhere Peach Pie ribbon to card base on top of Soft Sea Foam layer.
- Attach label on top of ribbon.
- Stamp and colour the badgers and die cut with corresponding die in Hearts & Hugs die set. Adhere with dimensionals at bottom of card below label.
- Die cut floral piece in Shaded Spruce, but cut off the floral stems and glue to card front to “ground” the badgers.
- Lastly add 2024-2026 In Color shimmer gems on the card front.
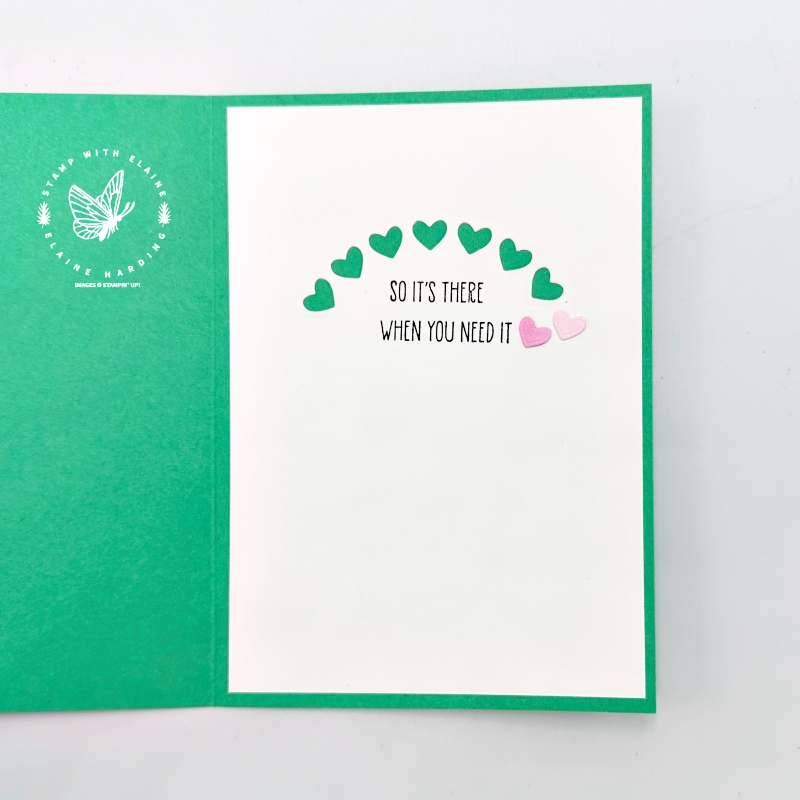
- Inside card die cut the heart arc. Reserve the heart pieces and colour them with Bubble Bath Stampin’ Blends combo to adhere next to the sentiment.
- Once you’ve stamped your sentiment (instructions below), adhere the hearts to the right of sentiment as shown.
How to stamp the sentiment
The sentiment on the stamp is in a single line. Here’s how you can break up the sentiment into two lines.
- In order to stamp it over two lines, use a post-it note to block off “when you need it”. Ink up the stamp in Tuxedo Black Memento ink and remove Post-it note. Then centre “so it’s there” underneath the heart apertures and stamp.
- Repeat process but this time block off “so it’s there”. Always remember to remove Post-it note before you stamp. Then position “when you need it” underneath “so it’s there” and voilà you have split the sentiment into two lines.
Avid
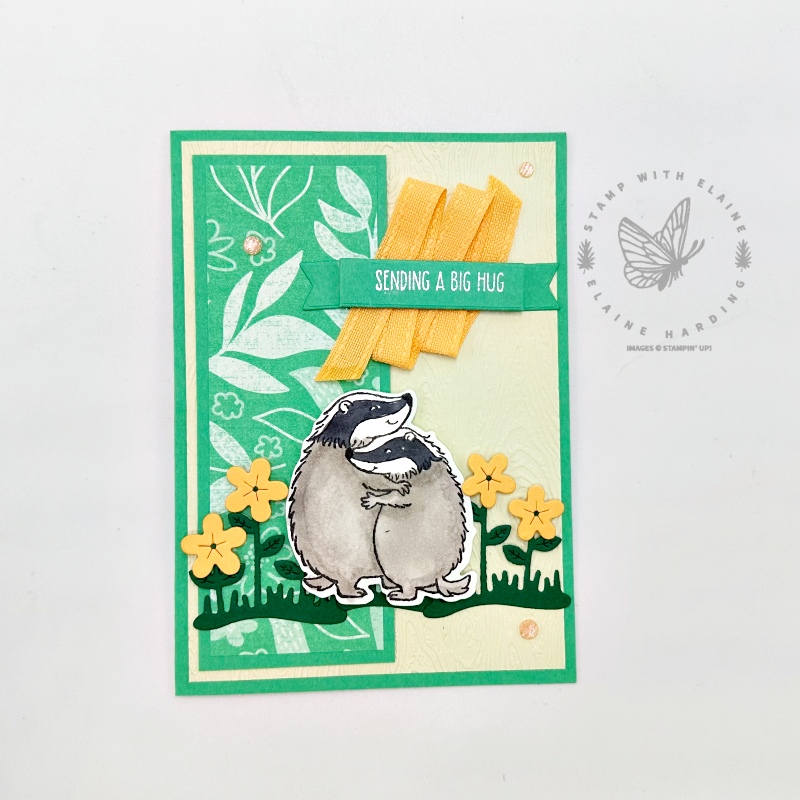
- Cut card stock according to instructions following Steps 1-4 for the Casual card, but in Step 2, emboss the Soft Sea Foam layer with Timber 3D embossing folder before adhering to card base. Cut and adhere the DSP to the Shy Shamrock layer and adhere to Soft Sea Foam Embossed layer.
- Prepare the label, but this time instead of stamping with Tuxedo Black Memento ink, stamp it with Versamark, sprinkle the label with White embossing powder and set the powder with a heat tool. Adhere the ribbon as before, and adhere the white embossed sentiment on double flag end label on top. Optional : Score label at ½” and ⅝” at one end. Rotate 180 degrees and score other end also at ½” and ⅝”.
- Die cut 3 grass and stem/leaves pieces in Shaded Spruce.
- Use a piece of Peach Pie scrap to die cut 4 flowers and glue these on top of the stems as shown.
- Apply dimensionals behind the badgers and adhere on top of grass and stem die cuts.
- Lastly add the shimmer gems on the card front.
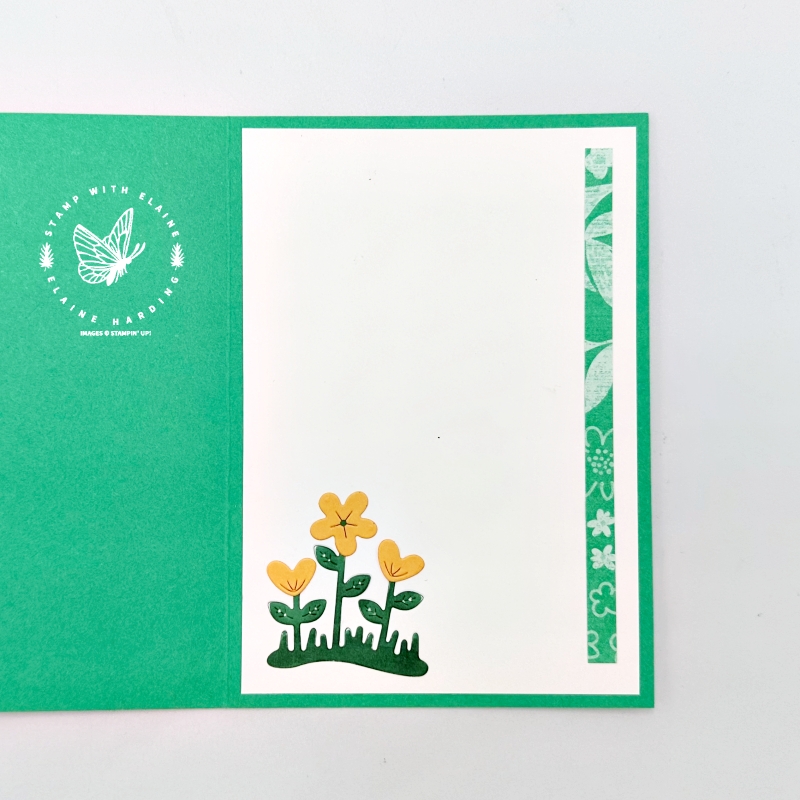
- For the inside of the card, place the grass/stems die in the bottom left corner. Colour the die cut with Shaded Spruce dark Stampin’ Blend. Adhere Basic White layer to inside of card and re-insert die cut and adhere in bottom left corner as shown.
- Die cut a pair of heart shaped flowers and a 5-petal flower to glue on top of stems.
- Adhere left-over strip of DSP to right as shown to complete card.
So that’s how you step it up – using more layers, and more embellishments!
Supply list
Listed below is the supply list. Just click on the picture to take you directly to the item in my online store.
Product List")


 Bordered Ribbon")
 Designer Series Paper")


- SHOP ONLINE – EARN 10% REWARDS ON ALL PURCHASES OVER £20
- PURCHASE A STARTER KIT : Get £155 worth of products for only £99. Choose from current catalogues and any specials available. Free Shipping. Read more
- Subscribe to my Video Tutorials – click here