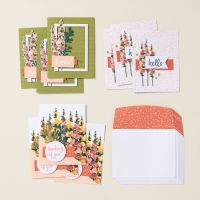
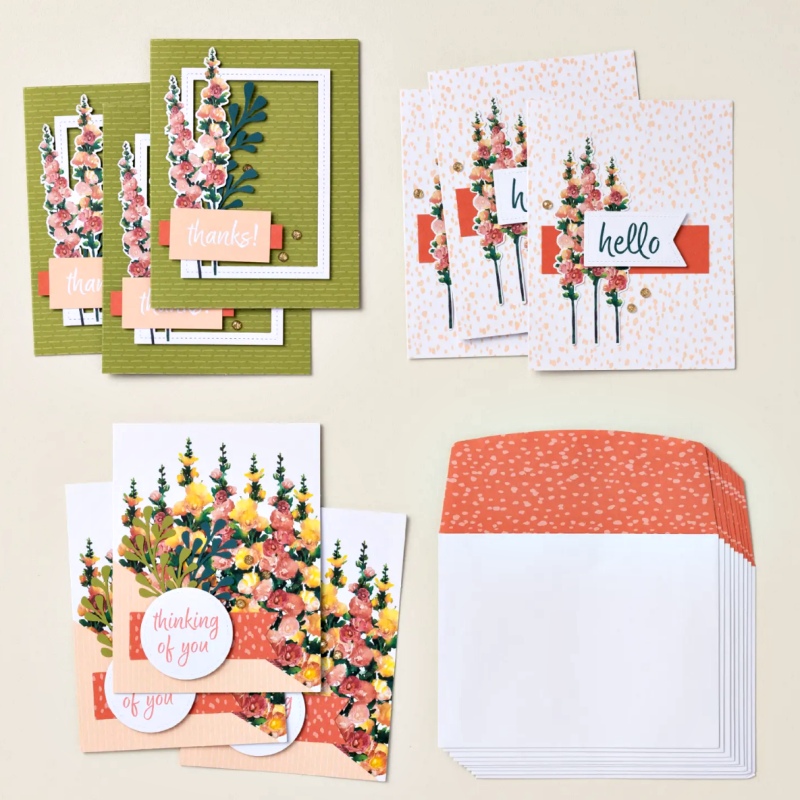
Altered cards – Hello Hollyhocks. Hello Hollyhocks is a card only kit. It contains 9 pre-printed card bases and envelops, die-cut images and labels, adhesive backed sequin gems and step by step instructions. Also, there’s enough adhesive included for all 9 cards.
Additional supplies
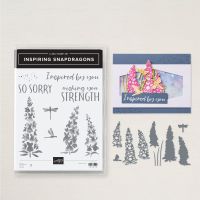
To create the altered cards, I added the Inspiring Snapdragons bundle, some extra card stock, Flirty Flamingo, Daffodil Delight, Calypso Coral, Pretty Peacock, Olive Olive inks.
The original card designs for all three designs
The picture below shows the completed cards from the Hello Hollyhock kit – 3 designs with 3 of each design. Images copyright Stampin’ Up!
Altered cards from one card
The card I altered is the bottom Petal Pink “Thinking of You” design. I cut the card in half then trimmed it to fit a standard card base used in UK/Ireland/Europe so that I could make 2 cards out of one kit card. You’ll also need extra envelops. I stamped the envelop on the front with the smallest Snapdragon to coordinate with the card.
Instructions for creating alternate Basic White card
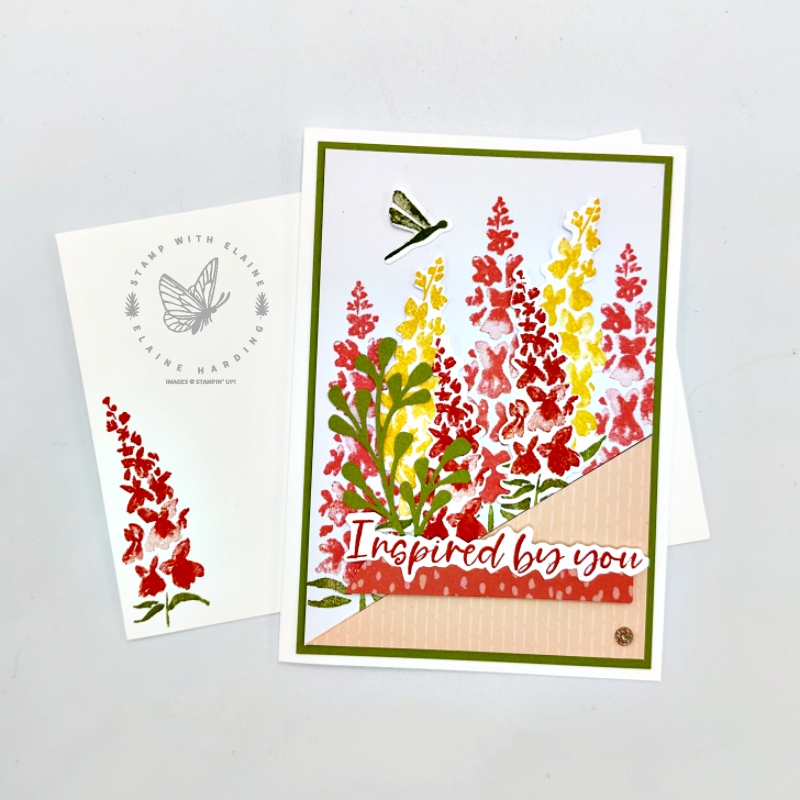
- Card base : Basic White 5 ¾” x 8 ¼” (14.5 cm x 21 cm) folded in half
- Old Olive mat layer : 3 ¾” x 5 ½” (9.5 cm x 14 cm)
- Back piece of Hello Hollyhock kit card: trim to 3 ⅝” x 5 ⅜” (9.2 cm x 13.7 cm).
- Align Petal Pink diagonal pattern in cutting groove of trimmer and cut.
- Stamp 3 largest snapdragon with Flirty Flamingo ink directly on the white portion of card kit card stock leaving a space between to stamp 2 medium snapdragons in a different colour.
- On scrap of Basic White, stamp 2 medium size snapdragons in Daffodil Delight and 2 smallest ones in Calypso Coral. Die cut them with corresponding dies from Inspiring Snapdragons die set.
- Arrange Daffodil Delight snapdragons and glue them in between directly stamped Flirty Flamingo snapdragons on card kit card base.
- Next adhere Calypso Coral ones in between, then adhere the pre-laser cut Old Olive leaf to the side and trim off excess (anything sticking out beyond the bottom edge)
- Adhere both sections to kit card on to the StampOld Olive mat layer and then adhere this to the card base leaving an even border on all 4 sides.
- Stamp the sentiment in Calypso Coral ink and the dragonfly in Old Olive and die cut with corresponding dies.
- Adhere Old Olive pre-die cut sprig of leaves to left of card front.
- Trim the pre-cut labels in half and adhere one half to the card with dimensionals covering the Old Olive sprig of leaves.
- Fussy cut the words, apply adhesive to the bottom of the sentiment and adhere on top of the pre-cut label. Also adhere the dragonfly as shown on top.
- Lastly add two of the gold sequins.
Instructions on how to assemble Petal Pink card
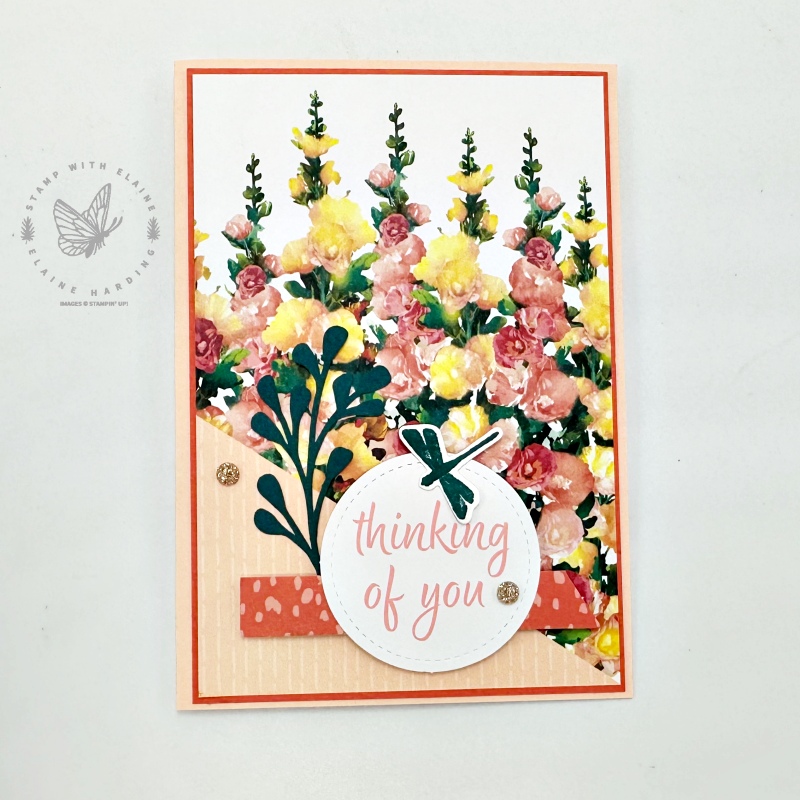
- Card base : Petal Pink cut at 5 ½” x 8″ (14 cm x 20.3 cm)
- Calypso Coral mat layer : 3 ¾” x 5 ¼”(9.5 cm x 13.3 cm)
- Trim card kit card base on the front half of card to 3 ⅝” x 5 ⅛” (9.2 cm x 13 cm)
- Adhere card kit card front onto Calypso Coral mat layer
- Next adhere Pretty Peacock pre-laser cut leaf sprig directly on to card base.
- Attach second half of pre-cut Calypso Coral label to card base with dimensionals and also the label circle.
- On scrap of Basic White, stamp and die cut dragonfly in Pretty Peacock. Apply adhesive along body and adhere to top of circle sentiment.
- Add adhesive back gold gems x 2.
Supply list
Listed below is the supply list. Just click on the picture to take you directly to the item in my online store.
Product List
- SHOP ONLINE – EARN 10% REWARDS ON ALL PURCHASES OVER £20
- PURCHASE A STARTER KIT : Get £155 worth of products for only £99. Choose from current catalogues and any specials available. Free Shipping. Read more
- Subscribe to my Video Tutorials – click here

