
Easy fun fold – Wildflower Designs. Here’s an easy fun fold inspired by my upline, Amanda Fowler which she shared on one of her craft and chat shows. The original design was from a card she received from Lesley a member in our team so thank you both for the inspiration. Amanda did hers with the Sketched Butterflies, but I thought I’d give the Wildflower Designs a little love and see how it will turn out.
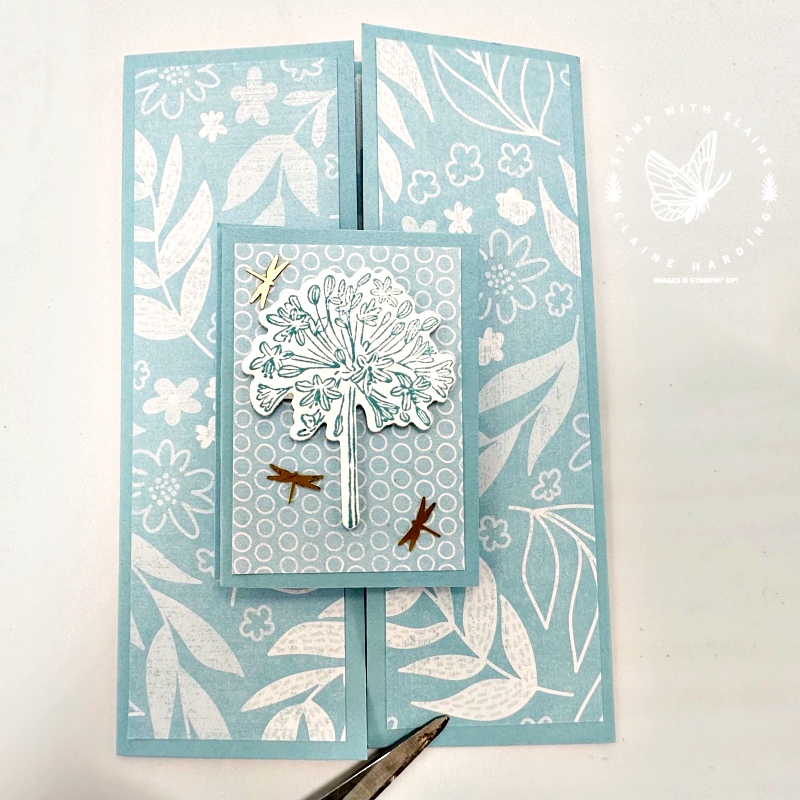
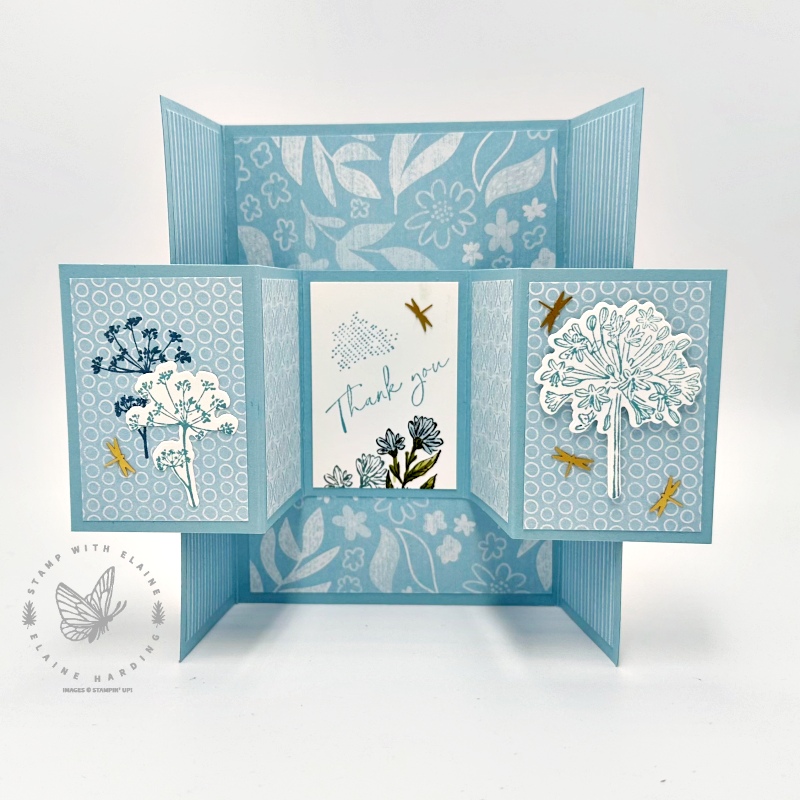
In the picture above, the card will fold flat to fit into an envelop, but it is on the bulky side so may require extra postage. The picture on the right shows the card open.
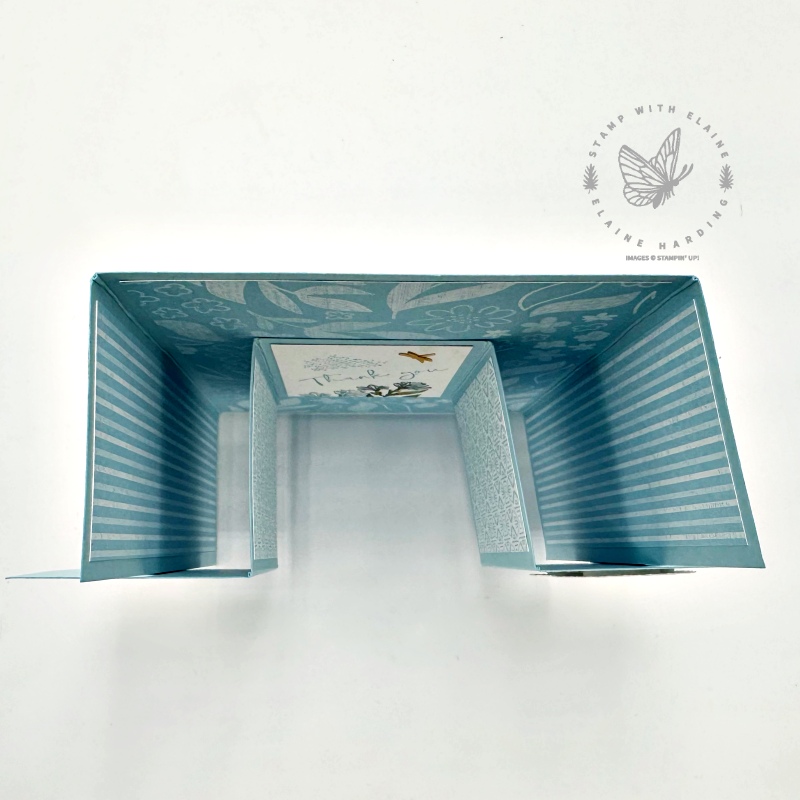
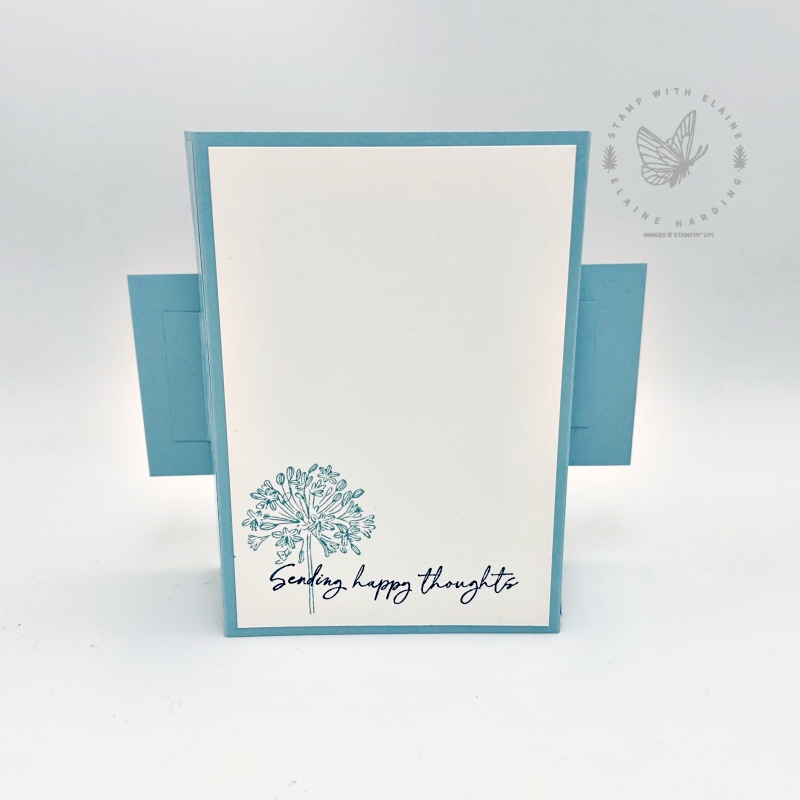
Below, the picture on the left shows a view from the top and there is a piece of Basic White adhered to the back so there’s somewhere to pen a few lines to the recipient. You can also just make out the hinges which creates this fun fold which is in the same colour as the card base so that it all blends in together.
Cutting guide
- Card base : Balmy Blue 5 ¾” x 8″ (14.5 cm x 20 cm). Long side on top score at 2″ and 6″ (5 cm and 15 cm)
- Fancy Fold insert : Balmy Blue 2 ¾” x 10″ (7 cm x 25 cm), long side score at 2″, 4″, 6″, 8″ (5 cm, 10 cm, 15 cm, 20 cm)
- Back of card base : Basic White 3 ¾” x 5 ½” (9.5 cm x 14 cm)
- Hinges : Balmy Blue 2 pieces 1″ x 1 ¾” (3 cm x 4.5 cm). Short side score at 1/2″ (1.5 cm).
Patterned paper cutting guide
I used the Subtles 6″x 6″ (15.2 x 15.2 cm) Designer Series Paper pack but you can substitute it with anything you like.
- DSP Pattern A : Inside centre panel card base 3 ¾” x 5 ½” (9.5 cm x 14 cm)
- Pattern B – Inside side panels 2 x 1 ¾” x 5 ½” (4.5 cm x 14 cm)
- Front side panels Pattern A : 2 x 1 ¾” x 5 ½” (4.5 cm x 14 cm)
- Fancy Fold Pattern C & D : 2 each 1 ¾” x 2 ½” (4.5 cm x 6.5 cm)
- Centre panel Fancy Fold : Basic White 1 ¾” x 2 ½” (4.5 cm x 6.5 cm)
Assembly instructions
- Adhere DSP Pattern A on to centre panel of card base and Pattern B to the 2 inside side panels.
- On the Fancy Fold Piece, alternate Patterns C & D on panel 1 and 2 from the left.
- Stamp and adhere Basic White piece on middle panel 3. then adhere DSP pattern D to panel 4 and DSP pattern C to panel 5 on the end panel on the right.
- On the Fancy Fold piece – stamp and embellish panel 1 on the left and on panel 5 on the right as desired.
- Apply adhesive to the back of panel 3 on the Fancy Fold piece.
- Glue this to the centre panel of card base so that it is equidistant top, bottom and sides.
- Flip card over so that it lies flat to apply hinges. Burnish score line on hinges well. Apply adhesive on both sides. Fold along score line. Align score line with edge of main card base and glue down. Repeat for other side.
- Lastly stamp large Basic White 3 ¾” x 5 ½” (9.5 cm x 14 cm) and adhere to back of card.
Supply list
Listed below is the supply list. Just click on the picture to take you directly to the item in my online store.
Product List")

 Designer Series Paper")


Thanks for visiting – happy stampin’

- SHOP ONLINE – EARN 10% REWARDS ON ALL PURCHASES OVER £20
- PURCHASE A STARTER KIT : Get £155 worth of products for only £99. Choose from current catalogues and any specials available. Free Shipping. Read more
- Subscribe to my Video Tutorials – click here