
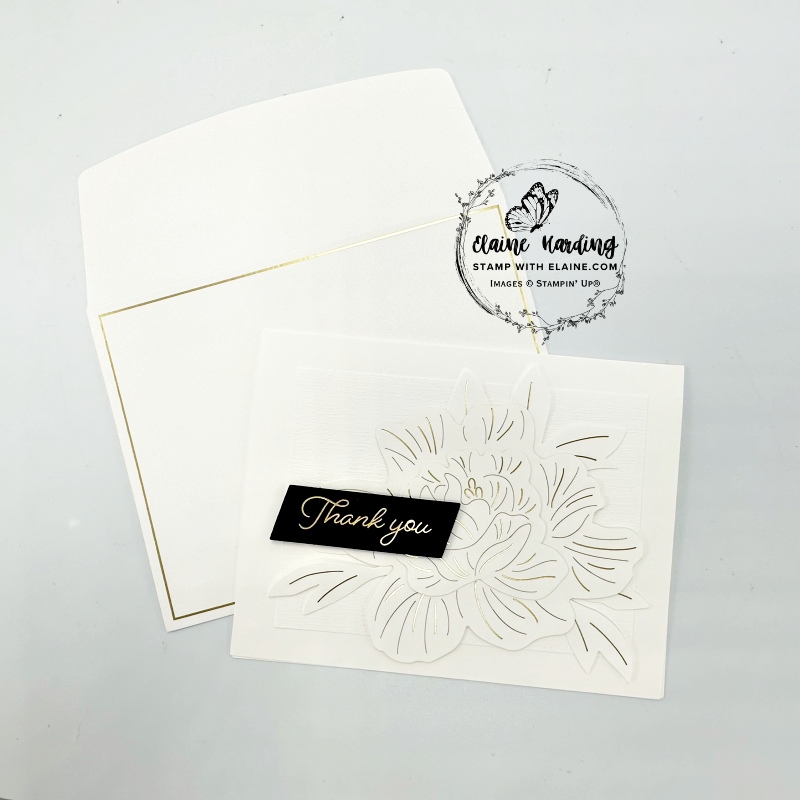
Altered cards – Thank you Kindly kit. The Thank you Kindly Kit is one of the kits released in January 25. This Thank You Kindly Kit is white on white. The pop-out floral elements are also in white with gold foil. So are the sentiments but against a black background. What’s unusual about this kit is the texture of the mat layers and envelops which also have a gold foiled border around it. The only way I can describe its texture is that it looks like watercolour paper, but is thinner and a lot smoother.
Stampin’ Up! introduced kits in its supply line so that people new to paper crafting wouldn’t be overwhelmed by the vast array of products to choose from in their catalogues. Where do you start? Hence the Kits – everything you need to complete the project in a box.
Original Kit Design 1 & 2
The cards below were made following the instructions in the kit. All the materials needed to make 8 cards, 4 each of 2 designs. The envelops are made from textured paper with gold foil like the floral pop-out elements. There are also rectangular and circular mat layers which are textured too.

Altering cards to stretch supplies
What I love to do with the supplies in my kit is to stretch the supplies to make even more cards from the kit. By adding supplies of my own and distributing the original kit design elements across the extra cards, I can make it go further. Simply add card stock for the card bases, ink, a pack of embellishments and tools you already own so that you can make more than the 8 cards in the kit. You’ll need to use your own envelops too for the extra cards.
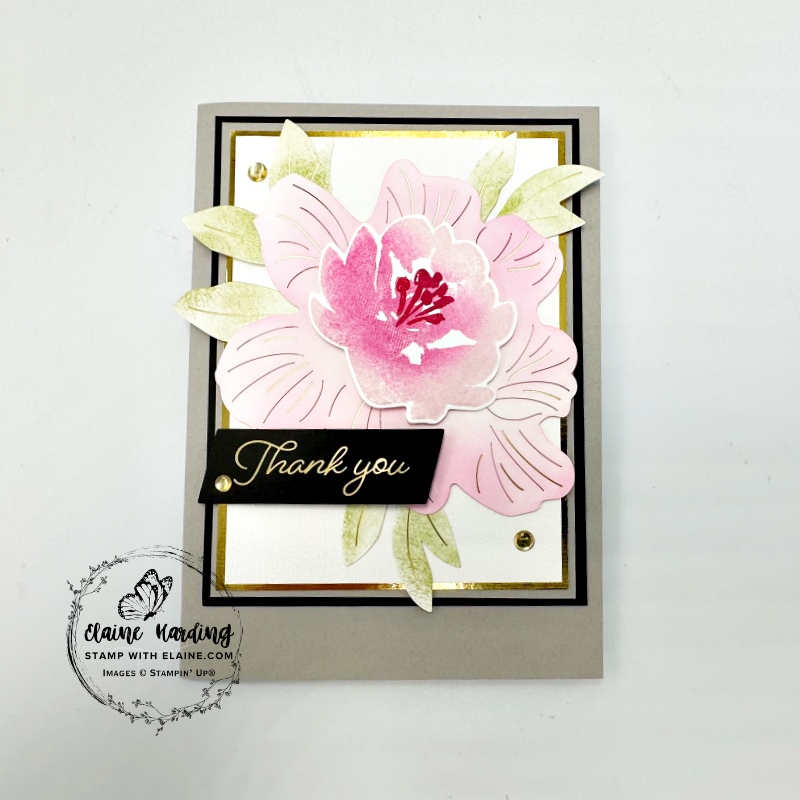
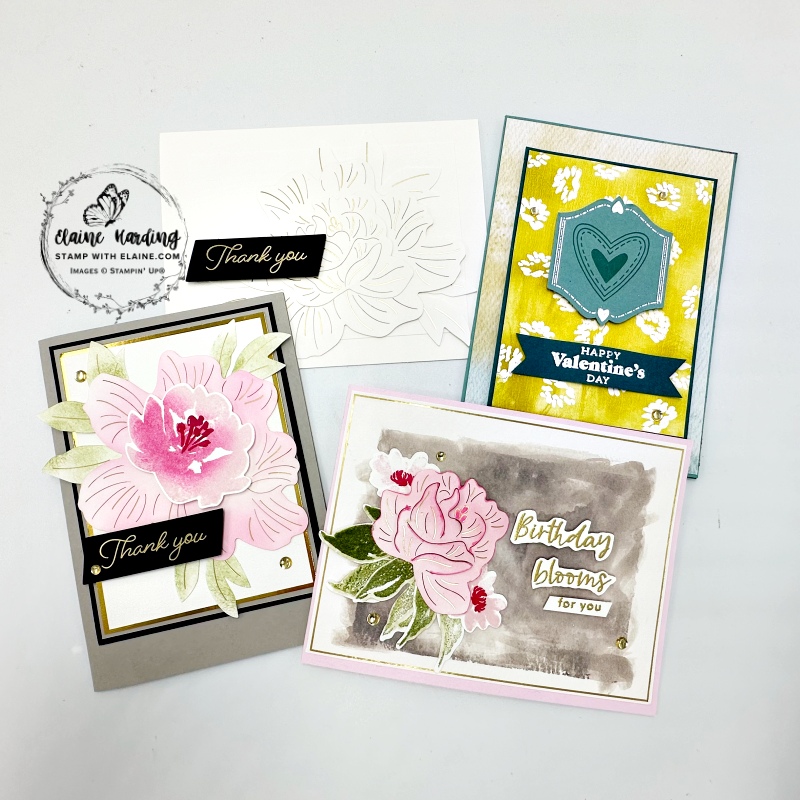
Colouring floral elements – Altered Kit Design 1 card
I made 2 cards from the floral elements meant for SU’s Card Design 1. The stamp set that I thought would compliment the kit is the Textured Floral photopolymer stamp set and its coordinating dies called the Textured Floral Dies. They have been around for some time and therefore no longer available as a bundle except as separate items.

Gray Granite portrait card
The metric measurements are direct conversions and have not been rounded off because it was governed by the size of the Kit rectangular textured layer.
- Card base : Gray Granite 5 ¾” x 8 ¼” (14.5 cm x 21 cm) folded in half.
- Basic Black mat layer 3 ⅝” x 4 ⅞” (9.2 cm x 12.4 cm)
- Gray Granite mat layer 3 ½” x 4 ¾” (8.9 cm x 12.1 cm)
- Gold Foil frame 3 ⅜” x 4 ⅝” (8.6 cm x 11.7 cm). Place on trimmer and gut the inside by cutting a ¼” frame. Reserve the gutted inside for future projects.
- Adhere Kit card textured layer which measures 3 ¼” x 4 ⅜” on top of gold frame with tear and tape.
- Apply Old Olive lightly on leaves with blending brush.
- Lightly colour kit card’s larger floral element with Bubble Bath ink
- Stamp largest Textured Floral image and adhere with dimensional on top of blended leaves as pictured.
- Add kit card “Thank you” sentiment on dimensionals.
- Finally adhere low profile adhesive dots.
Altering envelop and smaller floral layer from Kit Card Design 1
There is gold foil round the envelop and therefore there isn’t very much wriggle room. Consequently the metric measurements are direct conversions from the imperial measurements. I used the remaining small gold foil flower for this card.
- Card base : Bubble Bath cut at 4 ½” x 11 ½” (11.5 cm x 29 cm) and folded in half. If you’re in the US, it will cover the whole of the card front 4 ¼” x 5 ½” without a border.
- Trim the envelop on all 4 sides by cutting equal amount off each side. It measures 4 ¼” x 5 ½” (10.8 cm x 14 cm).
- Ink up Clear block E with Gray Granite and spritz with water then stamp on envelop and allow to dry. This colouring technique is called “smooshing”.
- Stamp twice with the larger leaf stamp from Textured Floral photopolymer stamp set in Old Olive first generation and second generation on the envelop flap. Die cut with corresponding die from Textured Floral dies.
- On scrap of Basic White, stamp 2 medium size flowers in Bubble Bath, and the flower centres in Melon Mambo then die cut with corresponding die.
- Use a blending brush to add ink on the remaining Smaller flower for Kit card Design 1 and highlight the edges with a Melon Mambo marker.
- Adhere altered envelop to Bubble Bath card base.
- Arrange and adhere flowers as pictured.
- Gold emboss the sentiment and fussy cut then adhere with dimensionals to card front.
- Lastly add the Low profile adhesive dots.
Re-purposing the rectangular mat layer from Kit Card Design 1
As we’re so close to Valentine’s day, I made a Valentine card using a new bundle in the Jan-April 25 Mini called Hugs for Love. I used a resist emboss technique for this piece. You simply stamp a pattern on the card stock, white emboss, then add colour with a blending brush. The embossing will resist the ink and remain white while the background will absorb the colour.
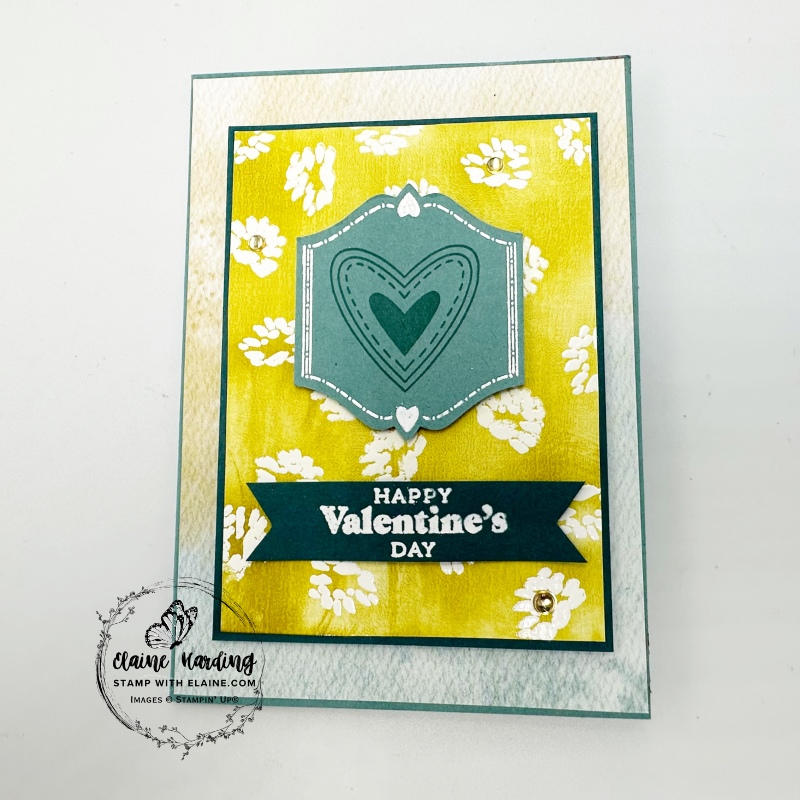
- Card base : Lost Lagoon cut at 5 ¾” x 8 ¼” (14.5 cm x 21 cm) folded in half.
- Everyday Happiness 12″x 12″ DSP cut at 4″ x 5 ⅝” (10 cm x 14 cm)
- Pretty Peacock mat layer 3 ⅜” x 4 ⅝” (8.5 cm x 11.5 cm).
- Mat layer from Kit Card Design 1 – Trim to 4 ½” x 3 ¼”. Stamp with Versamark randomly with the smallest flower from Textured Florals stamp set. White emboss and use a blending brush to add colour in Wild Wheat. Adhere to Pretty Peacock mat layer.
- Stamp label from Hugs for Love in Versamark on Lost Lagoon card stock. White emboss and punch out with “To the Point label punch”.
- Adhere label with dimensionals on to altered Kit Card Design 1 mat layer.
- Next stamp “Happy Valentine’s day” in versamark on Pretty Peacock card stock and trim with flag ends at both ends. Adhere with dimensionals underneath Hugs for Love label.
- Lastly add low profile dots as shown on card front.
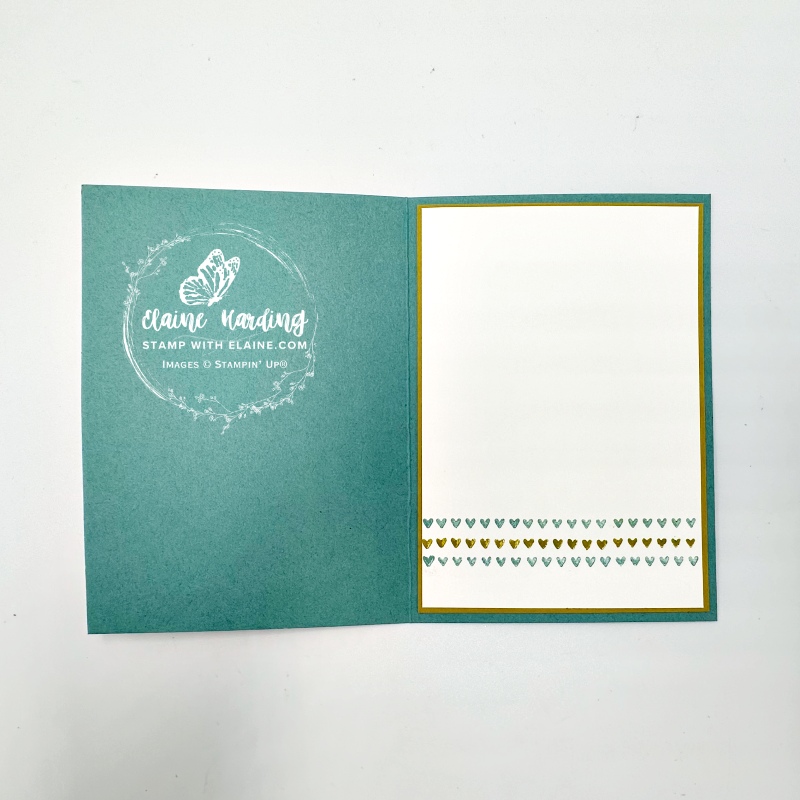
- Inside card : cut a Wild Wheat mat layer 3 ⅞” x 5 ½” (9.8 cm x 14 cm).
- Basic White layer – cut at 3 ¾” x 5 ⅜” (9.5 cm x 13.7 cm). Stamp a row of Lost Lagoon hearts at the bottom third, Wild Wheat hearts in the middle followed by another row at the top in Lost Lagoon.
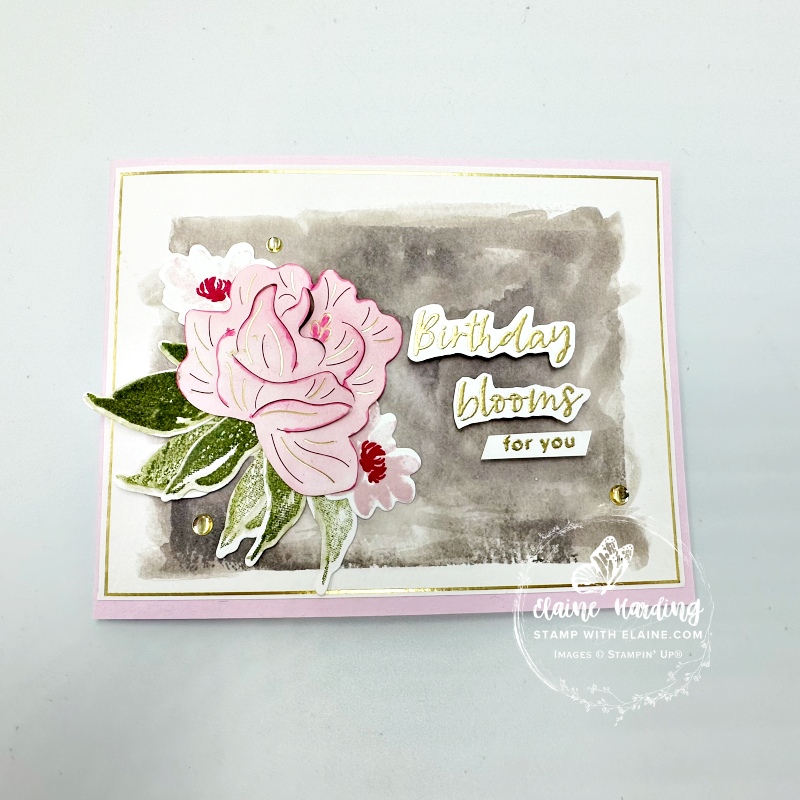
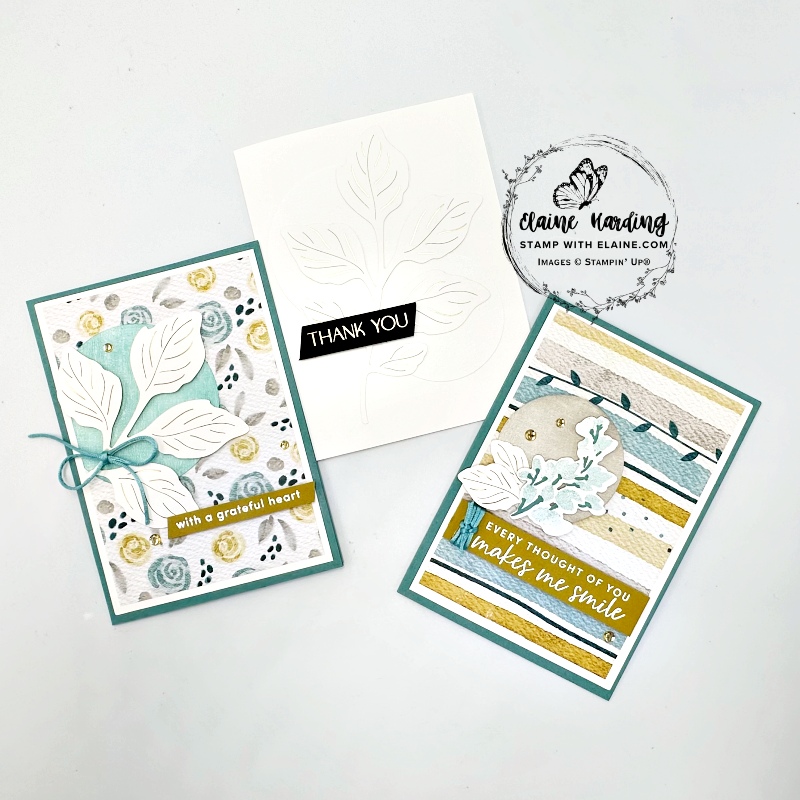
Altered Kit Design 2 card – Use DSP as background
There are 4 textured rectangular pieces for Design 1 of the Kit card, as well as 4 large and 4 small textured circles for Design 2 of the Kit card. You can colour these to match your Designer Series Paper. The card base for Design 2 of the Kit card can also be cut up to use as mat layers on the card front.

Floral DSP background card
- Card base : Lost Lagoon 5 ¾” x 8 ¼” (14.5 cm x 21 cm) folded in half.
- Cut Kit card White base in half and trim 3 ⅞” x 5 ½” (9.8 cm x 14 cm) and adhere to card base.
- Everyday Happiness DSP cut at 3 ⅝” x 5 ¼” (9.2 cm x 13.3 cm). Adhere to Basic White layer.
- Use blending brush to apply Lost Lagoon ink to larger Kit circle and trim ⅛” off to create a straight edge. Align with DSP layer toward top left corner.
- Trim the trio of larger leaves, and the remaining large one to use on this card. Reserve the two smaller leaves for the other card.
- Curl the trio of large leaves and adhere with dimensionals on top of circle. Adhere the remaining leaf at the bottom of leaf cluster by aligning with stem and adding dimensional on the underside of single leaf as pictured.
- Tie a bow with Lost Lagoon soft cording and attach with glue dots on leaf stem.
- Stamp greeting on Wild Wheat scrap in Versamark ink and white emboss. Adhere with dimensionals as pictured.
- Adhere low profile dots as a finishing touch.
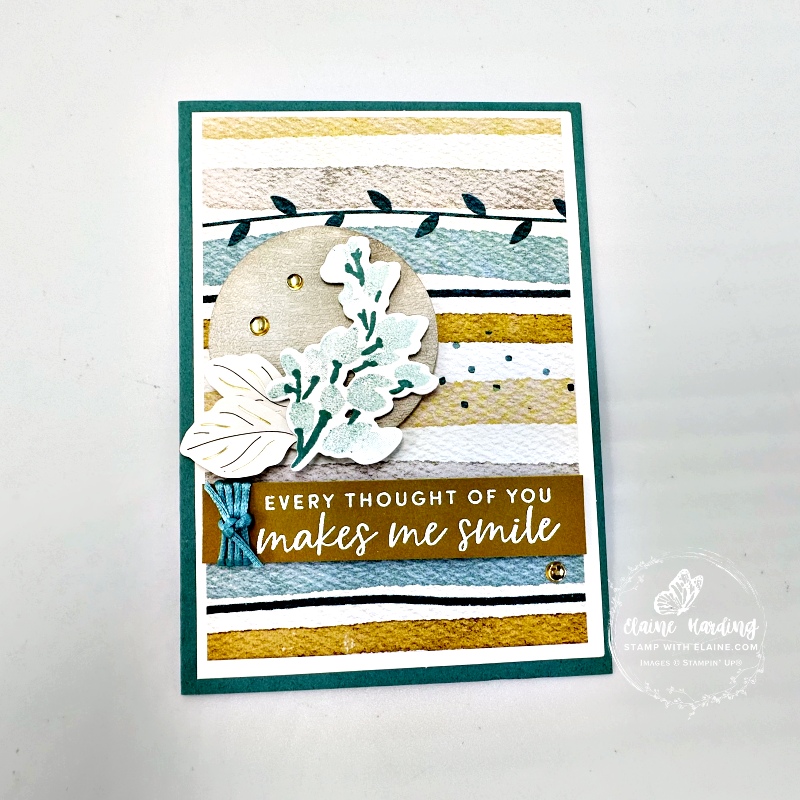
Card with striped pattern
- Card base : Lost Lagoon 5 ¾” x 8 ¼” (14.5 cm x 21 cm) folded in half.
- Cut Kit card White base in half and trim 3 ⅞” x 5 ½” (9.8 cm x 14 cm) and adhere to card base.
- Everyday Happiness DSP cut at 3 ⅝” x 5 ¼” (9.2 cm x 13.3 cm). Adhere to Basic White layer.
- Use blending brush to apply Gray Granite ink to smaller Kit circle.
- Stamp 2nd generation (stamp off first for a lighter shade) cluster of flowers from Texured Flowers in Lost Lagoon ink on scrap of Basic White scrap. Then ink the stems first generation Lost Lagoon stems.
- Attach to circle with dimensionals.
- Trim the smaller Kit leaves so you can tuck it into the stamped floral piece with glue dots.
- Adhere circle with dimensionals to the card front as pictured.
- Cut a Wild Wheat strip 3 ⅝” x ¾” (9.2 cm x 2 cm). Stamp greeting with Versamark ink and white emboss.
- Put double sided tape on left side. Wrap Lost Lagoon soft cording around it. Slip another length underneath at the top and tie a knot.
- Attach greeting with dimensionals.
- Lastly attach low profile dots.
From 8 cards to 17 cards in total!
From Kit card Design 1, I made 9 plus the original, and from Kit card Design 2, I made 6 plus the original making a total of 17 cards instead of 8. I still had leftovers from the back of the envelops which I shall leave for another project another day.
Supply list
Listed below is the supply list. Just click on the picture to take you directly to the item in my online store.
Product List
")

")

 Designer Series Paper")


Thanks for visiting today – enjoy the rest of your weekend.

- SHOP ONLINE – EARN 10% REWARDS ON ALL PURCHASES OVER £20
- PURCHASE A STARTER KIT : Get £155 worth of products for only £99. Choose from current catalogues and any specials available. Free Shipping. Read more
- Subscribe to my Video Tutorials – click here