
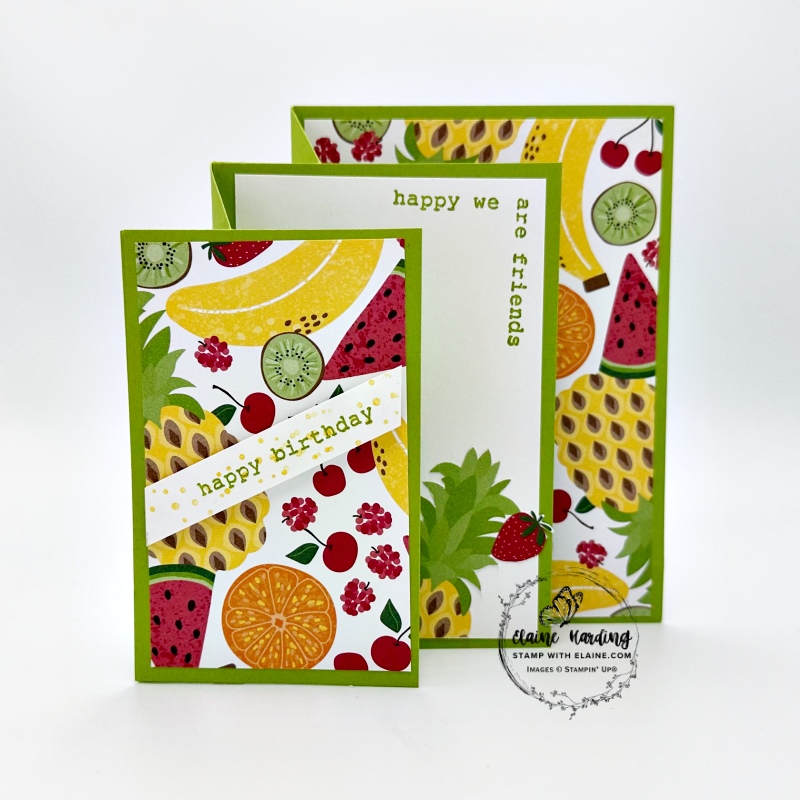
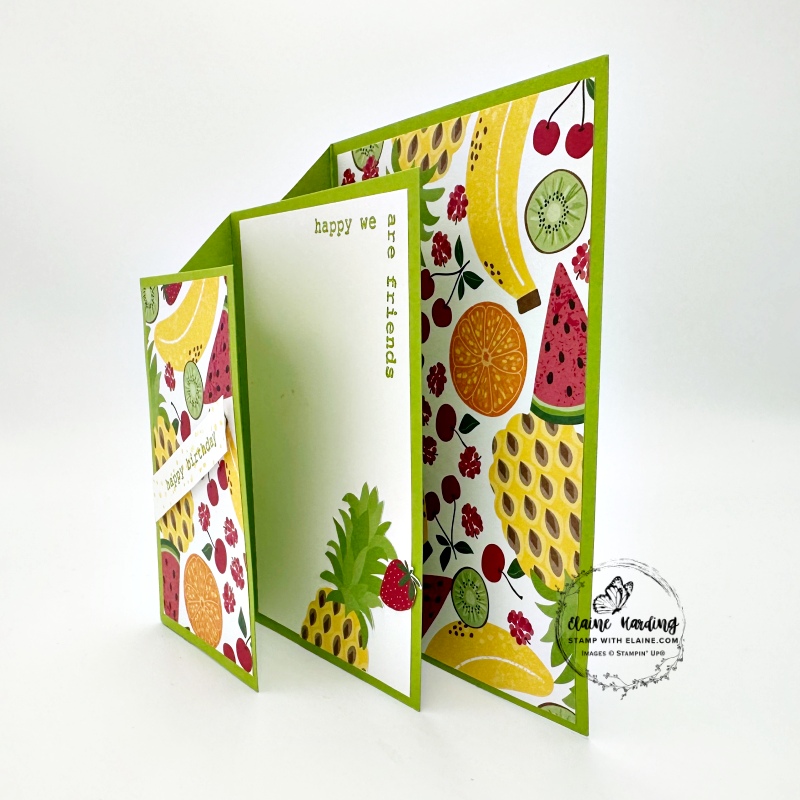
Cascading Pleat fun fold. The pleats set each layer apart and the front layer is the smallest, the middle being larger and the largest is the size of a normal card front.
Materials used
The Spring Corners bundle is an online exclusive released in January and would be perfect for this type of card. I earned the Fruit Salad 6″ x 6″ (15.2 x 15.2 cm) DSP. The colours are so vibrant reflecting nature’s bounty and as a dish, Fruit Salad is my favourite food to eat. It’s so refreshing especially at this time of year when we’re still in mid-winter.
If you love these papers, don’t delay because Sale-a-bration ends on 28 February and that’s 9 days away so the countdown begins!
How to make the card
Cutting Guide
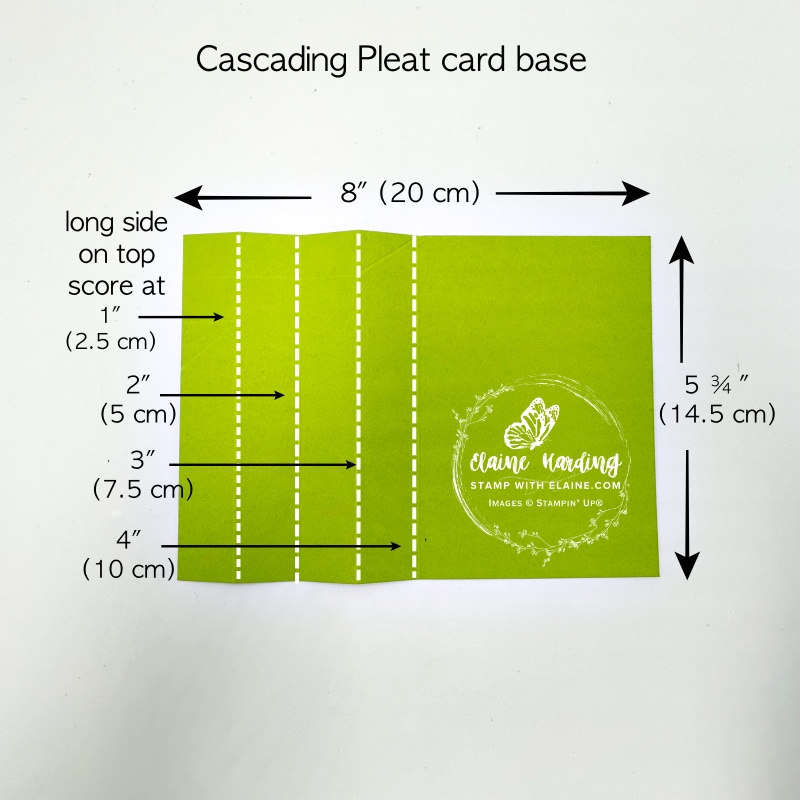
- Card Base : Granny Apple Green 5 ¾” x 8 “(14.5 cm x 20 cm). Long side score at 4” (10 cm).
- Orient card stock in landscape and score at 1″, 2″, 3″, 4″ (2.5 cm, 5 cm, 7.5 cm, 10 cm)
- Burnish all score lines
- Cut Middle panel Granny Apple Green base 3 ¼” x 5″ (8 cm x 12.5 cm)
- Next cut Smallest front panel Granny Apple Green base at 2 ½” x 4 ¼” (6.5 cm x 11 cm)
- Scrap of Basic White to stamp greeting.
Mat layers
- Sale-a-bration’s Fruit Salad 6″x 6″ (15.2 cm x 15.2 cm) Free with a £55 order : Back panel 3 ¾” x 5 ½” (9.5 cm x 14 cm)
- Middle panel : Basic White 3″ x 4 ¾” (7.5 cm x 12 cm)
- Small front panel : Sale-a-bration’s Fruit Salad DSP 2 ¼” x 4″ (6.5 cm x 10 cm)
How to create cascading pleat template
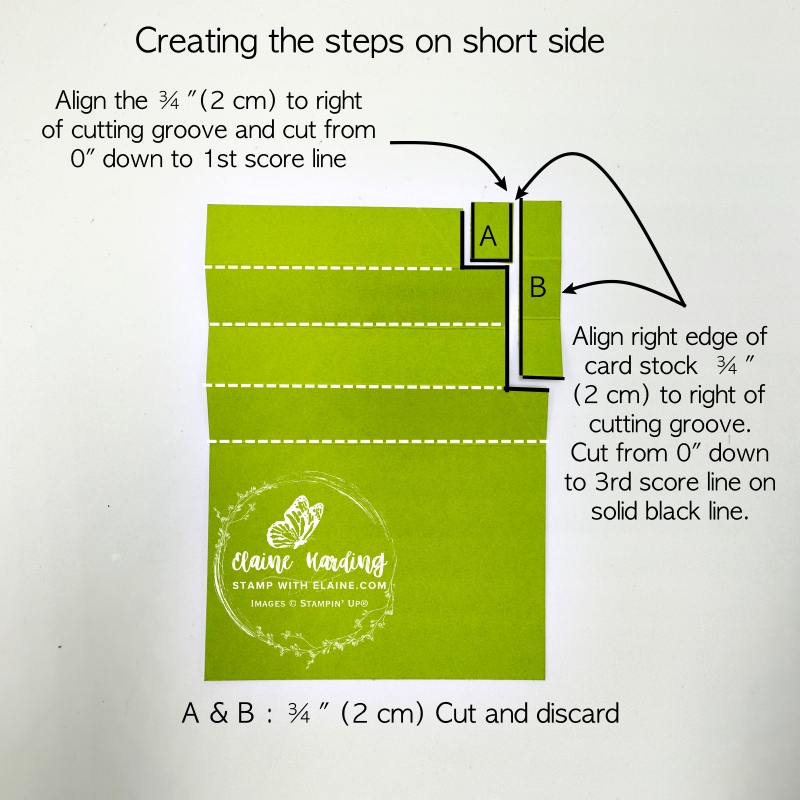
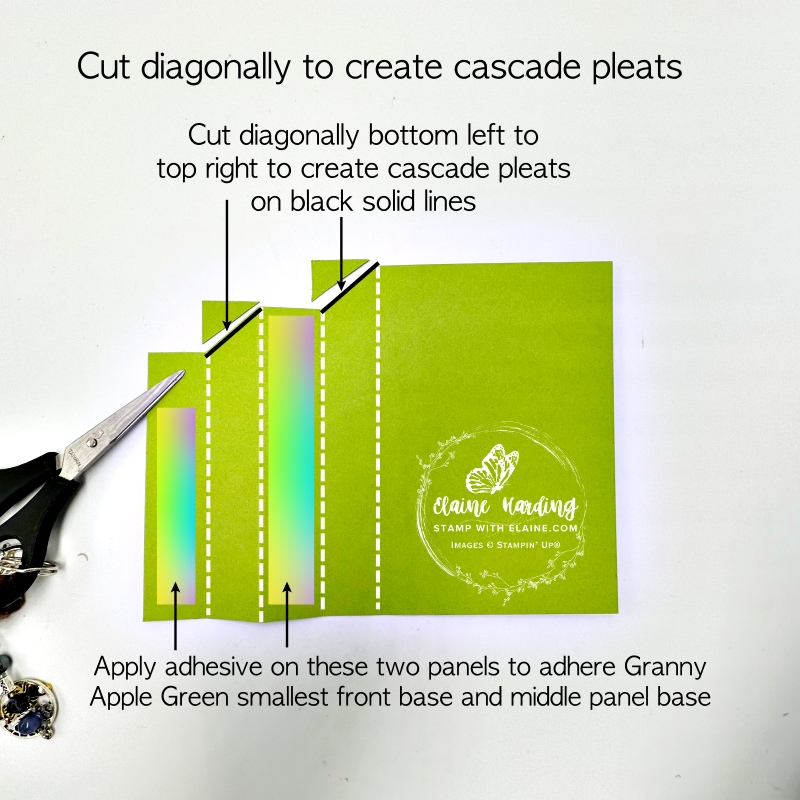
- Rotate card stock so short side is on top. On trimmer, align right edge ¾” to right of cutting groove and cut from 0″ down to 3rd score line. Cut on solid black line and remove that strip B.
- Once you remove that strip, you’ll have a straight edge (not pictured) which you can align to right of cutting groove at ¾” and cut from 0″ down to 1st score line depicted above by solid black line. You can then remove that small rectangle A pictured above.
- Now orient card stock in landscape and cut diagonally on the 2nd panel and 4th panel [next to the 4″(10 cm) score line] from the bottom left up to the top right corner.
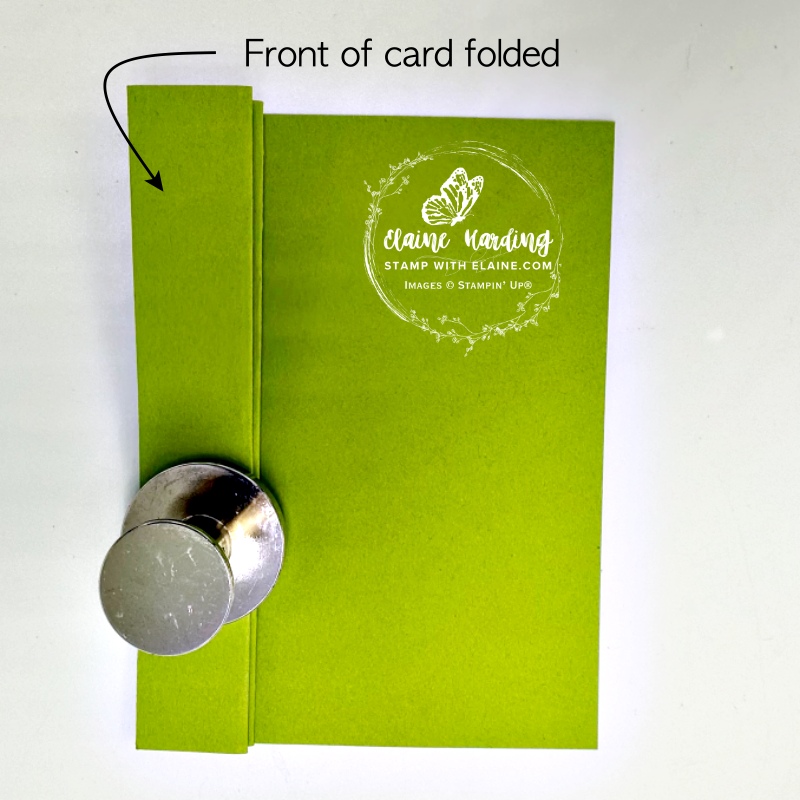
- Apply adhesive on the 1st and 3rd panels, fold on the 3rd score line so that the adhesive is face up and attach the middle Granny Apple Green base panel.
- Valley fold the 2nd score line so the adhesive side is face up on the 1st panel and adhere the smallest Granny Apple Green base panel
Adhere layers to assemble card
Now that you’ve attached the base layers, you can adhere the remaining layers.
- Adhere largest DSP Back panel 3 ¾” x 5 ½” (9.5 cm x 14 cm) to the card base.
- Fussy cut the pineapple from a scrap of DSP with the same pattern and adhere to Basic White Middle Panel. Stamp greeting from Spring Corners in Granny Apple Green ink and adhere on top of Granny Apple Green middle base panel.
- Adhere smallest DSP cut at 2 ¼” x 4″ (6.5 cm x 10 cm) and adhere to smallest Granny Apple Green front base panel.
- Lastly stamp “happy birthday” in Granny Apple Green on a scrap of Basic White and the dots in Daffodil Delight. Trim and cut at an angle to fit across card front. Apply mini dimensionals on the back and adhere to card front to finish card.
Supply list
Listed below is the supply list. Just click on the picture to take you directly to the item in my online store.
Product List")

")
 Designer Series Paper")


- SHOP ONLINE – EARN 10% REWARDS ON ALL PURCHASES OVER £20
- PURCHASE A STARTER KIT : Get £155 worth of products for only £99. Choose from current catalogues and any specials available. Free Shipping. Read more
- Subscribe to my Video Tutorials – click here