
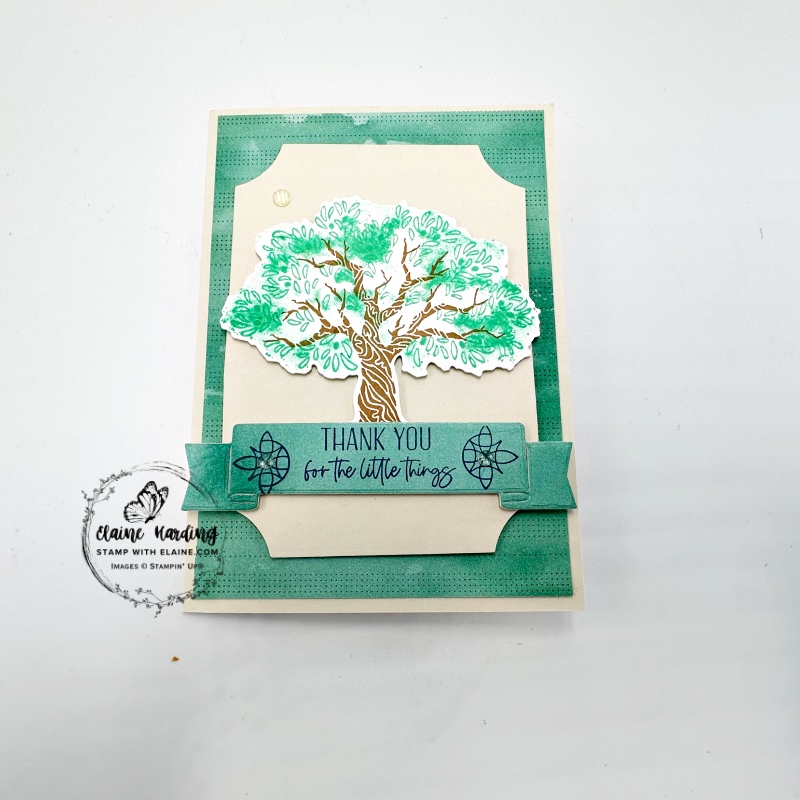
Easy card – Twisted in Time. It’s a race to try and use up the Blooms Impressions 12″x 12″ (30.5 x. 30.5 cm) DSP which is FREE during Sale-a-bration with a £55 order. Only 5 days left of Sale-a-bration as it ends on 28 February 2025.
The Twisted in Time stamp set is a three step stamping method. First you stamp the distINKtive stamp which has light and shade incorporated into its stamp image, a second stamp which stamps the leaves and a third which stamps the twisted trunk. It has coordinating dies and is available as a bundle as an Online Exclusive.
Tip on how to mount stamps to do 3-step stamping
The easiest way to ensure correct placement of each stamp is to use a template. If you still have your Stamparatus, I would recommend using that, but if you don’t, this is a tip as a work around. If you’re making lots of cards, then creating a template will save you time otherwise you’ll spend ages trying to stamp each part of the tree in the right spot every time you stamp this trio of images to make the tree whole.
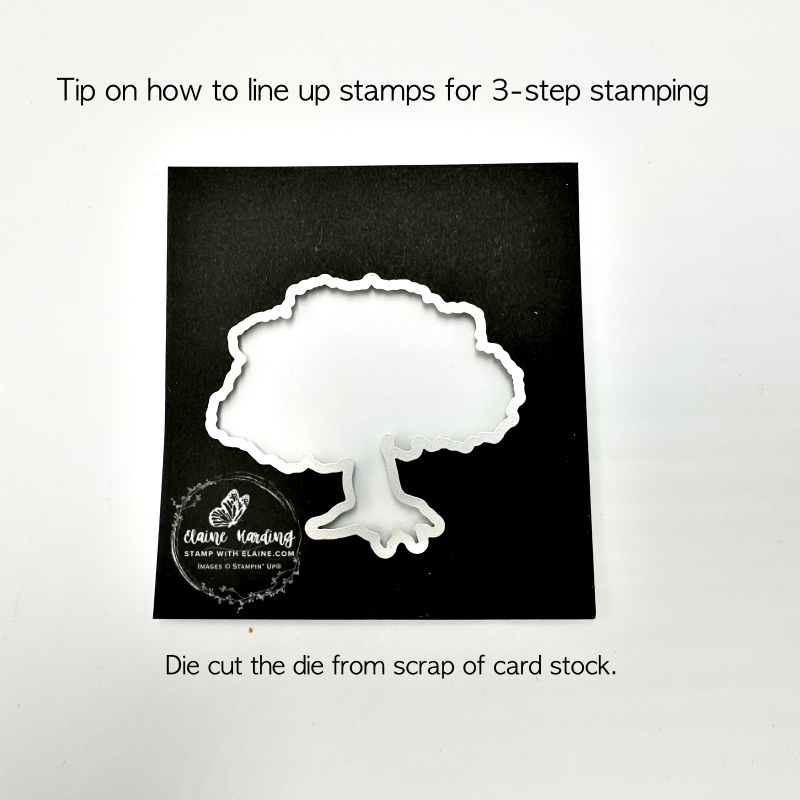
How to create template
- Die cut the whole Twisted in Time tree from scrap card stock
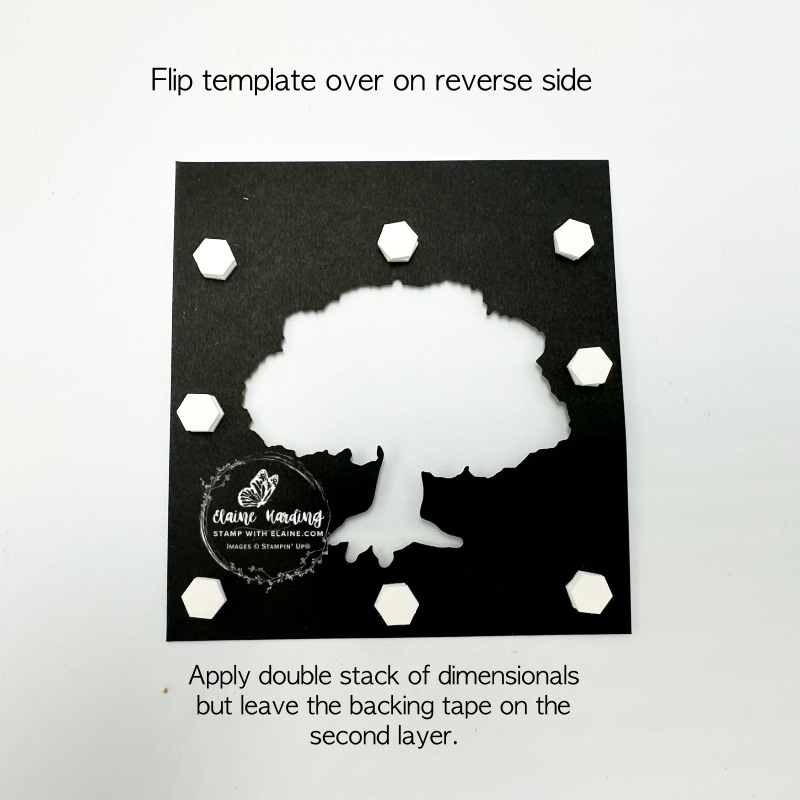
- Flip it over and place a double stack of dimensionals on the back. Leave the backing tape in situ on the 2nd stack of dimensionals.
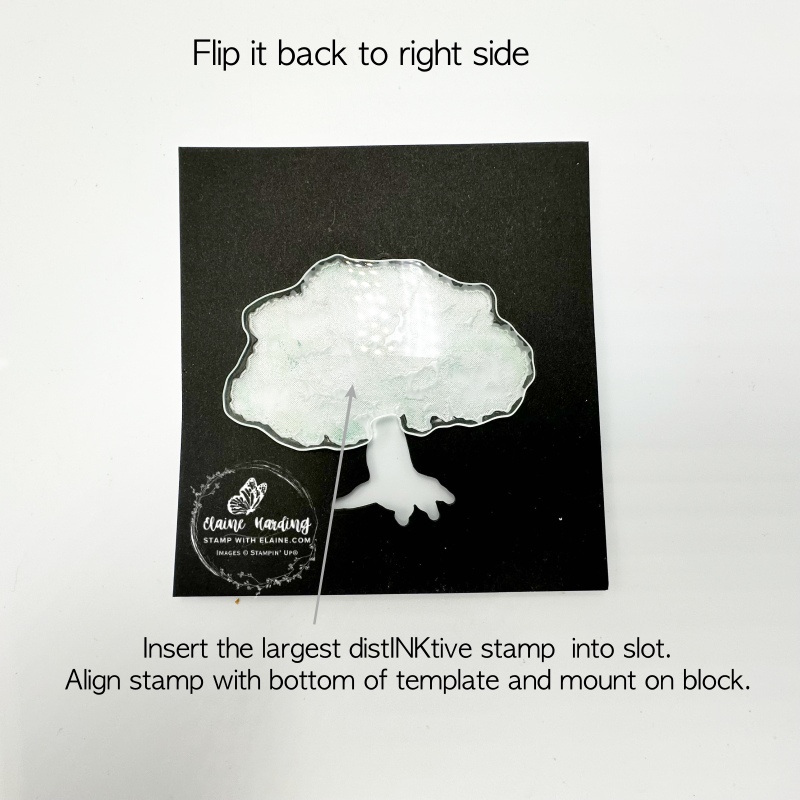
- Turn it back over on the right side.
Mounting stamps in template
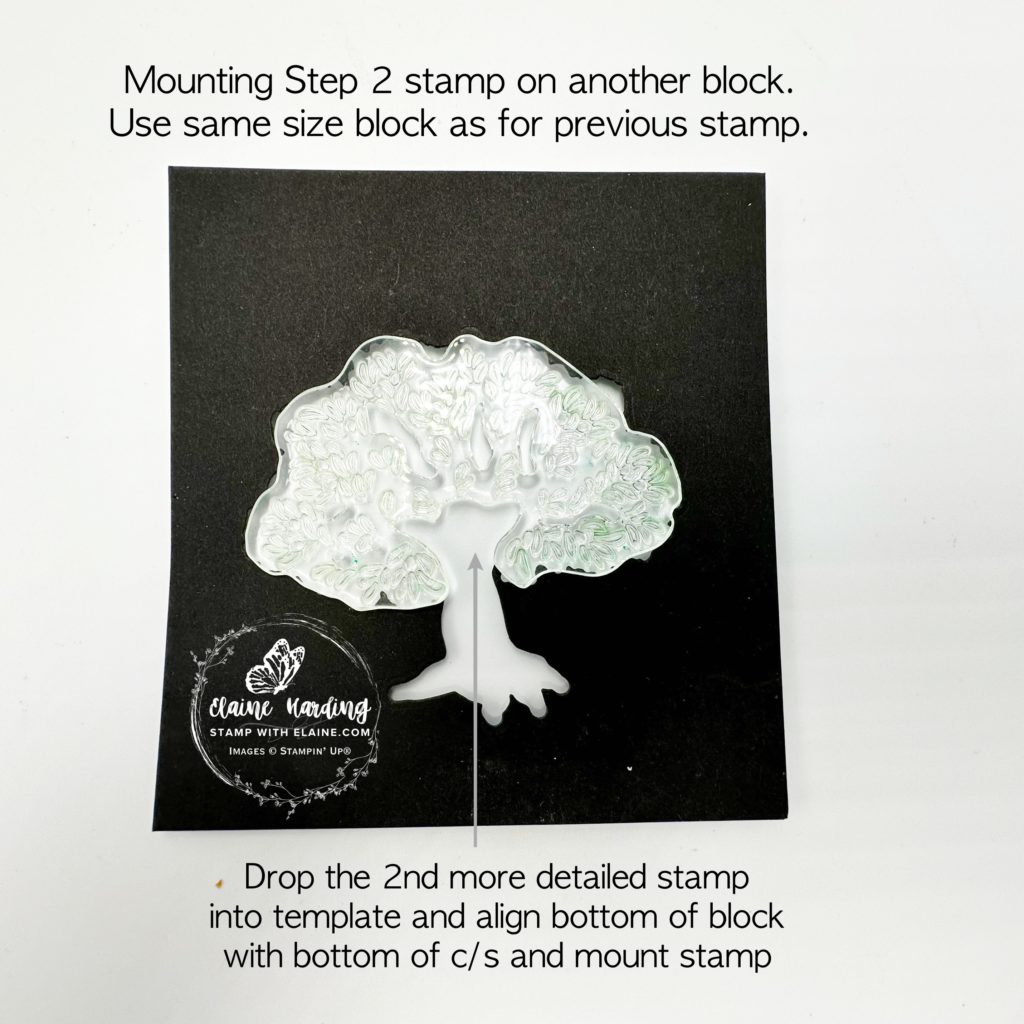
Important Note: By aligning the bottom of the block with the bottom of the card stock ensures you are stamping each image in the correct position. It takes the hassle out of trying to align the different stamps in the correct position each time.

- Drop the largest disTINKtive stamp into the top of template. You will feel it slot in. Mount it on a block and align bottom of the block with the bottom of the card stock before you pick up the stamp.
- Next drop the 2nd more detailed stamp into top of template so that it fits snugly at the top of template. Pick up stamp with a 2nd block, aligning bottom of block with bottom of card stock before picking up the stamp.
- Lastly drop the tree trunk into the bottom of the template so that it fits snugly with the roots. Pick up stamp with a 3rd block, aligning bottom of block with bottom of card stock before picking up the stamp.
As mentioned before, align the bottom of the block with the bottom of the card stock you’re stamping on to ensure correct placement. Once you’ve stamped all three images to complete the tree image, you can die cut the tree.
Cutting guide
- Card base : Basic Beige 5 ¾” x 8 ¼ ” (14.5 cm x 21 cm). Long side score at at 4 ⅛” (10.5 cm)
- Bloom Impressions 12 x 12 DSP : cut 2 pieces 3 ⅞” x 5 ½” (9.8 cm x 14 cm) Emboss one of the pieces with the new sneak peek Pattern of Friendship die
- Die cut the frame in Basic Beige with the Twisted in Time die – you need to cut it once, then flip it over to the other side and die cut again to make the frame.
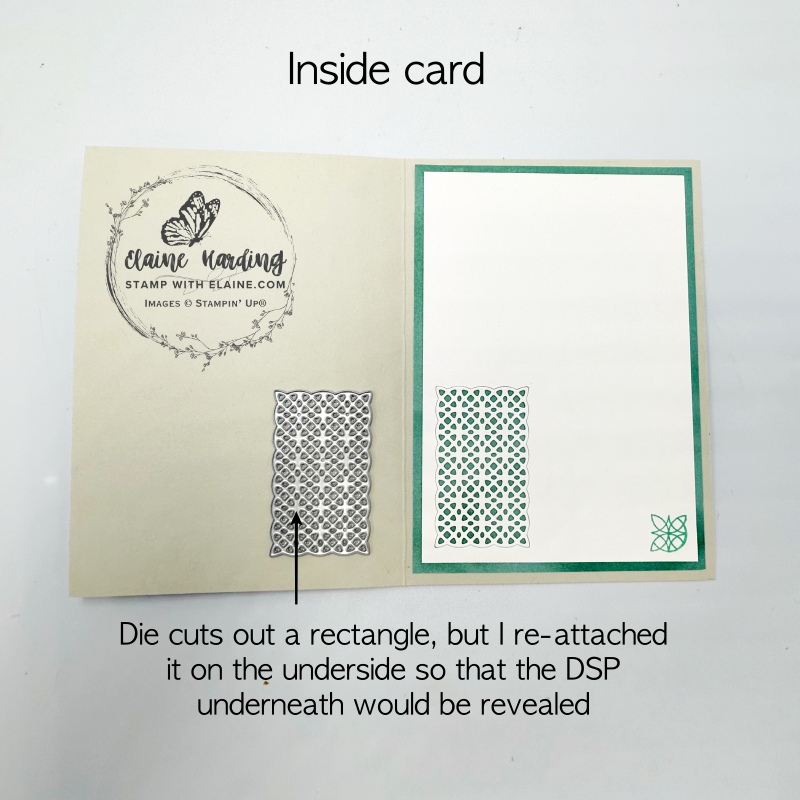
- Inside card : Basic White 3 ⅝” x 5 ¼” (9.2 cm x 13.3 cm)
- Scraps of Basic White to stamp tree and label.
- Scrap of Bloom Impressions DSP adhered to Basic White then die cut with label die from Twisted in Time dies.
Supply list
Listed below is the supply list. Just click on the picture to take you directly to the item in my online store.
I will add the sneak peek Pattern of Friendship die once it becomes available in March.
Product List")
")


 Designer Series Paper")


Thanks for visiting. Enjoy your weekend.

- SHOP ONLINE – EARN 10% REWARDS ON ALL PURCHASES OVER £20
- PURCHASE A STARTER KIT : Get £155 worth of products for only £99. Choose from current catalogues and any specials available. Free Shipping. Read more
- Subscribe to my Video Tutorials – click here