
Blending with Decorative masks. The Layers of Beauty Bundle is from the January 24 – April 25 Annual Catalogue on page 57. Decorative masks or stencils is such an easy way to lay down colour on an image to add dimension and it makes you feel like an artist.
Layers of Beauty Decorative Masks
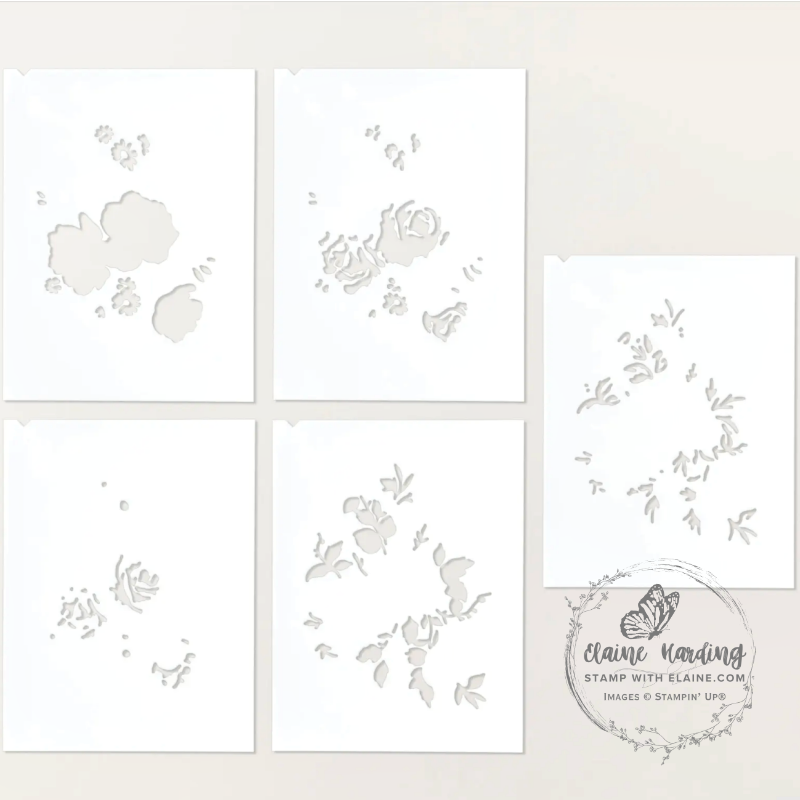
Stampin’ Up! decorative masks have been numbered in the top left corner for easy reference and there is also a “V” notch so that it can be aligned easily. You can see each stencil masks different areas of the image. Consequently, some areas will have additional layers of ink and will be deeper in colour. This is how it creates that 3 dimensional look.
Tip for marking the mask
The numbers etched on the stencils are hard to see. Scribble a black Sharpie pen over it and use the Stazon cleaner to remove the ink. The residue will be embedded in the etched number and make it much easier to see.
Cutting guide
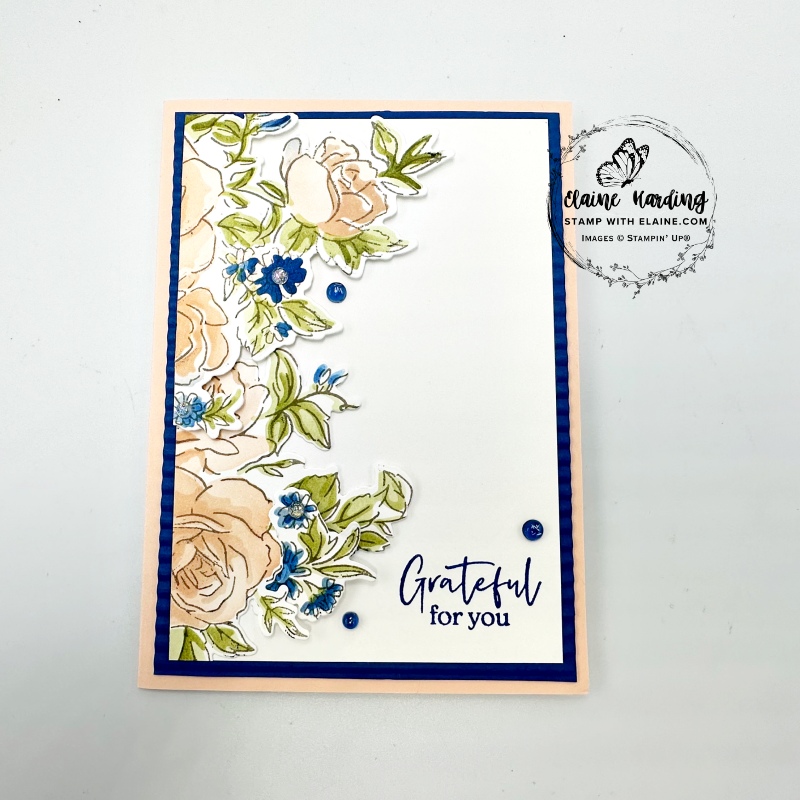
Card front
- Card base : Petal Pink 8 ¼” x 5 ¾” (21 cm x 14.5 cm) and fold in half.
- Cut a 6″x 6″ (15 x 15 cm) piece of Blueberry Bushel and emboss it with the Mini Corrugated 3D embossing folder, then trim it down to 3 ⅞” x 5 ½” (10 cm x 14 cm) and adhere to card front.
- Trim a Basic White mat layer for the card front 3 ⅝” x 5 ¼” (9 cm x 13 cm), but do not adhere to Blueberry Bushel layer yet.
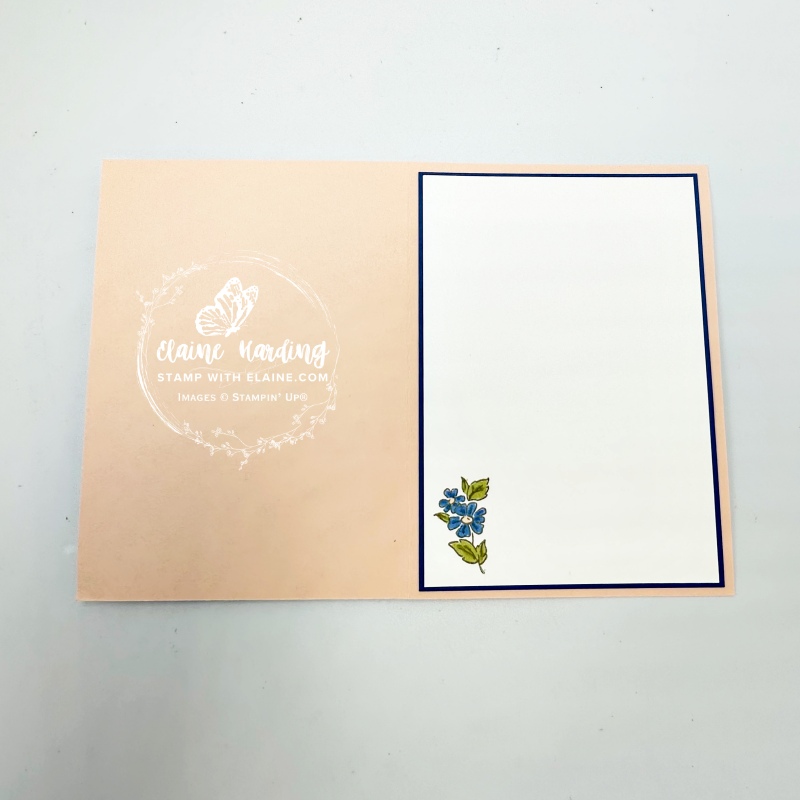
Inside card
- Blueberry Bushel mat layer : 3 ⅞” x 5 ½” (10 cm x 14 cm)
- Basic White layer : 3 ¾”x 5 ⅜” (9.5 cm x 13.5 cm)
- Stamp in Gray Granite the little floral stamp and use Petal Pink, Blueberry Bushel and Old Olive Stampin’ Blends combo to colour it in.
How to cut and attach the Layers of Beauty floral element
- Trim a. piece of Basic White card stock slightly smaller than the decorative mask and secure it on grid paper so that it doesn’t move.
- Place mask marked “1” and trace around the “V” shaped reference point and the 4 corners so that you can easily align the remaining masks as and when you need it.
- If you’re blending the small flowers in a different colour, be sure to have plenty of post-it notes. Both small and large flowers are on the same decorative mask, so as to avoid colour contamination, you will need to mask the various floral elements.
- Blend in numerical sequence 1-5 as shown above. Colours I used are Blueberry Bushel, Petal Pink and Old Olive.
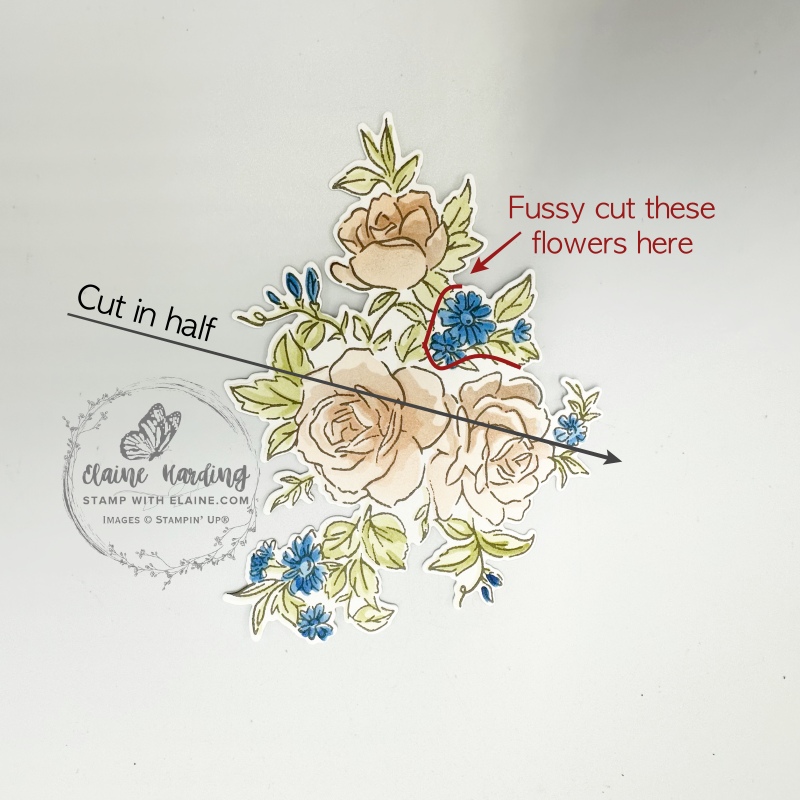
- The diagram above shows you how I cut my flower spray in half and aligned the straight edges along the left side of the Basic White layer.
- Cut the small flower in top right marked with a solid red line.
- Adhere one half at the bottom, and the other half raised on dimensionals at the top. Once adhered, flip it over and trim off any excess.
- Tuck fussy cut Blueberry Bushel flower behind the large rose at the bottom.
- Stamp greeting as shown.

Finishing touches
- Once you’ve trimmed the back, adhere to Mini corrugated Blueberry Bushel piece with tear n’ tape.
- Finally add the Tinsel Gems Four pack Blueberry Bushel colour to the card front.
Supply list
Listed below is the supply list. Just click on the picture to take you directly to the item in my online store.
Product List")
")


- SHOP ONLINE – EARN 10% REWARDS ON ALL PURCHASES OVER £20
- PURCHASE A STARTER KIT : Get £155 worth of products for only £99. Choose from current catalogues and any specials available. Free Shipping. Read more
- Subscribe to my Video Tutorials – click here