
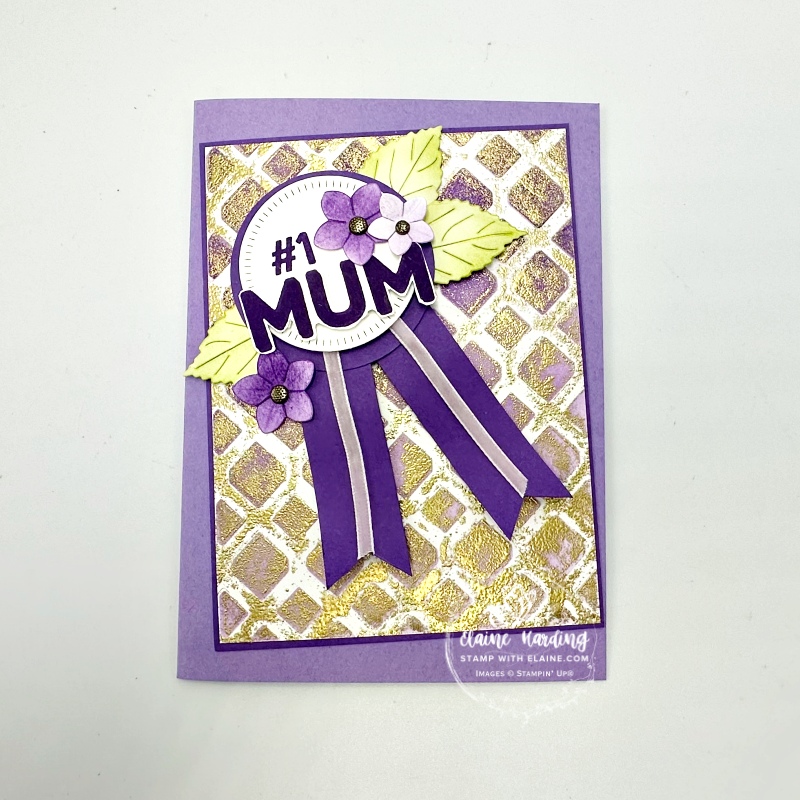
Faux Gold foil technique. Here’s a simple way to create a faux gold foil technique. You can use your decorative masks or stencils in a different way. Ink the back of the mask with versamark ink and apply pressure to transfer ink to card stock. Gold emboss then replace the same mask/stencil on top. Use a blending brush to apply a dark shade of ink to make the gold “pop” and see the result!
Linked Together Bundle
The Linked Together Bundle consists of a photopolymer stamp set which contains words only. There are 7 dies in the Linked Together die set and are 5 decorative masks in the Linked Together Decorative Masks which is also part of the bundle.
How to create the Faux gold foil effect
- Secure a Basic White piece of card stock slightly smaller than the Decorative Mask on grid paper.
- Mark the “V” shape in the decorative mask as a reference of the No. 3 mask and ink up the back with Versarmark ink. Align it over card stock with the “V” mark and use your fingers to firmly put pressure all over the mask to transfer ink.
- Sprinkle with Wow! Metallic Gold Embossing powder and heat set.
- Use No. 2 mask and align with “V” mark. With a blending brush, apply Gorgeous Grape, darker at the bottom, medium in the middle and light at the top to create an ombre effect.
Cutting guide
Card front
- Card base Highland Heather cut at 5 ¾” x 8 ¼” (14.5 cm x 21 cm) and fold in half.
- Gorgeous Grape mat layer for card front : 3 ¾” x 5″ (9.5 cm x 12.5 cm)
- Trim Faux Gold foil background piece at 3 ⅝” x 4 ⅞” (9 cm x 12 cm) and adhere on top of Gorgeous Grape mat layer then adhere to card base at an angle as pictured above.
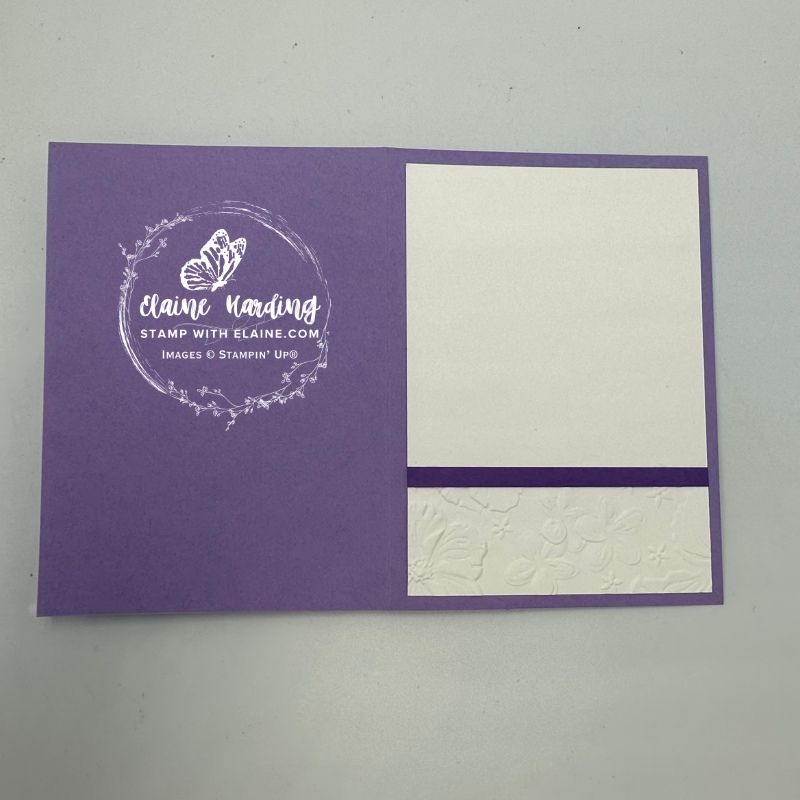
Inside card
- Cut Basic White at 3 ¾” x 5 ⅜” (9.5 cm x 13.5 cm)
- Partially emboss the bottom of Basic White with Happy Hibiscus Hybrid embossing folder. Insert about 1″ (2.5 cm) on short side into embossing folder.
- Insert the embossing folder so that the hinge is on its side and not on the leading edge of the plates and make sure it is clear of the sides so that you do not damage the embossing folder.
- Cut ¼” (0.3 cm) Gorgeous Grape strip and adhere to inside as pictured above.
- Flip it over and trim off excess before adhering to the inside card base.
How to create Rosette
- Stamp “#1” in Gorgeous Grape on a scrap of Basic White and die cut a circle with the Happy Hibiscus Hybrid embossing folder die.
- Stamp MUM from “She’s the Greatest” and fussy cut then adhere with dimensionals to the Basic White circle.
- Die cut floral elements from the Happy Hibiscus Hybrid embossing folder dies with Basic White card stock and use blending brushes to add colour to the flowers and leaves with Gorgeous Grape and Granny Apple Green ink.
- Punch a 2″ circle with 2″ circle punch in Gorgeous Grape.
- Adhere White circle with dimensionals to Gorgeous Grape circle.
- Cut 2 strips of the ¾” x 3″ (2 cm x 7.5 cm) Gorgeous Grape for the Rosette tails and cut flag ends then adhere to back of Gorgeous Grape circle.
- Add Fresh Freesia ⅛” (3.2 mm) faux velvet ribbon as pictured.
- Attach floral elements with glue dots and finish with adhesive backed Textured Dots in flower centres.
Supply list
Listed below is the supply list. Just click on the picture to take you directly to the item in my online store.
Product List")

")
 Faux Velvet Ribbon")

 Circle Punch")


Thanks for visiting.

- SHOP ONLINE – EARN 10% REWARDS ON ALL PURCHASES OVER £20
- PURCHASE A STARTER KIT : Get £155 worth of products for only £99. Choose from current catalogues and any specials available. Free Shipping. Read more
- Subscribe to my Video Tutorials – click here