
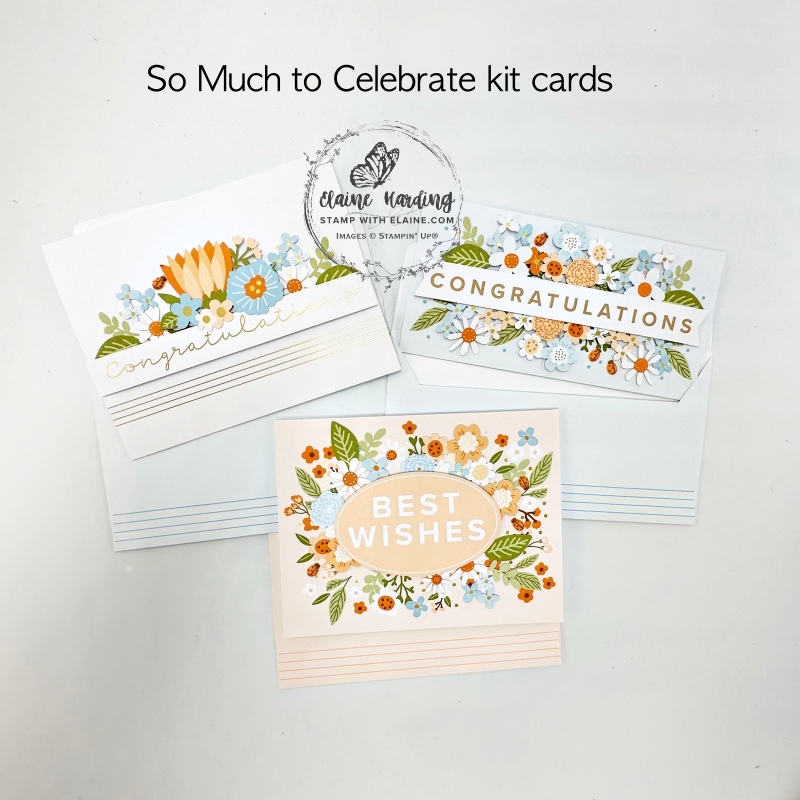
Final Altered Kit card. This is the final kit card in my Altered Kit card series for the So Much to Celebrate kit. It has all the materials to create 9 cards, 3 each of 3 designs but by stretching supplies I’ve managed to make 15 in all. I made one of each design following the kit instructions and cut the remaining 2 kit cards in half to make 4 cards for the remaining designs.
So Much To Celebrate
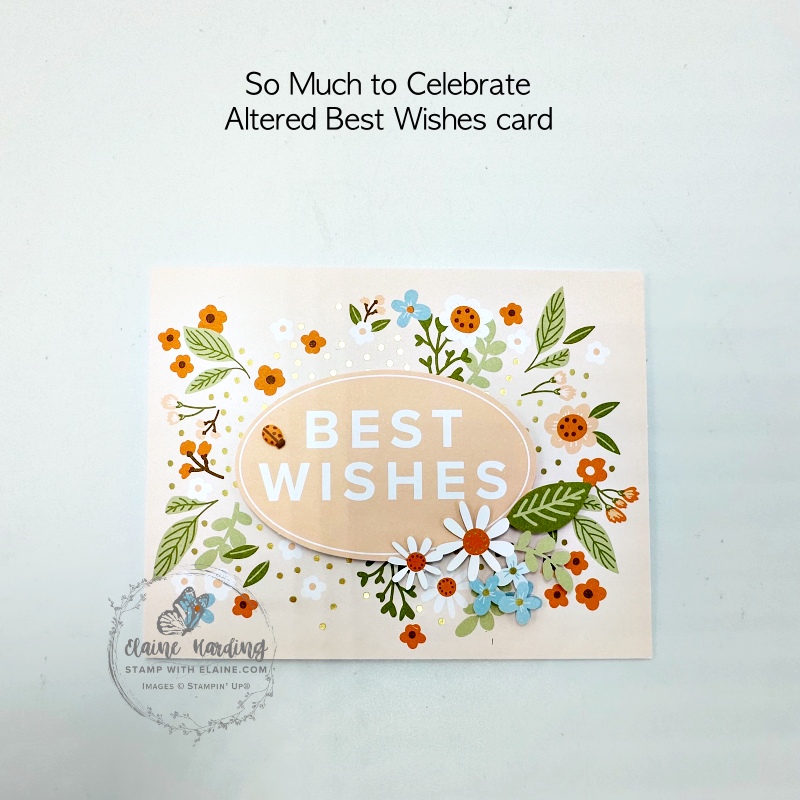
Here are the original designs which I followed to the “T”. Welcome to the final blog post in my Altered Kit card series – no. 3 of 3. In previous posts I tackled the Congratulations slim card in the top right and the Gold foiled scripted Congratulations card on the top left. Today I will alter the Petal Pink Best Wishes card in the bottom which measures 4 ¼” x 5 ½” (10.8 cm x 14 cm).
Materials used
- Basic White Thick card stock : In Europe our A4 sheets measure 8 ¼” x 11 ¾”. You can create 2 card bases from each sheet in landscape by cutting *FIRST CARD BASE @ 4″ x 11 ½” (10.2 cm x 29 cm) and score on long side at 5 ¾” (14.5 cm).
- With the remaining card stock, trim **SECOND CARD BASE @ 4 ¼” x 11″ (10.8 cm x 28 cm). On the long side score this at 5 ½” 14 cm). Make another 2 card bases from a second A4 sheet – altogether 2 card bases of each type.
- Cut Petal Pink Best wishes Kit card in half to yield 2 card fronts and 2 backs of the card to use as mat layers for the First Card Base.
How to make the altered cards
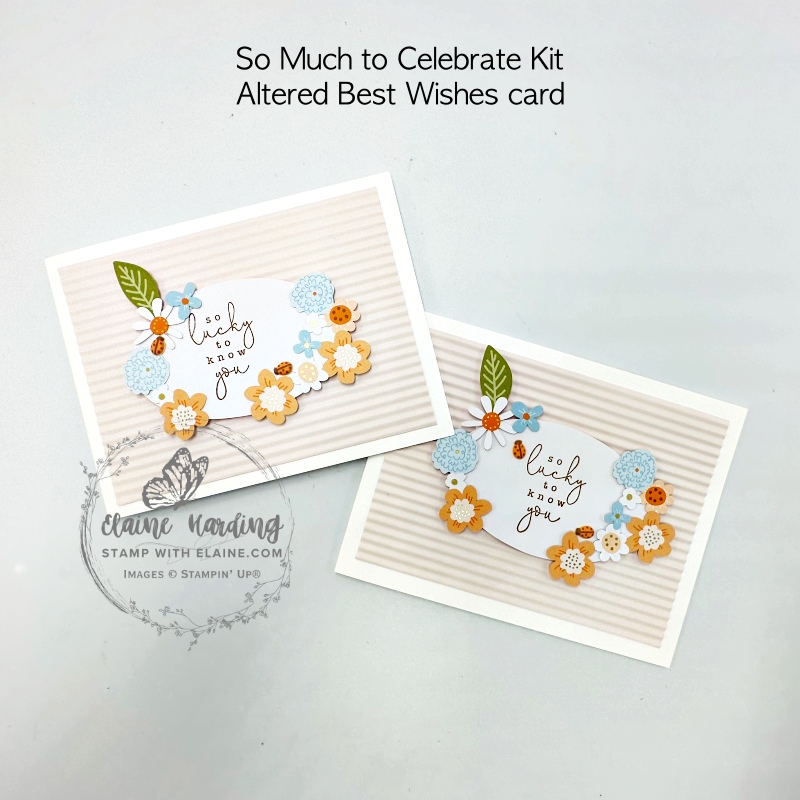
Altered card 1
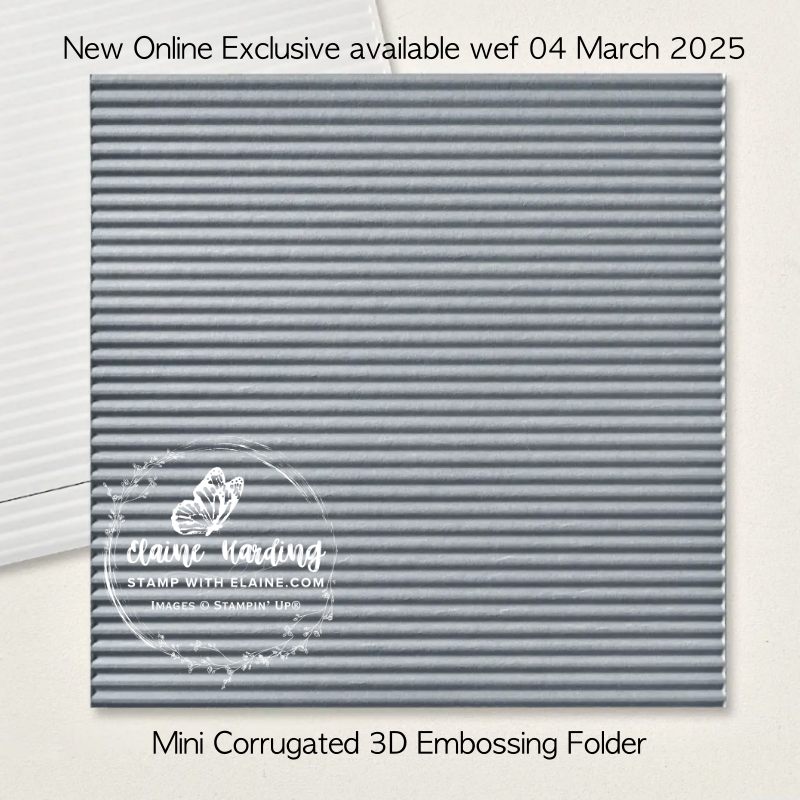
- Sandwich each piece of Petal Pink backs of kit card in the Mini Corrugated 3D embossing folder.
- Trim both pieces to 3 ¾” x 5 ½” (9.5 cm x 14 cm) and adhere to front of each * First Basic White card bases.
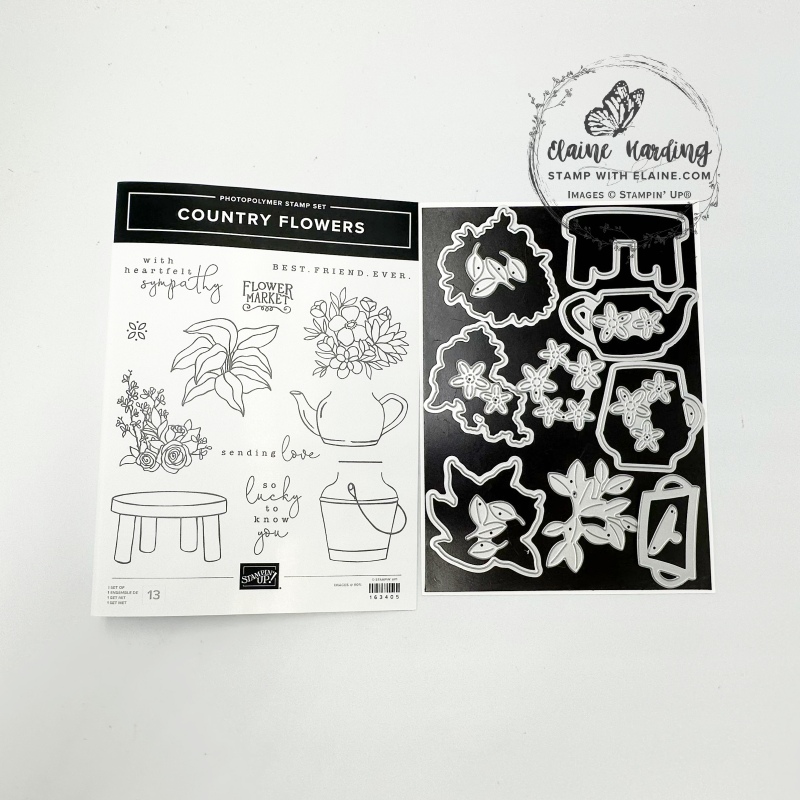
- Re-purpose 2 of the oval laser-cut sentiments. in foreign languages and stamp with greeting from Country Flowers stamp set in Pecan Pie ink.
- Attach dimensionals on the back of the ovals, centre and adhere on to each of the corrugated mat layers on respective card bases.
- Adhere remaining floral laser-cuts on the card with glue dots as pictured above.
Second Altered card
- Adhere pre-printed card front on to each of the **Second Basic White card bases.
- Attach dimensionals to back of each oval and adhere to each of the card bases as pictured.
- Use glue dots to adhere part of the smallest laser cluster of flowers to bottom right of oval as pictured.
Hurrah! Now with the original and 4 extras from the Best Wishes Kit card, together with all the previous ones made, you have a set of 15 cards altogether! From 9 to 15 – not bad, huh?
Supply list
Listed below is the supply list. Just click on the picture to take you directly to the item in my online store.
Product List

")


I hope you’ve enjoyed the series. Enjoy the rest of your weekend! Happy Sunday and thanks for visiting. Happy crafting!

- SHOP ONLINE – EARN 10% REWARDS ON ALL PURCHASES OVER £20
- PURCHASE A STARTER KIT : Get £155 worth of products for only £99. Choose from current catalogues and any specials available. Free Shipping. Read more
- Subscribe to my Video Tutorials – click here