
Happy Mothering Sunday. In the UK today is Mother’s Day, a day to honour and remember all who have played a mothering role, yes, that includes Mums for fur babies too! I hope you like today’s card dedicated to all the Mums out there! My Mum is in Australia, and they mark Mother’s Day later in the year on May 11th in 2025.
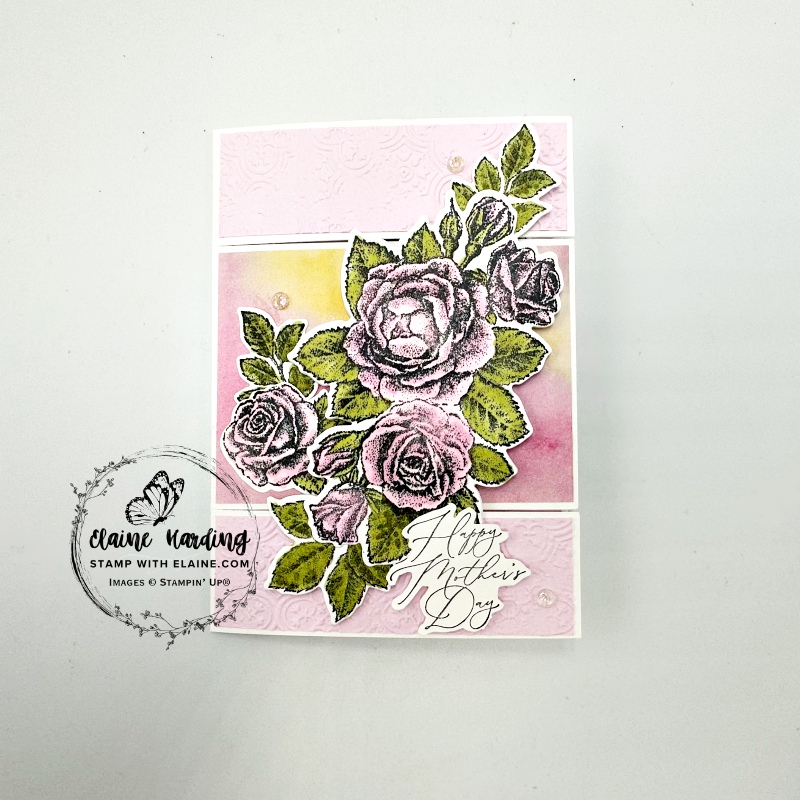

Fun Bridge Fold card
Today’s card is a fun fold called a bridge fold which is quick and easy to do. What takes the time is the decoration.
- Take a standard card – in Europe this measures 8 ¼” x 5 ¾” (21 cm x 14.5 cm).
- Orient card stock on the long side and score at 4 ⅛” (10.5 cm).
- Turn card stock a quarter turn anti-clockwise so that the short side is at the top on your trimmer.
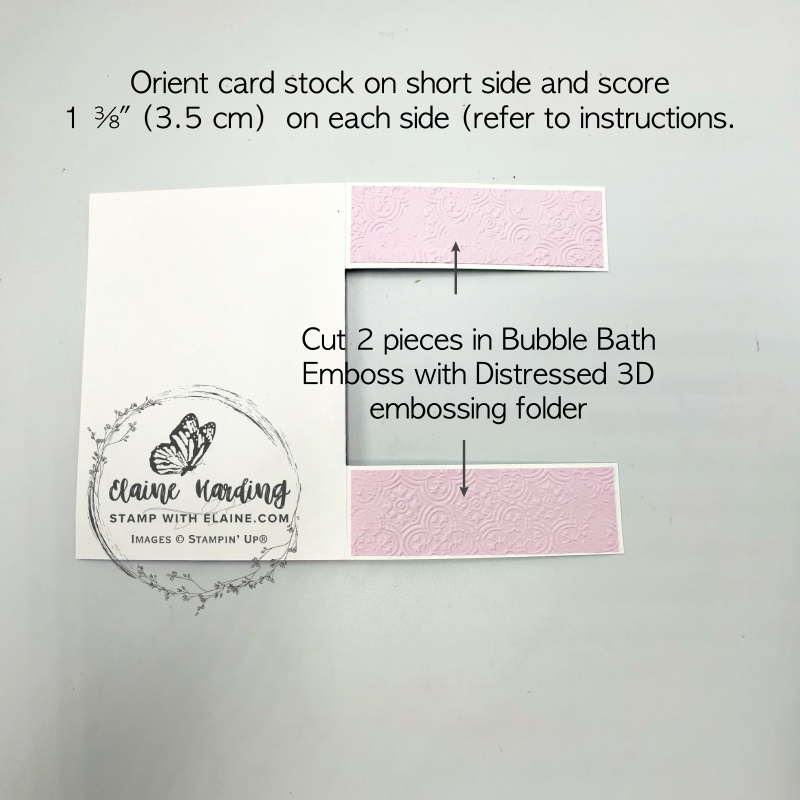
- Align right edge to right of cutting groove at 1 ⅜” (3.5 cm) and cut from score line to the top.
- Then align left edge at 1 ⅜” (3.5 cm) to the left of cutting groove and repeat cut.
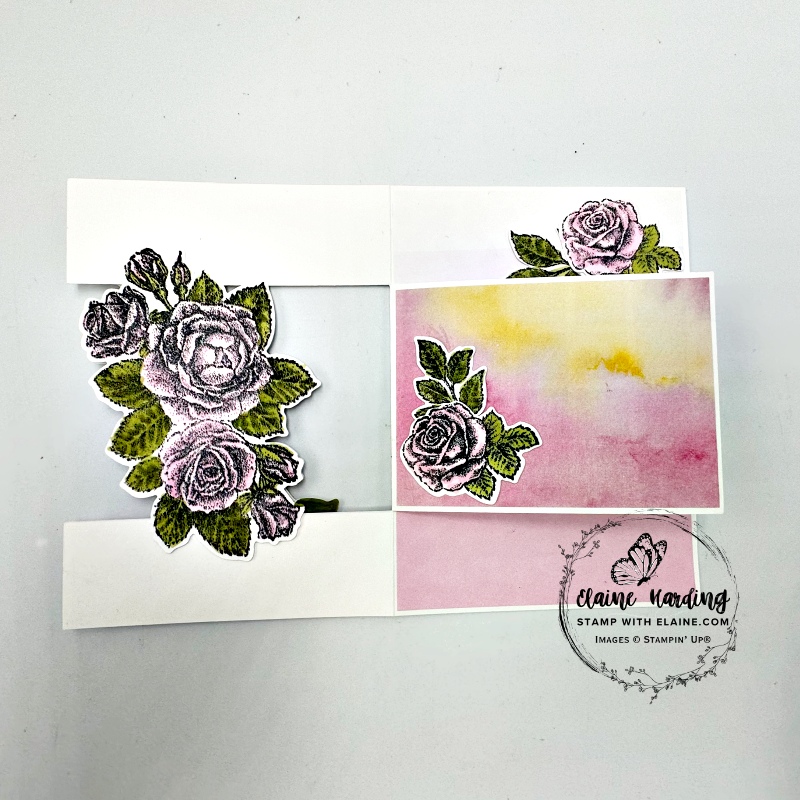
Once you’ve cut the front of the card, simply stamp and embellish with an image or card stock spanning the two narrow cut pieces to form the bridge. I’ve used the Stippled Roses as my “bridge”.
Cutting guide for Mat layers

- Blushing Bride : cut 2 pieces 1 ¼” x 4″ (3.2 cm x 10 cm) and emboss with Distressed tile 3D embossing folder
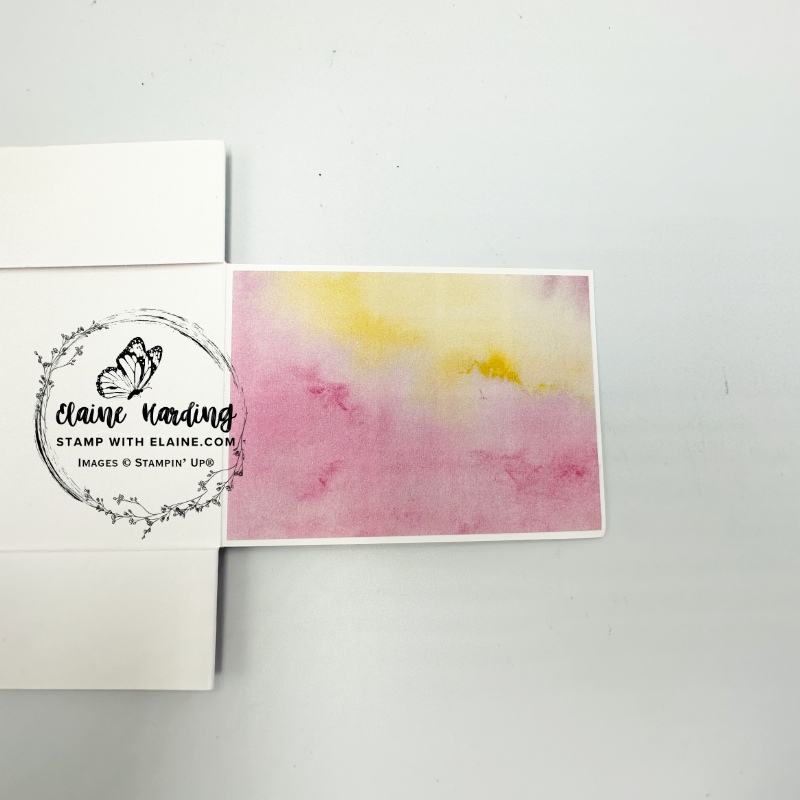
- Middle panel : cut 2 pieces Full of Life 6 x 6 DSP at 2 ⅞” x 4″ (7.3 cm x 10 cm)
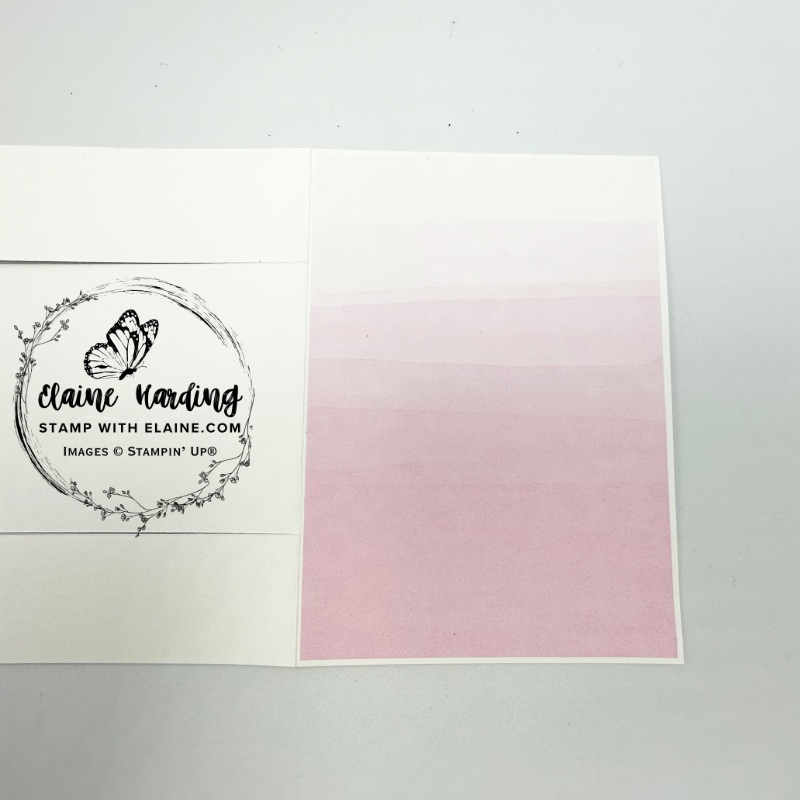
- Inside card base panel : cut 1 piece Bright & Beautiful 6 x 6 DSP cut at 4″ x 5 ⅝” (10 cm x 14.3 cm)
Stamping floral elements
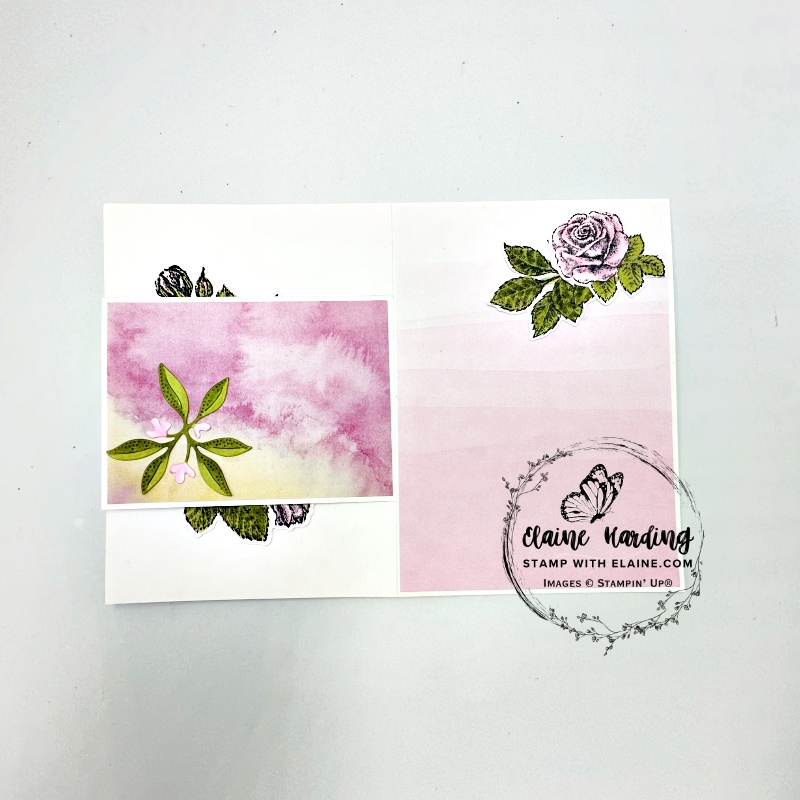
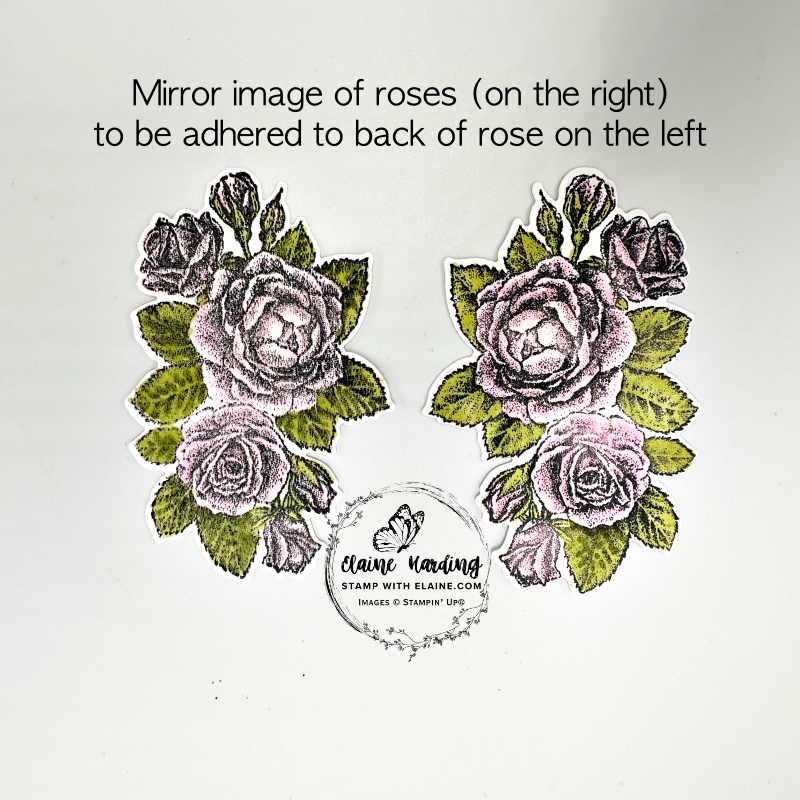
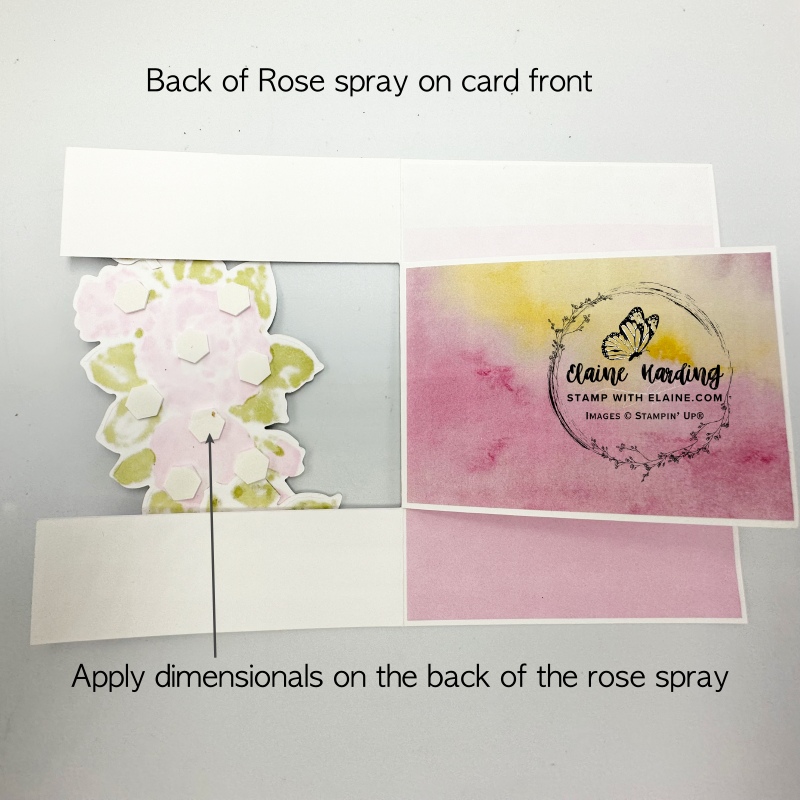
With a bridge card, you also have a view from the back. Unfortunately alcohol markers saturates the card stock so that from behind the image, you can see all the colour marks. As a solution, I stamped the same image again as a mirror image.
Stamp the images in Tuxedo Black Memento ink and colour with Blushing Bride and Old Olive Stampin’ Blends combo.
How to cut the leaves
- Stamp 1 rose spray as normal and a second spray in a mirror image of the same rose spray as pictured on the left. You can see how to stamp a mirror image in one of my previous blog posts HERE. It has a a video tutorial to help you visualize how it’s done. Unfortunately the “Stamparatus” tool has since retired, but if you still have yours, as I do mine, you’re quids in!
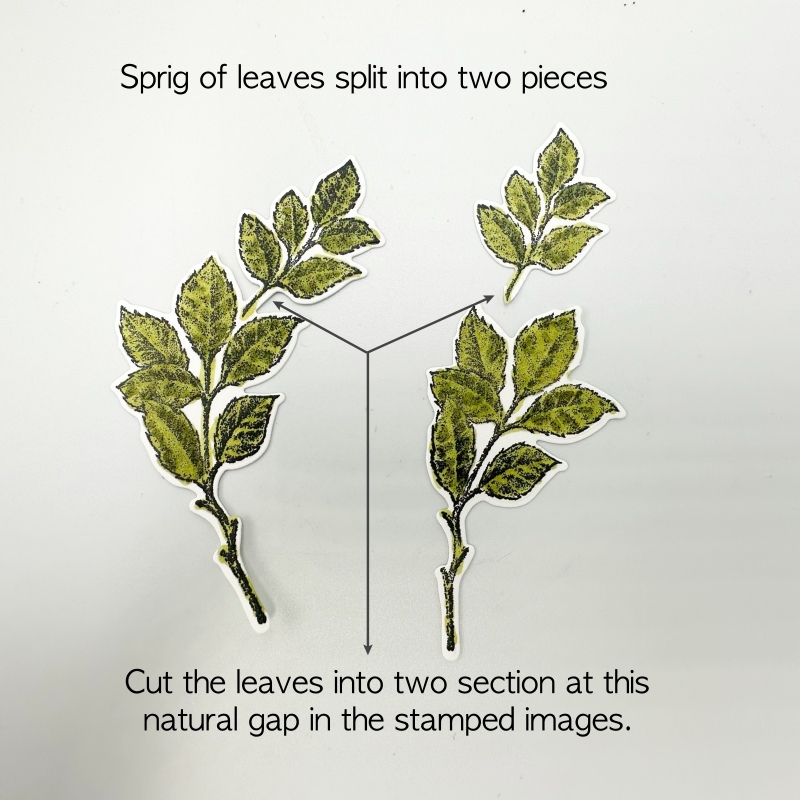
- Next stamp the leaves and divide each sprig into two by snipping where shown in the middle picture above.
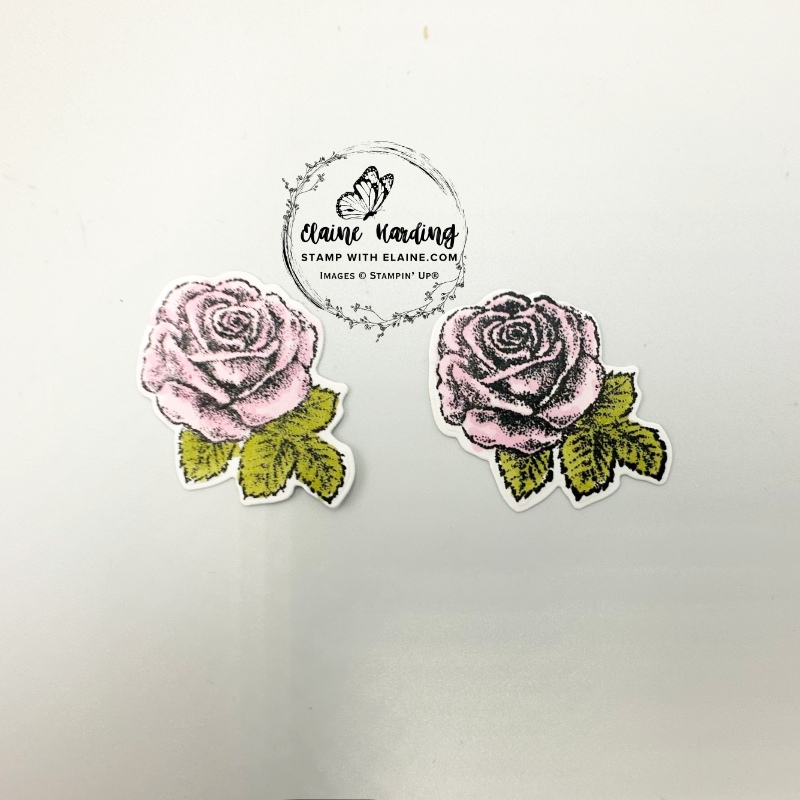
- Lastly stamp, colour and die cut 2 small roses as pictured in picture on right.
Assembly instructions
- Adhere the embossed pieces to the two front panels in picture on left
- Fold the middle section to the left so that you don’t accidentally put glue on it (not pictured). Refer to picture below on the right and arrange the smaller leaf section at top, and the larger leaf section at the bottom, apply adhesive and place rose spray to overlap the top and bottom and adhere.
- Turn over and apply dimensionals to the back of the rose spray – middle picture.
- Align mirror image of rose spray and adhere to back as pictured on the right.
- Adhere the DSP pieces for the Full of Life 6 x 6 middle panels, front and back.
- Arrange smaller leaf sprig behind single rose and adhere to left of middle panel as pictured.


- Die cut one of the extra die elements in Basic White and colour in with Stampin blends and adhere to bottom left as pictured above.
- Adhere Bright & Beautiful DSP to inside card base back panel.
- Arrange the other half of leaf sprig in top right behind single rose and adhere both pieces in top right corner of inside of card base as pictured.
- Stamp sentiment on Basic White in Tuxedo Black Memento ink and fussy cut. Adhere to front of card at the bottom ensuring that it doesn’t peep through from behind.
- Finally add a trio of Iridescent Foil Gems to embellish card.
Supply list
Listed below is the supply list. Just click on the picture to take you directly to the item in my online store.
Product List")


 Designer Series Paper")
 Designer Series Paper")


Thanks for visiting, enjoy the rest of your weekend.

- SHOP ONLINE – EARN 10% REWARDS ON ALL PURCHASES OVER £20
- PURCHASE A STARTER KIT : Get £155 worth of products for only £99. Choose from current catalogues and any specials available. Free Shipping. Read more
- Subscribe to my Video Tutorials – click here