
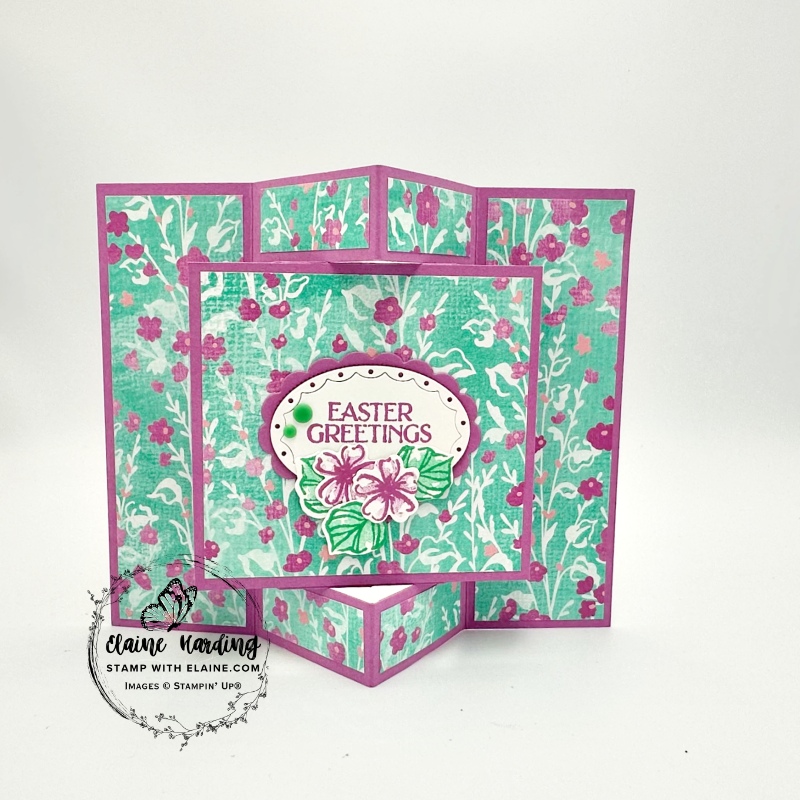
Fun Fold Floating panel. Time for Tech 4 Stampers Blog hop! The brief is a fancy fold, so I made a card with a floating panel. Unbounded Beauty is a suite collection in the 2024-25 Annual Catalogue and at time of writing it is still current. I love this suite, especially the dies and sweet sentiments. Now that the Last Chance list has been updated, this stamp set and the papers are on the Last Chance Product list, so when it’s gone, it’s gone!
Welcome to April’s Tech 4 Stampers blog hop. It’s been ages since I’ve used this colour combo. I tend to veer towards blues but the Unbounded Beauty 12″x 12″ (30.5 x 30.5 cm) paper shows how well Petunia Pop and Shy Shamrock work together.

As Easter is fast approaching, I thought I’d make an Easter card. It’s non-traditional, no daffodils, chicks or bunnies in sight, but I am reserving that for future projects with the run up to Easter.

The Build & Bloom Stampers Blog hop (formerly Tech 4 Stampers)is a monthly subscription group run by Louise Sims. She mentors and enables members to understand IT jargon and equips them with a fountain of Technical knowledge to build or manage their own websites. It takes the mystery out of “tech” and I’ve certainly grown in confidence thanks to her expertise, patience and guidance. Not only that, I’ve met and made new friends with my fellow “Techs” and love the camaraderie within the group.
Fun Fold with floating panel
Here’s a diagram of the card base. The overall measurement is 5 ¾” x 8″ (14.5 cm x 20 cm). Tip: Adhere the DSP mat layers first before burnishing the score lines.
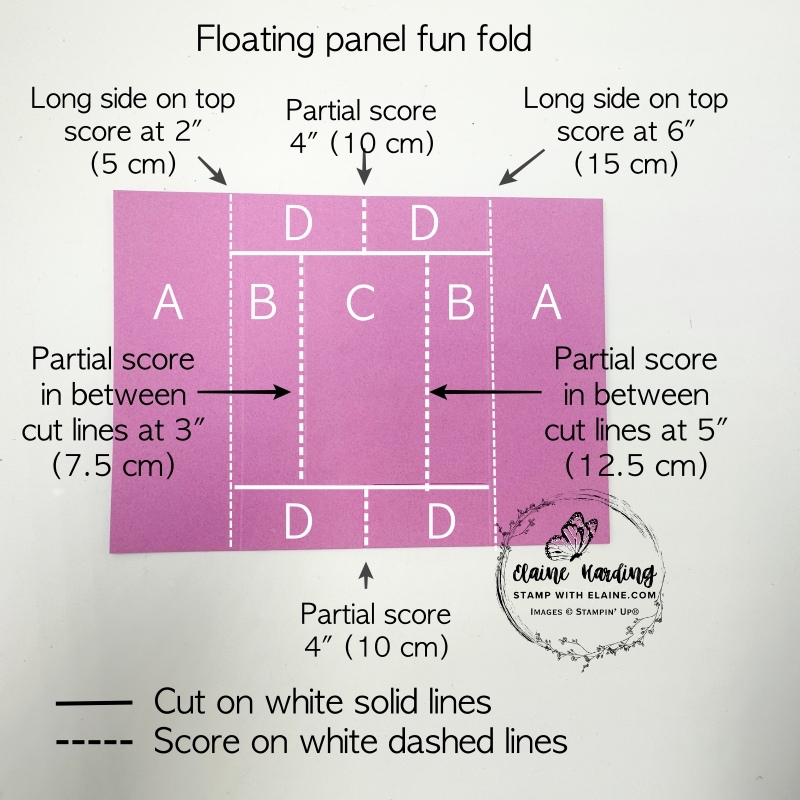
Imperial measurements for scoring and cutting card base
- On the 8″ (long side) score at 2″ and 6″
- Rotate card stock on short side and align right edge of card stock to the right of cutting groove at 1″ and cut between the two score lines at 2″ down to 6″.
- Repeat cut on left side by aligning left edge to left of cutting groove at 1″ and cut between the two score lines at 2″ down to 6″.
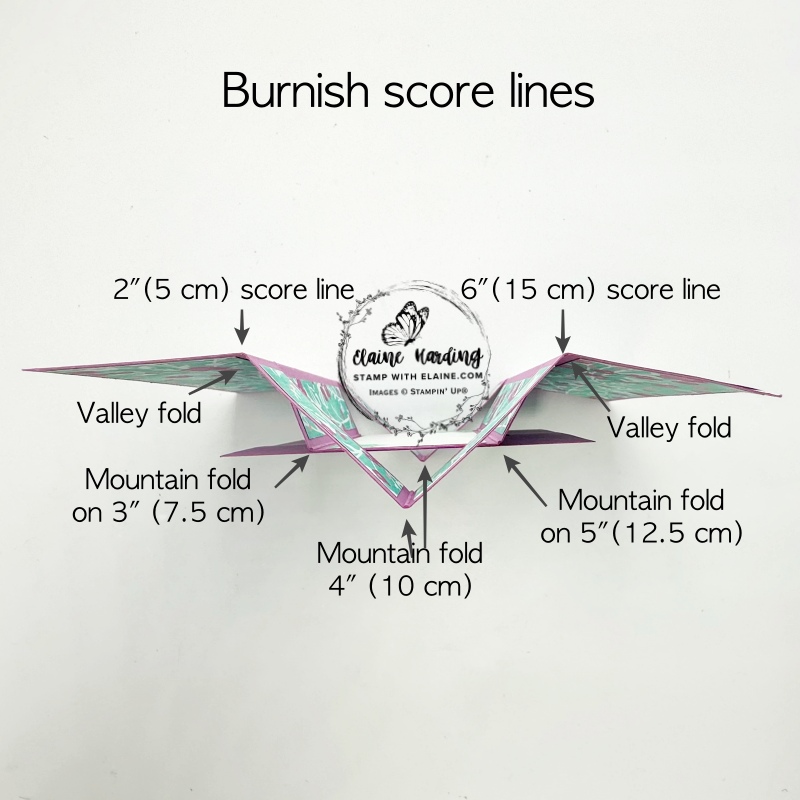
- Picture on the right shows how to burnish and fold card.
Metric measurements for scoring and cutting card base
- On the 20 cm (long side) score at 5 cm and 15 cm.
- Repeat cut on left side by aligning left edge to left of cutting groove at 2.5 cm and cut between the two score lines at 5 cm down to 15 cm.
- Rotate card stock on short side and align right edge of card stock to the right of cutting groove at 2.5 cm and cut between the two score lines at 5 cm down to 15 cm.
- Picture on the right shows how to burnish and fold card
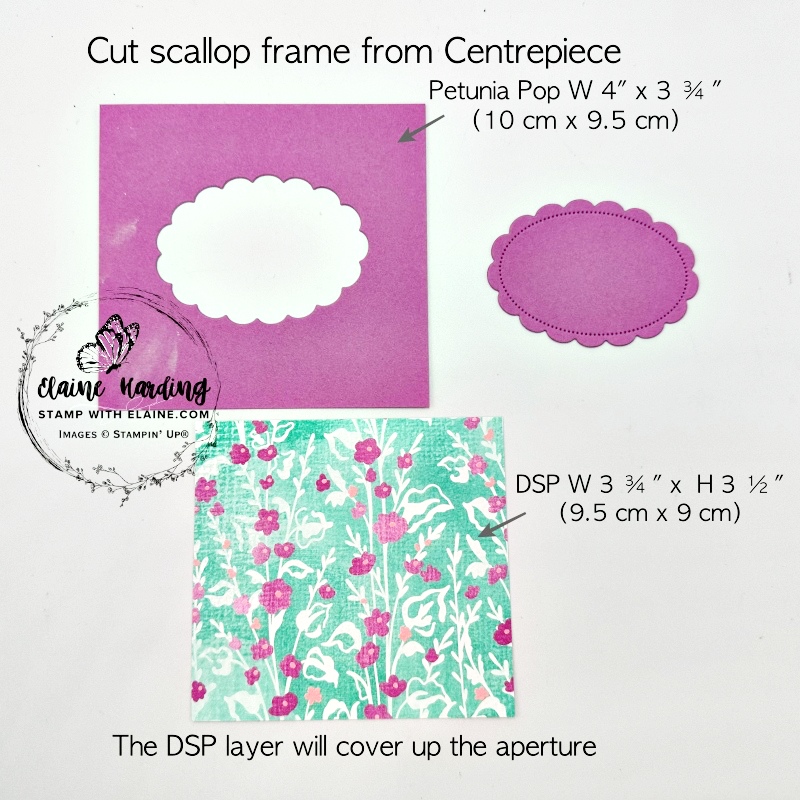
Cutting guide for mat layers
Tip: You can save card stock by cutting the label from the centre piece because it will be covered by the DSP.
Imperial
- “A” panels cut 2 pieces DSP at 1 ¾” x 5 ½” for front and 2 pieces Basic White for back
- “B” panels cut 4 pieces DSP at ¾” x 3 ½” for front and back
- Petunia Pop centre piece covers “B” and “C” and measures W 4″ x H 3 ¾”
- “C” mat layer for centre piece cut 1 x W 3 ¾” x H 3 ½”
- Centre panel back of card : Basic White W 1 ¾” x H 3 ½”
- “D” panels cut 8 pieces DSP front and back : ¾” x 1 ¾”
Metric
- “A” panels cut 2 pieces 4.5 cm x 14 cm for front and 2 pieces Basic White for back
- “B” panels cut 4 pieces DSP at 2 cm x 9 cm for front and back
- Petunia Pop centre piece covers “B” and “C” and measures W 10 cm x H 9.5 cm.
- “C” mat layer for centre piece cut 1 x W 9.5 cm x H 9 cm
- Centre panel back of card : Basic White W 4.5 cm x H 9 cm
- “D” panels cut 8 pieces DSP front and back : 2 cm x 4.5 cm
Finishing touches
Basic White card stock panels were added on the back so that there was somewhere to address the recipient and also somewhere to say who it’s from.
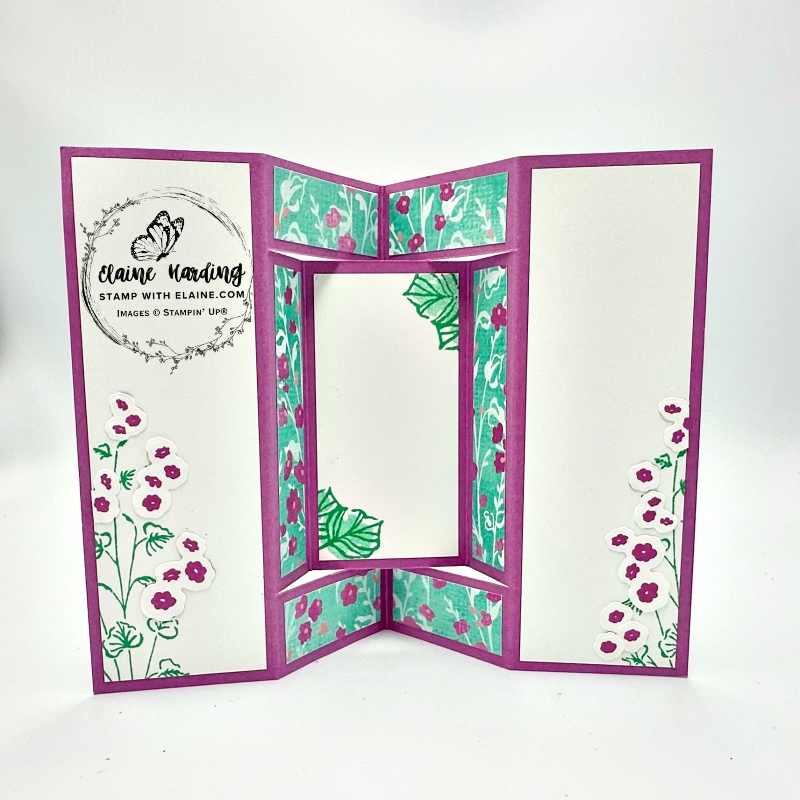
- Stamp the leaves with Shy Shamrock ink with Flowers of Beauty stamps.
- Use Petunia Pop ink to stamp the flowers and then die cut with the Flowers of Beauty Dies.
- Next die cut Basic White label and stamp Easter Greetings from Storybook Friends.
- On Basic White scrap stamp the two-step floral stamps, die cut and arrange on label as pictured.
Supply list
Listed below is the supply list. Just click on the picture to take you directly to the item in my online store.
Product List


")

")
 Designer Series Paper")


Thanks for visiting. I would love to know what you think of my project and would appreciate it if you could leave a comment. To visit the next person on the list and see their fabulous creations, simply click on the link below or before my name depending who you visited initially. Happy hopping!

- SHOP ONLINE – EARN 10% REWARDS ON ALL PURCHASES OVER £20
- PURCHASE A STARTER KIT : Get £155 worth of products for only £99. Choose from current catalogues and any specials available. Free Shipping. Read more
- Subscribe to my Video Tutorials – click here
Fabulous card Elaine, I’m definitely having a go at this one!