
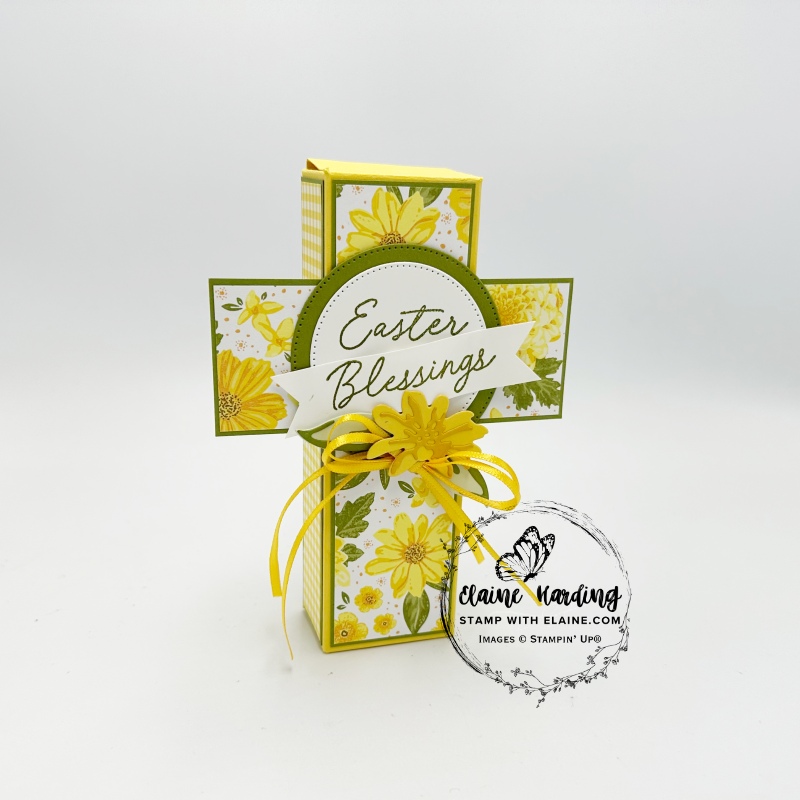
Gift packaging for Easter. Hot on the heels of using the Delightful Wishes bundle from my previous post here, I thought it would be lovely to have a box that would coordinate with it. I used the Storybook Life photo-polymer stamp set from January 2025 Scrap-booking Brochure and the Stylish Shapes Dies for cutting my circles instead of the punches. To be honest, the 2″ circle punch was too small.
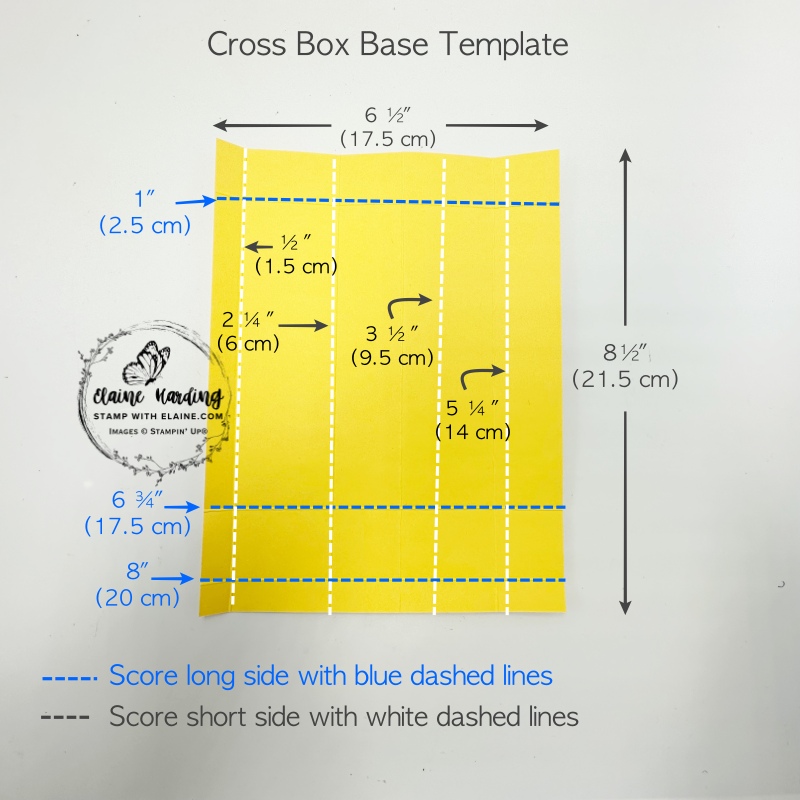
Box template
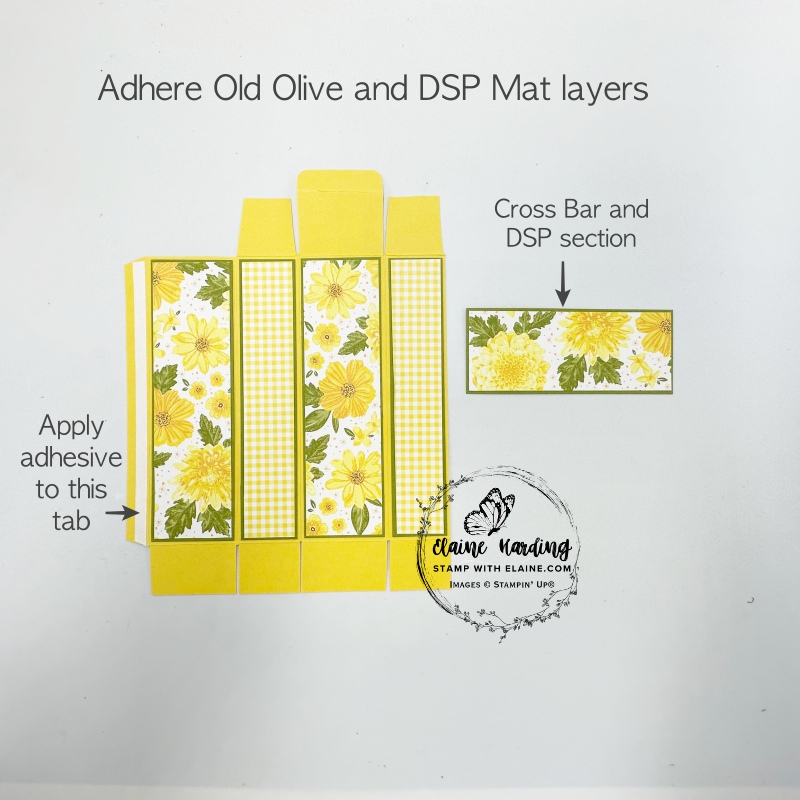
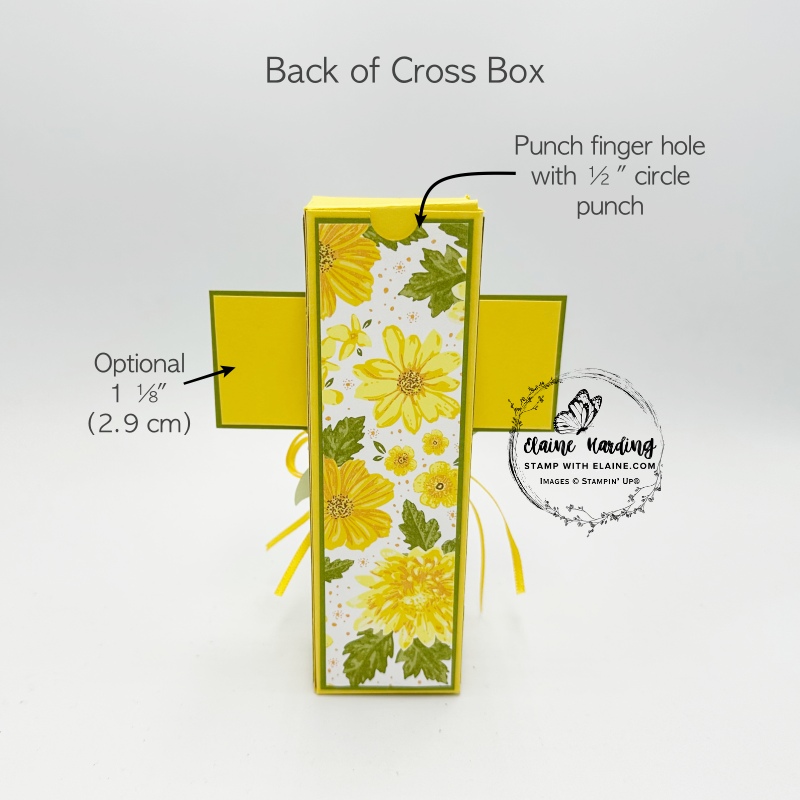
The box is in two parts. Cross bar section is simply layers of card stock adhered across the upper part of a vertical box. It’s optional to add an extra layer on the back of the cross. As the main box was in Daffodil Delight, I didn’t want the Old Olive to be dominant so added the Daffodil Delight card stock on the back.
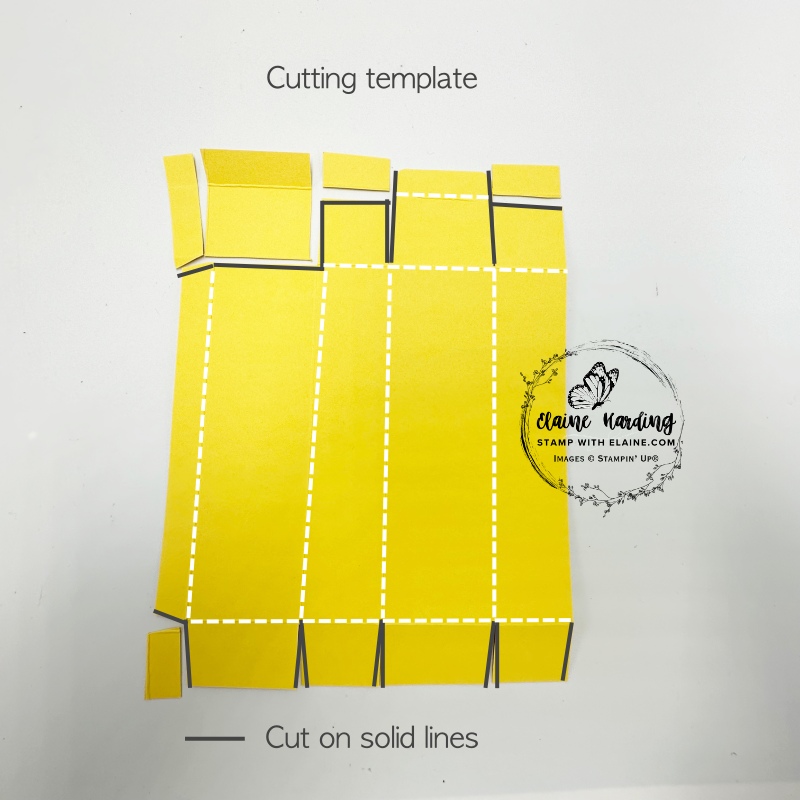
Cutting guide for template
- Cut Daffodil Delight 6 ½” x 8 ½” (17.5 cm x 21.5 cm)
- Short side score at ½”, 2 ¼”. 3 ½”, 5 ¼” (1.5 cm, 6 cm, 9.5 cm, 14 cm)
- Rotate card stock quarter turn anti-clockwise. With the long side at the top, score at 1″, 6 ¾” and 8″ (2.5 cm, 17.5 cm and 20 cm)
- In the picture on the right, make cuts on the solid black lines to create the tabs and lid for box as shown.
Preparing decorative elements
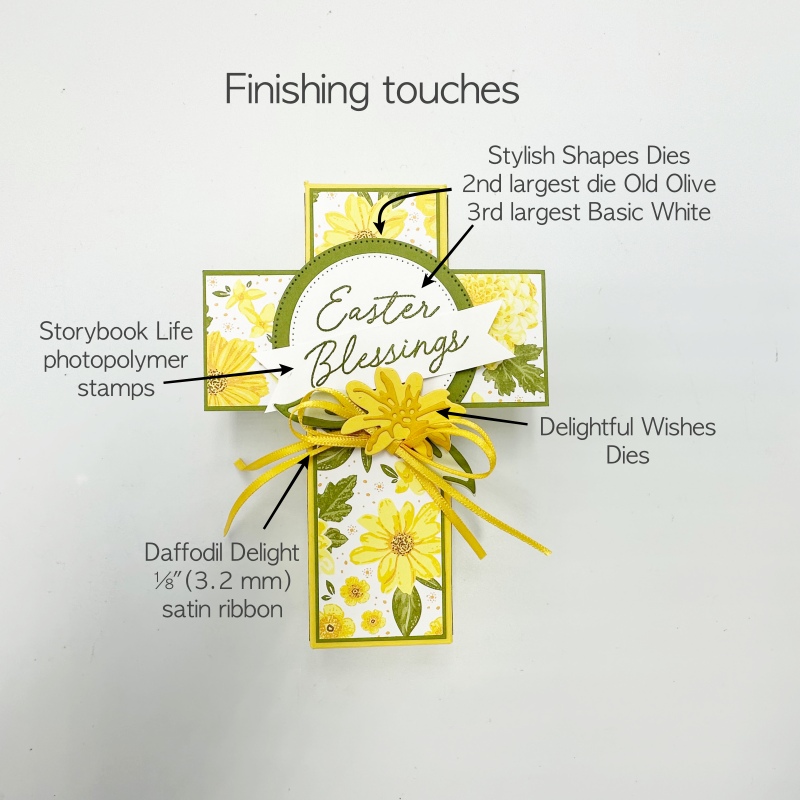
- Old Olive card stock scrap – die cut the second largest circle die from Stylish Shapes Dies.
- Basic White card stock scrap – die cut the third largest circle die from Stylish Shapes Dies.
- Apply Adhesive sheet to back of scrap of Crushed Curry and die cut accent floral die.
- Die cut large flower from Delightful Wishes bundle in Daffodil Delight.
- Soft Sea foam – die cut 2 large leaves.
- Apply Adhesive sheet to back of scrap of Old Olive and die cut accents for leaves.
- Remove backing tape on leaves and flower and adhere accent pieces to the corresponding flower and leaves. Set aside.
- Mask “Easter” and only stamp “Blessings” from the Storybook Life photopolymer stamp in Old Olive ink on Basic White card stock. Trim and cut flag ends.
- Stamp “Easter” only on Basic White circle and set aside.
Cutting mat layers
Mat layers Old Olive
- Front and back panels – 2 pieces cut at 1 ⅝” x 5 ⅝” (4 cm x 14.5 cm)
- Side panels – 2 pieces cut at 1 ⅛” x 5 ⅝” (3 cm x 14.5 cm)
- Cross Bar – 1 piece 1 ¾” x 4 ¼” (4.5 cm x 11 cm)
DSP Mat layer
- Front and back panels – 2 pieces floral pattern cut at 1 ½” x 5 ½” (3.5 cm x 14 cm)
- Side panels – 2 pieces reverse side gingham pattern cut at 1″ x 5 ½” (2.5 cm x 14 cm)
- Cross Bar section – 1 piece floral pattern 1 ⅝” x 4 ⅛” (4 cm x 10.5 cm)
Assembly instructions
- Adhere corresponding DSP layers to Old Olive mat layers for the front, back, sides. Adhere DSP to the Old Olive cross bar section. Next adhere to panels on box template as pictured on the left. Set aside Cross Bar section till needed.
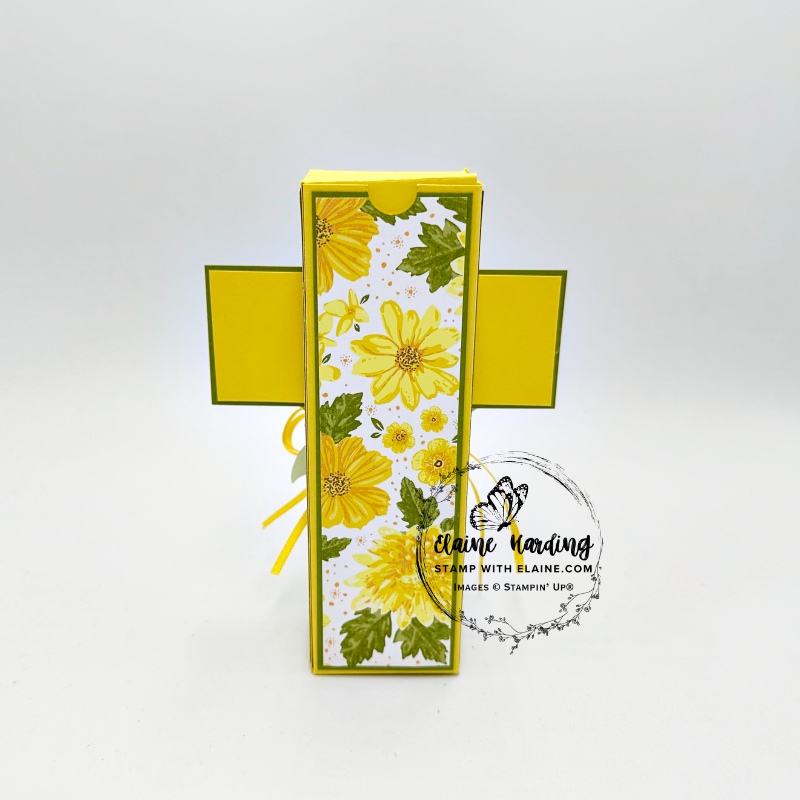
- Before assembling the box, use a ½” circle punch to punch a finger hole at the back (middle picture).
- Once box is assembled, centre the cross bar section in the middle toward the top with tear n- tape or stamp n’ seal+. Only apply adhesive where cross bar intersects with box.
- Centre and adhere large Old Olive circle.
- Adhere with dimensionals the Basic White die cut circle on top of Old Olive circle and adhere “blessings” with dimensionals at an angle underneath “Easter”. Blessings was too long to fit in the circle hence the workaround.
- Adhere floral element and leaves as shown in picture.
- Tie a double strand of Daffodil Delight ribbon and adhere with glue dots tucked underneath the flower.
- Optional : cut 2 pieces Daffodil Delight W 1 ⅛” x H 1 ⅝” (W 3 cm x H 4 cm)
Supply list
Listed below is the supply list. Just click on the picture to take you directly to the item in my online store.
Product List")
")
")
")


 Designer Series Paper")
 Satin Ribbon")


- SHOP ONLINE – EARN 10% REWARDS ON ALL PURCHASES OVER £20
- PURCHASE A STARTER KIT : Get £155 worth of products for only £99. Choose from current catalogues and any specials available. Free Shipping. Read more
- Subscribe to my Video Tutorials – click here