
New Online exclusive sneak peek. So excited – Launch Day is coming soon so here’s a sneak peek. I’ve created a multi pop-up – card so say “hello” to the Fabulous Celebratory Sips Suite Collection from the soon to be released Online Exclusives range on May 6th, 2025.
We all love a celebratory tipple or two. This suite allows you to create festive cocktails, dirty sodas wherever your imagination takes you!
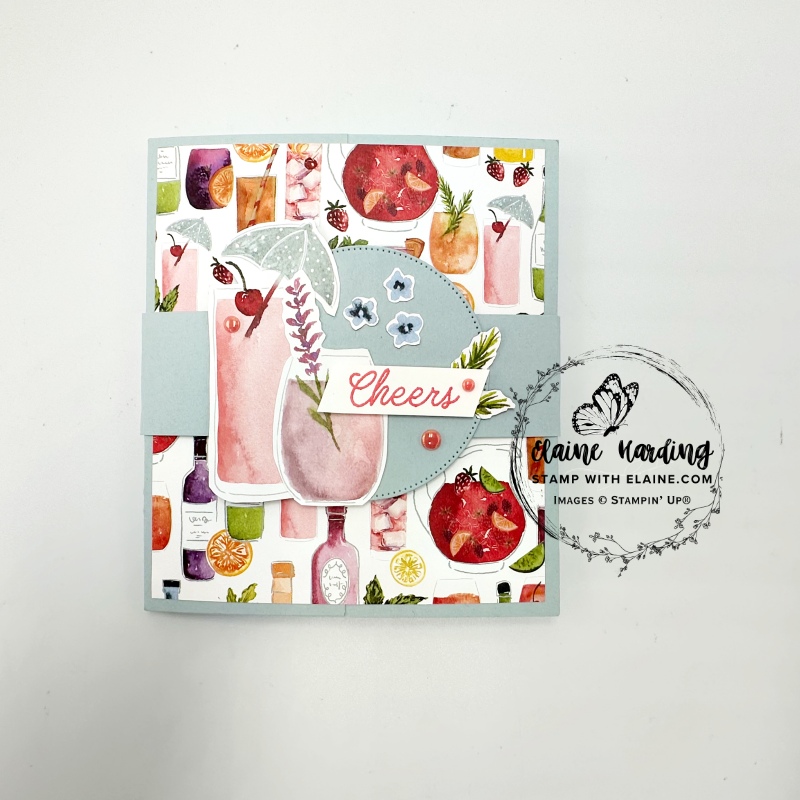
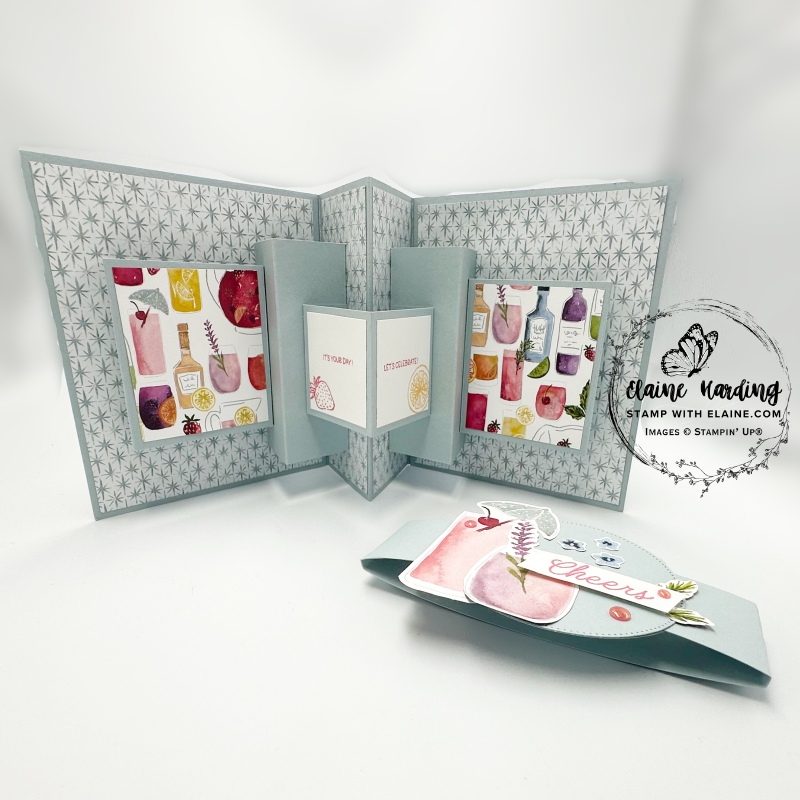
This fun multi pop-up card is deceptively easy to do. It does require a lot of pieces but the finished product is SO cool! I suggest you create a template with retired Sale-a-bration paper and different coloured pieces of card stock for the various layers so it’s easier to visualize, but first, feast your eyes on the finished card!
Please note that for the best results, ensure your card lies flat while you adhere the various pieces during the whole process for accuracy.
Cloud Cover, Base template and card extensions
I got to play with one of the new In Colours called Cloud Cover – there was an issue with the Ink changing colour so Stampin’ Up! has withdrawn it for the time being. Consequently you won’t be able to purchase the money saving bundle for all 5 new In Colours, there are only 4 available for purchasing individually. The Stampin’ Write markers have Cloud Cover as part of an In-Colour set but not the classic stampin’ pads. However there’s no reason why you can’t use the card stock which I’ve done here. I used the marker pen to ink up the sentiment.
- The base is cut at 10″ x 5 ¾” (26 cm x 14.5 cm).
- On the long side score at 2 ½”, 5″ and 7 ½” (6.5 cm, 13 cm and 19.5 cm)
- Cut 2 card extensions 5″ x 5 ¾” (13 cm x 14.5 cm)
- DSP – Cut 2 pieces 4 ¾” x 5 ½” (12.5 cm x 14 cm) adhere to Cloud Cover extension pieces.

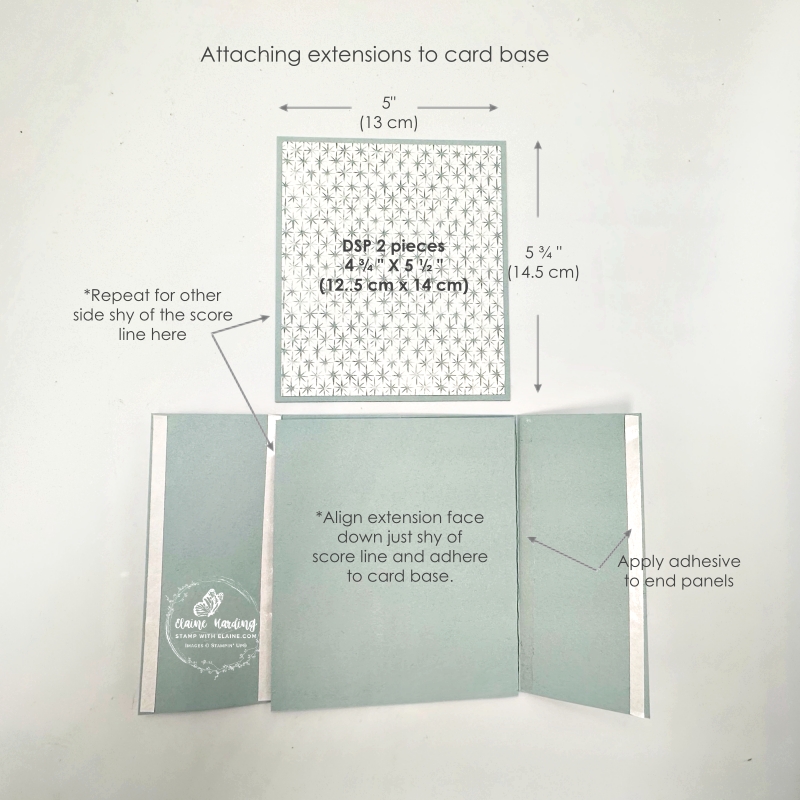
Adhere Card Extensions and Panel A
- Apply adhesive to end panels on the right side of card base.
- Place the extension 5″ x 5 ¾” (13 cm x 14.5 cm) piece DSP side face down as pictured – remove backing tape and close the section on the right of card base on top of card extension to adhere it.
- Open the extension so the you can repeat process with remaining card extension on the other side mirroring the process.
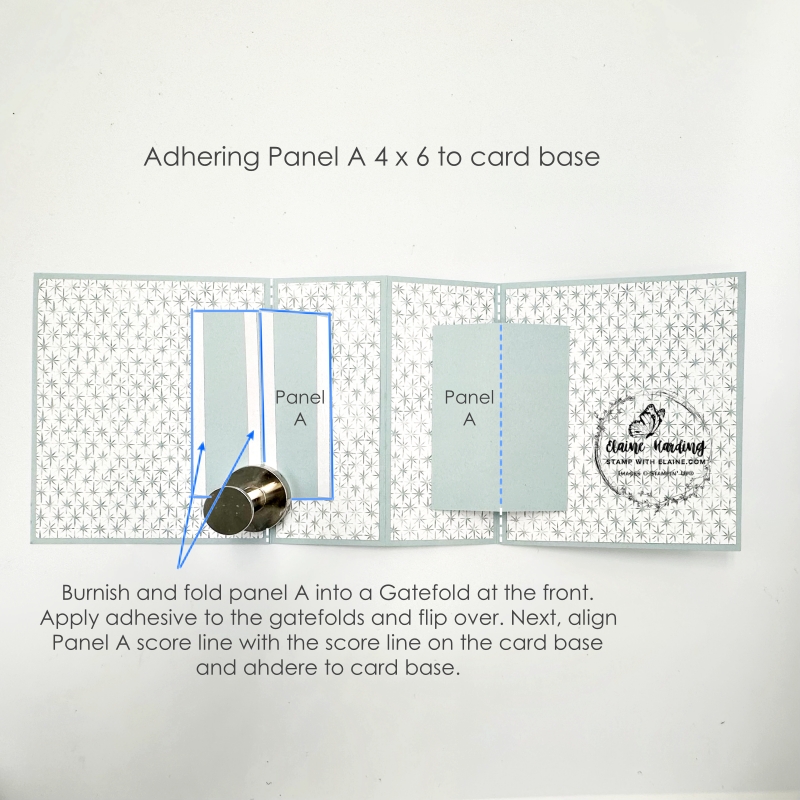
Cutting Panel A, DSP and adhering to Panel A and card base
- Cut 2 pieces Cloud Cover measuring 4″ x 6″ (10 cm x 16 cm).
- On the long side score each piece at 1 ½”, 3″ and 4 ½” (4 cm, 8 cm and 12 cm). Burnish score lines well.
- Mountain fold on all score lines and fold into a Gate-fold. Apply adhesive as shown in picture above. Remove backing tape, flip it over so that where the gate fold meets is aligned with score line on the card base before adhering it.
- Repeat for remaining piece. The picture on the right above shows what it should look like once adhered.
Preparing Panel B, adhering to Panel A
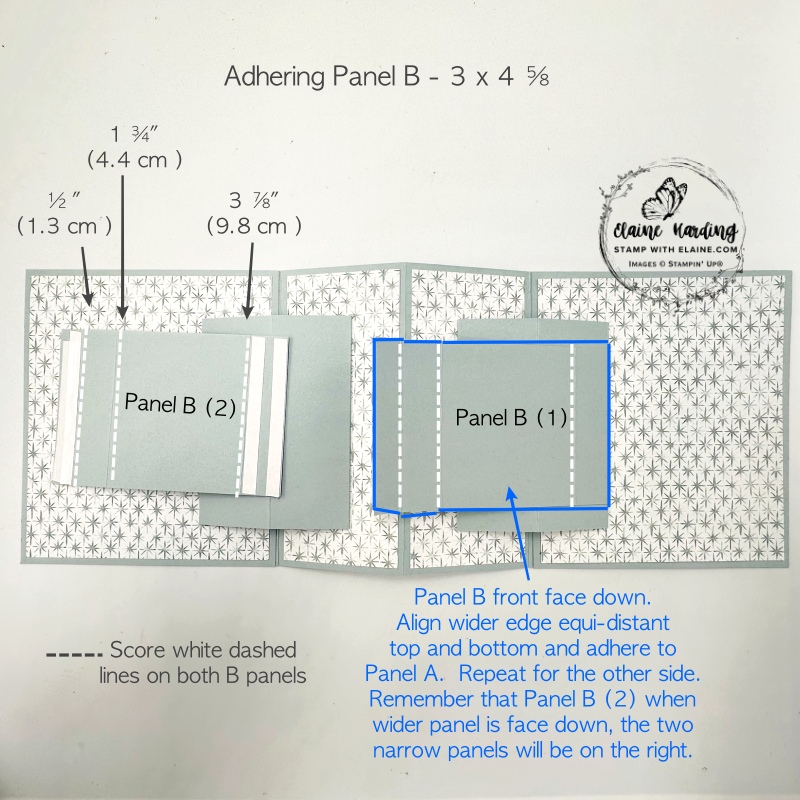

- Cut 2 pieces Cloud Cover for Panel B measuring 3″ x 4 ⅝” (7.6 cm x 11.7 cm). This one’s a direct conversion.
- Long side score at ½”, 1 ¾”, 3 ⅞” (1.3 cm, 4.4 cm, 9.8 cm)
- DSP : Cut 2 pieces W 2 ⅜” x H 2 ¾” (W 6 cm x H 7 cm) and adhere to widest panel.
- Refer to left picture above. Both panel B has 3 score lines. Apply adhesive on the side with the single ¾” score line. Flip panel so that DSP is face down and equidistant from the top and bottom on Panel A. Remove backing tape, align Panel B (1) as pictured and adhere to Panel A.
- Flip the Panel B (1) back so DSP is face up.
- Remove backing tape from ½” tab, tuck under and adhere to card base extension piece on the right.
- Repeat for left side Panel B (2) mirroring the steps. Remember to lay it in the opposite direction so that you can fold it back toward the left with the two narrow score lines on its left.
Centre Panel C
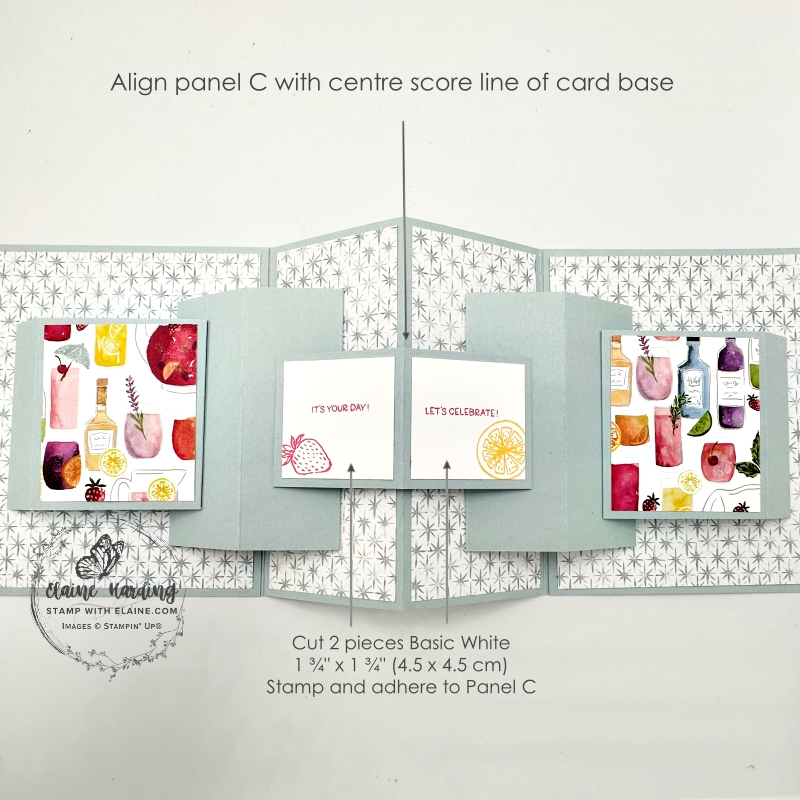
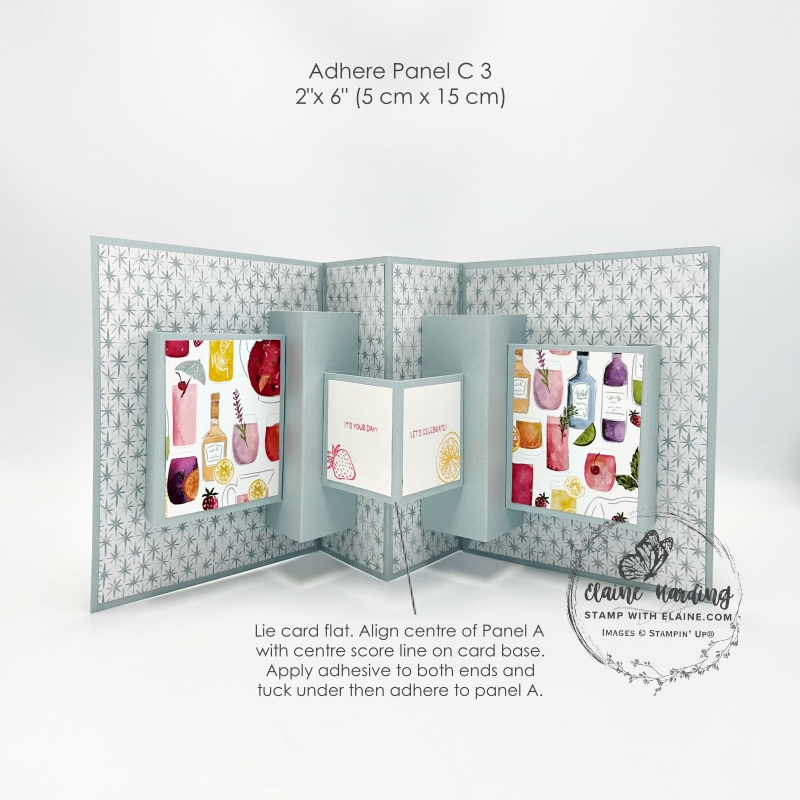
- Cut the Centre Panel C at 2″ x 6″ (5 cm x 15 cm).
- Long side score at 1″, 3″ and 5″ (2.5 cm, 7.5 cm and 12.5 cm)
- Cut 2 pieces Basic White 1 ¾” x 1 ¾” (4.5 cm x 4.5 cm) and stamp as desired with Cheers & Sips stamps. Adhere as shown in picture.
- Apply adhesive to two end tabs, fold back tabs and align centre score line with centre score line on card base and adhere to panel A. Remember to keep the whole card base flat whilst doing this.
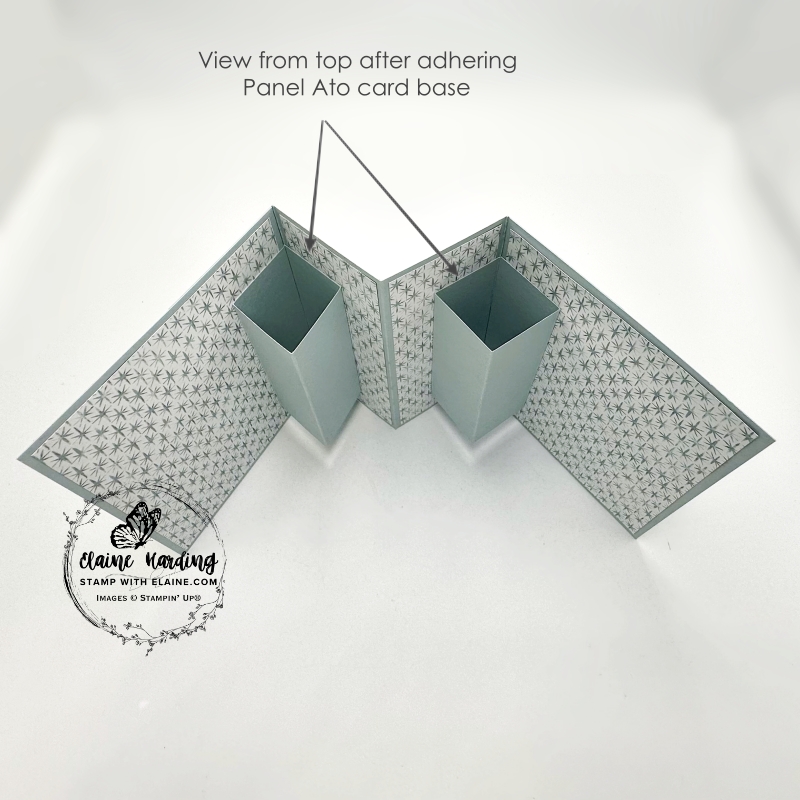
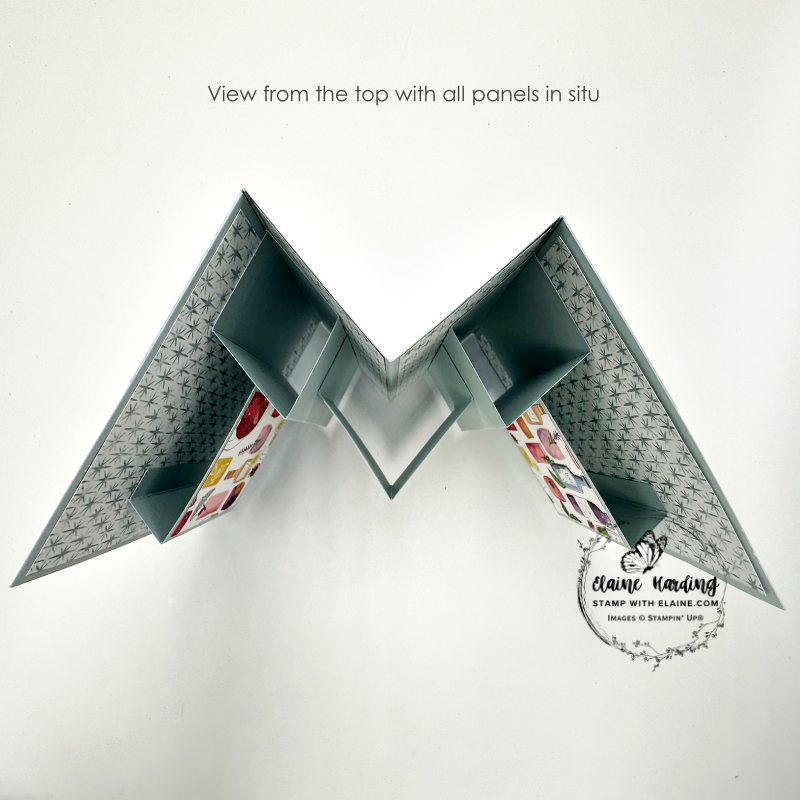
- Once all the panels have been adhered, it should look like picture on the right from the top.
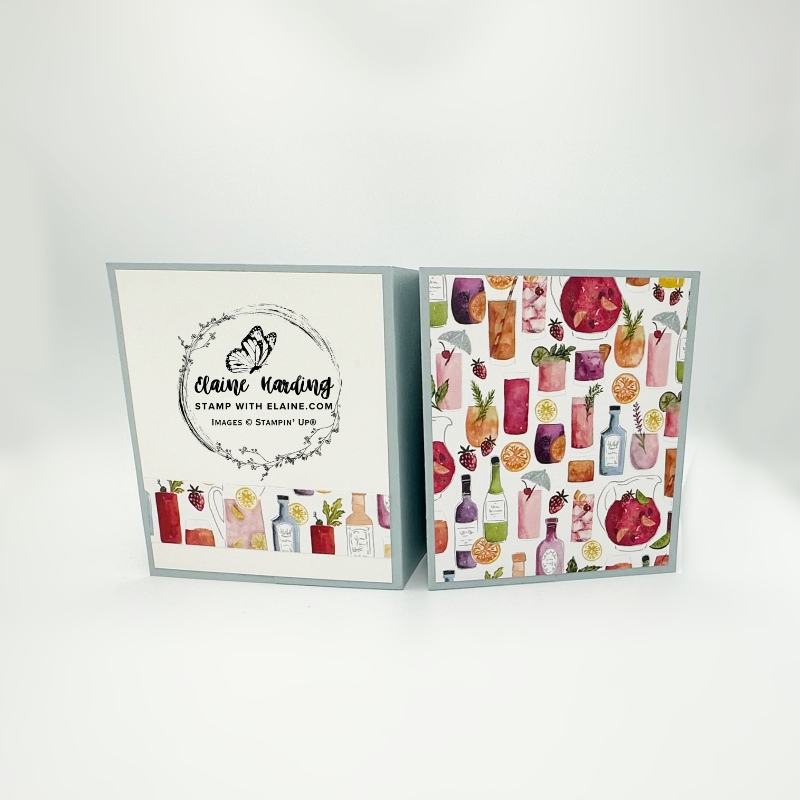
Back view of back and front of card and belly band
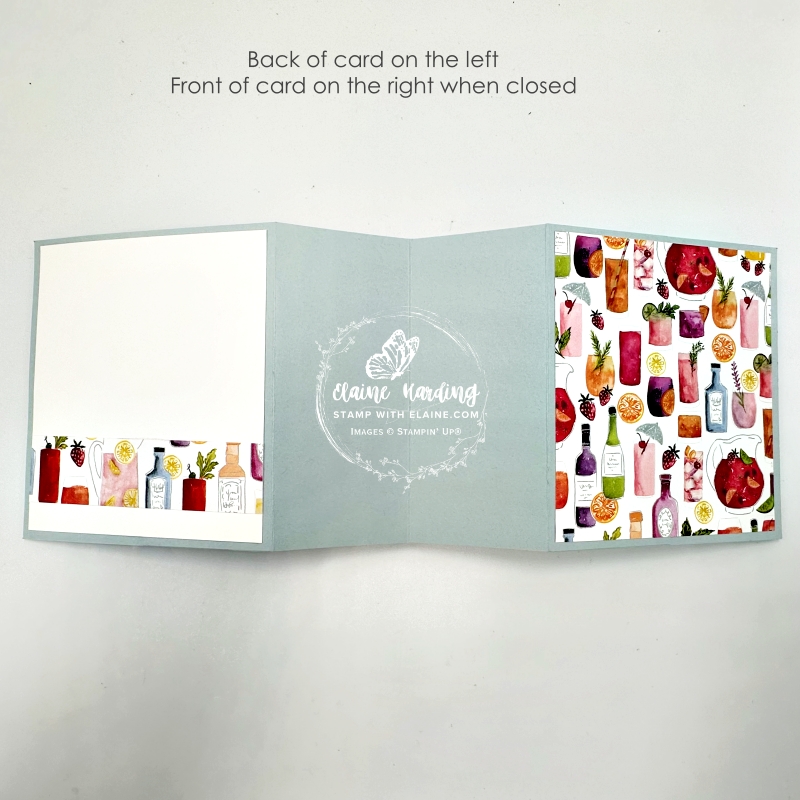

- Cut 1 piece of Basic White and 1 piece DSP measuring 5″ x 5 ¾” (13 cm x 14.5 cm).
- Adhere Basic White on the Left hand side, skip the two narrower middle panels and adhere the DSP on the Right hand side.
- Cut a strip of DSP (same pattern) 1″ x 5″ (2.5 cm x 13 cm) and adhere to Basic White layer 1″ (2.5 cm) from bottom edge as shown.
- Wrap a strip of 1 ½” x A4 length around closed card and adhere ends.
- Cut the largest circle from Stylish Shapes Dies and adhere to centre of belly band.
- Select some cocktails to fussy cut from the DSP and adhere to circle. Lastly stamp “Cheers” and adhere to circle as pictured in photo on the right.
Supply list
Listed below is the supply list. Just click on the picture to take you directly to the item in my online store.
Product List![Celebratory Sips Suite Collection (English) [ 165600 ]](https://assets1.tamsnetwork.com/images/EC042017NF/165600s.jpg "Celebratory Sips Suite Collection (English) [ 165600 ]")
![Stylish Shapes Dies [ 159183 ]](https://assets1.tamsnetwork.com/images/EC042017NF/159183s.jpg "Stylish Shapes Dies [ 159183 ]")
![Celebratory Sips 12" X 12" (30.5 X 30.5 Cm) Designer Series Paper & Sticker Sheet (English) [ 166645 ]](https://assets1.tamsnetwork.com/images/EC042017NF/166645s.jpg "Celebratory Sips 12\" X 12\" (30.5 X 30.5 Cm) Designer Series Paper & Sticker Sheet (English) [ 166645 ]")
![Basic White A4 Cardstock [ 166781 ]](https://assets1.tamsnetwork.com/images/EC042017NF/166781s.jpg "Basic White A4 Cardstock [ 166781 ]")
![Cloud Cover A4 Cardstock [ 165293 ]](https://assets1.tamsnetwork.com/images/EC042017NF/165293s.jpg "Cloud Cover A4 Cardstock [ 165293 ]")
![Strawberry Slush Classic Stampin' Pad [ 165286 ]](https://assets1.tamsnetwork.com/images/EC042017NF/165286s.jpg "Strawberry Slush Classic Stampin' Pad [ 165286 ]")
![2025–2027 In Color™ Flat Pearls [ 165192 ]](https://assets1.tamsnetwork.com/images/EC042017NF/165192s.jpg "2025–2027 In Color™ Flat Pearls [ 165192 ]")

- SHOP ONLINE – EARN 10% REWARDS ON ALL PURCHASES OVER £20
- PURCHASE A STARTER KIT : Get £155 worth of products for only £99. Choose from current catalogues and any specials available. Free Shipping. Read more
- Subscribe to my Video Tutorials – click here