
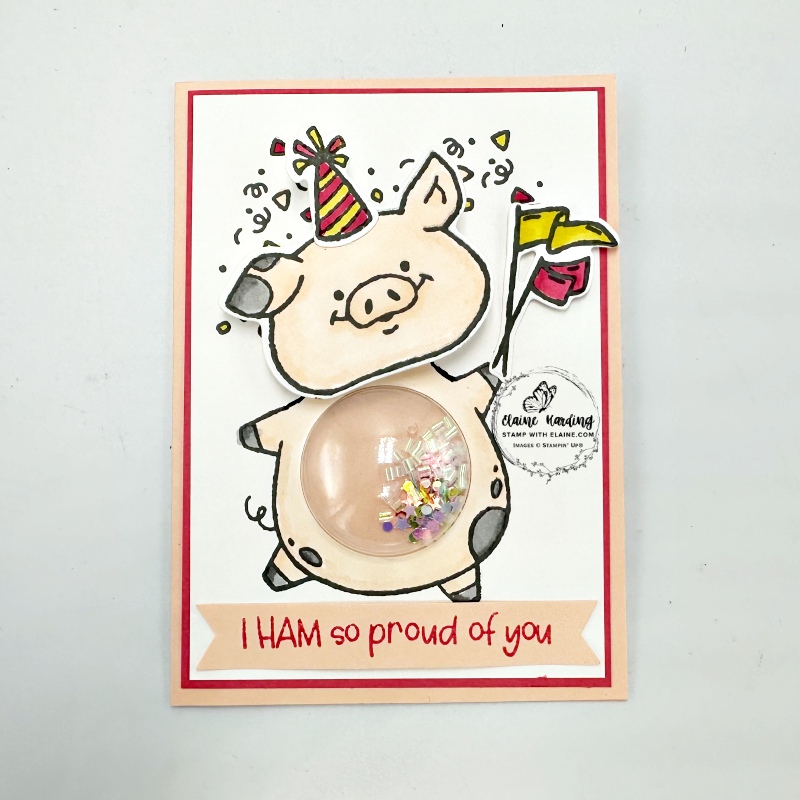
Shaker card – Party Piggy. If you love inter-active cards, you’ll LOVE this! It’s another online exclusive and great for kiddie cards. The pig’s head and its body are two separate stamps so it lends itself to make the head move independently and the body is large enough to die cut a small circle through which you can insert a small dome to create a shaker card.
Wibbly Wobbly head

It’s a pity that a still photo cannot illustrate that the head wobbles. It has a wibbly wobbly mechanism on the back and when you flick it, the head moves from side to side.
The coordinating dies can cut the head, body separately, includes a circle die so you can fit the dome (as pictured above) and fill it with the loose shaker elements.
How to make the card
- Card base : Petal Pink cut at 5 ¾” x 8 ¼” (14.5 m x 21 cm) folded in half.
- Mat layers card front and inside : Strawberry Slush 3 ⅞” x 5 ½” (9.8 cm x 13.7 cm). Adhere 1 piece to card front and the other to inside of card leaving an even border on alll 4 sides.
- Card front 2nd mat layer – Cut 2 pieces Basic White layer 3 ¾” x 5 ⅜” (9.5 cm x 14.2 cm). Stamp the pig’s body in the lower half of card in Basic Gray ink. Stamp the confetti in upper half of card on one of the Basic White piece. On the remaining piece, stamp confetti in Basic Grey. Set aside.
- On a scrap piece of Basic White, stamp the head, flags and party hat and die cut.
- Use Stampin’ Blends to colour the pig elements in Petal Pink, the spotty patches in Basic Grey, flags in Strawberry Slush and Darling Duckling as well as the confetti for the card front and inside of card.
Shaker element
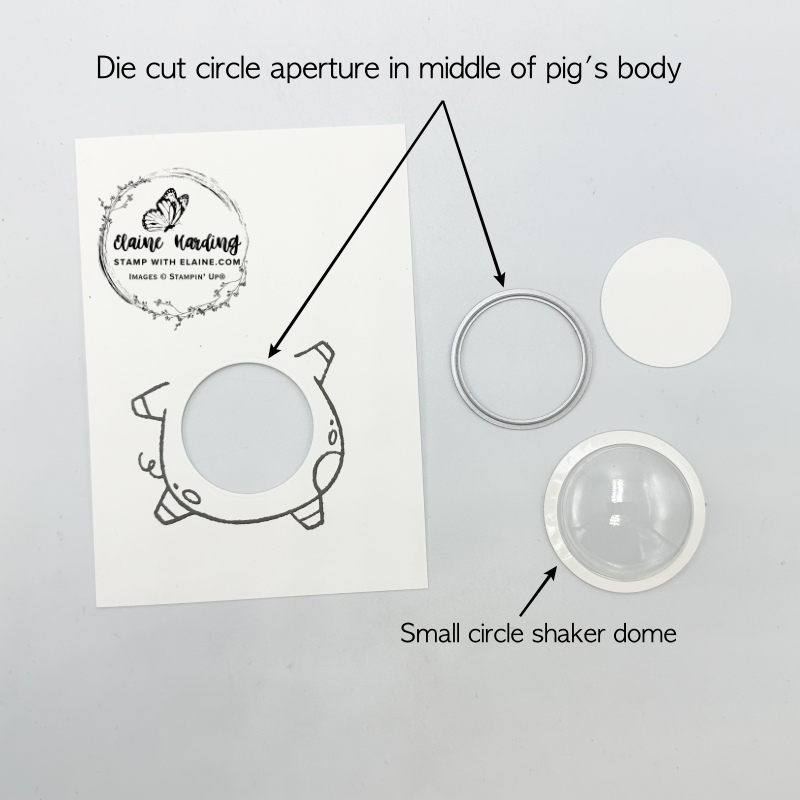
- Stamp pig body in Basic Gray as shown and die cut aperture with Party Pig circle die to hold shaker dome on one of the Basic White pieces.
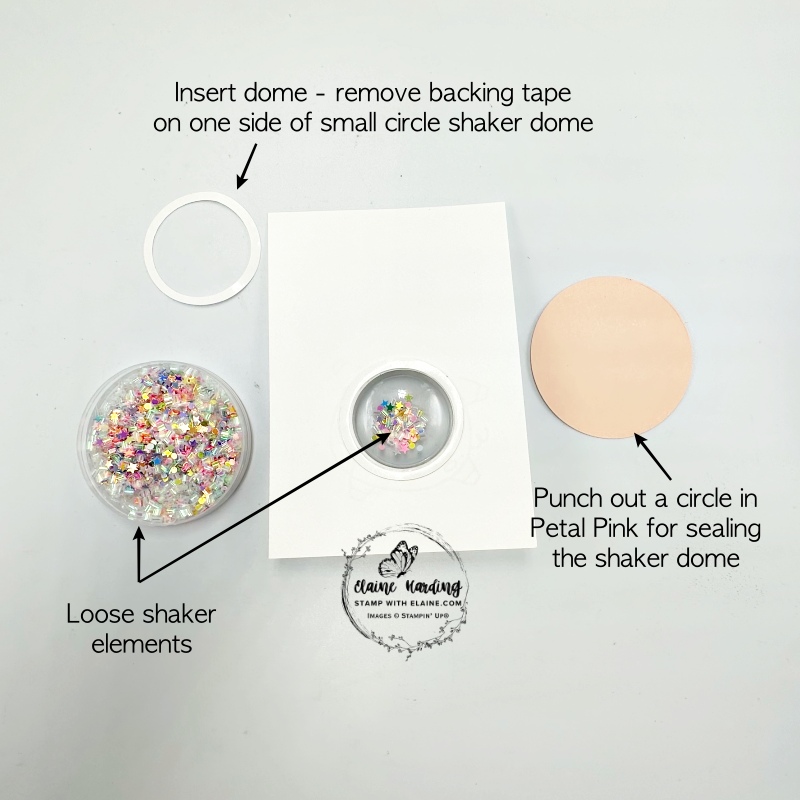
- Shaker dome has double sided tape on both sides of the rim. Remove backing tape from one side and insert through aperture as shown so that you can add the sprinkles. (picture on right)
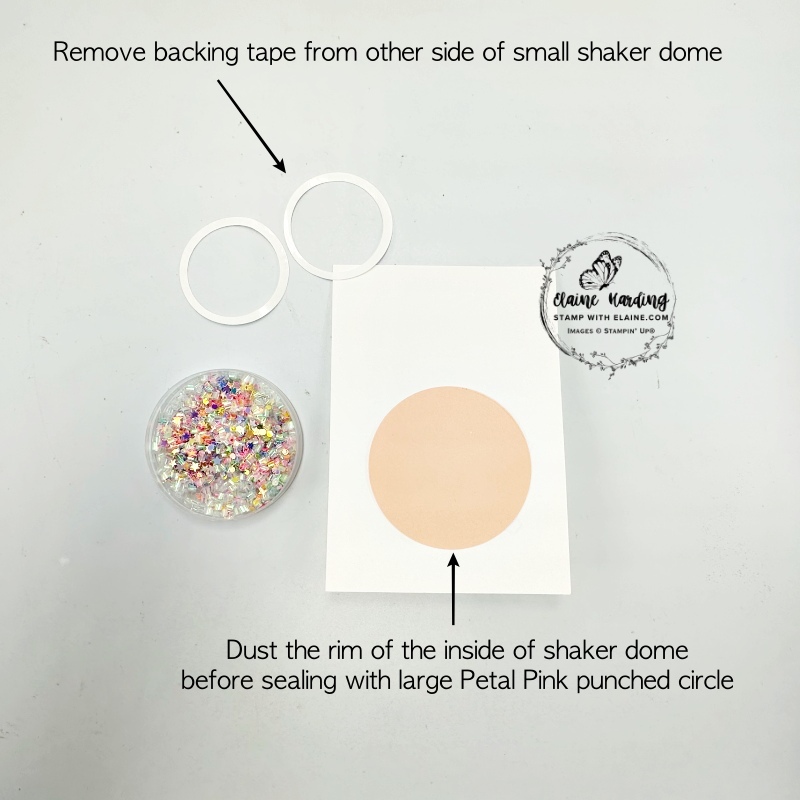
- Remove the remaining piece of backing tape from the shaker dome, dust the sides with an embossing buddy to prevent sequins from sticking to it before sealing punched Petal Pink circle over it to seal the dome.
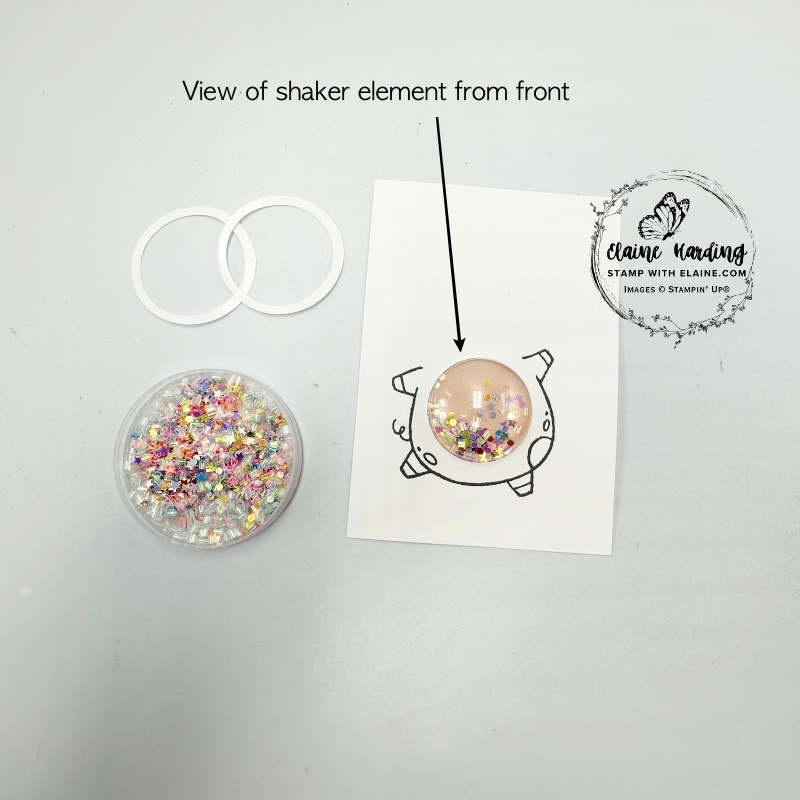
- Picture on the right above shows the front of card layer. You can see through the shaker dome all the loose shaker elements.
Assembling card front
- After the dome has been filled with the loose shaker elements and the dome is sealed, you can adhere the Basic White piece with the shaker dome right side face up to Strawberry Flush layer leaving an even border on all 4 sides.
- Glue the party hat to the piggy’s head. The head is stamped and die cut separately. Put a wibble wobble mechanism on the back and attach above the body.
- Apply glue on the handles of the flags at the bottom and adhere on piggy’s trotter.
- On the flag banner part, apply dimensionals to adhere to mat layer as pictured.
- Stamp the sentiment on a scrap of Petal Pink card stock in Strawberry Slush ink. Cut flag ends on each end and adhere at the bottom of the card with dimensionals.
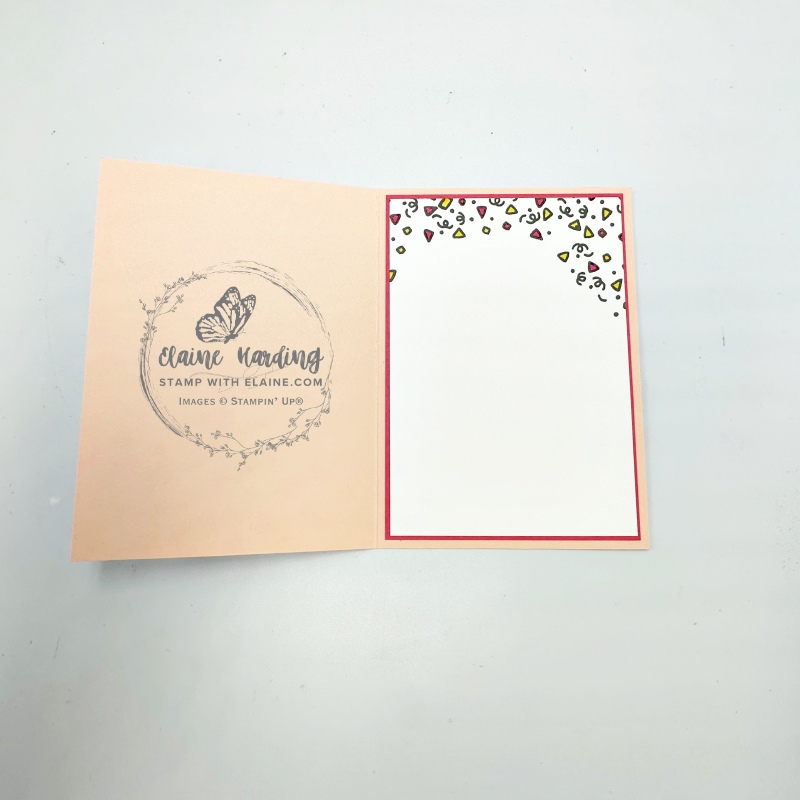
Inside card
- Adhere the prepared inside layer to Strawberry Slush layer to complete card.
Supply list
Listed below is the supply list. Just click on the picture to take you directly to the item in my online store.
Product List![Party Piggy Bundle (English) [ 165483 ]](https://assets1.tamsnetwork.com/images/EC042017NF/165483s.jpg "Party Piggy Bundle (English) [ 165483 ]")
![Party Piggy Photopolymer Stamp Set (English) [ 165479 ]](https://assets1.tamsnetwork.com/images/EC042017NF/165479s.jpg "Party Piggy Photopolymer Stamp Set (English) [ 165479 ]")
![Party Piggy Dies [ 165482 ]](https://assets1.tamsnetwork.com/images/EC042017NF/165482s.jpg "Party Piggy Dies [ 165482 ]")
![Loose Shaker Elements [ 165268 ]](https://assets1.tamsnetwork.com/images/EC042017NF/165268s.jpg "Loose Shaker Elements [ 165268 ]")
![Small Circle Shaker Domes [ 165510 ]](https://assets1.tamsnetwork.com/images/EC042017NF/165510s.jpg "Small Circle Shaker Domes [ 165510 ]")
![Basic White A4 Cardstock [ 166781 ]](https://assets1.tamsnetwork.com/images/EC042017NF/166781s.jpg "Basic White A4 Cardstock [ 166781 ]")
![Petal Pink A4 Cardstock [ 147009 ]](https://assets1.tamsnetwork.com/images/EC042017NF/147009s.jpg "Petal Pink A4 Cardstock [ 147009 ]")
![Strawberry Slush A4 Cardstock [ 165297 ]](https://assets1.tamsnetwork.com/images/EC042017NF/165297s.jpg "Strawberry Slush A4 Cardstock [ 165297 ]")
![Basic Gray Classic Stampin' Pad [ 149165 ]](https://assets1.tamsnetwork.com/images/EC042017NF/149165s.jpg "Basic Gray Classic Stampin' Pad [ 149165 ]")
![Petal Pink & White 1/4" (6.4 Mm) Diagonal Trim Combo Pack [ 163417 ]](https://assets1.tamsnetwork.com/images/EC042017NF/163417s.jpg "Petal Pink & White 1/4\" (6.4 Mm) Diagonal Trim Combo Pack [ 163417 ]")
![Smoky Slate Stampin' Blends Combo Pack [ 154904 ]](https://assets1.tamsnetwork.com/images/EC042017NF/154904s.jpg "Smoky Slate Stampin' Blends Combo Pack [ 154904 ]")
![Darling Duckling Stampin’ Blends Combo Pack [ 165288 ]](https://assets1.tamsnetwork.com/images/EC042017NF/165288s.jpg "Darling Duckling Stampin’ Blends Combo Pack [ 165288 ]")
![Strawberry Slush Stampin’ Blends Combo Pack [ 165290 ]](https://assets1.tamsnetwork.com/images/EC042017NF/165290s.jpg "Strawberry Slush Stampin’ Blends Combo Pack [ 165290 ]")
Hope you enjoyed this project! Thanks for visiting.

- SHOP ONLINE – EARN 10% REWARDS ON ALL PURCHASES OVER £20
- PURCHASE A STARTER KIT : Get £155 worth of products for only £99. Choose from current catalogues and any specials available. Free Shipping. Read more
- Subscribe to my Video Tutorials – click here