
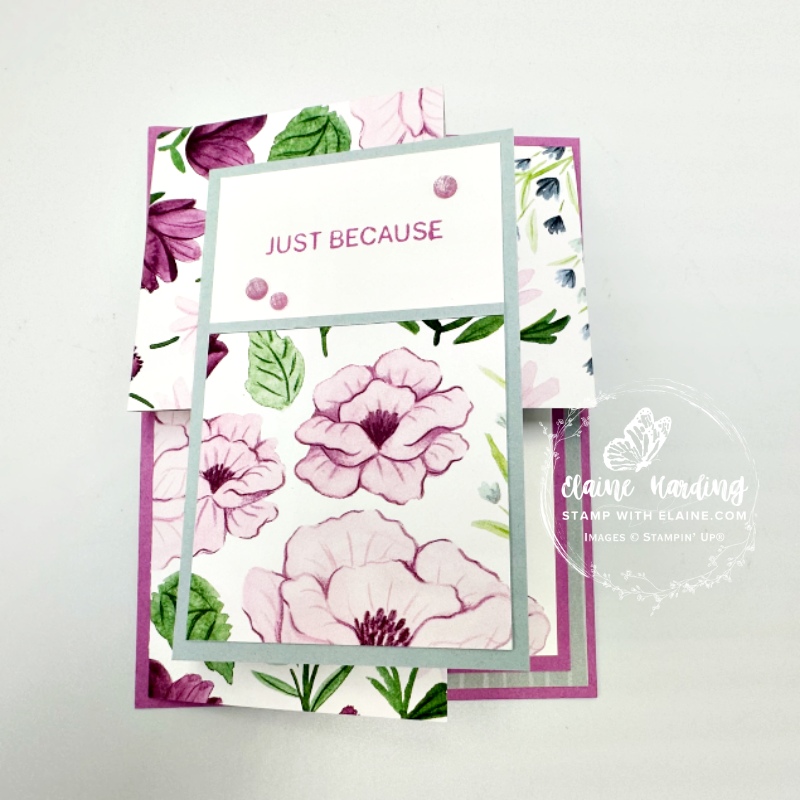
Corner fold card – Fancy Borders. I made this card with the Florals in Bloom Designer Series paper. The corner fold card allows you to see both sides of the patterned paper you are using. Such a simple yet effective concept.
I chose the Fancy Borders stamp set for its simple upper case fonts. Sometimes it’s just nice to send a card with no reason at all “just because”! The sentiment for the inside says “a little hello with a whole lot of love”.

Cutting/Scoring Main DSP for corner fold mechanism
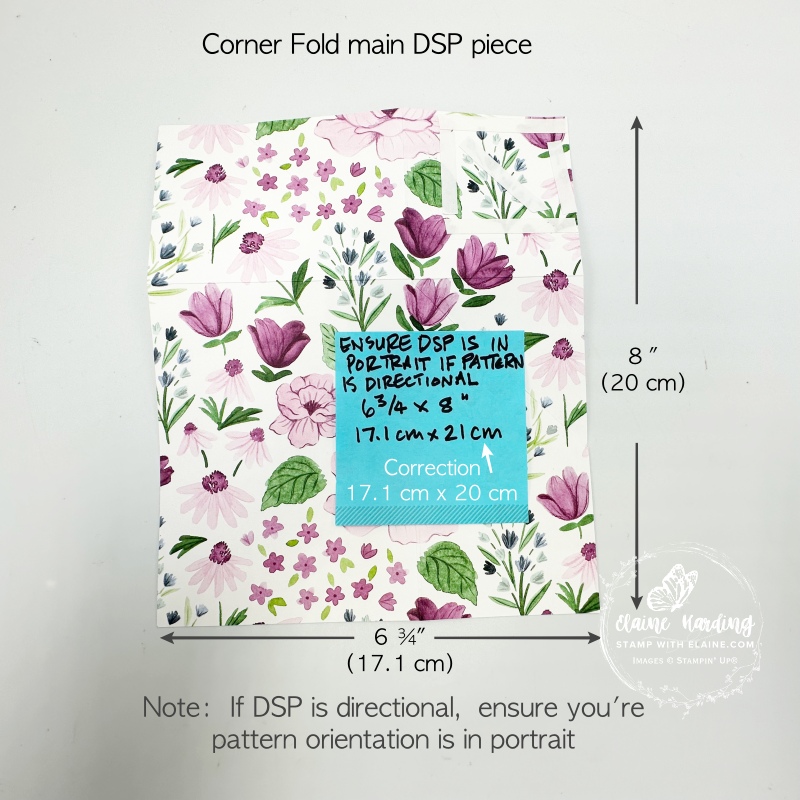
- DSP corner fold main mechanism – 6 ¾” x 8″ (17.1 cm x 20 cm). If using directional paper, ensure it is in portrait orientation.
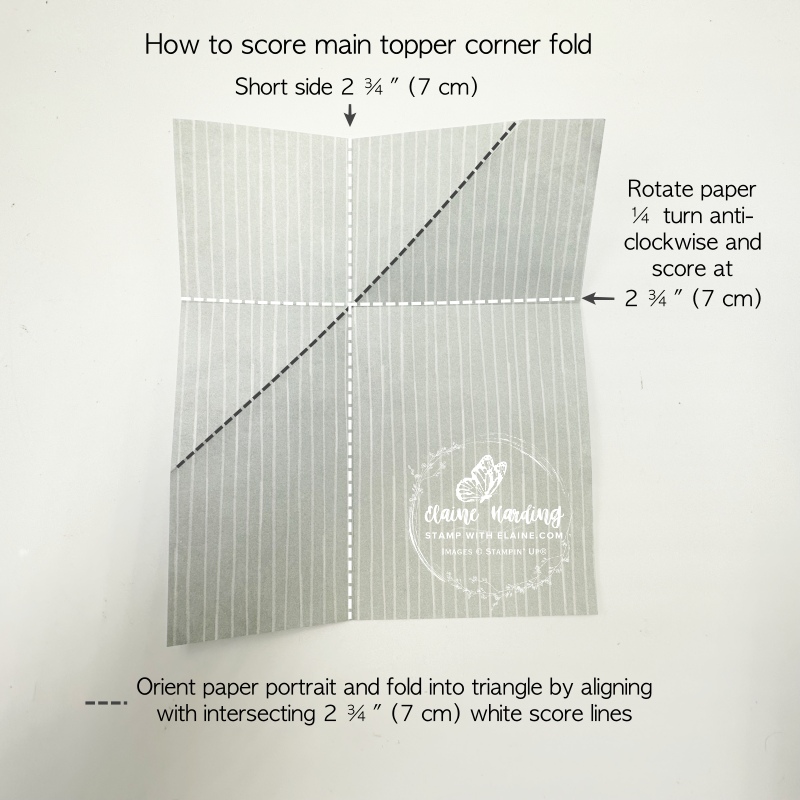
- On short side, score at 2 ¾” (7 cm). Rotate paper ¼ turn anti-clockwise and score long side at 2 ¾” (7 cm).
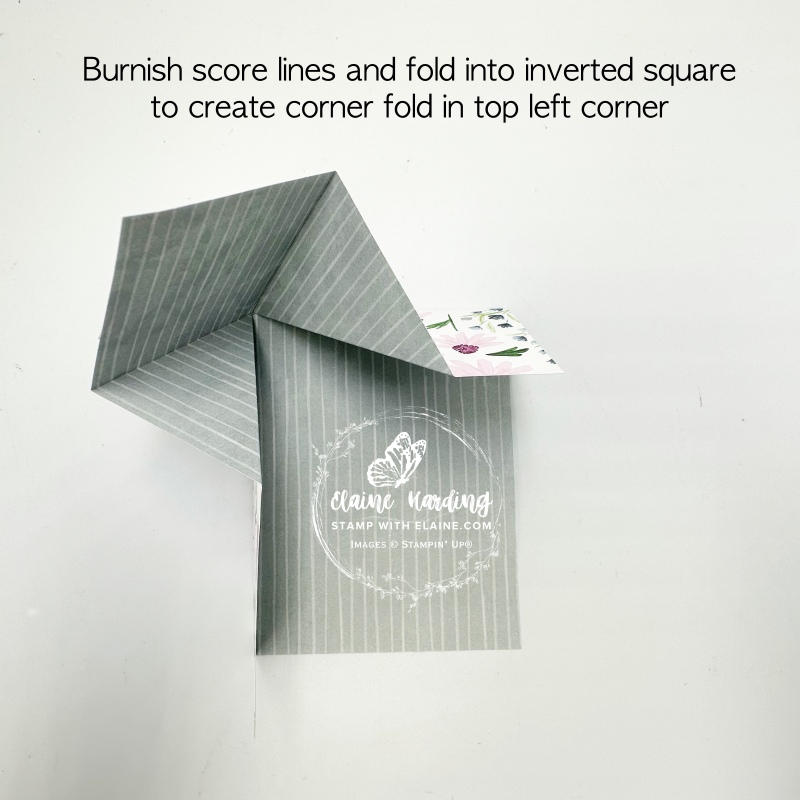
- Fold top left corner down to meet both 2 ¾” score lines. (picture on the right)
DSP and mat layers for corner square and card front
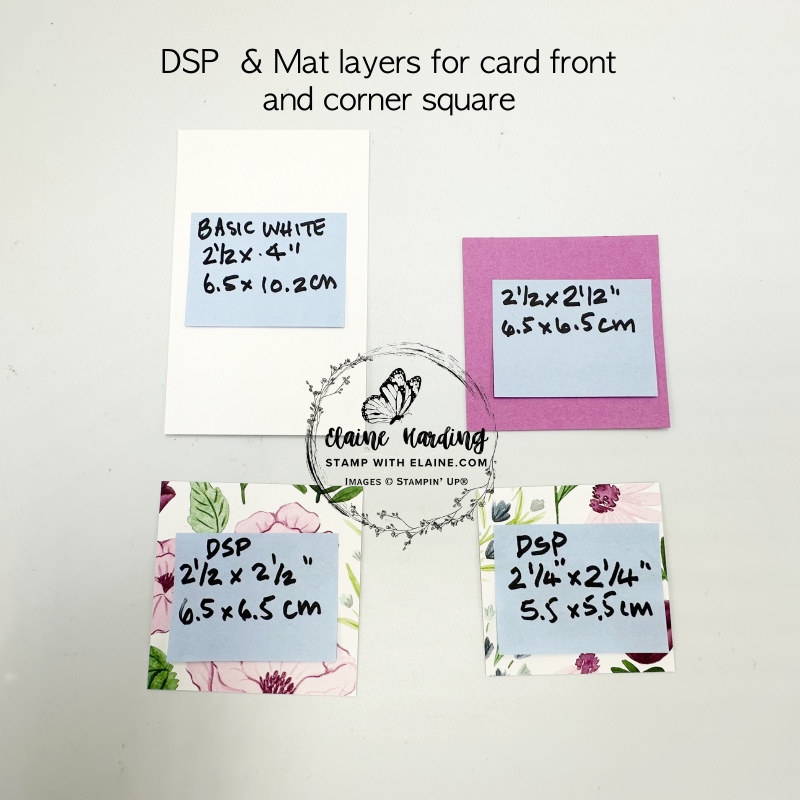
- Basic White card front 2 ½” x 4″ (6.5 x 10.2 cm). DSP 2 ½” x 2 ½” (6.5 x 6.5 cm). Align with bottom and two sides of Basic White card front and adhere. Then cut DSP at 2 ¼” x 2 ¼” (5.5 x 5.5 cm) and adhere to Petunia Pop mat cut at 2 ½” x 2 ½” (6.5 x 6.5 cm).
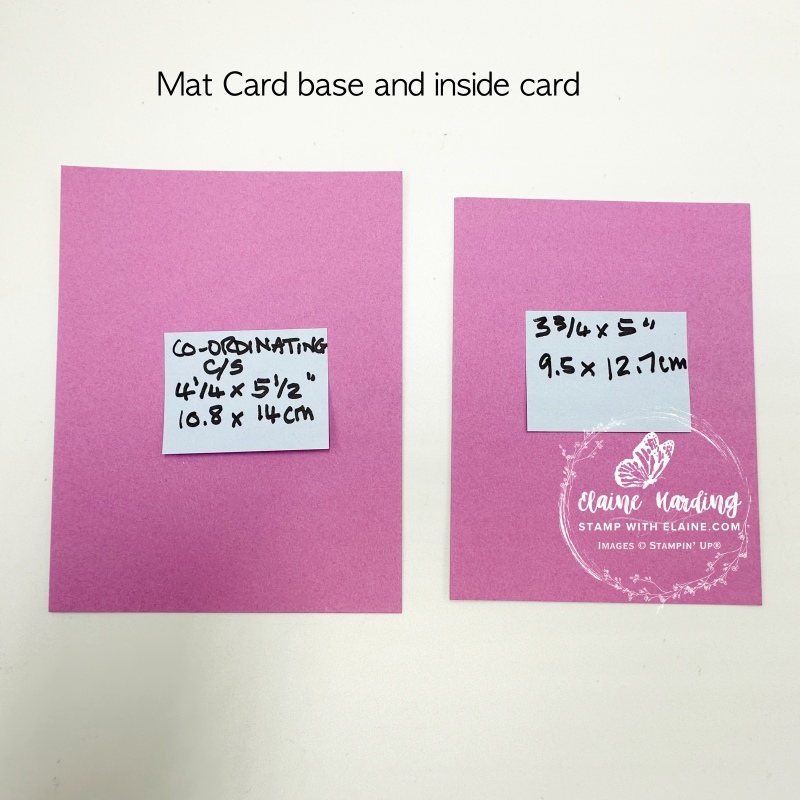
- Petunia Pop : Mat for card base cut at 4 ¼” x 5 ½” (10.8 cm x 14 cm) and Mat for inside card 3 ¾” x 5″ (9.5 cm x 12.7 cm)


- Cloud Cover front mat : 2 ¾” x 4 ¼” (7 x 10.8 cm) and a strip of Cloud Cover ⅛” x 2 ¾” (0.3 cm x 7 cm) to be trimmed later.
- Basic White mat for inside of card – 3 ½” x 4 ¾” (9 cm x 11.5 cm)
- From scrap of DSP fussy cut floral elements – set aside.
Assembling card
Card Front
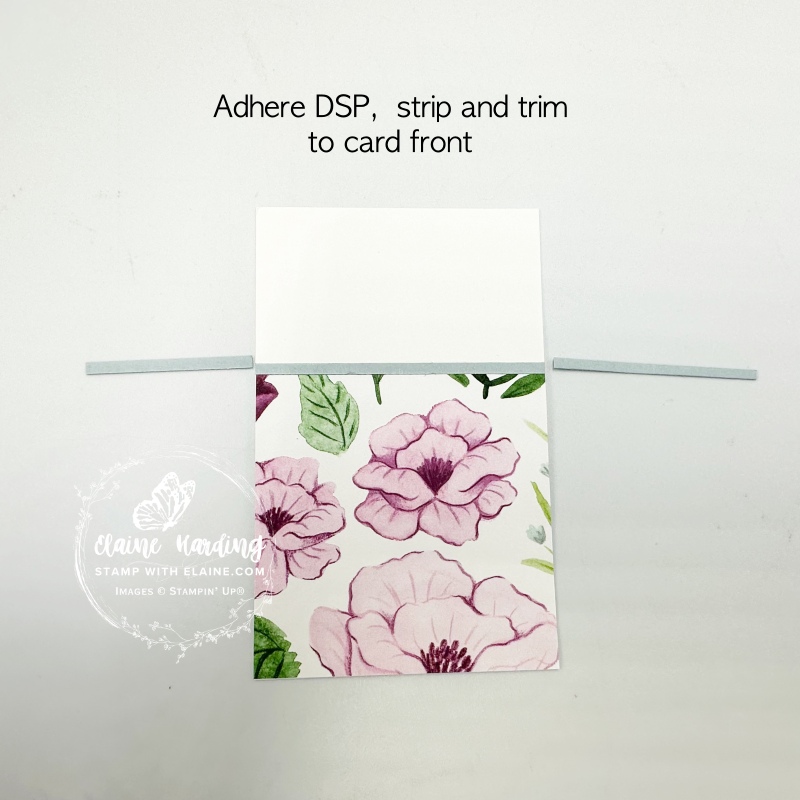

- Align 2 ½” DSP square to bottom and sides of Basic White 2 ½” x 4″ (6.5 x 10.2 cm) piece. Adhere strip as shown and trim off excess.
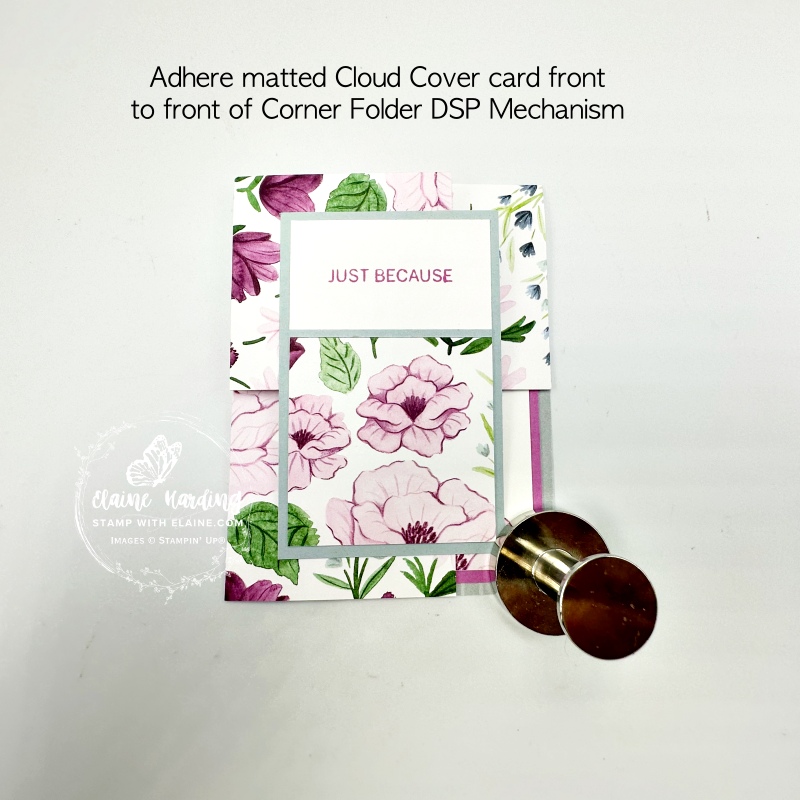
- Middle picture – close Corner Fold DSP mechanism and apply adhesive in bottom right corner as shown. Be mindful adhesive does not extend beyond card front mat layer.
- Picture on right – remove backing tape and adhere stamped and matted card front as pictured.
Inside card and adhering Corner Fold Mechanism to card base
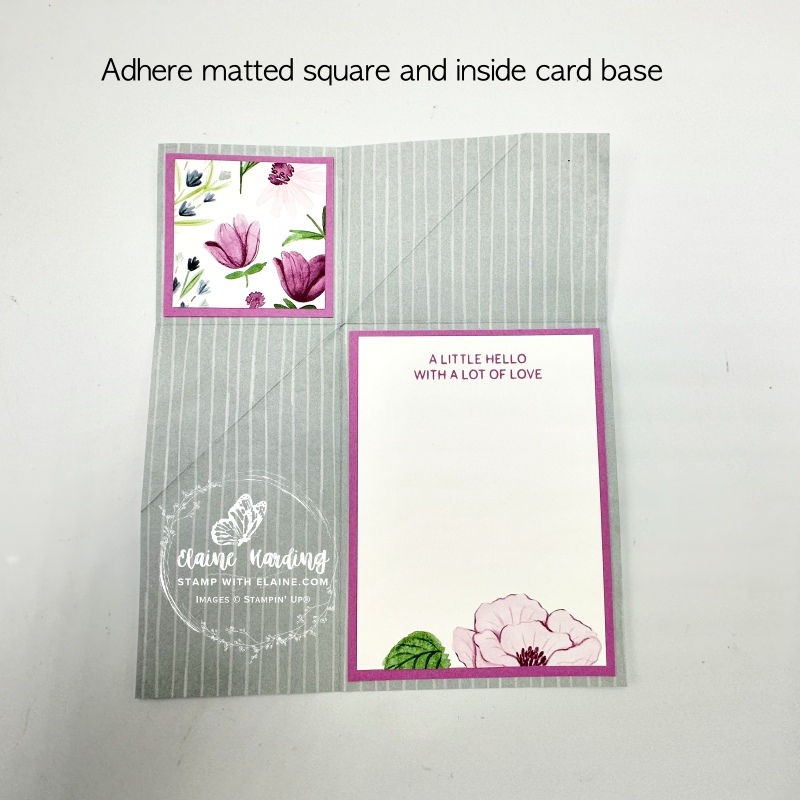
- Adhere 2 ¼” (6.5 cm) DSP square to Petunia Pop 2 ½” (7 cm) square and adhere in top left corner as shown. Stamp sentiment at the top of Basic White piece and adhere fussy cut floral elements at the bottom then adhere to Petuna Pop inside mat layer before adhering to Corner Fold DSP mechanism leaving an even border on all four sides.
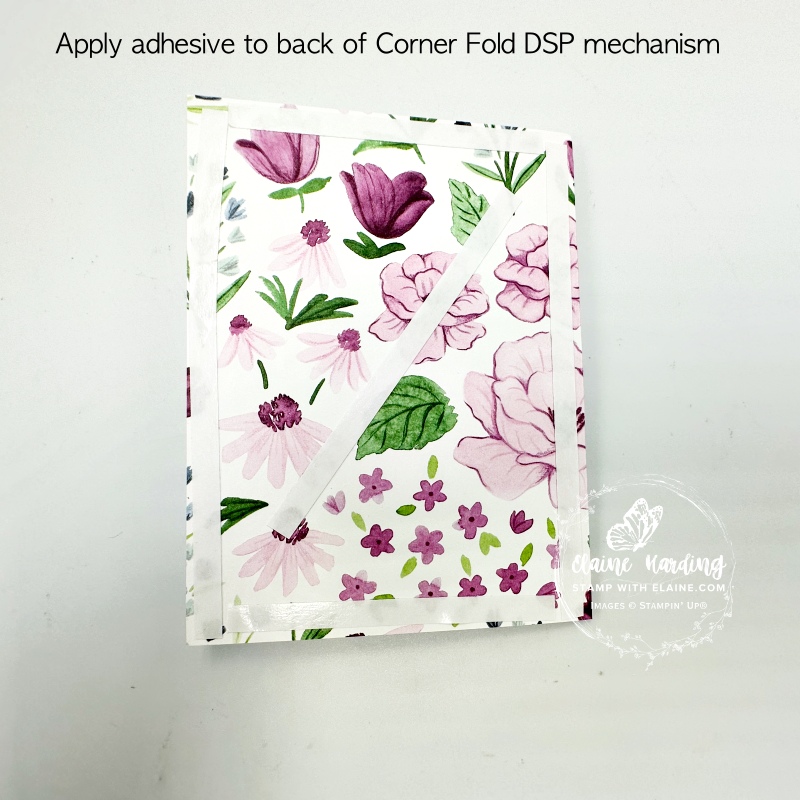
- Flip DSP Corner Fold Mechanism over and apply adhesive (middle picture)
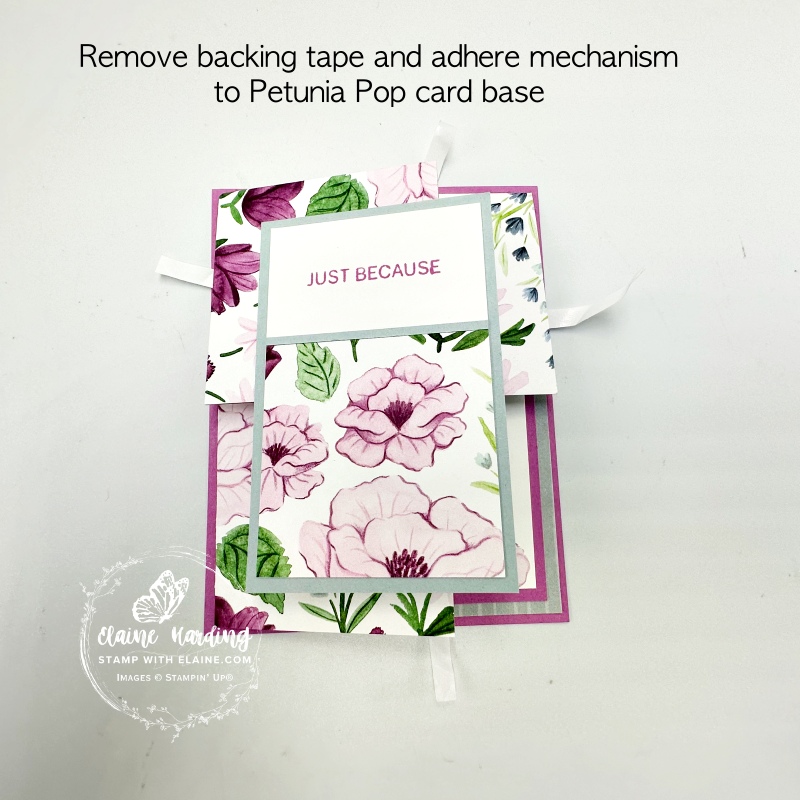
- Position over Petunia Pop card base so that there is an even border on all 4 sides before removing backing tape and adhering to card base.
Finishing touches

- Add a trio of 2024-2026 In Color flat pearls as shown.
Lots of pictures today to facilitate visualising how to make the card. Thanks for visiting and I hope it’s inspired you to make one yourself.
Supply list
Listed below is the supply list. Just click on the picture to take you directly to the item in my online store.
Product List![Fancy Borders Bundle (English) [ 165381 ]](https://assets1.tamsnetwork.com/images/EC042017NF/165381s.jpg "Fancy Borders Bundle (English) [ 165381 ]")
![Fancy Borders Photopolymer Stamp Set (English) [ 165379 ]](https://assets1.tamsnetwork.com/images/EC042017NF/165379s.jpg "Fancy Borders Photopolymer Stamp Set (English) [ 165379 ]")
![Fancy Borders Dies [ 165380 ]](https://assets1.tamsnetwork.com/images/EC042017NF/165380s.jpg "Fancy Borders Dies [ 165380 ]")
![Simply Scored [ 122334 ]](https://assets1.tamsnetwork.com/images/EC042017NF/122334s.jpg "Simply Scored [ 122334 ]")
![Florals In Bloom 12" X 12" (30.5 X 30.5 Cm) Designer Series Paper & Sticker Sheet (English) [ 166643 ]](https://assets1.tamsnetwork.com/images/EC042017NF/166643s.jpg "Florals In Bloom 12\" X 12\" (30.5 X 30.5 Cm) Designer Series Paper & Sticker Sheet (English) [ 166643 ]")
![2024 2026 In Color™ Flat Pearls [ 165266 ]](https://assets1.tamsnetwork.com/images/EC042017NF/165266s.jpg "2024 2026 In Color™ Flat Pearls [ 165266 ]")
![Basic White A4 Cardstock [ 166781 ]](https://assets1.tamsnetwork.com/images/EC042017NF/166781s.jpg "Basic White A4 Cardstock [ 166781 ]")
![Cloud Cover A4 Cardstock [ 165293 ]](https://assets1.tamsnetwork.com/images/EC042017NF/165293s.jpg "Cloud Cover A4 Cardstock [ 165293 ]")
![Petunia Pop A4 Cardstock [ 163802 ]](https://assets1.tamsnetwork.com/images/EC042017NF/163802s.jpg "Petunia Pop A4 Cardstock [ 163802 ]")
![Petunia Pop Classic Stampin Pad [ 163811 ]](https://assets1.tamsnetwork.com/images/EC042017NF/163811s.jpg "Petunia Pop Classic Stampin Pad [ 163811 ]")

- SHOP ONLINE – EARN 10% REWARDS ON ALL PURCHASES OVER £20
- PURCHASE A STARTER KIT : Get £155 worth of products for only £99. Choose from current catalogues and any specials available. Free Shipping. Read more
- Subscribe to my Video Tutorials – click here