
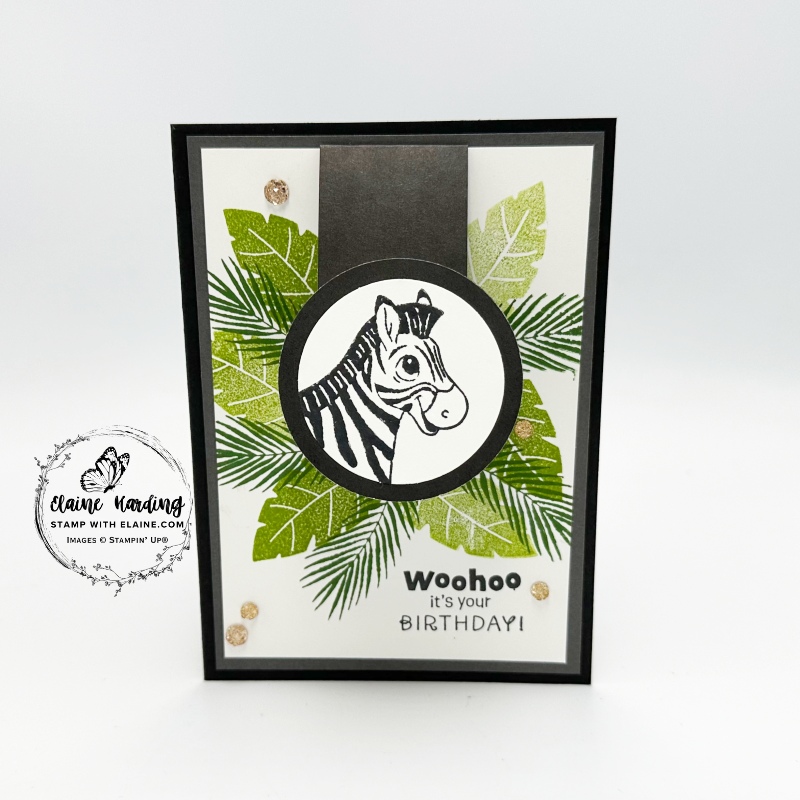
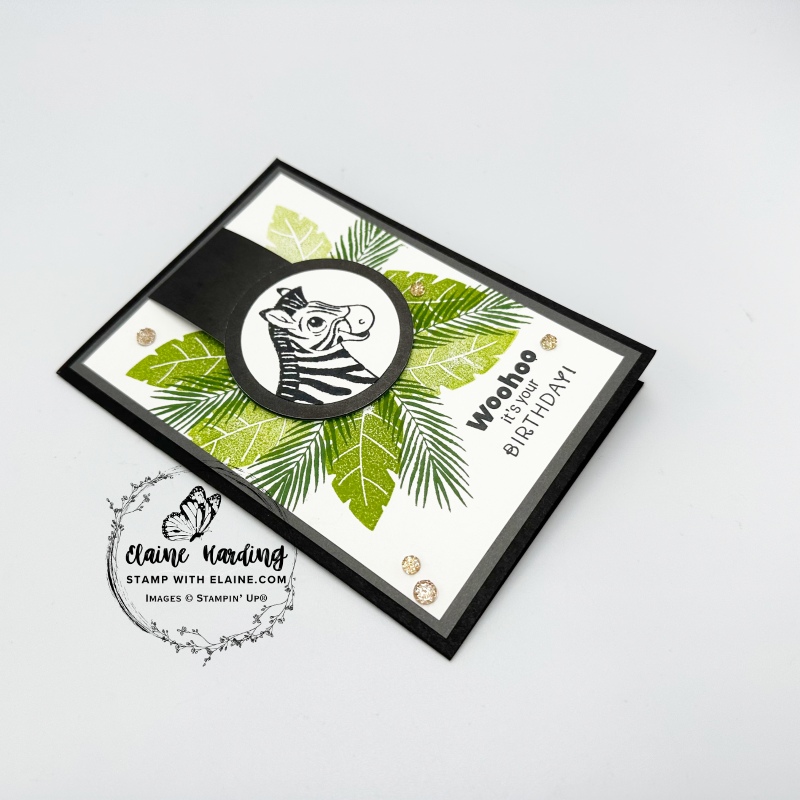
Flip flap card – Silly Safari. Good news! Silly Safari is now available as a bundle because the 1 ⅞” circle punch has finally arrived at the warehouse! You’ll find it in the 2025-2026 Annual Catalogue on page 83. This is such a great set for kiddies cards. Cute animals like a giraffe, rhino, monkey, zebra or leopard with loads of all-occasion sentiments to make cards or tags.
Here’s a flip flap card I made using the zebra image. I used the two-tone Basic Black card stock for my mat layers. It is lighter in weight than ordinary card stock and great for mat layers so that the finished card isn’t so thick.

Cutting guide
Card base/mat layers
- Basic Black card base : 5 ¾” x 8 ¼” (14.5 cm x 21 cm). Long side score at 4 ⅛” (10.5 cm)
- Two-Tone Basic Black c/s : Lighter side cut 2 x 3 ⅞” x 5 ½” (9.8 cm x 14 cm). One for card front, and the other for inside card.
- Basic White c/s : cut 2 pieces 3 ⅝” x 5 ¼” (9.2 cm x 13.3 cm) one for card front, and the other for inside.
Flip Flap mechanism/punched circles
- Two-tone Basic Black c/s : cut a strip 1 ½” x 3 ½” (4 cm x 9 cm). Score one end at ½” (1 cm)
- Basic Black two-tone c/s – punch two 2 ¼” circles
- Garden Green c/s – punch one 2 ¼” circle
- Basic White : punch two 1 ⅞” circles
Assembling card
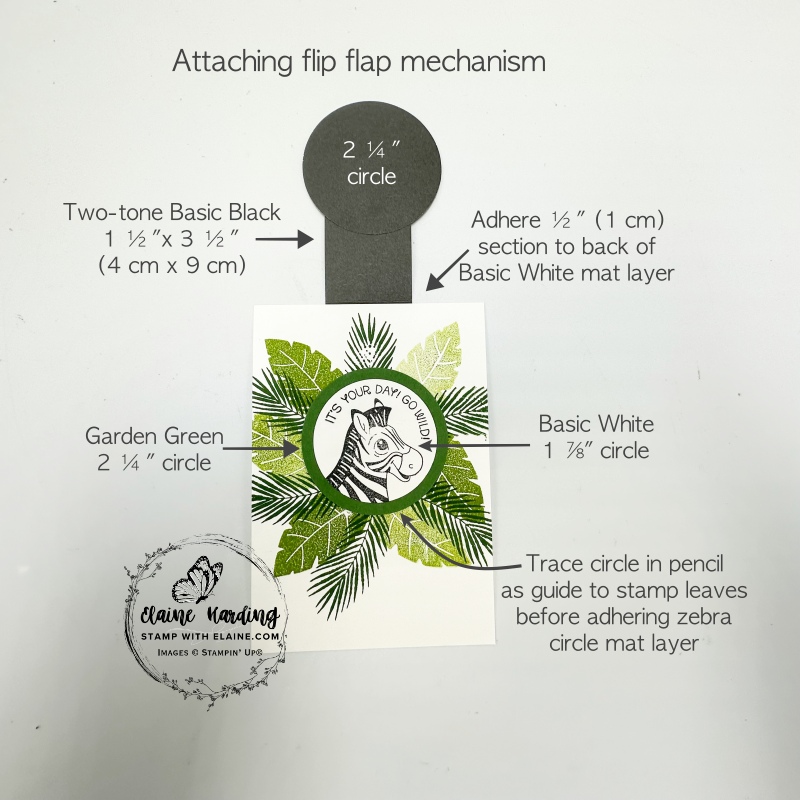
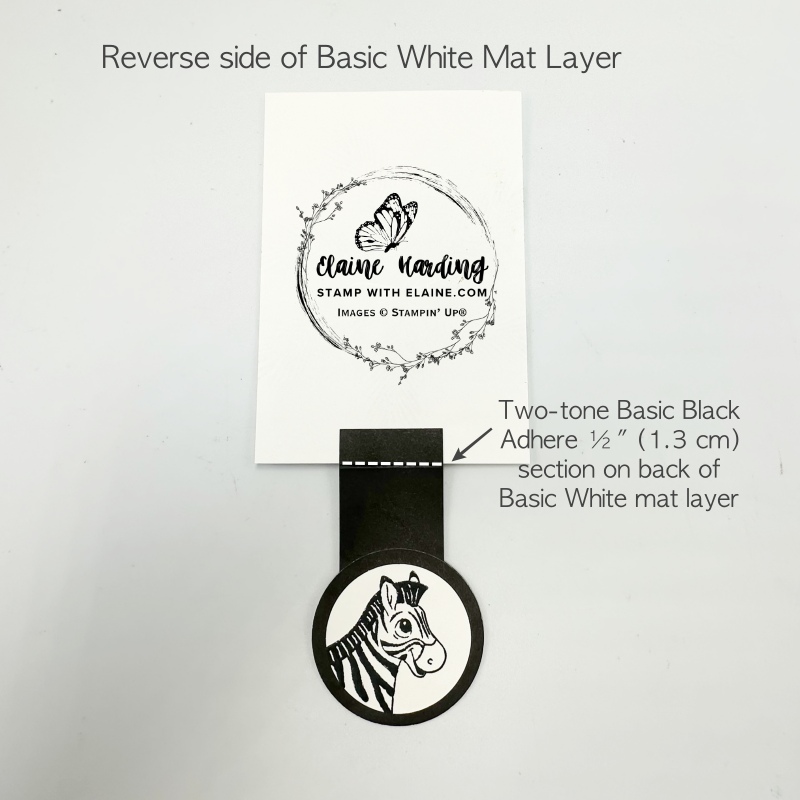
Card front Basic White mat layer
- Adhere two-tone Basic Black ½” (1 cm) section of 1 ½” x 3 ½” (4 cm x 9 cm) strip centred to back of Basic White Mat layer. The darker side should be face up on front of card.
- Position 2 ¼” circle on strip with dark side face up and adhere to strip (picture on right)
- Adhere 2nd circle (light side up) so that strip is sandwiched between the two circles (picture on left).
- Bring flap down over Basic White layer and lightly trace round circle with a pencil so that you have a guide for stamping leaves.
- Stamp solid leaf first in both first and second generation Granny Apple Green.
- Ink palm leaf in Garden Green and stamp in between.
- Apply adhesive to back of Garden Green 2 ¼” circle. Align with Basic Black circle on flip flap mechansim, close flap to adhere on top of stamped leaves as pictured.
Stamping 1 ⅞” circles
- Stamp zebra in Tuxedo Black Memento ink on one of the circles and adhere to Flip Flap Basic Black circle.
- On second circle, stamp sentiment first, then a zebra in Tuxedo Black Memento ink. Adhere to Garden Green circle.
Adhering mat layers for card front
- Adhere lighter two-tone Basic Black to card base.
- Next adhere prepped flip flap Basic White layer on top leaving an even border on all 4 sides.
- Stamp birthday greeting in bottom right corner in Tuxedo black memento ink.
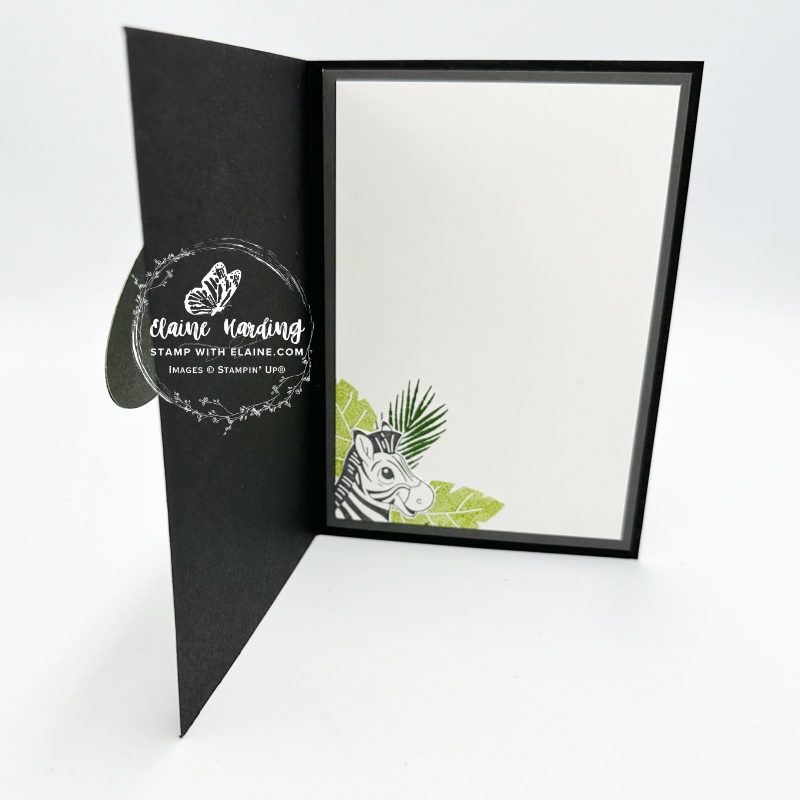
Inside card
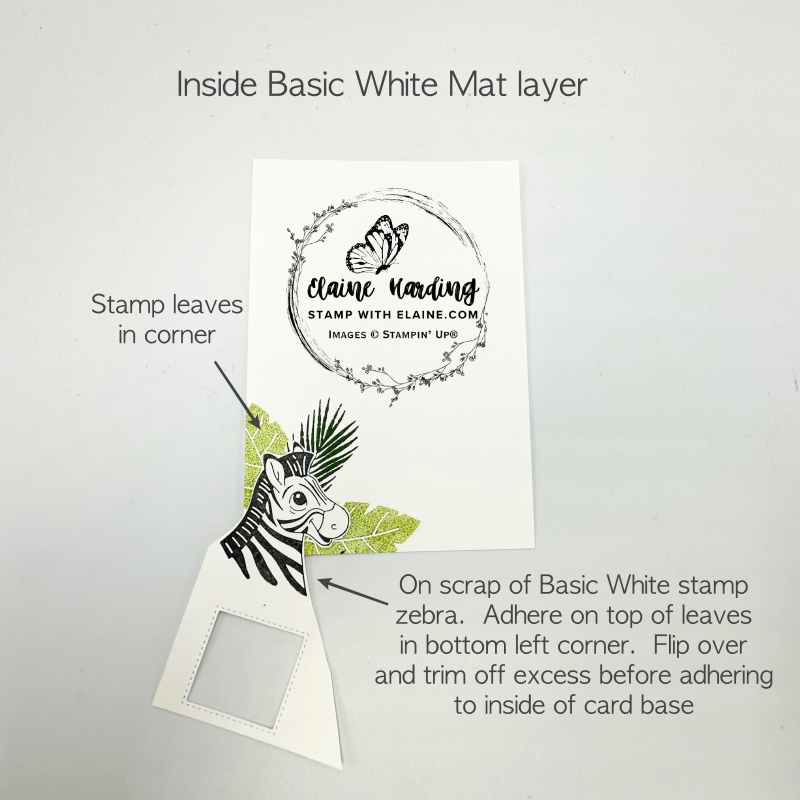

- Stamp leaves as pictured in bottom left corner.
- On a scrap of Basic White, stamp zebra and fussy cut around neck and head, but leave base whole so you can trim it after you’ve adhered it on top of leaves.
- Flip over to the back and trim off excess.
- Adhere lighter side face up of two-tone Basic Black mat layer.
- Then adhere Basic White layer on top leaving an even border all round.
Finishing touches
- To complete card, adhere Drusy adhesive-backed embellishments on the card front in odd numbers.
- Triangulate the embellishments for a more pleasing, balanced effect as shown in picture.
Supply list
Listed below is the supply list. Just click on the picture to take you directly to the item in my online store.
Product List![Silly Safari Bundle (English) [ 165260 ]](https://assets1.tamsnetwork.com/images/EC042017NF/165260s.jpg "Silly Safari Bundle (English) [ 165260 ]")
![Silly Safari Photopolymer Stamp Set (English) [ 165254 ]](https://assets1.tamsnetwork.com/images/EC042017NF/165254s.jpg "Silly Safari Photopolymer Stamp Set (English) [ 165254 ]")
![1 7/8" (4.8 Cm) Circle Punch [ 165259 ]](https://assets1.tamsnetwork.com/images/EC042017NF/165259s.jpg "1 7/8\" (4.8 Cm) Circle Punch [ 165259 ]")
![2 1/4" (5.7 Cm) Circle Punch [ 143720 ]](https://assets1.tamsnetwork.com/images/EC042017NF/143720s.jpg "2 1/4\" (5.7 Cm) Circle Punch [ 143720 ]")
![Basic Black 12" X 12" (30.5 X 30.5 Cm) Two Tone Cardstock [ 166704 ]](https://assets1.tamsnetwork.com/images/EC042017NF/166704s.jpg "Basic Black 12\" X 12\" (30.5 X 30.5 Cm) Two Tone Cardstock [ 166704 ]")
![Basic Black A4 Card Stock [ 121688 ]](https://assets1.tamsnetwork.com/images/EC042017NF/121688s.jpg "Basic Black A4 Card Stock [ 121688 ]")
![Basic White A4 Cardstock [ 159228 ]](https://assets1.tamsnetwork.com/images/EC042017NF/159228s.jpg "Basic White A4 Cardstock [ 159228 ]")
![Garden Green Classic Stampin' Pad [ 147089 ]](https://assets1.tamsnetwork.com/images/EC042017NF/147089s.jpg "Garden Green Classic Stampin' Pad [ 147089 ]")
![Granny Apple Green Stampin' Pad [ 147095 ]](https://assets1.tamsnetwork.com/images/EC042017NF/147095s.jpg "Granny Apple Green Stampin' Pad [ 147095 ]")
![Tuxedo Black Memento Ink Pad [ 132708 ]](https://assets1.tamsnetwork.com/images/EC042017NF/132708s.jpg "Tuxedo Black Memento Ink Pad [ 132708 ]")
![Drusy Adhesive Backed Embellishments [ 164223 ]](https://assets1.tamsnetwork.com/images/EC042017NF/164223s.jpg "Drusy Adhesive Backed Embellishments [ 164223 ]")

- SHOP ONLINE – EARN 10% REWARDS ON ALL PURCHASES OVER £20
- PURCHASE A STARTER KIT : Get £155 worth of products for only £99. Choose from current catalogues and any specials available. Free Shipping. Read more
- Subscribe to my Video Tutorials – click here
.
Pingback: Pinwheel topper - Silly Safari - Stamp with Elaine