
Matching card and gift box. Cast your eye on pages 28-31 of the new September-December 2025 Mini catalogue and check out the North Pole Delivery Suite collection. You can see the first card I made with it HERE.
This Suite was on my wish list. Over a period of time, I had earned sale incentive rewards from my upline and was due to redeem this against Stampin’ Up! products and this is what I chose.

I chose Cloud Cover and Secret Sea as my colour palette. To ground the postal van and squirrel, I used the retired Pearlised Enamel Effects Basics which have 3 bottles of colour – Real Red, White and Black and I used the Black one. The Perennial Postage Dies came into play again.
How to make the card

Card front
- Cloud Cover card base : 5 ¾” x 8 ¼” (14.5 cm x 21 cm) folded in half.
- Stamp the compass with Cloud Cover Stampin’ Spot on all four edges.
- Die cut Secret Sea card stock with Perennial Postage 2nd largest die. Adhere at an angle to card front.
- Select pre-cut images from the North Pole Delivery 12″x 12″ (30.5 x 30.5 cm) Specialty Designer Series Paper pack and adhere as shown.
- Stamp “thank you” from Light & Wonder stamp set in Versamark ink in bottom right corner and white emboss.
- Optional : ground van and squirrel with Pearlised Enamel Effects Basics if you have it, or use a marker pen.
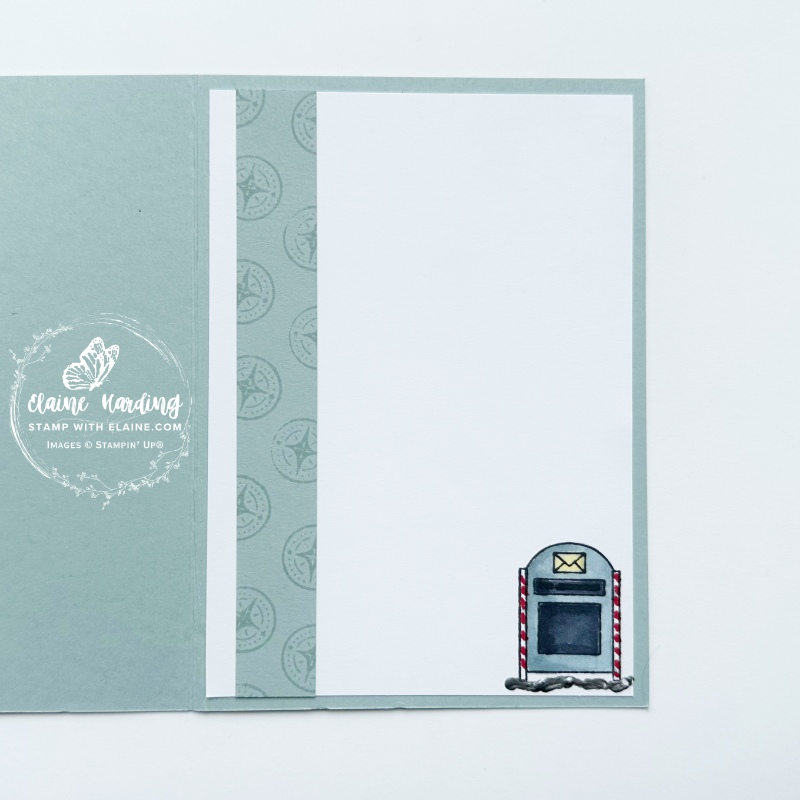
Inside card
- Cut a Basic White mat layer for inside card 5 ½” x 3 ⅞” (14 cm x 9.8 cm).
- Cloud Cover – cut a strip ¾” x 5 ½” and stamp compass with Cloud Cover Stampin’ Spot.
- Adhere to the left of Basic White layer and then adhere Basic White layer to the inside of card base.
- Stamp mail box in bottom right corner. Colour with Real Red Stampin’ Write Marker, Lemon Lolly, Cloud Cover, Secret Sea Stampin’ Blends.
How to make the box
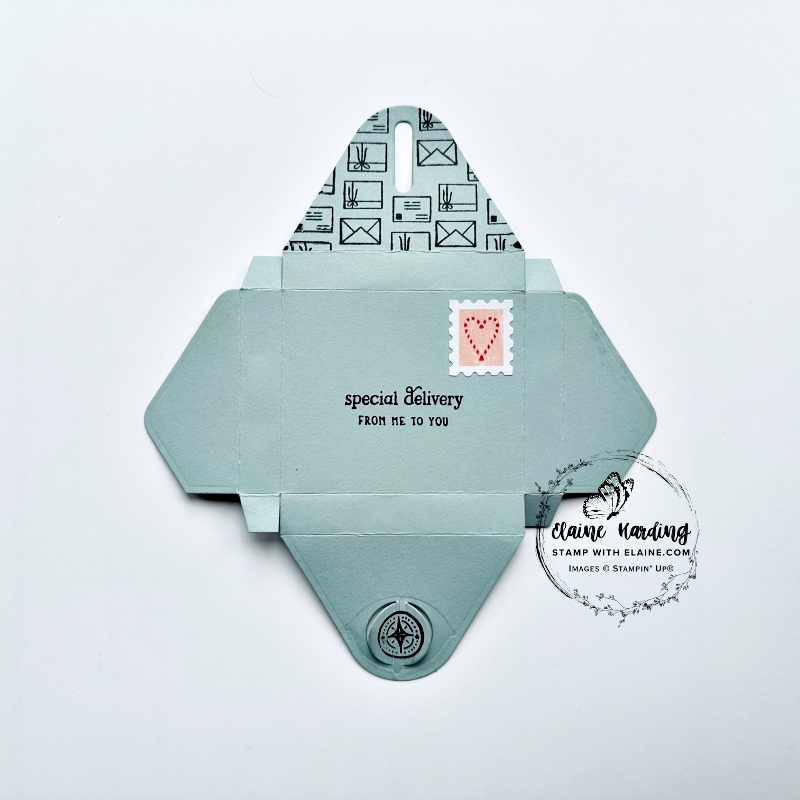
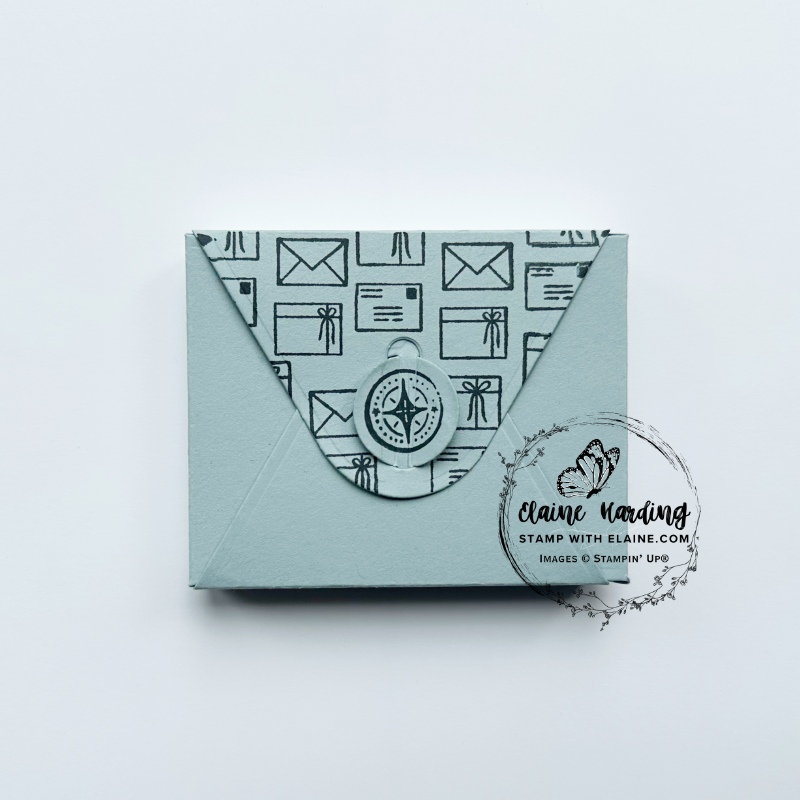
- Use the Jolly Delivery envelop die to cut an envelop box with Cloud Cover card stock.
- Select the circle closure die on the opposite corner from slot, use the three points on die to align with edge of envelop and die cut the closure mechanism.
- Stamp compass image over the closure as pictured on left with Secret Sea ink.
- Fold on first score line of envelop. Ensure you are stamping the group of envelops with Secret Sea ink in the right orientation. Insert a piece of scrap to protect the inside of envelop so that only the flap is stamped.
- Choose a pre-cut stamp from the DSP pre-cut sheets.
- Stamp greeting “special delivery” and “from me to you” to finish.
I can’t wait to use it with a Christmas theme closer to the festive season. There is a star and a heart closure as well, so you can use it for an anniversary or Valentine’s Day. The star could be used at Christmas or for a graduation or special occasion.
Supply list
Listed below is the supply list. Just click on the picture to take you directly to the item in my online store.
Product List![Jolly Delivery Bundle (English) [ 165845 ]](https://assets1.tamsnetwork.com/images/EC042017NF/165845s.jpg "Jolly Delivery Bundle (English) [ 165845 ]")
![Perennial Postage Bundle (English) [ 162608 ]](https://assets1.tamsnetwork.com/images/EC042017NF/162608s.jpg "Perennial Postage Bundle (English) [ 162608 ]")
![Perennial Postage Cling Stamp Set (English) [ 162598 ]](https://assets1.tamsnetwork.com/images/EC042017NF/162598s.jpg "Perennial Postage Cling Stamp Set (English) [ 162598 ]")
![Perennial Postage Dies [ 162607 ]](https://assets1.tamsnetwork.com/images/EC042017NF/162607s.jpg "Perennial Postage Dies [ 162607 ]")
![Cloud Cover A4 Cardstock [ 165293 ]](https://assets1.tamsnetwork.com/images/EC042017NF/165293s.jpg "Cloud Cover A4 Cardstock [ 165293 ]")
![Secret Sea A4 Cardstock [ 165296 ]](https://assets1.tamsnetwork.com/images/EC042017NF/165296s.jpg "Secret Sea A4 Cardstock [ 165296 ]")
![Classic Stampin' Spot Small Assortment 1 [ 166716 ]](https://assets1.tamsnetwork.com/images/EC042017NF/166716s.jpg "Classic Stampin' Spot Small Assortment 1 [ 166716 ]")
![Secret Sea Classic Stampin' Pad [ 165285 ]](https://assets1.tamsnetwork.com/images/EC042017NF/165285s.jpg "Secret Sea Classic Stampin' Pad [ 165285 ]")
![Versamark Pad [ 102283 ]](https://assets1.tamsnetwork.com/images/EC042017NF/102283s.jpg "Versamark Pad [ 102283 ]")
![Basics Wow! Embossing Powder [ 165679 ]](https://assets1.tamsnetwork.com/images/EC042017NF/165679s.jpg "Basics Wow! Embossing Powder [ 165679 ]")
![Embossing Additions Tool Kit [ 159971 ]](https://assets1.tamsnetwork.com/images/EC042017NF/159971s.jpg "Embossing Additions Tool Kit [ 159971 ]")
![Heat Tool - Uk Plug [ 129054 ]](https://assets1.tamsnetwork.com/images/EC042017NF/129054s.jpg "Heat Tool - Uk Plug [ 129054 ]")

- SHOP ONLINE – EARN 10% REWARDS ON ALL PURCHASES OVER £20
- PURCHASE A STARTER KIT : Get £155 worth of products for only £99. Choose from current catalogues and any specials available. Free Shipping. Read more
- Subscribe to my Video Tutorials – click here