
Traditions of Christmas – Part 1. Traditions of Christmas suite is featured on the front cover of the September-December 2025 Mini Catalogue. You’ll find it on pages 21 -27 and it has lots of photos of wonderful projects you can make with it.
The Traditions of Christmas suite is a mega suite consisting of two stamp sets and dies bundles. Traditional Labels Bundle has words only and Christmas Greenery Bundle has imagery only. Included in the suite are coordinating pattern paper, an embossing folder, sequins and ribbon.
How to make the card
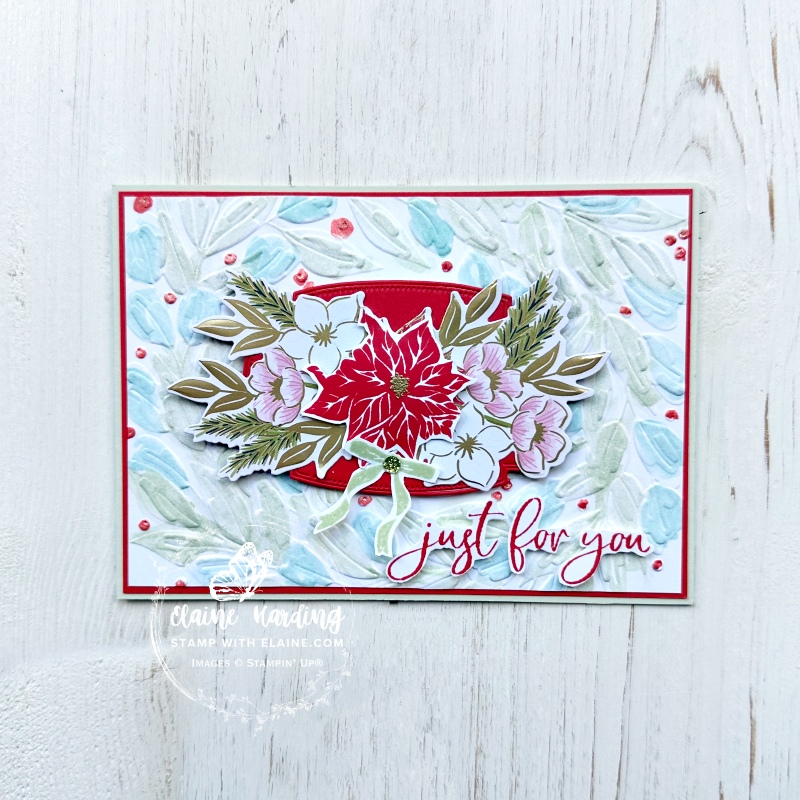
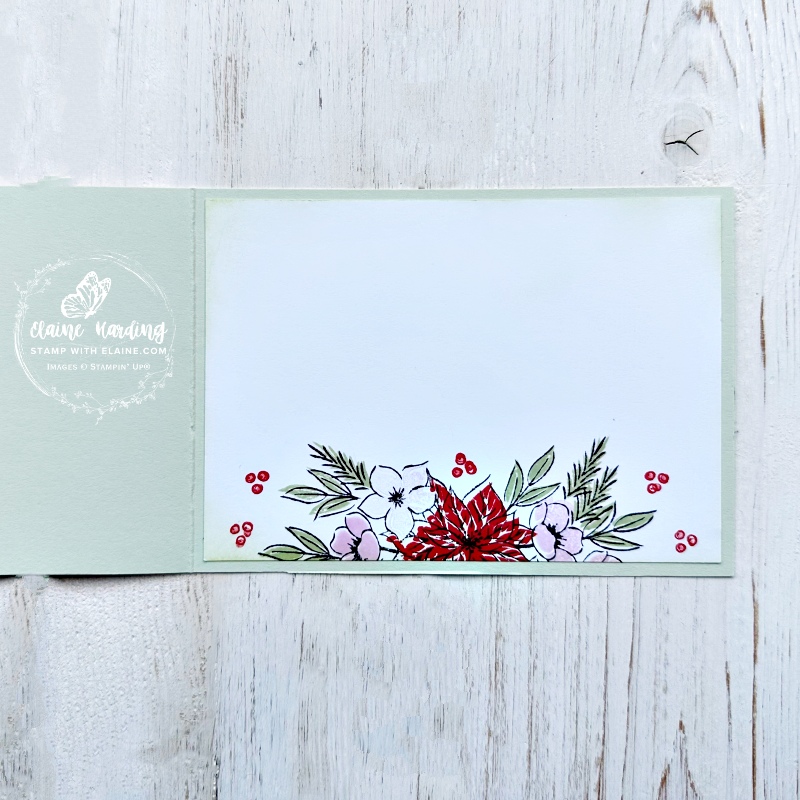
In my card today I’ve featured the embossing folder and a technique on how to colour the embossed images. In fact, there are several features. A label in Poppy Parade was cut from the Traditional Labels die set as well as the sentiment. I separated the words by fussy cutting them and adhering them in a row instead. The floral arrangement was die cut directly from the patterned papers and for inside the card, the bouquet was stamped in Tuxedo black memento ink and the flowers used a two-step stamping method to fill in with coloured ink.
The photo doesn’t do the card justice. I used a White Clear Wink of Stella glimmer brush to pick up the coloured inks as my colouring paint brush and the card sparkles whenever the light catches the raised embossed areas.
Cutting guide
- Card base Soft Sea Foam : 11 ½” x 4 ⅛” (29 cm x 10.5 cm) and folded in half.
- Poppy Parade card front mat layer : 3 ⅞” x 5 ½” (9.8 cm x 14 cm)
- Basic White : 3 ¾” x 5 ⅜” (9.5 cm x 13.5 cm) emboss with Traditional Wreath 3D embossing Folder.
- Scrap of Poppy Parade : Die cut largest label to use as mat layer for centre.
- Inside card : Basic White : 3 ⅞” x 5 ½” (9.8 cm x 14 cm)
- Die cut corresponding floral bouquet from the Traditions of Christmas 12 x 12 Specialty Designer Series Paper.
How to colour embossing folder
- Pick up ink with an acrylic block using Pool Party Ink. Squeeze a drop of Clear Wink of Stella and mix with ink and colour the floral elements on wreath.
- Clean Wink of stella brush and clean block. Pick up ink from Soft Sea Foam ink pad. Squeeze a drop of Clear Wink of Stella and mix with ink and colour leaves on wreath.
- Lastly clean both brush and block. This time pick up ink from Poppy Parade ink and squeeze a drop of Clear Wink of Stella, mix with ink and colour the berries.
Two-step stamping inside card
- Stamp on Basic White layer at the bottom and the upper portion of floral bouquet in Tuxedo Black Memento ink.
- Follow up by using the solid corresponding stamps to fill in colour for the flowers in Poppy Parade for the pointsettia and Bubble Bath for the Helibores. Stamp second generation Bubble Bath for the larger helibore.
- Stamp leaves and pines with Soft Sea Foam.
Card assembly
Card front
- Adhere Poppy Parade mat layer first, then embossed coloured layer.
- Apply dimensionals to back of Poppy Parade label and adhere to centre of wreath.
- Put tear n’ tape or adhesive to centre of label and adhere DSP cut floral bouquet.
- On scrap of Basic White, stamp pointsettia in Poppy Parade. Then stamp centre with versamark and gold emboss. Fussy cut and adhere with dimension aligned over top of floral bouquet’s pointsettia flower. Adhere DSP die cut bouquet to label.
- Stamp bow in Soft Sea foam and fussy cut and adhere underneath pointsettia. Attach Traditional Sparkling sequin to centre of bow.
- On scrap of Basic White, stamp “just for you” in Poppy Parade and fussy cut all three words. Apply dimensionals to the back of each word and arrange in a row to adhere to bottom right of card front.
Inside card
- Adhere two-step stamped Basic White mat layer inside card.
Supply list
Listed below is the supply list. Just click on the picture to take you directly to the item in my online store.
Product List![Traditions Of Christmas Suite Collection (English) [ 165877 ]](https://assets1.tamsnetwork.com/images/EC042017NF/165877s.jpg "Traditions Of Christmas Suite Collection (English) [ 165877 ]")
![Traditional Labels Bundle (English) [ 165865 ]](https://assets1.tamsnetwork.com/images/EC042017NF/165865s.jpg "Traditional Labels Bundle (English) [ 165865 ]")
![Traditional Labels Photopolymer Stamp Set (English) [ 165854 ]](https://assets1.tamsnetwork.com/images/EC042017NF/165854s.jpg "Traditional Labels Photopolymer Stamp Set (English) [ 165854 ]")
![Traditional Labels Dies [ 165864 ]](https://assets1.tamsnetwork.com/images/EC042017NF/165864s.jpg "Traditional Labels Dies [ 165864 ]")
![Christmas Greenery Bundle [ 165873 ]](https://assets1.tamsnetwork.com/images/EC042017NF/165873s.jpg "Christmas Greenery Bundle [ 165873 ]")
![Christmas Greenery Photopolymer Stamp Set [ 165870 ]](https://assets1.tamsnetwork.com/images/EC042017NF/165870s.jpg "Christmas Greenery Photopolymer Stamp Set [ 165870 ]")
![Christmas Greenery Dies [ 165872 ]](https://assets1.tamsnetwork.com/images/EC042017NF/165872s.jpg "Christmas Greenery Dies [ 165872 ]")
![Traditional Wreath 3 D Embossing Folder [ 165874 ]](https://assets1.tamsnetwork.com/images/EC042017NF/165874s.jpg "Traditional Wreath 3 D Embossing Folder [ 165874 ]")
![Traditions Of Christmas 12" X 12" (30.5 X 30.5 Cm) Specialty Designer Series Paper [ 165853 ]](https://assets1.tamsnetwork.com/images/EC042017NF/165853s.jpg "Traditions Of Christmas 12\" X 12\" (30.5 X 30.5 Cm) Specialty Designer Series Paper [ 165853 ]")
![Traditional Sparkling Sequins [ 165875 ]](https://assets1.tamsnetwork.com/images/EC042017NF/165875s.jpg "Traditional Sparkling Sequins [ 165875 ]")
![Basic White A4 Cardstock [ 166781 ]](https://assets1.tamsnetwork.com/images/EC042017NF/166781s.jpg "Basic White A4 Cardstock [ 166781 ]")
![Poppy Parade A4 Cardstock [ 121694 ]](https://assets1.tamsnetwork.com/images/EC042017NF/121694s.jpg "Poppy Parade A4 Cardstock [ 121694 ]")
![Soft Sea Foam A4 Cardstock [ 147012 ]](https://assets1.tamsnetwork.com/images/EC042017NF/147012s.jpg "Soft Sea Foam A4 Cardstock [ 147012 ]")
![Bubble Bath Classic Stampin' Pad [ 161664 ]](https://assets1.tamsnetwork.com/images/EC042017NF/161664s.jpg "Bubble Bath Classic Stampin' Pad [ 161664 ]")
![Poppy Parade Classic Stampin' Pad [ 147050 ]](https://assets1.tamsnetwork.com/images/EC042017NF/147050s.jpg "Poppy Parade Classic Stampin' Pad [ 147050 ]")
![Soft Sea Foam Classic Stampin' Pad [ 147102 ]](https://assets1.tamsnetwork.com/images/EC042017NF/147102s.jpg "Soft Sea Foam Classic Stampin' Pad [ 147102 ]")
![Tuxedo Black Memento Ink Pad [ 132708 ]](https://assets1.tamsnetwork.com/images/EC042017NF/132708s.jpg "Tuxedo Black Memento Ink Pad [ 132708 ]")
![Clear Block C [ 118486 ]](https://assets1.tamsnetwork.com/images/EC042017NF/118486s.jpg "Clear Block C [ 118486 ]")
![Clear Wink Of Stella Glitter Brush [ 141897 ]](https://assets1.tamsnetwork.com/images/EC042017NF/141897s.jpg "Clear Wink Of Stella Glitter Brush [ 141897 ]")
Today’s card illustrates how you can also use the two bundles to make a card which isn’t necessarily for Christmas which means you can use it all year round. No doubt I’ll be revisiting this again in a more festive way during my Countdown to Christmas Series later in the year.

- SHOP ONLINE – EARN 10% REWARDS ON ALL PURCHASES OVER £20
- PURCHASE A STARTER KIT : Get £155 worth of products for only £99. Choose from current catalogues and any specials available. Free Shipping. Read more
- Subscribe to my Video Tutorials – click here