
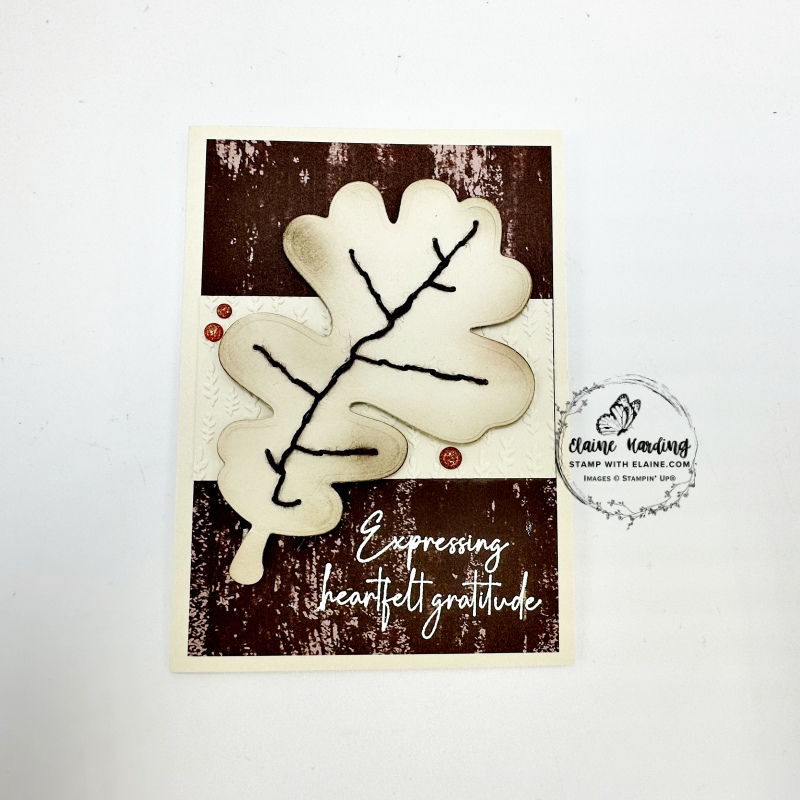
Sewn leaf card – Gathering Moments. Sewn leaf? Yes, you heard right! Last week I showed you the large leaf aperture card and today’s leaf is what was cut out of that Basic Beige card front! Nestle the corresponding die on the leaf and run it through the die cutting machine which will perforate the leaf. This will give you a guide on where to do your stitching!
You need a tapestry needle with a big eye so that the linen thread will pass through. I used a running stitch, then went back in the other direction. It is more economical on your thread, and a tip is not to tie a knot at the end. Simply weave the thread at the back through the stitches and secure with some cello tape.
Cutting Guide
- Card base : Basic Beige cut at 5 ¾” x 8 ¼” (14.5 cm x 21 cm) and folded in half.
- Gathering Together 12″x 12″ (30.5 x 30.5 cm) Specialty DSP : 3 ⅞” x 5 ½” (9.8 cm x 14 cm)
- Basic Beige for card front 2″ x 3 ¾” (5 cm x 9.5 cm). Place in Gathering Leaves Embossing Folder to emboss.
- Inside card : Basic White 3 ⅞” x 5 ½” (9.8 cm x 14 cm).
- Basic Beige strip for inside card : 1″ x 3 ⅞” (2.5 cm x 9.8 cm). Place in Gathering Leaves Embossing Folder to emboss.
Assembling card
Card front
- Adhere Gathering Together Specialty DSP on card front leaving an even border on all 4 sides.
- Next adhere the embossed 2″ x 3 ¾” (5 cm x 9.5 cm) Basic Beige piece in the middle on top of DSP.
- Prepare the leaf by using a blending brush with Early Espresso ink to darken the edges. Use a running stitch to sew the detail on leaf, and fill in the gaps with a reverse running stitch as shown. Secure ends with cello tape. Apply dimensionals on back. Set aside.
- White emboss sentiment in bottom toward the right of card front and heat set.
- Remove backing on dimensionals and adhere to card front as shown and finally add the Cajun Craze & Gold dots.
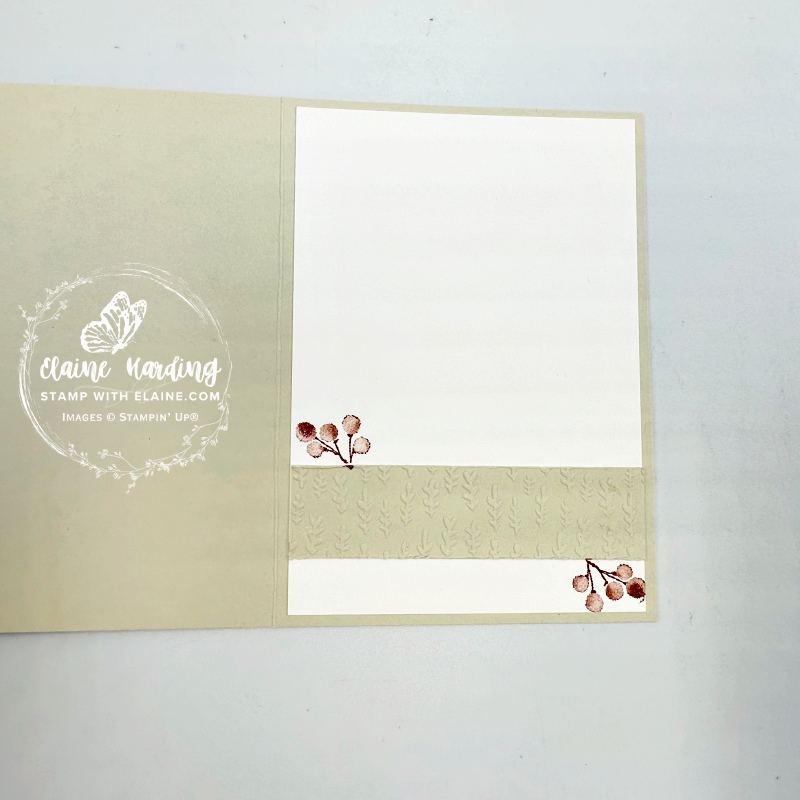
Inside card
- Emboss the 1″x 3 ⅞” (2.5 cm x 9.8 cm) Basic Beige strip with Gathering Leaves embossing folder.
- Distress the long top and bottom sides with edge of scissors and adhere to Basic White layer.
- Stamp the berries in Cherry Cobbler ink as shown. Avoid getting ink on the embossed piece.
- Adhere Basic White layer to inside of card.
How quick and easy was that? Hope you liked it. A different leaf next time! Thanks for stopping by, but before I go some more exciting news!
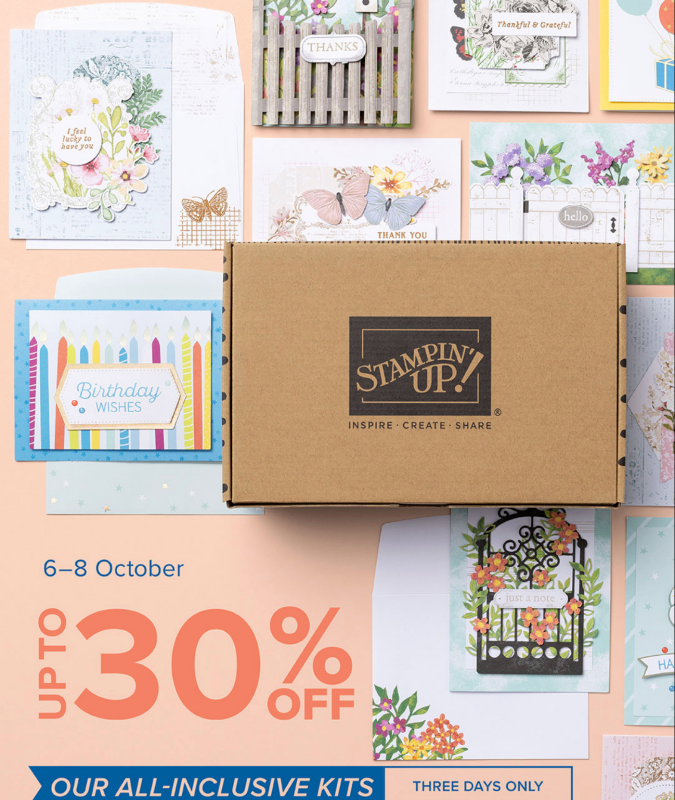
3 Day Sale! Up to 30% off on all Kits from Kits Collection
Starts from 6-8 October!
This three-day sale is the perfect opportunity to stock up on your favourite kits from the Kits Collection. Stampin’ Up! kits come with everything you need for a fun and creative experience. From season’s greetings to birthday wishes to home decor, you can find almost anything to suit your crafting needs in our Kits Collection. And with up to 30% off, now’s the perfect time to grab that kit (or two, or three!) that you’ve been eyeing. Some kits may sell out faster than others, so don’t wait to start shopping on 6 October!
Supply list
Listed below is the supply list. Just click on the picture to take you directly to the item in my online store.
Product List![Gathering Moments Bundle (English) [ 165980 ]](https://assets1.tamsnetwork.com/images/EC042017NF/165980s.jpg "Gathering Moments Bundle (English) [ 165980 ]")
![Gathering Together 12" X 12" (30.5 X 30.5 Cm) Specialty Designer Series Paper [ 165969 ]](https://assets1.tamsnetwork.com/images/EC042017NF/165969s.jpg "Gathering Together 12\" X 12\" (30.5 X 30.5 Cm) Specialty Designer Series Paper [ 165969 ]")
![Gathering Leaves Embossing Folder [ 165983 ]](https://assets1.tamsnetwork.com/images/EC042017NF/165983s.jpg "Gathering Leaves Embossing Folder [ 165983 ]")
![Early Espresso & Old Olive Linen Thread Pack [ 165986 ]](https://assets1.tamsnetwork.com/images/EC042017NF/165986s.jpg "Early Espresso & Old Olive Linen Thread Pack [ 165986 ]")
![Cajun Craze & Gold Dots [ 165984 ]](https://assets1.tamsnetwork.com/images/EC042017NF/165984s.jpg "Cajun Craze & Gold Dots [ 165984 ]")
![Gold 1 1/2" (3.8 Cm) Open Weave Trim [ 165715 ]](https://assets1.tamsnetwork.com/images/EC042017NF/165715s.jpg "Gold 1 1/2\" (3.8 Cm) Open Weave Trim [ 165715 ]")
![Basic Beige A4 Cardstock [ 164512 ]](https://assets1.tamsnetwork.com/images/EC042017NF/164512s.jpg "Basic Beige A4 Cardstock [ 164512 ]")
![Basic White A4 Cardstock [ 166781 ]](https://assets1.tamsnetwork.com/images/EC042017NF/166781s.jpg "Basic White A4 Cardstock [ 166781 ]")
![Early Espresso Classic Stampin' Pad [ 147114 ]](https://assets1.tamsnetwork.com/images/EC042017NF/147114s.jpg "Early Espresso Classic Stampin' Pad [ 147114 ]")
![Cajun Craze Classic Stampin' Pad [ 147085 ]](https://assets1.tamsnetwork.com/images/EC042017NF/147085s.jpg "Cajun Craze Classic Stampin' Pad [ 147085 ]")
![Versamark Pad [ 102283 ]](https://assets1.tamsnetwork.com/images/EC042017NF/102283s.jpg "Versamark Pad [ 102283 ]")
![Embossing Additions Tool Kit [ 159971 ]](https://assets1.tamsnetwork.com/images/EC042017NF/159971s.jpg "Embossing Additions Tool Kit [ 159971 ]")
![Basics Wow! Embossing Powder [ 165679 ]](https://assets1.tamsnetwork.com/images/EC042017NF/165679s.jpg "Basics Wow! Embossing Powder [ 165679 ]")
![Heat Tool - Uk Plug [ 129054 ]](https://assets1.tamsnetwork.com/images/EC042017NF/129054s.jpg "Heat Tool - Uk Plug [ 129054 ]")
![Blending Brushes [ 153611 ]](https://assets1.tamsnetwork.com/images/EC042017NF/153611s.jpg "Blending Brushes [ 153611 ]")

- SHOP ONLINE – EARN 10% REWARDS ON ALL PURCHASES OVER £20
- PURCHASE A STARTER KIT : Get £155 worth of products for only £99. Choose from current catalogues and any specials available. Free Shipping. Read more
- Subscribe to my Video Tutorials – click here