
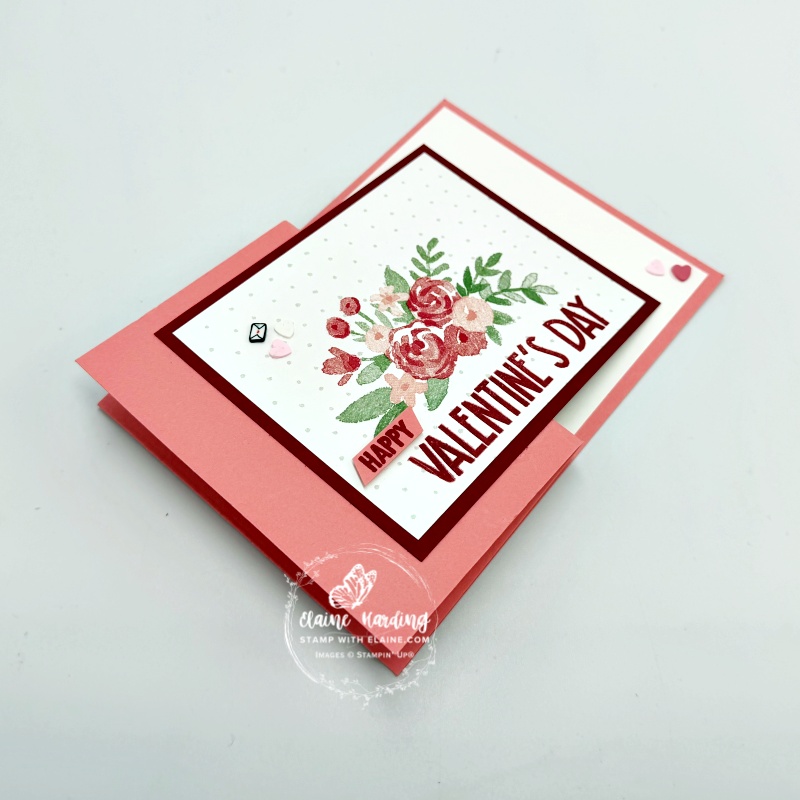
Happy Valentine’s Day card. I don’t normally post on a Saturday but as Valentine’s day falls on Saturday, I wanted to wish you a Happy Valentine’s Day. This is my last Valentine project of the year and I certainly got my money’s worth from the Love Notes 6″x 6″ (15.2 x 15.2 cm) papers!
I also used one of the new stamp sets called Reason to Celebrate to add the sentiment on the fun fold panel on the front.
Reason to Celebrate
This is a stamp set on page 19 of the new Jan-Apr 2026 Mini and is a two step stamping set. It allows you to layer two or more images to create one final image with extrature texture and dimension in the colours of your choice.
The stamp sets have sentiments for most occasions, celebrating life’s moments from holidays to birthdays and anniversaries.
How to make the card
Cutting guide
- Card base : 4 ⅛” x 11 ½” (10.5 cm x 29 cm). Long side score at 5 ¾” (14.5 cm).
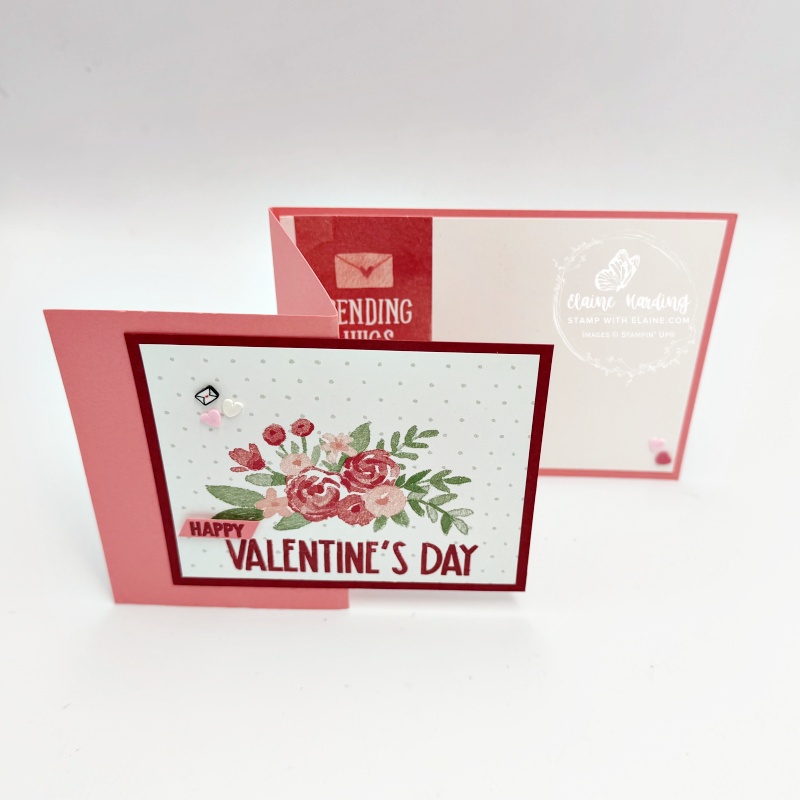
- Fold back front of card in half.
- Cut Cherry Cobbler mat layer at 3 ½” x 4 ¼” (8.9 cm x 10.8 cm)
- Trim Love Notes DSP on all 4 sides to keep floral design in centre at 3 ¼” x 4″ (8.9 cm x 10.2 cm)
- Inside card : Basic White : 3 ⅞” x 5 ½” (9.8 cm x 14 cm)
- Love Notes DSP : Sending Hugs piece measures 1 ¾” x 3″ (4.4 cm x 7.6 cm). Trim ¼” (0.6 cm) off the top. At the bottom, find the centre at ⅞” (2.2 cm) and cut ⅜” (1 cm) up, then from each end cut to centre to create flag end.
Assembly
- Burnish the folded back front of card.
- Adhere Cherry Cobbler piece to left side of card – be careful not to get glue on the right underside so that it won’t accidentally adhere to inside of card and make sure it’s equidistant top and bottom and left and right on card base.
- Stamp “Happy” from Reason to Celebrate in Cherry Cobbler ink on scrap of Flirty Flamingo and trim as pictured.
- On Love Notes floral mat layer, stamp “Valentine’s Day” in Cherry Cobbler ink.
- Adhere to Cherry Cobbler mat layer leaving an even border on all 4 sides.
- Place tiny dots of adhesive in top left corner and adhere the Loose Valentine Assortment. I used a letter, and a pink and white heart.
- Apply mini dimensionals to the back of the “happy” sentiment and adhere above Valentine’s Day greeting as pictured.
Inside card
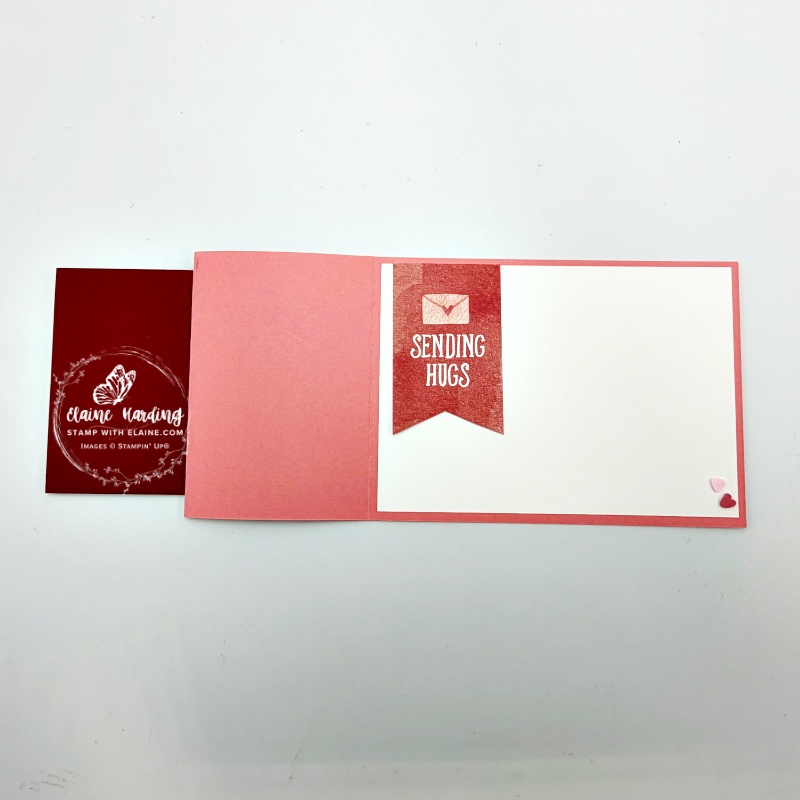
- First adhere Basic White piece inside the card.
- Then adhere trimmed “sending hugs” flag end dsp to top left of Basic White piece.
- Close card and apply 2 tiny dots of glue in bottom right corner and adhere Loose Valentine Assortment – a pink and darker pink heart to finish.
Supply list
Listed below is the supply list. Just click on the picture to take you directly to the item in my online store.
Product List![Reason To Celebrate Photopolymer Stamp Set (English) [ 166905 ]](https://assets1.tamsnetwork.com/images/EC042017NF/166905s.jpg "Reason To Celebrate Photopolymer Stamp Set (English) [ 166905 ]")
![Love Notes 6" X 6" (15.2 X 15.2 Cm) Mix & Match Designer Series Paper [ 166985 ]](https://assets1.tamsnetwork.com/images/EC042017NF/166985s.jpg "Love Notes 6\" X 6\" (15.2 X 15.2 Cm) Mix & Match Designer Series Paper [ 166985 ]")
![Basic White A4 Cardstock [ 159228 ]](https://assets1.tamsnetwork.com/images/EC042017NF/159228s.jpg "Basic White A4 Cardstock [ 159228 ]")
![Cherry Cobbler A4 Card Stock [ 121681 ]](https://assets1.tamsnetwork.com/images/EC042017NF/121681s.jpg "Cherry Cobbler A4 Card Stock [ 121681 ]")
![Flirty Flamingo A4 Cardstock [ 141421 ]](https://assets1.tamsnetwork.com/images/EC042017NF/141421s.jpg "Flirty Flamingo A4 Cardstock [ 141421 ]")
![Cherry Cobbler Classic Stampin' Pad [ 147083 ]](https://assets1.tamsnetwork.com/images/EC042017NF/147083s.jpg "Cherry Cobbler Classic Stampin' Pad [ 147083 ]")
![Loose Valentine's Assortment [ 167074 ]](https://assets1.tamsnetwork.com/images/EC042017NF/167074s.jpg "Loose Valentine's Assortment [ 167074 ]")

- SHOP ONLINE – EARN 10% REWARDS ON ALL PURCHASES OVER £20
- PURCHASE A STARTER KIT : Get £155 worth of products for only £99. Choose from current catalogues and any specials available. Free Shipping. Read more
- Subscribe to my Video Tutorials – click here