
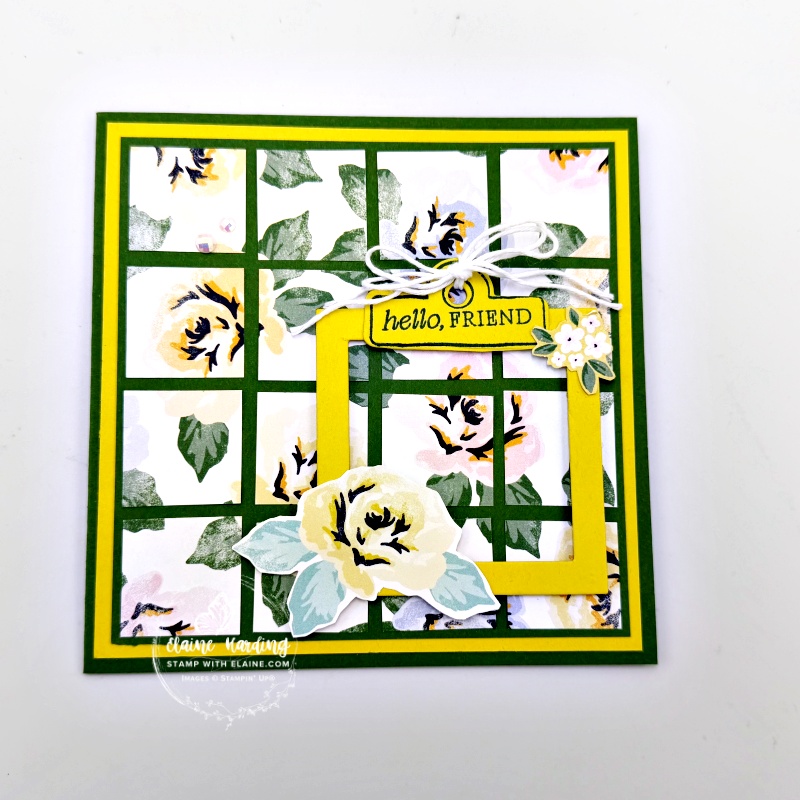
Square mosaic card – plus Free Shipping just announced from 18-20 February on orders £60 excluding coupons, rewards, bonus day rewards and shipping. Expedited shipping is not applicable for free shipping items.

Joyful Squares
Some time ago I used the Joyful Squares bundle to make a scrapbook layout which you can see HERE. Today I’m using it on a card. On page 55 of the Jan-Apr 2026 mini, you will find the Square Snippets 12″x 12″ (30.5 x 30.5 cm) Designer Series Paper (DSP) which is perfectly paired to use with the Joyful Squares bundle.
Square Snippets Designer Series Paper
There are 4 sheets each of 3 double-sided designs. The DSP features 3″ x 3″ (7.6 x 7.6 cm) designs that you can arrange in a grid on a scrapbook page, layer on cards, or use as playful accents. With versatile patterns for every season, this paper is a must-have for year-round crafting fun! There is also one design which features 4″x 4″ (10.2 x 10.2 cm) designs.
How to cut the mosaic pieces
In order to recreate the mosaic as a “whole” picture you have to be aware of the orientation of the paper and the position of each square after it has been cut. Mark each square with an arrow pointing up, also the row number vertically as well as horizontally. If you do this initially, you won’t get in a hot mess trying to piece all the pieces together again! Ask me how I know!!!
- Cut a 4″x 4″(10.2 x 10.2 cm) square into 4 strips of 1″x 4″ (2.5 cm x 10.2 cm).
- On the long side of each strip, cut them into 1″ (2.5 cm) squares and mark their position and orientation.
- Set aside.
Card base and mat layers
- Card base : 5″ x 10″ (12.5 cm x 25 cm) and folded in half.
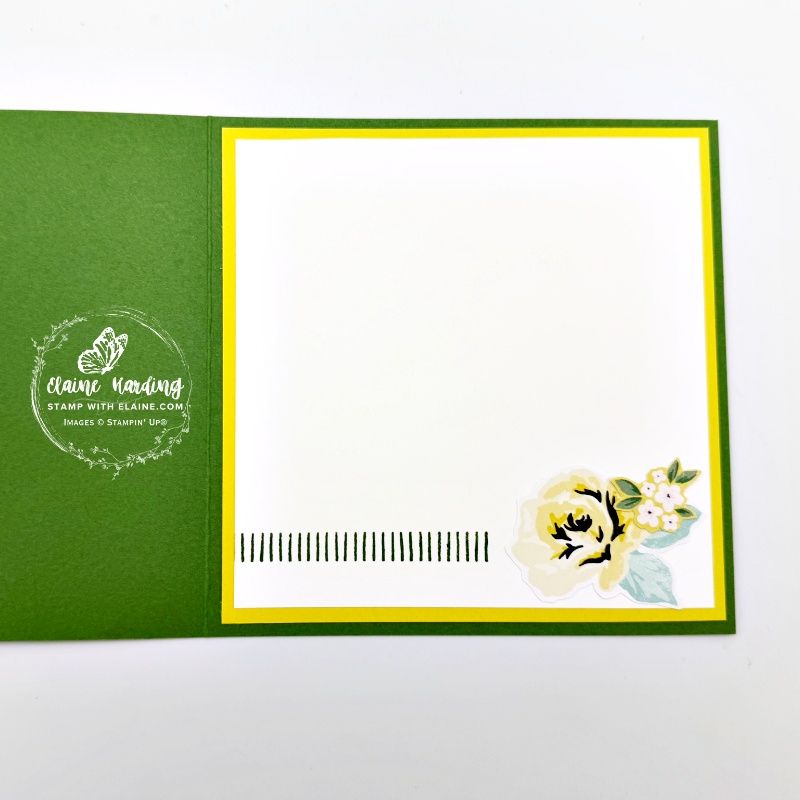
- Darling Duckling mat layer #1 card front and inside card : cut 2 pieces 4 ¾” x 4 ¾” (12 cm x 12 cm)
- Garden Green mat layer #2 : 4 ½”x 4 ½” (11.5 cm x 11.5 cm)
- Basic White mat layer #2 inside card : 4 ½”x 4 ½” (11.5 cm x 11.5 cm)
Square Snippets Pattern Paper
- Select a co-ordinating square of DSP to fussy cut some flowers
- Choose a second square to cut smaller flowers for embellishing with.
Die cutting Joyful Squares dies
- On a scrap of Darling Duckling, stamp clipboard stamp in Garden Green.
- Stamp “hello friend” (coming soon – a March Online Exclusive from Delicate Whispers stamp set) in the centre of clipboard stamp and die cut.
- Die cut square frame with Darling Duckling scrap.
Assembling card
- Adhere Darling Duckling mat layers to front of card and one for the inside of card leaving an even border on all 4 sides.
- Next adhere Garden Green layer on front of card.
- Arrange your mosaic pieces on top of Garden Green layers. Adhere the 4 corner ones first so you have a guide for the remaining squares.
- Apply dimensionals on back of Darling Duckling square frame and frame a section of your mosaic picture. Because I chose a floral pattern, I framed my rose in the bottom right corner.
- Adhere your clipboard at the top, followed by the fussy cut floral pieces.
- Take a double length of White Bakers Twine and tie a bow as pictured.
- Add Pearlized faceted circles in top left corner.
- Adhere your fussy cut flowers in the bottom right corner.
Optional
- (Optional) Stamp the striped detail in Garden Green – this was an exclusive stamp set from the 2026 Virtual Card Making Retreat. If you don’t have it, substitute it for something else or omit it completely.
Supply list
Listed below is the supply list. Just click on the picture to take you directly to the item in my online store.
Product List![Joyful Squares Bundle (English) [ 166850 ]](https://assets1.tamsnetwork.com/images/EC042017NF/166850s.jpg "Joyful Squares Bundle (English) [ 166850 ]")
![Joyful Squares Dies [ 166849 ]](https://assets1.tamsnetwork.com/images/EC042017NF/166849s.jpg "Joyful Squares Dies [ 166849 ]")
![Joyful Squares Photopolymer Stamp Set (English) [ 166847 ]](https://assets1.tamsnetwork.com/images/EC042017NF/166847s.jpg "Joyful Squares Photopolymer Stamp Set (English) [ 166847 ]")
![Square Snippets 12" X 12" (30.5 X 30.5 Cm) Designer Series Paper [ 166993 ]](https://assets1.tamsnetwork.com/images/EC042017NF/166993s.jpg "Square Snippets 12\" X 12\" (30.5 X 30.5 Cm) Designer Series Paper [ 166993 ]")
![Garden Green A4 Card Stock [ 108605 ]](https://assets1.tamsnetwork.com/images/EC042017NF/108605s.jpg "Garden Green A4 Card Stock [ 108605 ]")
![Darling Duckling A4 Cardstock [ 165294 ]](https://assets1.tamsnetwork.com/images/EC042017NF/165294s.jpg "Darling Duckling A4 Cardstock [ 165294 ]")
![Basic White A4 Cardstock [ 166781 ]](https://assets1.tamsnetwork.com/images/EC042017NF/166781s.jpg "Basic White A4 Cardstock [ 166781 ]")
![Garden Green Classic Stampin' Pad [ 147089 ]](https://assets1.tamsnetwork.com/images/EC042017NF/147089s.jpg "Garden Green Classic Stampin' Pad [ 147089 ]")
![Baker's Twine Essentials Pack [ 155475 ]](https://assets1.tamsnetwork.com/images/EC042017NF/155475s.jpg "Baker's Twine Essentials Pack [ 155475 ]")
![Pearlized Faceted Circles [ 166978 ]](https://assets1.tamsnetwork.com/images/EC042017NF/166978s.jpg "Pearlized Faceted Circles [ 166978 ]")

- SHOP ONLINE – EARN 10% REWARDS ON ALL PURCHASES OVER £20
- PURCHASE A STARTER KIT : Get £155 worth of products for only £99. Choose from current catalogues and any specials available. Free Shipping. Read more
- Subscribe to my Video Tutorials – click here