
2024-26 In Colour Challenge. The brief for July’s Tech 4 Stampers Blog hop was to choose any 3 of the 2024-26 In Colours to make a card. This narrowed down the choice to just five colours. Stampin’ Up! had already worked out which 5 colours would compliment each other, so it wasn’t difficult to do this 2024-26 In Colour Challenge.
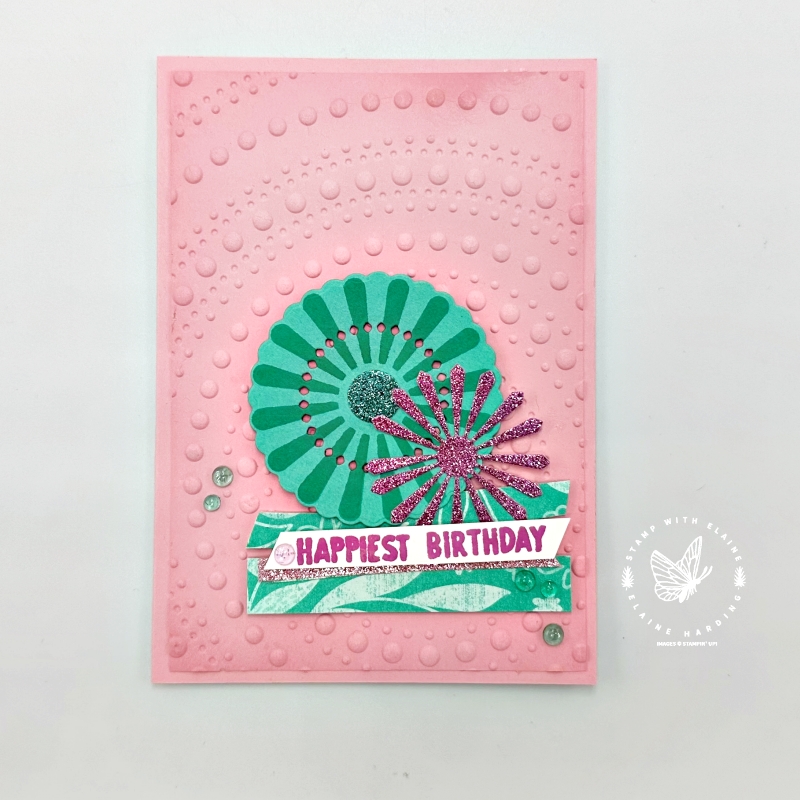
I’ve used the Round we Go bundle and the Dotted Circle 3D embossing folder and the colours I chose are Pretty in Pink, Summer Splash and Petunia Pop. Initially, my idea was to create a home decor piece because there is a die which incorporates the folds and a scalloped rim in the Round we Go dies set. I started with a card, then a 3D project.
Welcome to July’s Tech 4 Stamper’s Blog Hop!

The Build & Bloom Stampers Blog hop (formerly Tech 4 Stampers)is a monthly subscription group run by Louise Sims. She mentors and enables members to understand IT jargon and equips them with a fountain of Technical knowledge to build or manage their own websites. It takes the mystery out of “tech” and I’ve certainly grown in confidence thanks to her expertise, patience and guidance. Not only that, I’ve met and made new friends with my fellow “Techs” and love the camaraderie within the group.
The card
This is a standard Pretty in Pink card with a mat layer ¼” smaller than the card front. I embossed this with the Dotted Circles 3D embossing folder and used a blending brush to darken the edges with Pretty in Pink ink.
I stamped and die cut the largest wheel in Summer Splash on Summer Splash card stock, die cut a smaller die element out of the 2024-2026 In Color Glimmer 12″x 12″ (30.5 x 30.5 cm) Specialty Paper in Petunia Pop, and a sliver in Pretty in Pink. Also cut strips from the 2024-2026 In Color 6″x 6″ (15.2 x 15.2 cm) DSP in Summer Splash and layered these as shown on the card. Lastly I stamped the greeting and laid it on top.
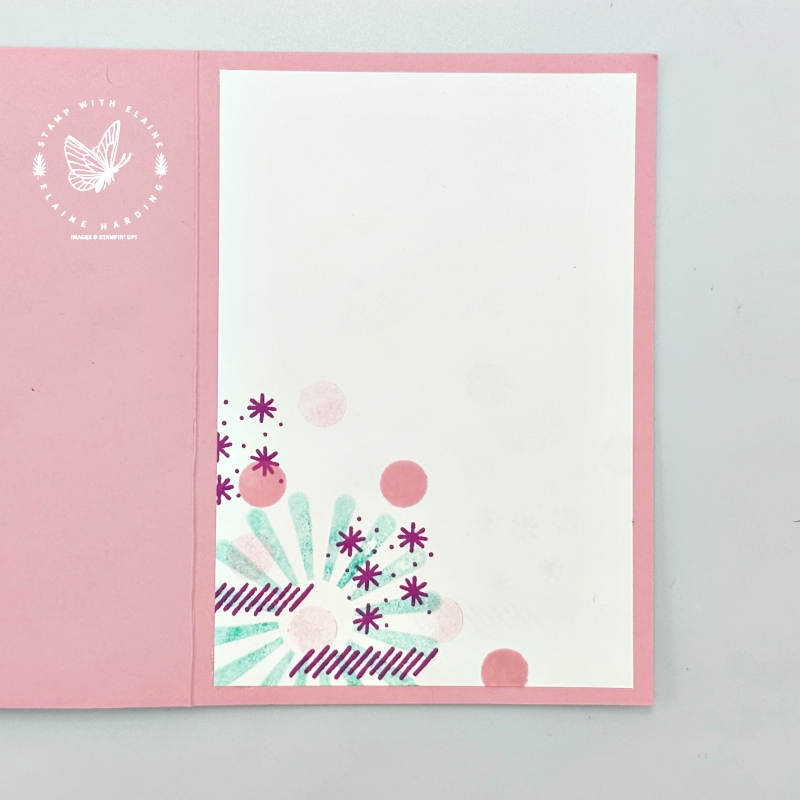
For the inside of the card, I used the same colour palette – Pretty in Pink, Summer Splash and Petunia Pop using a variety of second generation stamping for the large Summer Splash wheel and Pretty in Pink dots, and first generation ink for the stars & dots, hashed stamp and dots.
Home Decor piece
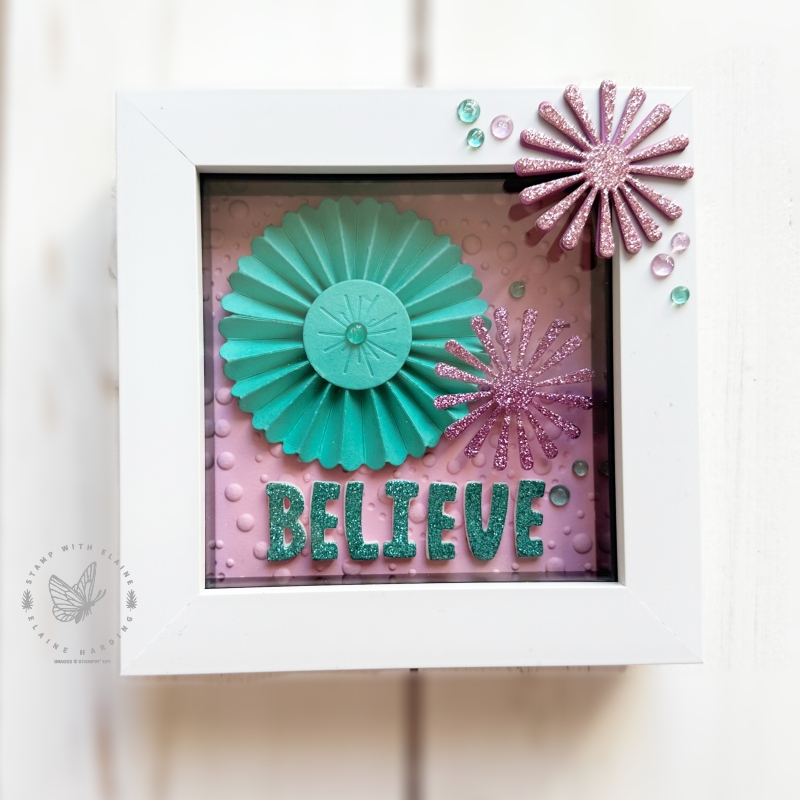
This would make a great gift to go with the birthday card. The overall size of the frame is 5″ x 5″ (12.7 x 12.7 cm) to fit a 4″x 4″ (10.2 x 10.2 cm) photo or project inside.
How to reduce size of pinwheel
The pinwheel die creates a pinwheel with a 3″ diameter – so I had to reduce its circumference by ¼” because if I didn’t, there wouldn’t be room for anything else! How did I do that?
It didn’t work with lightweight paper because I ran it through twice to reduce the size and it cut right through the paper and broke up when you tried to assemble the pinwheel. So I switched to ordinary card stock and die cut two pieces. I aligned the scalloped edge along the 1 ¼” mark and trimmed the bottom pointy edge off. Then I aligned this trimmed piece with the scored lines on the scalloped edge piece at the bottom and secured it with low tack tape. Using this as a guide, I fussy cut the pointy edges and voilà you now have a 2 ½” diameter pinwheel!
Assembling Home Decor piece
I cut a 4″x 4″ (10.2 x 10.2 cm) Pretty in Pink card stock and embossed it with the Dotted Circles 3D embossing folder. To assemble the 2 ½” Summer Splash pinwheel – you’ll need to die cut one of the larger circle dies to adhere to the back of the pinwheel in order to keep its shape and added a smaller circle to adhere on top as decoration.
The Petunia Pop glimmer pinwheel has a stack of 4 dimensionals trimmed so that it would not be visible from above and adhered overlapping the Summer Splash pinwheel. I attached Summer Splash Glimmer paper to a foam adhesive sheet and die cut the letters from the Mini Alphabet Dies to spell “Believe”. Lastly I added some gems from Tinsel Gems Three Pack as a finishing touch.
To decorate the outside, I attached an adhesive sheet to the back of the Pretty in Pink card stock before die cutting 4 pinwheel elements with the same die. Remove the backing tape, stack and adhere 4 pieces together. Die cut a 5th one with Pretty in Pink Glimmer paper to glue on top. Then adhere it to the frame in the top right corner ensuring that it does not jut out and lastly added some tinsel gems.
Supply list
Listed below is the supply list. Just click on the picture to take you directly to the item in my online store.
Product List")


 Specialty Paper")
 Designer Series Paper")


Thanks for visiting. I would love to know what you think of my project and would appreciate it if you could leave a comment. To visit the next person on the list and see their fabulous creations, simply click on the link below or before my name depending who you visited initially. Happy hopping!

- SHOP ONLINE – EARN 10% REWARDS ON ALL PURCHASES OVER £20
- PURCHASE A STARTER KIT : Get £155 worth of products for only £99. Choose from current catalogues and any specials available. Free Shipping. Read more
- Subscribe to my Video Tutorials – click here
Elaine, love your card and the frame! Very pretty!
Thank you Diane, glad you like it.
Love the frame, how lovely x
Thanks Angela, had fun making it.
Beautiful card and frame
Thanks, Carol. I enjoyed the challenge to resize the Round we Go wheel.
Lovely card and frame, great idea!
Thanks Tina. It was nice to do a home decor piece for a change.
gorgeous projects ? thank you for sharing x
Thank you, Cary. I enjoyed doing the frame – just something a little different from the norm.
You always create beautiful cards, loving the frame! ❤️
Thanks, Elaine – the frame has been buzzing in my head for a while, so glad it turned out as I wanted.
What gorgeous projects! I love how you have decorated the inside of your card. Thank you x
Thanks, Lisa. It was a fun challenge this month.
Lovely card and I love your Home Decor frame.
Thank you, it made a nice change.