
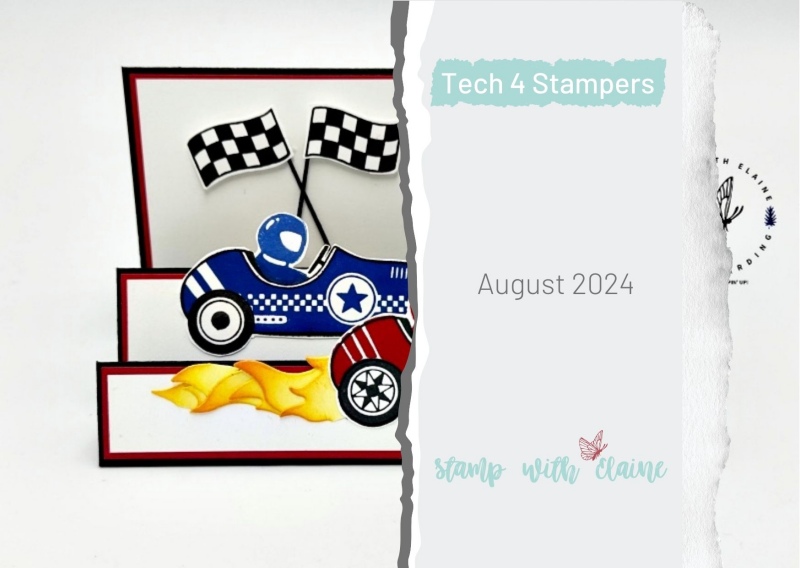
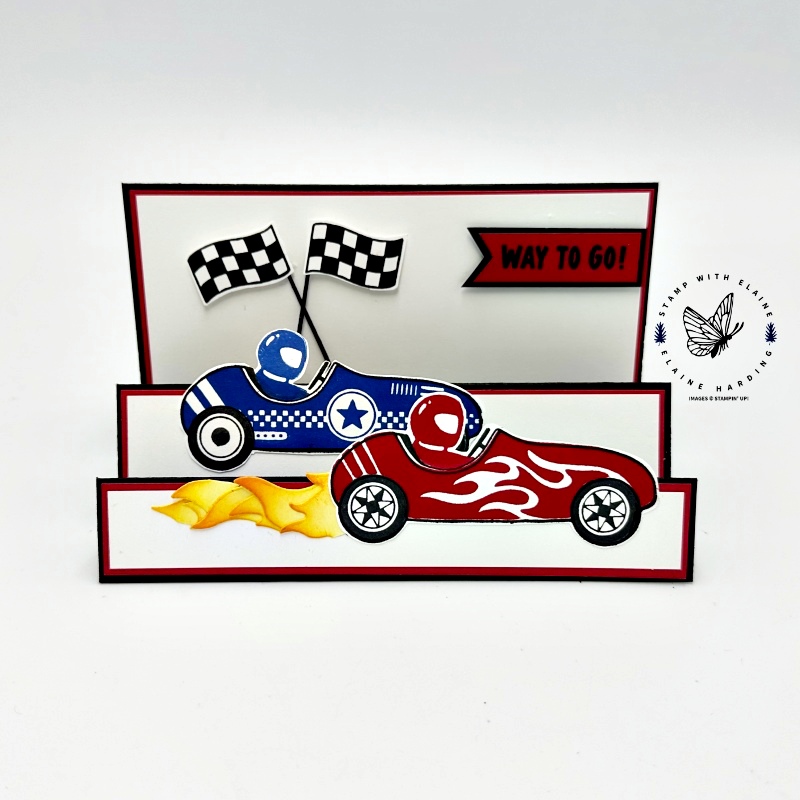
Cards for kids – Racing By. This month Tech 4 Stampers Blog Hop theme is cards for kids. One of my grandsons is learning to drive, and at 17 would you consider a teenager still a “kid”? I made this card with him in mind and picked the Racing By stamp set because it was just so appropriate. He also recently saved up to buy his first car with a little help from the Bank of Mum and Dad.
Full step card
I’ve made a full step card but had to think of a way to prevent it from completely collapsing when on display, so that’s why I avoid making tent cards. If I do any landscape cards, I cut them at 4 ⅛” x 11 ½” (10.5 cm x 29 cm) scored at 5 ¾” (14.5 cm). That way they have a lot more support as with Portrait cards. However, I’ve adjusted the width for today’s card and the card base for the Full Step Fun Fold card is 5 ½” x 11″ (14 cm x 28 cm) and added struts to prevent it from sliding and collapsing.

The Build & Bloom Stampers Blog hop (formerly Tech 4 Stampers)is a monthly subscription group run by Louise Sims. She mentors and enables members to understand IT jargon and equips them with a fountain of Technical knowledge to build or manage their own websites. It takes the mystery out of “tech” and I’ve certainly grown in confidence thanks to her expertise, patience and guidance. Not only that, I’ve met and made new friends with my fellow “Techs” and love the camaraderie within the group.
Additional dies
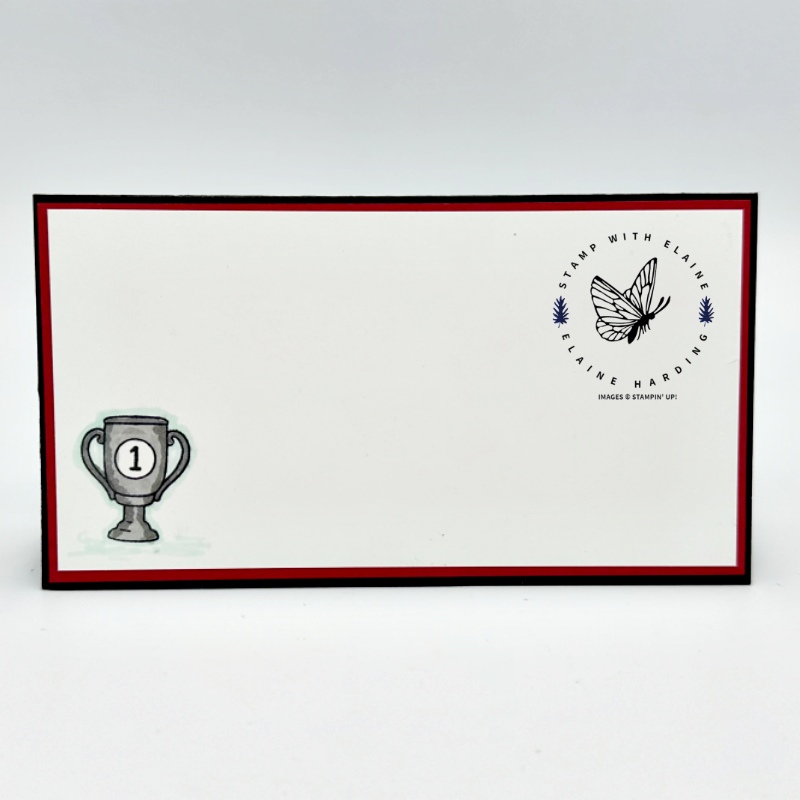
I also used the Bistro Burger Dies for the flames coming out of the back of the car as well as the toothpick die for the poles for the flags. The livery on one of the cars has flames on the side so I thought that the Bistro Burger flame die would be a great accessory to add. It’s so satisfying to be able to mix and match your stash, don’t you think? For somewhere to address the recipient, I added mat layers and stamped the Trophy Cup on the back of the card.
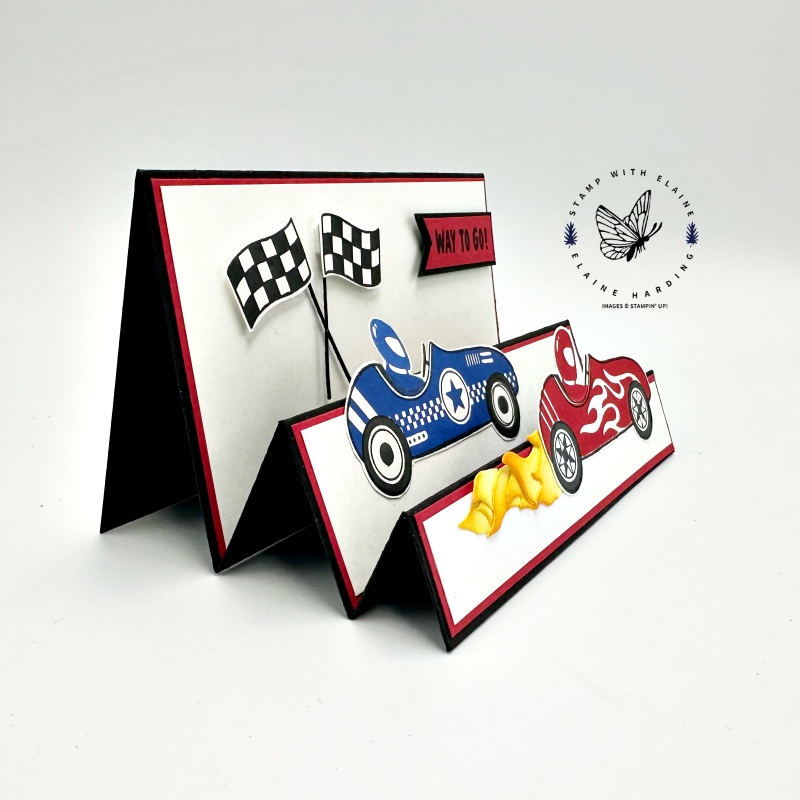
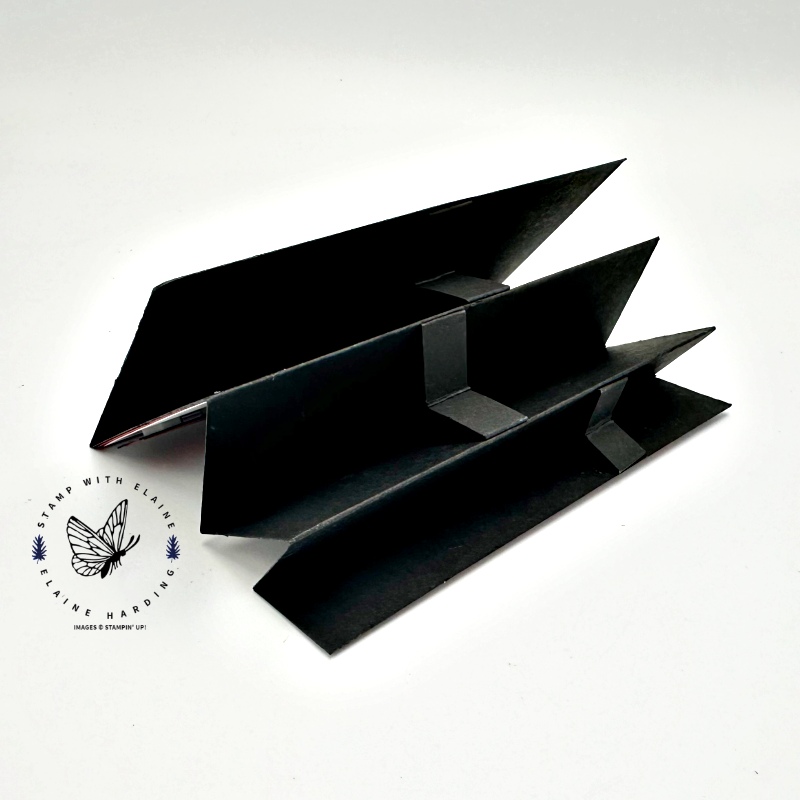
On the left is a side view of the full step card. To prevent it from sliding and collapsing, I added some struts at the bottom of the card, but staggered the struts in order to distribute the bulk.
Cutting guide
- Card base : Basic Black 5 ½” x 11″ (14 cm x 28 cm). Long side on top, score at 1″, 2″, 3 ½”, 5″ and 8″ (2.5 cm, 5 cm, 8.9 cm, 12.7 cm, and 20.3 cm)
- Real Red mat layer #1 for the respective steps : 1 x ⅞” x 5 ⅜”, 1 x 1 ⅜” x 5 ⅜” and 2 x 2 ⅞” x 5 ⅜”. (1 x 12.2 cm x 13.7 cm, 1 x 3.5 cm x 13.7 cm, and 2 x 7.3 cm x 13.7 cm)
- Basic White mat layer #2 for the respective steps : 1 x ¾” x 5 ¼”, 1 x 1 ¼” x 5 ¼” and 2 x 2 ¾” x 5 ¼” (1 x 1.9 cm x 13.3 cm, 1 x 3.2 x 13.3 cm and 2 x 7 cm x 13.3 cm)
- Strut 1 between step 1 & 2 : Basic Black 1 x ½” x 2″. Long side score ½”, 1″ , 1 ½”.
- Remaining struts for other 2 steps : Basic Black 2 x ½” x 2″. Long side score ½”, 1″, 1 ¾”.
- Basic White scraps for stamping Racing Cars and Flags and die cut Flames.
Assembly instructions
- Burnish score lines on Basic Black card base.
- Adhere Real Red layers to respective steps according to size and subsequently the Basic White layers on top of red layers leaving an even border all round on both layers.
- On scraps of Basic White, stamp one racing car in Real Red, and the other in Blueberry Bushel. Stamp the wheels with corresponding wheels on each car with Tuxedo Black Memento Ink and stamp corresponding drivers on each car in Real Red or Blueberry Bushel. Also stamp a pair of flags in Tuxedo Black Memento Ink. Fussy cut the cars and flags and set aside.
- Bistro Burger Dies – die cut the toothpicks in Basic Black and the flames in Basic White. Attach Basic Black toothpicks to the respective flags and adhere to back panel with dimensionals.
- Take the Basic White flames and use blending brush to apply Lemon Lolly colour all over. Switch ink to Pumpkin Pie and only colour top of flames.
- Stamp sentiment in Basic Back on scrap of Real Red. Mat layer on to Basic Black leaving ⅛” (0.3 cm) border all round. Cut flag ends then adhere to top right of card with dimensionals.
- Apply adhesive along bottom of Blueberry Bushel racing car and adhere to middle step toward the left.
- Adhere the Real Red racing car on the first step toward the right. Omit applying adhesive at the rear of the car so that you can tuck the trail of flames in underneath.
- Trim the flames into pieces. Tuck the first flame behind the rear of the car then stagger the remaining flames and adhere with glue as shown in picture.
- Adhere the remaining mat layers for the largest panel to the back of the card.
- Stamp the cup and colour with Stampin’ Blends in Smoky Slate.
Supply list
Listed below is the supply list. Just click on the picture to take you directly to the item in my online store.
Product List  Real Red Classic Stampin’ Pad [126949] | ||
")


Thanks for visiting. I would love to know what you think of my project and would appreciate it if you could leave a comment. To visit the next person on the list and see their fabulous creations, simply click on the link below or before my name depending who you visited initially. Happy hopping!

- SHOP ONLINE – EARN 10% REWARDS ON ALL PURCHASES OVER £20
- PURCHASE A STARTER KIT : Get £155 worth of products for only £99. Choose from current catalogues and any specials available. Free Shipping. Read more
- Subscribe to my Video Tutorials – click here
What a fabulous card! I’m sure he will love it.
Thanks, Carol. Hard to believe he’s driving!
Fabulous card Elaine. TFS x
Ah, thanks Leighsa.
I love your card.
Thank you, Fiona.
I love the cars on your card! So cute!
I wasn’t going to get this set, but when my grandson started to take driving lessons, it was a no brainer!
I love your card ! Glad I bought this set
Thank you – me too!
love this stamp set it’s such a fun card ?
Thank you, so glad I bought this set.
I’m sure your grandson will love this fabulous card
Thank you, Sara
Loving the card!
Thanks, Elaine.
Gorgeous card. I’m sure your grandson will love it.
Thanks so much Cheryldiana.