
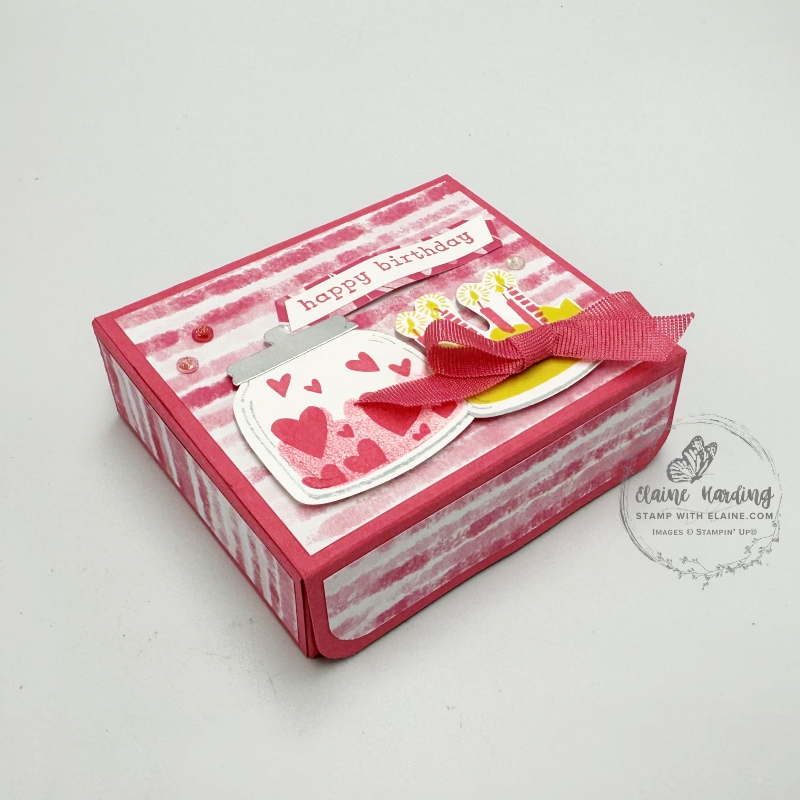
Cute treat box – Sweet Jar. Here’s another Online Exclusive that might tickle your fancy. It’s called Sweet Jar and the bundle consists of the stamps and the Sweet Jar builder punch. I thought I’d make a box to hold some candy just for a change, and I used velcro as a closure.
The DSP (Designer Series Paper) I used is the 2025-2027 In Color 6″x 6″ (15.2 x 15.2 cm) new design. Its best to use a non-directional pattern for the box but because I wanted to add the jars as decorative elements, I didn’t want a busy floral pattern so I used the stripes instead.
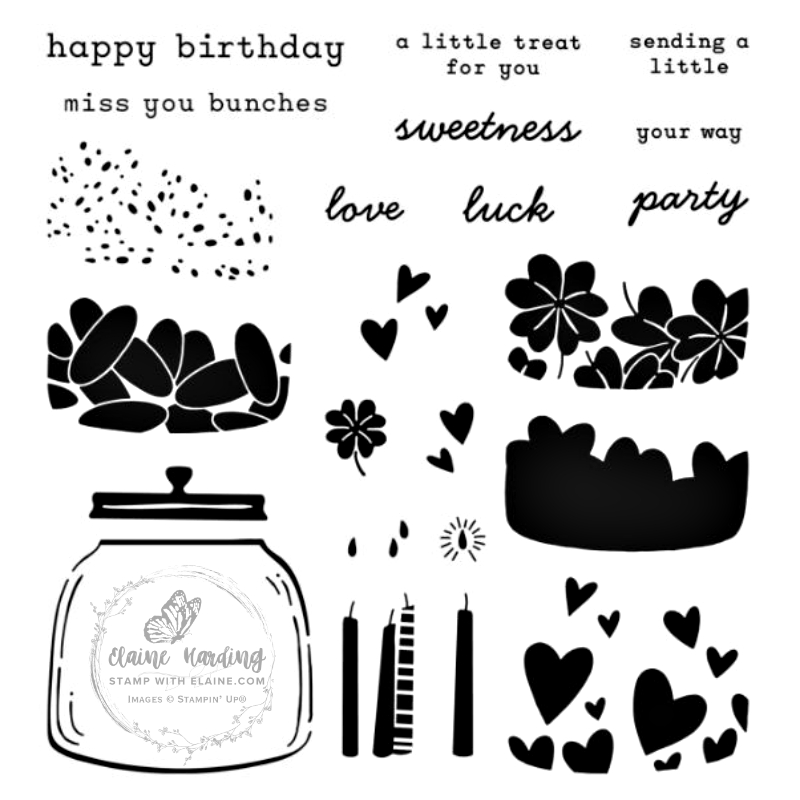
Sweet Jar Photopolymer stamp set
For the jar on the front of the box, I stamped second generation Strawberry Slush ink on the solid heart image inside the jar. Then I stamped the hearts over it in first generation Strawberry Slush.
It’s not clear in the photo, but I did stamp the jar in Cloud Cover before I stamped the solid heart image in Darling Duckling to resemble a cake. I stamped it a second time on a scrap of paper and fussy cut it just inside the silhouette to create a mask so that I could stamp the candles on top (refer to picture on the right).

Box template

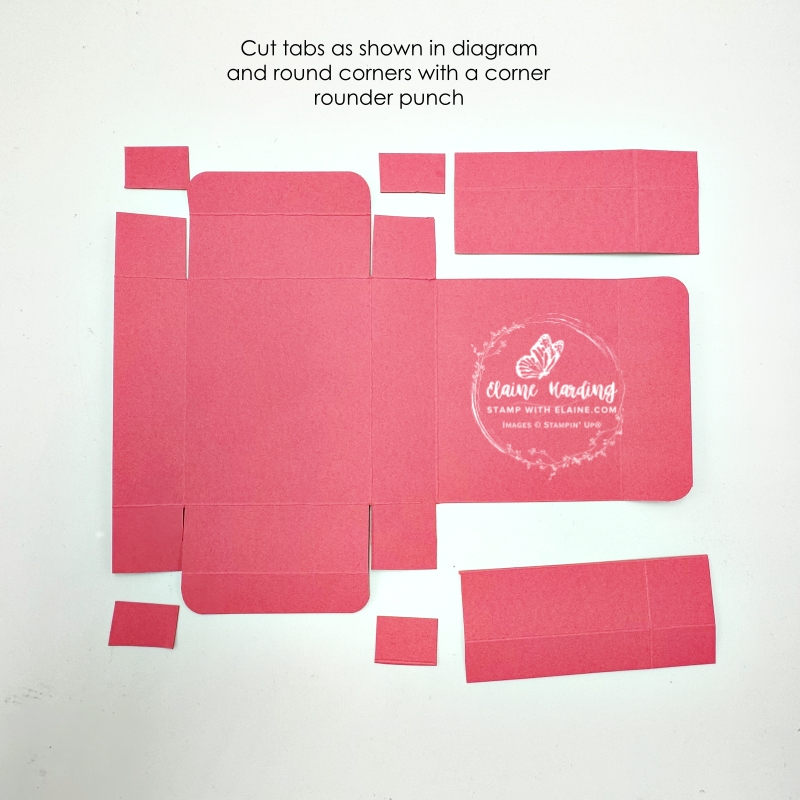
- Cut Strawberry Slush box base 10 ¾” x 8 ¼” (27.3 cm x 21 cm). On long side score at 1 ¼”, 4 ¾”, 6”, 9 ½” (3.2 cm, 12.1 cm, 15.2 cm, 24.1 cm). Rotate card stock so that short side is on top and score at ¾”, 2”, 6 ¼”, 7 ½” (1.9 cm, 5 cm, 15.8 cm and 19.1 cm)
- Orient template so that the long side is facing you and cut up to the 2nd score line as shown in photo on right. Rotate 180 degrees and repeat for opposite side.
DSP cutting guide
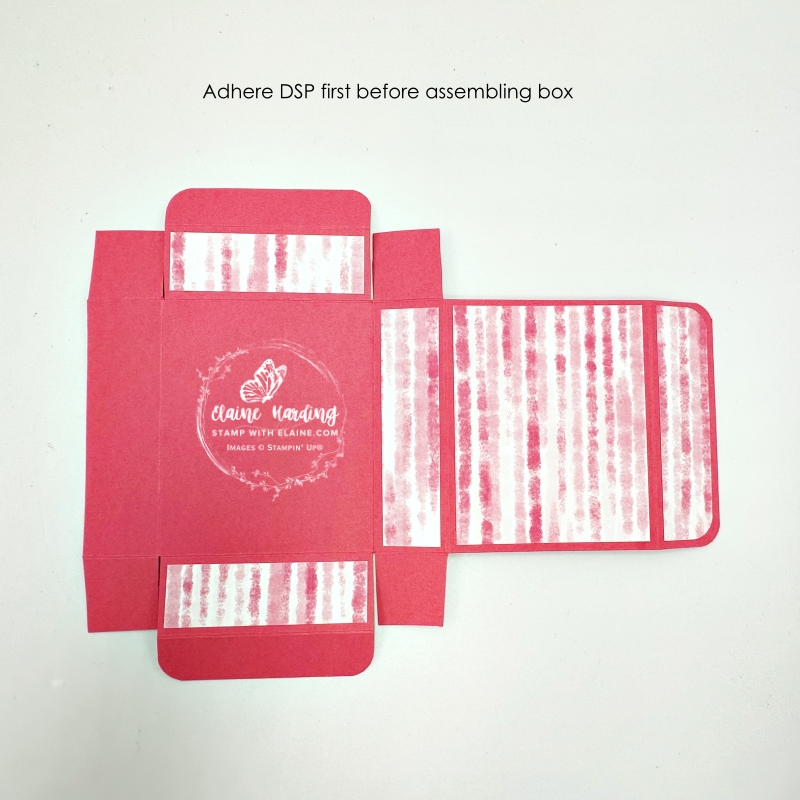
- Long sides of box : Cut 2 pieces 1″ x 4″ (2.5 cm x 10.2 cm). Corner round one of the pieces and adhere as shown in photo on left.
- Short sides of box : Cut 2 pieces 1″ x 3 ¼” (2.5 cm x 8.2 cm). Adhere to sides of box as shown in photo on left.
- Lid : Cut 1 piece 4″ x 3 ¼” (10.2 cm x 8.2 cm) and adhere as shown above.
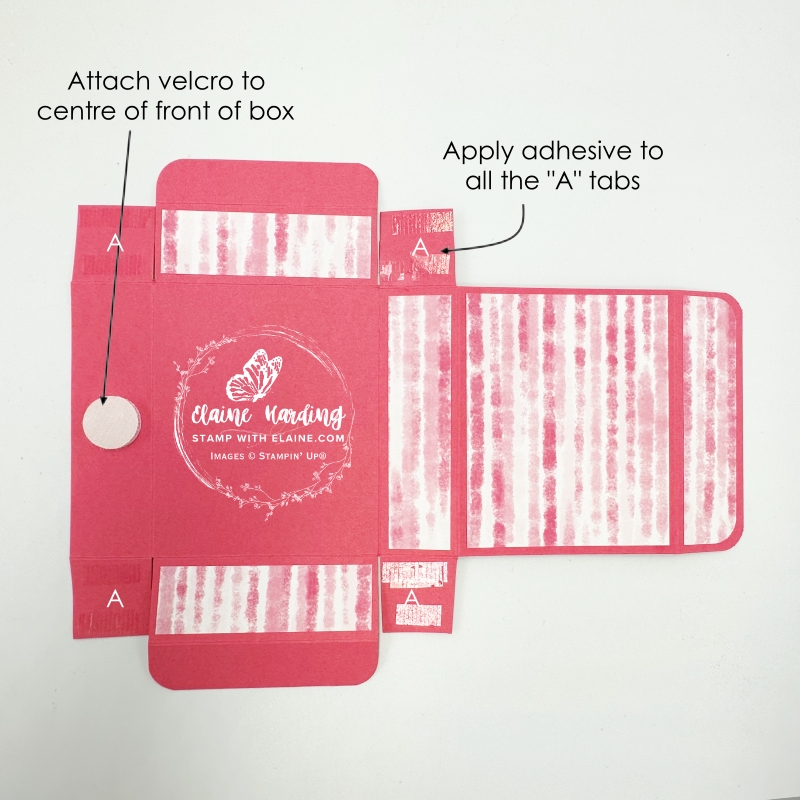
Assembling box
- Apply adhesive to all four “A” tabs and attach velcro fastening in the centre of the front of box as shown in photo on right
- Align and attach each “A” tab to adjacent side to construct box.
- Fold lid down and attach to velcro fastening to close the box.
Decorating lid of box
- On scraps of Basic White, stamp 2 jars in *Cloud Cover (available as a Stampin’ Spot from the Classic Stampin’ Spot Small Assortment 1).
- Stamp inside one of the jars with the solid heart stamp in 2nd generation Strawberry Slush ink.
- Next stamp the hearts in first generation Strawberry Slush ink on top of. solid heart stamped image.
- Punch jar out with Sweet Jar Builder punch. Adhere to box lid front with dimensionals as pictured below.
- Cut a scrap of Silver Foil and attach adhesive sheet to the foil before punching out 2 lids with Sweet Jar Builder punch. Adhere to jar as pictured for front of card and reserve the second one for later.
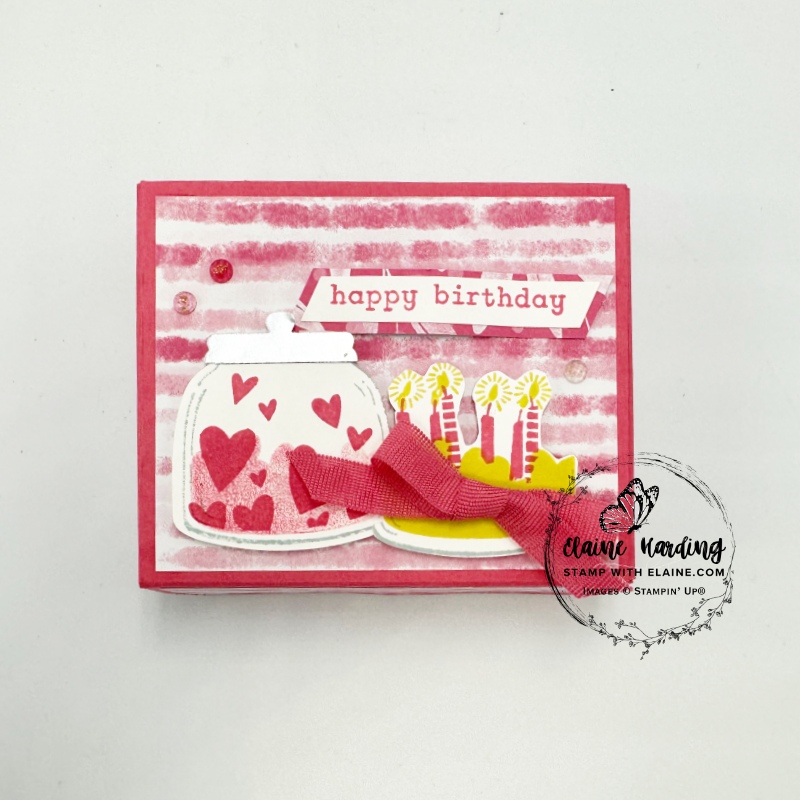
Cake portion
- Adhere the “cake” (prepared as described under the heading Sweet Jar Photopolymer stamp set). Apply dimensionals to the right side of the cake because the left side will partially overlap the other jar which already has dimensionals.
- Make a bow with Strawberry Slush ⅜” (1 cm) Faux Linen ribbon and attach to cake with glue dots as shown in photo above.
Label and embellishments
- Stamp sentiment on Basic White scrap, trim both ends at an angle.
- Adhere to DSP mat layer (reverse side) as shown.
- Finally add the gems.
Cloud Cover Classic Stampin’ pad
*Note: Cloud Cover is available as a Stampin’ Spot with a felt pad. The colour has stayed true on the felt pad.
Cloud Cover is not available at present in the Classic Stampin’ foam pad form because there was a chemical reaction when applied to the foam pad. The colour shifted which did not meet Stampin’ Up!’s standard and has therefore been withdrawn until further notice. You can substitute it by using the Stampin’ Spot and make sure you purchase the refill too so that you can re-ink the Stampin’ Spot whenever required.
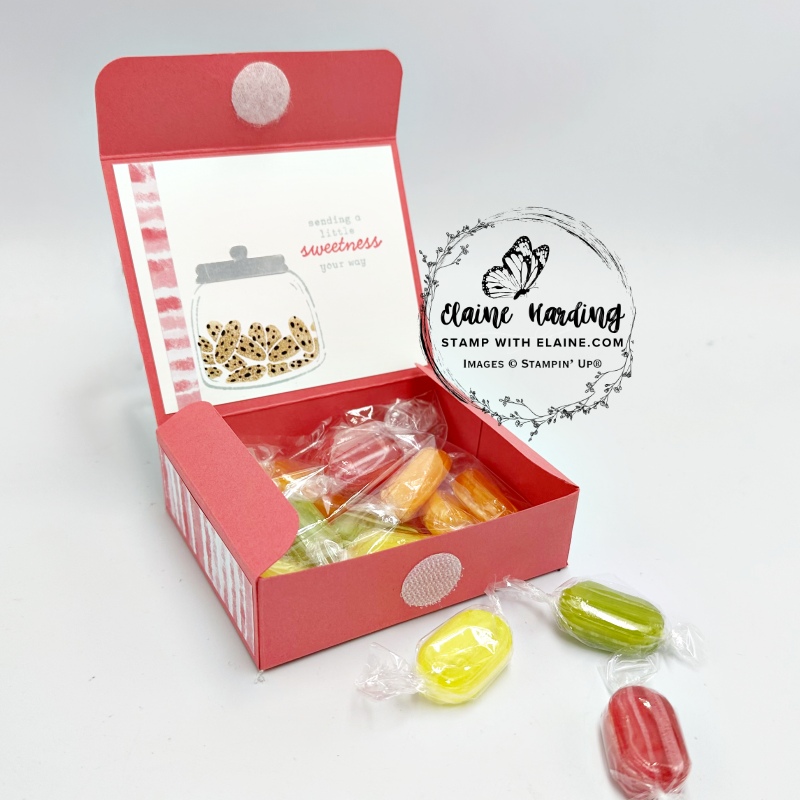
Inside box lid
I needed somewhere to address the recipient and say who it was from, so I decorated the inside of the box lid and had a chance to use the other stamps in the stamp set too.
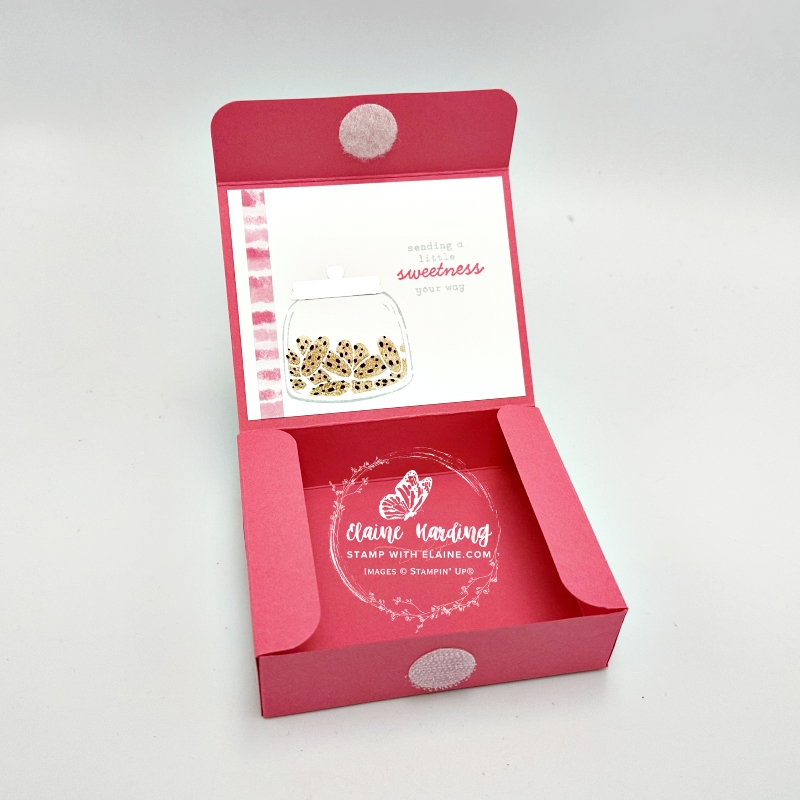
- Cut Basic White piece 4″ x 3 ¼” (10.2 cm x 8.2 cm)
- Adhere ½” strip of DSP toward left hand side as shown. Trim off excess.
- Use Cloud Cover stampin’ spot to ink up jar stamp and stamp jar
- Stamp cookies in 2nd generation Pecan Pie ink inside jar.
- Ink up spotty stamp with Early Espresso ink and stamp over the cookies to resemble chocolate chips.
- Adhere remaining punched silver lid to jar.
- Next stamp sentiment in Cloud Cover ink andStamp “sweetness” in Strawberry Slush in the gap in between (refer to photo on right below) to complete mat layer for box.
- Adhere to inside of box lid.
Supply list
Listed below is the supply list. Just click on the picture to take you directly to the item in my online store.
Product List![Sweet Jar Bundle (English) [ 165507 ]](https://assets1.tamsnetwork.com/images/EC042017NF/165507s.jpg "Sweet Jar Bundle (English) [ 165507 ]")
![Sweet Jar Photopolymer Stamp Set (English) [ 165501 ]](https://assets1.tamsnetwork.com/images/EC042017NF/165501s.jpg "Sweet Jar Photopolymer Stamp Set (English) [ 165501 ]")
![Sweet Jar Builder Punch [ 165506 ]](https://assets1.tamsnetwork.com/images/EC042017NF/165506s.jpg "Sweet Jar Builder Punch [ 165506 ]")
![Silver 12" X 12" (30.5 X 30.5 Cm) Foil Sheets [ 163387 ]](https://assets1.tamsnetwork.com/images/EC042017NF/163387s.jpg "Silver 12\" X 12\" (30.5 X 30.5 Cm) Foil Sheets [ 163387 ]")
![Adhesive Sheets [ 152334 ]](https://assets1.tamsnetwork.com/images/EC042017NF/152334s.jpg "Adhesive Sheets [ 152334 ]")
![2025–2027 In Color™ 6" X 6" (15.2 X 15.2 Cm) Designer Series Paper [ 165300 ]](https://assets1.tamsnetwork.com/images/EC042017NF/165300s.jpg "2025–2027 In Color™ 6\" X 6\" (15.2 X 15.2 Cm) Designer Series Paper [ 165300 ]")
![Basic White A4 Cardstock [ 166781 ]](https://assets1.tamsnetwork.com/images/EC042017NF/166781s.jpg "Basic White A4 Cardstock [ 166781 ]")
![Strawberry Slush A4 Cardstock [ 165297 ]](https://assets1.tamsnetwork.com/images/EC042017NF/165297s.jpg "Strawberry Slush A4 Cardstock [ 165297 ]")
![Classic Stampin' Spot Small Assortment 1 [ 166716 ]](https://assets1.tamsnetwork.com/images/EC042017NF/166716s.jpg "Classic Stampin' Spot Small Assortment 1 [ 166716 ]")
![Darling Duckling Classic Stampin' Pad [ 165277 ]](https://assets1.tamsnetwork.com/images/EC042017NF/165277s.jpg "Darling Duckling Classic Stampin' Pad [ 165277 ]")
![Strawberry Slush Classic Stampin' Pad [ 165286 ]](https://assets1.tamsnetwork.com/images/EC042017NF/165286s.jpg "Strawberry Slush Classic Stampin' Pad [ 165286 ]")
![Strawberry Slush 3/8" (1 Cm) Faux Linen Ribbon [ 165274 ]](https://assets1.tamsnetwork.com/images/EC042017NF/165274s.jpg "Strawberry Slush 3/8\" (1 Cm) Faux Linen Ribbon [ 165274 ]")
![Strawberry Slush & Pretty In Pink Gems [ 165615 ]](https://assets1.tamsnetwork.com/images/EC042017NF/165615s.jpg "Strawberry Slush & Pretty In Pink Gems [ 165615 ]")
Thanks for visiting – happy crafting!

- SHOP ONLINE – EARN 10% REWARDS ON ALL PURCHASES OVER £20
- PURCHASE A STARTER KIT : Get £155 worth of products for only £99. Choose from current catalogues and any specials available. Free Shipping. Read more
- Subscribe to my Video Tutorials – click here