
Japanese Art of Kintsugi.
What is Kintsugi?
Kintsugi is the Japanese Art of repairing broken crockery. Rather than discarding the broken pieces, it’s put back together with a glue-like tree sap and the cracks are adorned with gold. No attempt is made to hide the damage, instead it is celebrated and highlighted and can be a thing of beauty.
Kintsugi Inspirations Suite Collection
You can find the Kintsugi Inspirations Suite Collection in the May 2025 – April 2026 Annual Catalogue on pages 58-61. The collection includes the Inspiring Imperfections Bundle (stamps + dies). It has the Joined Together 3D embossing folder and Flower Accents embellishments. Also included are the Kintsugi Inspirations 12″x 12″ (30.5 x 30.5 cm) Designer Serires Paper (DSP) which is beautiful.
How to create the gold cracks
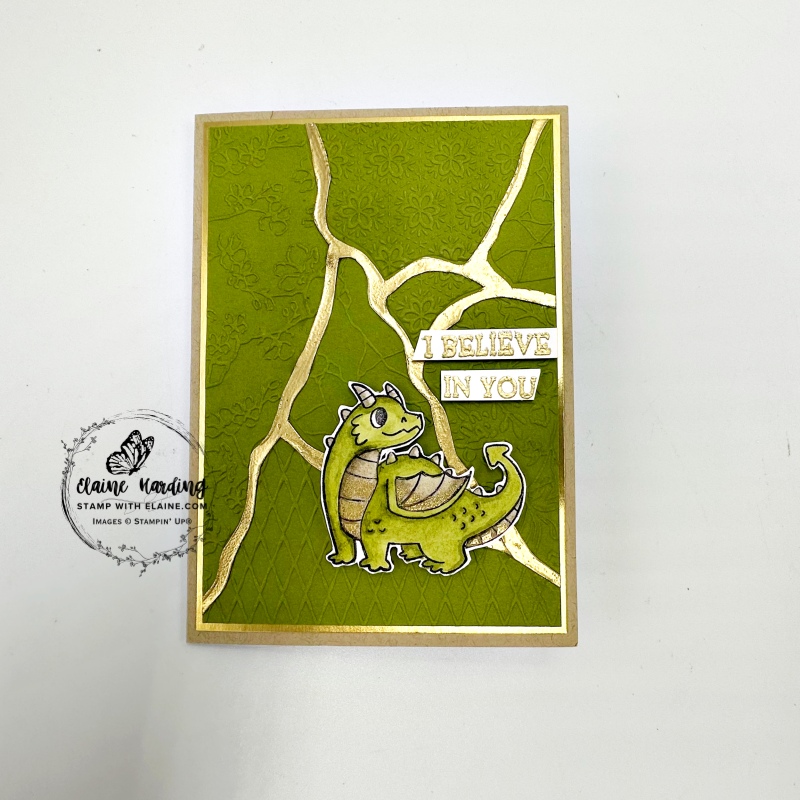
Here’s the card I made, I embossed a scrap of Basic White with the Joined Together 3D embossing folder. The cracks are debossed and the various sections are embossed with different patterns.
First I embossed it in Basic White card stock then fussy cut the cracks. Place the cracked pattern on a silicone mat and stamp all over it with a Versamark Ink Pad. Sprinkle Wow! metallic gold embossing powder over it all and heat set.
Emboss another piece in Old Olive, apply adhesive to the fussy cut gold embossed piece and insert and adhere along the cracks as pictured below.
How to make card
Card Base and card front
- Card base: Crumb Cake cut at 5 ¾” x 8 ¼” (14.5 cm x 21 cm) folded in half.
- Gold Foil layer : 3 ⅞” x 5 ½” (9.8 cm x 14 cm). Gut the inside so that you can use it for another project by trimming a ¼” (1 cm) border all round. Adhere gold frame to front of card leaving an even border on all 4 sides.
- Emboss Basic White 3 ¾” x 5 ⅜” (9.5 cm x 13.7 cm) with Joined Together 3D embossing folder and fussy cut the debossed crack lines. Stamp with Versamark and gold emboss with Wow! Metallic embossing powders (gold) and heat set.
- Cut and emboss Old Olive layer 3 ¾” x 5 ⅜” (9.5 cm x 13.7 cm) and adhere on top of gold foil frame.
- Apply adhesive on back of gold embossed crack line and adhere to Old Olive embossed piece as pictured above.
Emboss sentiment and prepare dragon
- From a scrap of Basic White, stamp the sentiment and gold emboss it. Separate the phrase by cutting “I believe” in one piece and “in you” for another.
- Stagger and adhere them with dimensionals on the front of card as pictured in photo above.
- On a scrap of Basic White, stamp the dragon in Tuxedo Black Memento ink. Colour the dragon with Stampin’ Blends combo in Old Olive, and the horns and bones on ridge of spine in Crumb Cake.
- Stamp a second dragon and colour in just the breast, underside of tail and wing in Crumb Cake then use a sponge dauber to dab some Versamark ink at the base of all three. Sprinkle with a pinch of Gold embossing powder and heat set. Fussy cut these following the black line and adhere to the other dragon (paper piecing technique).
- Adhere with dimensionals on card front below the sentiment.
Inside card
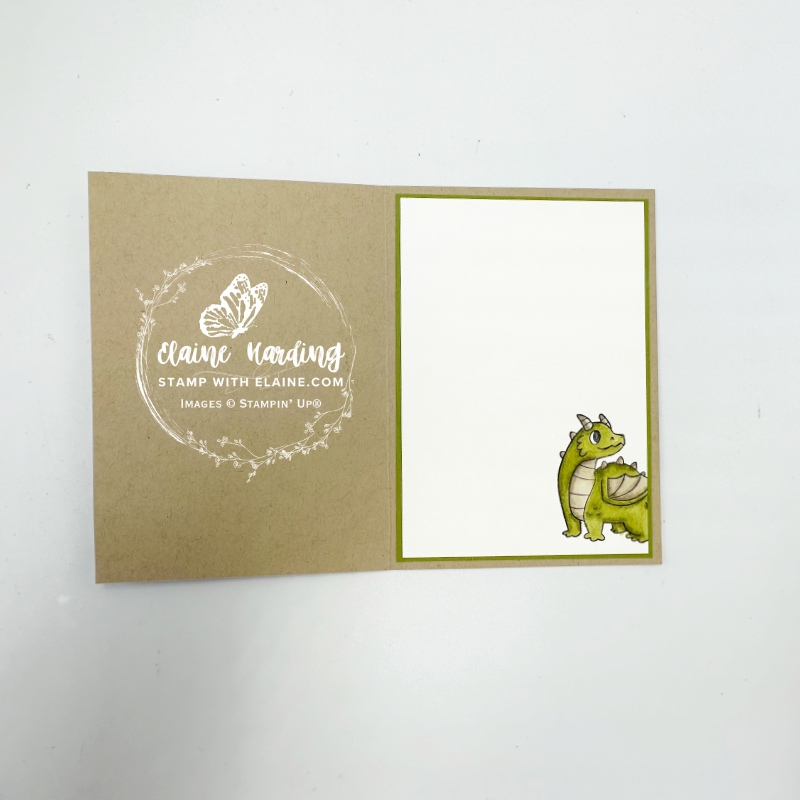
- Cut Old Olive mat layer 3 ⅞” x 5 ½” (9.8 cm x 14 cm) and adhere to inside of card.
- Basic White layer cut at 3 ¾” x 5 ⅜” (9.5 cm x 13.7 cm).
- Partially stamp the dragon in the bottom right corner in Tuxedo Black Memento ink.
- Colour dragon with a combination of Old Olive and Crumb Cake Stampin’ Blends.
- Adhere on to of Old Olive mat layer leaving an even border on all 4 sides.
Supply list
Listed below is the supply list. Just click on the picture to take you directly to the item in my online store.
Product List![Inspiration Squad Cling Stamp Set (English) [ 165515 ]](https://assets1.tamsnetwork.com/images/EC042017NF/165515s.jpg "Inspiration Squad Cling Stamp Set (English) [ 165515 ]")
![Joined Together 3 D Embossing Folder [ 165170 ]](https://assets1.tamsnetwork.com/images/EC042017NF/165170s.jpg "Joined Together 3 D Embossing Folder [ 165170 ]")
![Basic White A4 Cardstock [ 166781 ]](https://assets1.tamsnetwork.com/images/EC042017NF/166781s.jpg "Basic White A4 Cardstock [ 166781 ]")
![Old Olive A4 Card Stock [ 106576 ]](https://assets1.tamsnetwork.com/images/EC042017NF/106576s.jpg "Old Olive A4 Card Stock [ 106576 ]")
![Embossing Additions Tool Kit [ 159971 ]](https://assets1.tamsnetwork.com/images/EC042017NF/159971s.jpg "Embossing Additions Tool Kit [ 159971 ]")
![Versamark Pad [ 102283 ]](https://assets1.tamsnetwork.com/images/EC042017NF/102283s.jpg "Versamark Pad [ 102283 ]")
![Metallics Wow! Embossing Powder [ 165678 ]](https://assets1.tamsnetwork.com/images/EC042017NF/165678s.jpg "Metallics Wow! Embossing Powder [ 165678 ]")
![Heat Tool - Uk Plug [ 129054 ]](https://assets1.tamsnetwork.com/images/EC042017NF/129054s.jpg "Heat Tool - Uk Plug [ 129054 ]")
![Tuxedo Black Memento Ink Pad [ 132708 ]](https://assets1.tamsnetwork.com/images/EC042017NF/132708s.jpg "Tuxedo Black Memento Ink Pad [ 132708 ]")
![Old Olive Stampin' Blends Combo Pack [ 154892 ]](https://assets1.tamsnetwork.com/images/EC042017NF/154892s.jpg "Old Olive Stampin' Blends Combo Pack [ 154892 ]")
![Crumb Cake Stampin' Blends Combo Pack [ 154882 ]](https://assets1.tamsnetwork.com/images/EC042017NF/154882s.jpg "Crumb Cake Stampin' Blends Combo Pack [ 154882 ]")
![Silicone Craft Sheet [ 127853 ]](https://assets1.tamsnetwork.com/images/EC042017NF/127853s.jpg "Silicone Craft Sheet [ 127853 ]")
![Sponge Daubers [ 133773 ]](https://assets1.tamsnetwork.com/images/EC042017NF/133773s.jpg "Sponge Daubers [ 133773 ]")

- SHOP ONLINE – EARN 10% REWARDS ON ALL PURCHASES OVER £20
- PURCHASE A STARTER KIT : Get £155 worth of products for only £99. Choose from current catalogues and any specials available. Free Shipping. Read more
- Subscribe to my Video Tutorials – click here