
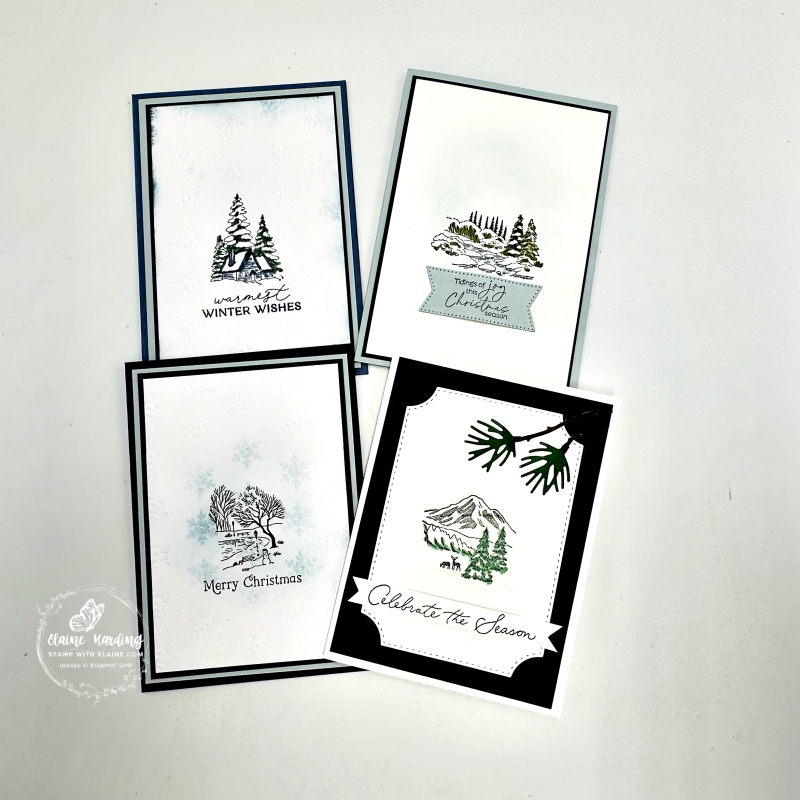
Easy flat post friendly cards. It’s week 3 of 12 in my 12 week Christmas Countdown Series. It’s true to say that with rising costs we’re all looking to minimise the cost of postage by creating designs with as little bulk as possible. The new Winter Scenes stand alone stamp set is ideal for making super quick, simply stamped festive cards. It’s an online exclusive and I nearly missed it!
I made 4 cards, 1 for each of the scene images. As there are no sentiments in the stamp set, you can choose whatever you have in your stash to add a greeting.
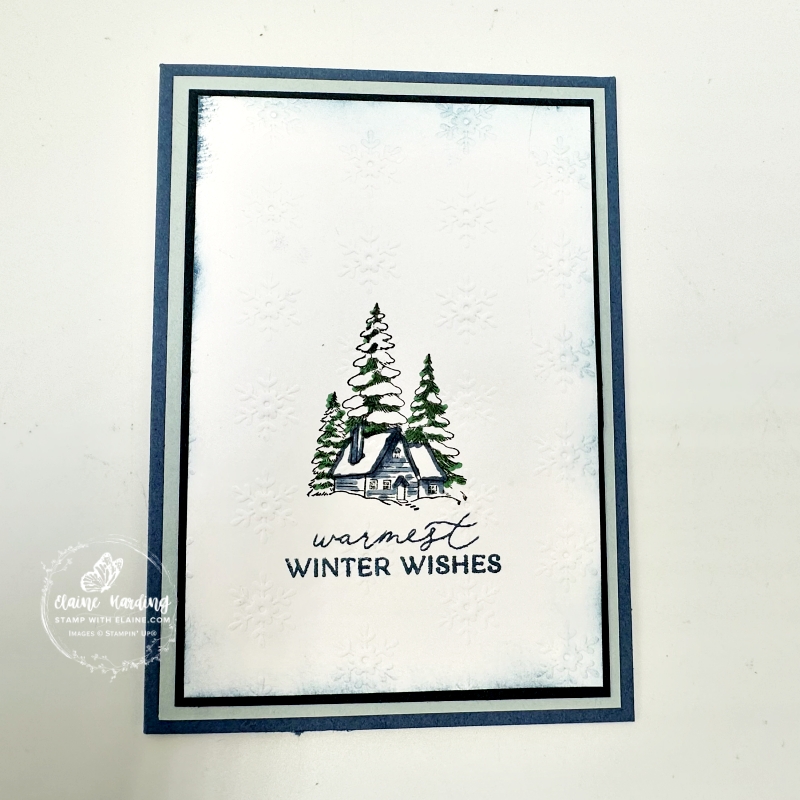
First card – chalet scene
Cutting guide
- Card base : Misty Moonlight cut at 5 ¾” x 8 ¼”. Long side scored at 4 ⅛” (14.5 cm x 21 cm scored at 10.5 cm)
- Cloud Cover Mat layer #1: 5 ½” x 3 ⅞” (14 cm x 9.8 cm)
- Misty Moonlight Mat layer #2 : 5 ⅜” x 3 ⅝” (13.7 cm x 9.2 cm)
- Silent Snowfall 12″x 12″ (30.5 x 30.5 cm) Specialty DSP : 5 ¼” x 3 ½” (13.3 cm x 8.9 cm)
- Inside card : Basic White 5 ½” x 3 ⅞” (14 cm x 9.8 cm)
Assembly
- Stamp chalet image on Silent Snowfall Specialty paper with Tuxedo Black Memento ink.
- The photo doesn’t really show the colouring, but the shaded areas of the fir tree has been coloured with the Dark Shaded Spruce Stampin’ Blend.
- Use Misty Moonlight Stampin’ Blend to highlight the chalet, and the Darker shade to trace outline of roof and chimney stack.
- Stamp “warmest Winter Wishes” from Delicate Pines stamp set Online exclusive.
- Add colour around the edges of the Basic White piece with a blending brush with a touch of Misty Moonlight Ink then adhere to Misty Moonlight layer, then Cloud Cover and finally to card base leaving an even border on all 4 sides.
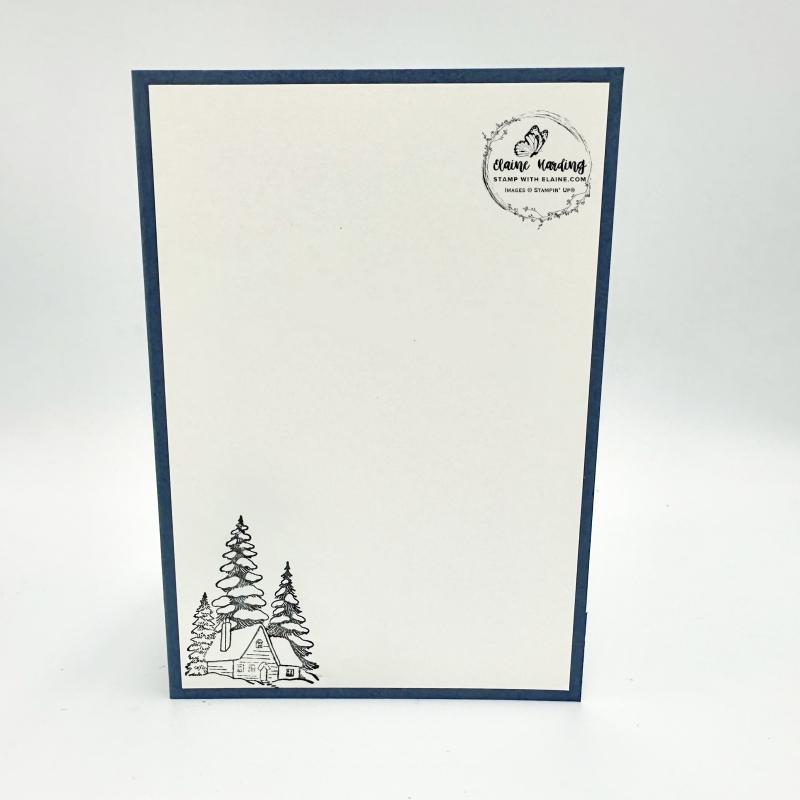
- Inside card : Stamp the chalet in bottom left corner and lightly add a touch of Cloud Cover before adhering to inside of card.
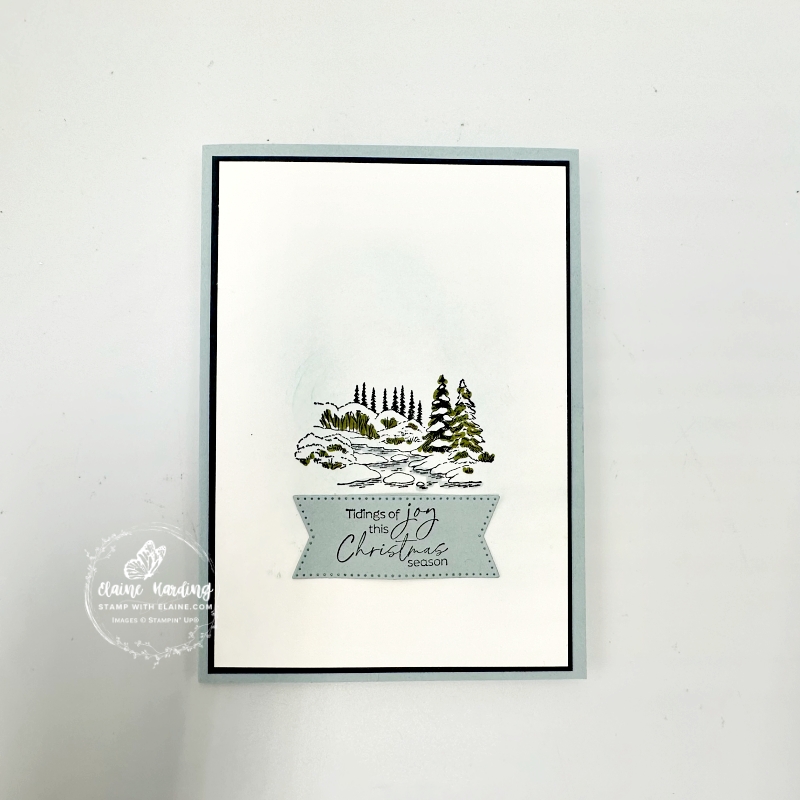
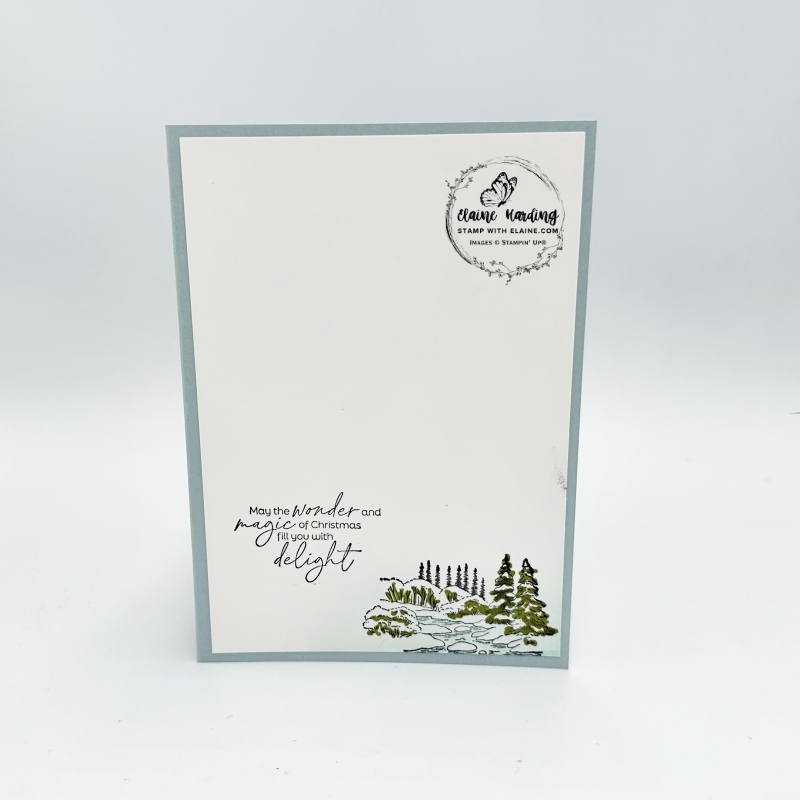
Second card – Winter scene with brook
Cutting guide
- Card base : Cloud Cover cut at 5 ¾” x 8 ¼”. Long side scored at 4 ⅛” (14.5 cm x 21 cm scored at 10.5 cm)
- Secret Sea mat layer #1 : 5 ½” x 3 ⅞” (14 cm x 9.8 cm)
- Basic White mat layer #2 : 5 ⅜” x 3 ⅝” (13.7 cm x 9.2 cm)
- Inside card : Basic White 5 ½” x 3 ⅞” (14 cm x 9.8 cm)
- Scrap of Cloud Cover card stock for label
Assembly
- Stamp the Mountain scene with brook in Tuxedo Black Memento ink.
- Add a hint of colour in centre of Basic White layer with a Blending Brush with Cloud Cover Stampin’ Spot.
- Use the darker Old Olive Stampin’ Blend to shaded areas of image and lighter Cloud Cover Stampin’ Blend for the shaded areas in the brook.
- Stamp “Tidings of joy this Christmas Season” from Joyful Tidings stamp set (new mini catalogue page 58) on scrap of Cloud Cover. Die cut with double flag end die from Stylish Shapes Dies. Adhere underneath image.
- Adhere stamped Basic White layer to Secret Sea mat layer and then on to Cloud Cover card base leaving an even border on all 4 sides.
- Inside card : Stamp “may the wonder and magic of Christmas fill you with delight” toward bottom left corner and the Mountain and brook image in bottom right corner. Repeat colouring as for card front. Adhere to inside of card base leaving an even border on all 4 sides.
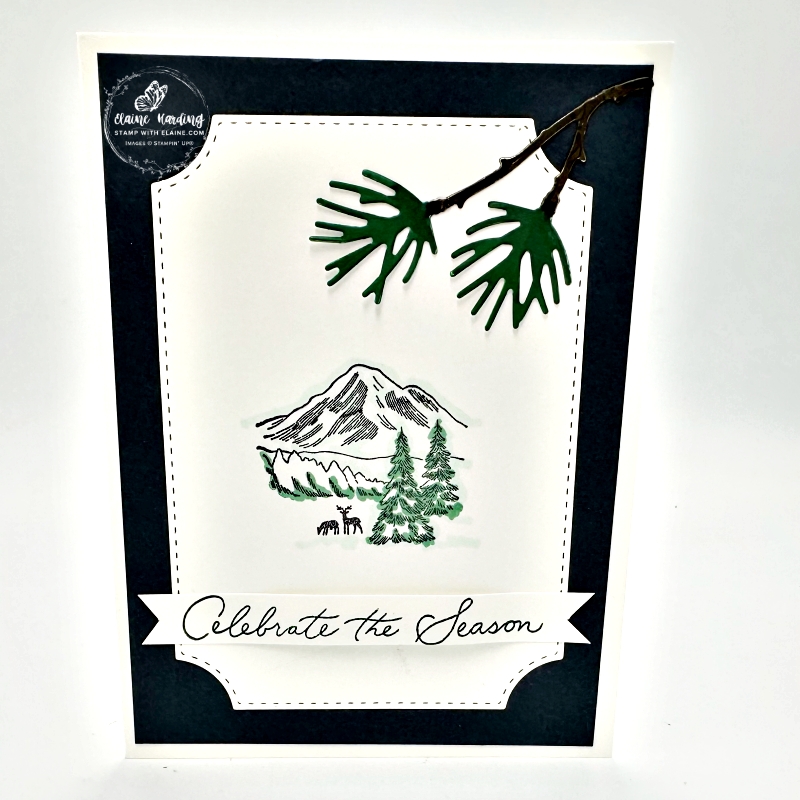
Third card – Scene with deer
Cutting guide
- Card base : Thick Basic White cut at 5 ½” x 8 ¼” (14 cm x 21 cm). Long side score at 4 ⅛” (10.5 cm)
- Secret Sea mat layer cut at 5 ¼” x 3 ⅞” (13.3 cm x 9.8 cm).
- Basic White layer : Die cut 2nd largest die from Branching Out dies and also the pine branch.
- Scrap of Basic White to stamp sentiment and fussy cut flag ends for label
- Inside card : Basic White 5 ¼” x 3 ⅞” (13.3 cm x 9.8 cm).
Assembly
- Adhere Secret Sea mat layer to Basic White card base leaving an even border on all 4 sides.
- Use an Early Espress Stampin’ Write Marker to colour the branch and a Shaded Spruce Stampin’ Write Marker to colour the pine needles. Set aside to dry.
- Stamp mountain range and deer scene in centre of die cut Branching Out layer.
- Use Pool Party light Stampin’ Blend to draw outline of mountain range and ground deer and trees. Colour shaded areas of trees and forest with light Shaded Spruce Stampin’ Blend.
- Stamp “Celebrate the Season” from Delicate Pines stamp set (online exclusive just released) in Shaded Spruce. Trim and cut flag ends at both ends.
- Curl label, adhere dimensional in the centre of label and adhere the end bits with a glue dot.
- Adhere pine branch in upper right corner of Secret Sea Mat layer overhanging Basic White Branching Out die cut layer.
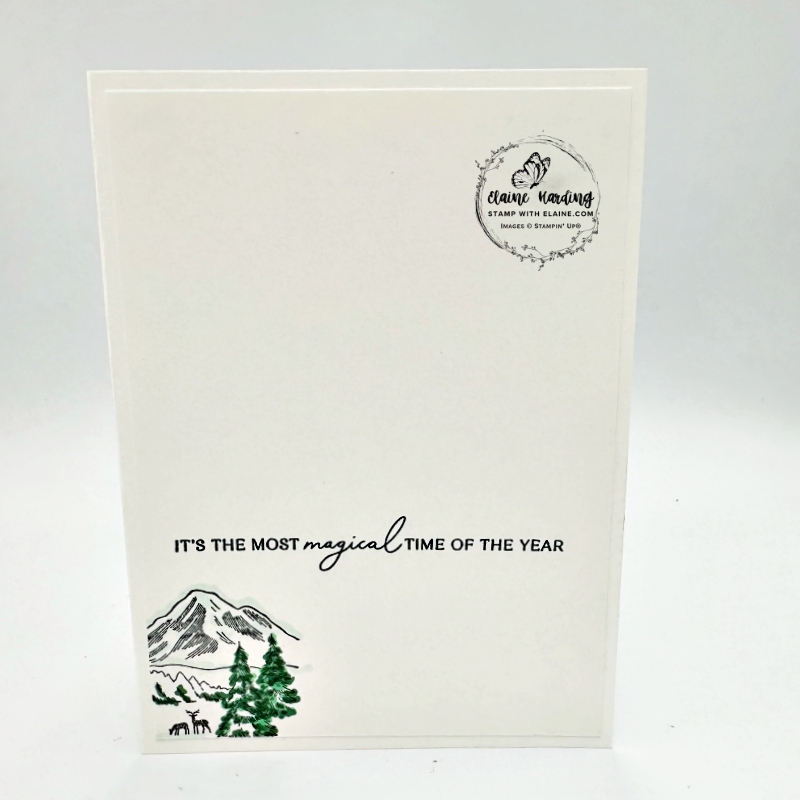
- Inside Basic White mat layer : Stamp same image in bottom left corner and repeat colouring as for card front.
- Stamp sentiment above and adhere Basic White piece to inside card base leaving an even border on all 4 sides.
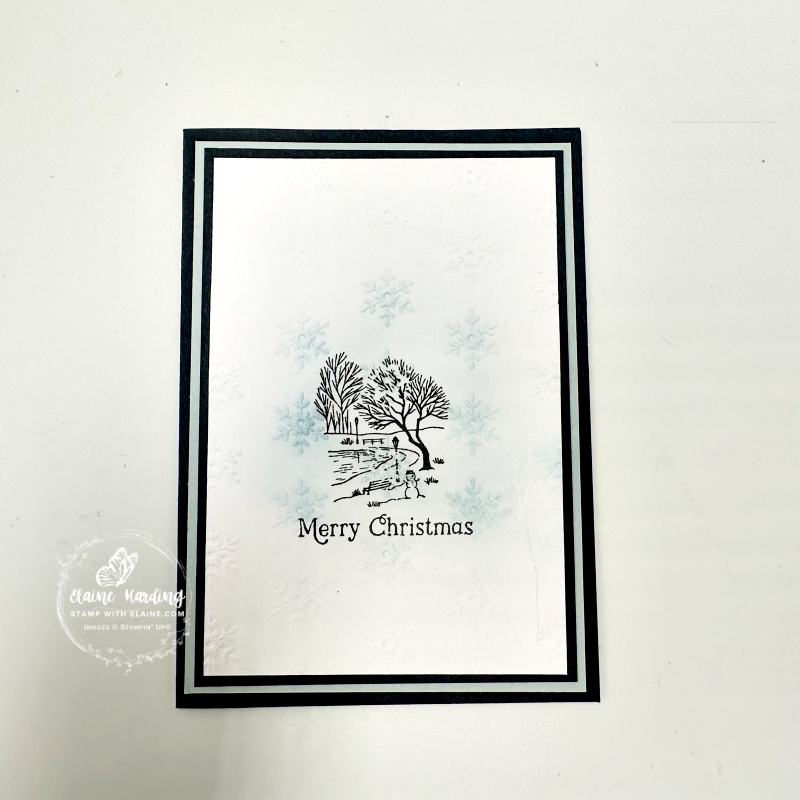
Fourth card – Scene with Snowman
Cutting guide
- Card base : Misty Moonlight cut at 5 ¾” x 8 ¼”. Long side scored at 4 ⅛” (14.5 cm x 21 cm scored at 10.5 cm)
- Cloud Cover mat layer #1 : 5 ½” x 3 ⅞” (14 cm x 9.8 cm)
- Misty Moonlight mat layer #2 : 5 ⅜” x 3 ⅝” (13.7 cm x 9.2 cm)
- Silent Snowfall 12″x 12″ (30.5 x 30.5 cm) Specialty DSP mat layer #3 : 5 ⅛” x 3 ⅜” (13 cm x 8.6 cm)
- Inside card : Basic White cut at 5 ½” x 3 ⅞” (14 cm x 9.8 cm)
Assembly
- Adhere Cloud Cover mat layer to card base leaving an even border on all 4 sides.
- Use blending brush and apply Cloud Cover ink from Cloud Cover stampin’ spot to centre of Silent Snowfall piece.
- Stamp scene with snowman as shown and stamp only the “Merry Christmas” part of sentiment from the Jolly Delivery. You can do this by masking the other words before inking sentiment. Remember to remove mask before stamping.
- Adhere stamped Silent Snowfall layer on top of Misty Moonlight layer #2 and then adhere to Cloud Cover layer on card base leaving an even border on all 4 sides.
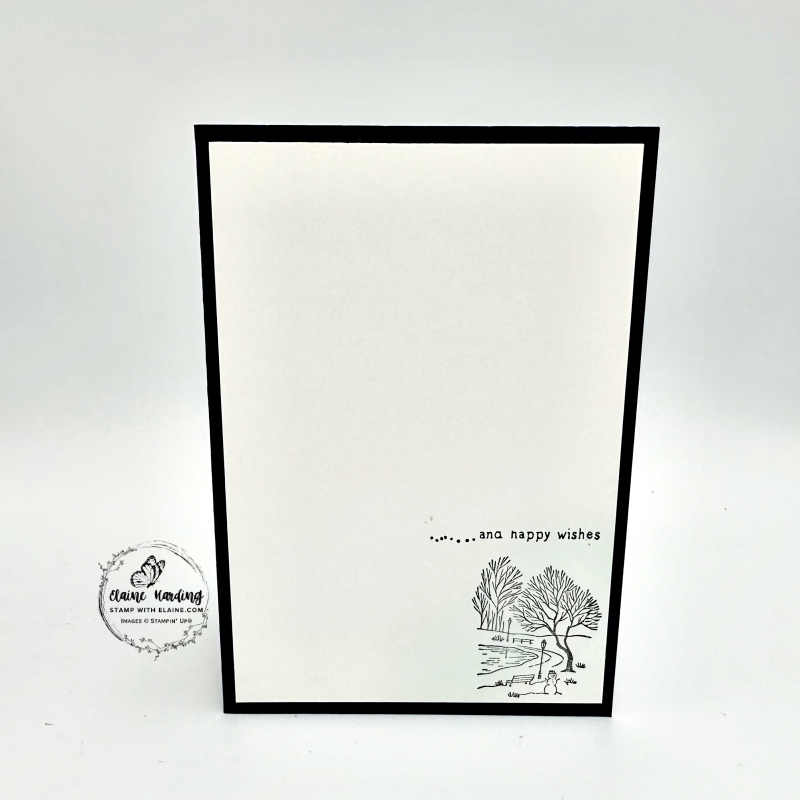
- Inside card : Stamp the snowman scene in bottom right corner. Use a blending brush to add a little colour with Cloud Cover Stampin’ Spot.
- Mask “Merry Christmas” on stamp and ink up with Tuxedo Black Memento ink – remove mask and stamp “… and happy wishes”. I added the dots with a Basic Black Stampin’ Write marker.
- Lastly, adhere to inside of card base to finish.
Four cards made in the twinkling of an eye! I’ve given you a variety of sentiments from different stamp sets. As the images are so small, choose sentiments that are also small in ratio so it doesn’t overwhelm the image. Hope you’ve found inspiration from these quick, easy cards. You can always add an embellishment or two and if you have a die that will cut a snowflake, you could add that too! Happy crafting.
Supply list
Listed below is the supply list. Just click on the picture to take you directly to the item in my online store.
Product List![Winter Scenes Cling Stamp Set (English) [ 166088 ]](https://assets1.tamsnetwork.com/images/EC042017NF/166088s.jpg "Winter Scenes Cling Stamp Set (English) [ 166088 ]")
![Branching Out Dies [ 165775 ]](https://assets1.tamsnetwork.com/images/EC042017NF/165775s.jpg "Branching Out Dies [ 165775 ]")
![Stylish Shapes Dies [ 159183 ]](https://assets1.tamsnetwork.com/images/EC042017NF/159183s.jpg "Stylish Shapes Dies [ 159183 ]")
![Silent Snowfall 12" X 12" (30.5 X 30.5 Cm) Specialty Designer Series Paper [ 166062 ]](https://assets1.tamsnetwork.com/images/EC042017NF/166062s.jpg "Silent Snowfall 12\" X 12\" (30.5 X 30.5 Cm) Specialty Designer Series Paper [ 166062 ]")
![Basic White A4 Cardstock [ 166781 ]](https://assets1.tamsnetwork.com/images/EC042017NF/166781s.jpg "Basic White A4 Cardstock [ 166781 ]")
![Cloud Cover A4 Cardstock [ 165293 ]](https://assets1.tamsnetwork.com/images/EC042017NF/165293s.jpg "Cloud Cover A4 Cardstock [ 165293 ]")
![Misty Moonlight A4 Cardstock [ 153086 ]](https://assets1.tamsnetwork.com/images/EC042017NF/153086s.jpg "Misty Moonlight A4 Cardstock [ 153086 ]")
![Secret Sea A4 Cardstock [ 165296 ]](https://assets1.tamsnetwork.com/images/EC042017NF/165296s.jpg "Secret Sea A4 Cardstock [ 165296 ]")
![Classic Stampin' Spot Small Assortment 1 [ 166716 ]](https://assets1.tamsnetwork.com/images/EC042017NF/166716s.jpg "Classic Stampin' Spot Small Assortment 1 [ 166716 ]")
![Tuxedo Black Memento Ink Pad [ 132708 ]](https://assets1.tamsnetwork.com/images/EC042017NF/132708s.jpg "Tuxedo Black Memento Ink Pad [ 132708 ]")
![Cloud Cover Stampin’ Blends Combo Pack [ 165287 ]](https://assets1.tamsnetwork.com/images/EC042017NF/165287s.jpg "Cloud Cover Stampin’ Blends Combo Pack [ 165287 ]")
![Old Olive Stampin' Blends Combo Pack [ 154892 ]](https://assets1.tamsnetwork.com/images/EC042017NF/154892s.jpg "Old Olive Stampin' Blends Combo Pack [ 154892 ]")
![Pool Party Stampin' Blends Combo Pack [ 154894 ]](https://assets1.tamsnetwork.com/images/EC042017NF/154894s.jpg "Pool Party Stampin' Blends Combo Pack [ 154894 ]")
![Shaded Spruce Stampin' Blends Combo Pack [ 154903 ]](https://assets1.tamsnetwork.com/images/EC042017NF/154903s.jpg "Shaded Spruce Stampin' Blends Combo Pack [ 154903 ]")
![Shaded Spruce Classic Stampin' Pad [ 147088 ]](https://assets1.tamsnetwork.com/images/EC042017NF/147088s.jpg "Shaded Spruce Classic Stampin' Pad [ 147088 ]")
![Regals Stampin' Write Markers [ 161699 ]](https://assets1.tamsnetwork.com/images/EC042017NF/161699s.jpg "Regals Stampin' Write Markers [ 161699 ]")
![Neutrals Stampin' Write Markers [ 161697 ]](https://assets1.tamsnetwork.com/images/EC042017NF/161697s.jpg "Neutrals Stampin' Write Markers [ 161697 ]")
![Blending Brushes [ 153611 ]](https://assets1.tamsnetwork.com/images/EC042017NF/153611s.jpg "Blending Brushes [ 153611 ]")

- SHOP ONLINE – EARN 10% REWARDS ON ALL PURCHASES OVER £20
- PURCHASE A STARTER KIT : Get £155 worth of products for only £99. Choose from current catalogues and any specials available. Free Shipping. Read more
- Subscribe to my Video Tutorials – click here