
Birthday card – Cake Day Bundle. The Cake Day bundle was an online exclusive released in November 2025. I’m a bit late to the party but I had a good excuse. We were relocating and moving house so my craft room was still packed in boxes!
Cake Day Bundle
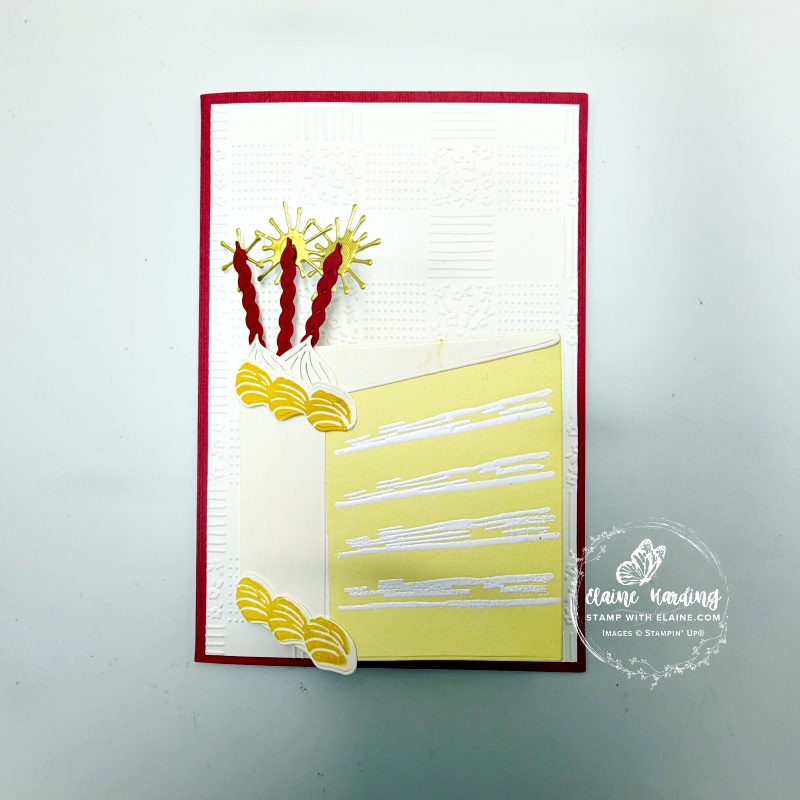
Make every birthday sweet with the Cake Day Bundle! These coordinating stamps and dies bring the party to your paper projects, featuring multilayered cake, swirled frosting, and, of course, glowing birthday candles. The icing on the cake? A die that lets you create an adorable cake slice-shaped card!
Product of the month
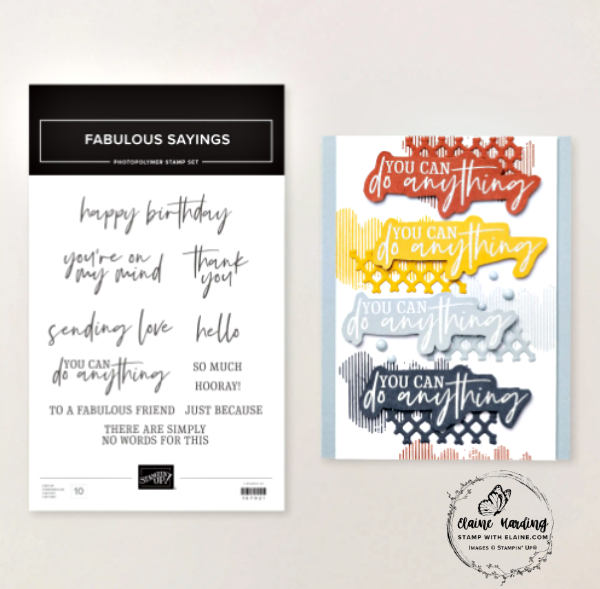
I also used January’s Product of the month which you can purchase one time only @ £5/- subject to a qualifying order of £70 excluding shipping. The Product of the month is exclusive and you won’t find it anywhere in the catalogue except online. January’s Product of the month is a stamp set called “Fabulous Sayings.
For the inside of the card I used the Cake Day stamps as well as the Fabulous Sayings stamps.
Cutting guide and die cutting
- Textured Striped Mix & Match Cards & Envelops
- Basic White for embossing card front 6″ x 4″ (15.2 cm x 10.2 cm) with All in a Row embossing folder
- Inside card : Basic White cut at 3 ⅞” x 5 ⅞” (9.8 cm x 14.9 cm)
- Lemon Lolly card stock : die cut cake from Cake Dies
- Very Vanilla card stock : die cut 2 ice drops and the plain icing bit on top and down side.
- Stamp 2 rows of icing in Daffodil Delight on Very Vanilla card stock and die cut with corresponding dies.
- Real Red card stock : die cut 3 candles
- Gold foil : die cut 2 large candle sparkles and 1 small sparkle
Assembling card
- Adhere embossed card front to the Red Textured Striped Mix & Match card.
- On the front of Lemon Lolly cake card, stamp in Versamark the tiers of cake and white emboss with heat tool.
- Apply adhesive to back of Very Vanilla icing piece to Lemon Lolly cake card front as pictured.
- Adhere the gold foil sparkles to the back of the candles with glue dots.
- Partially apply adhesive to bottom of candles and adhere as pictured.
- Adhere the icing drops on top of candles.
- Then adhere the two rows of Daffodil Delight icing – ensure the Cake card can still open.
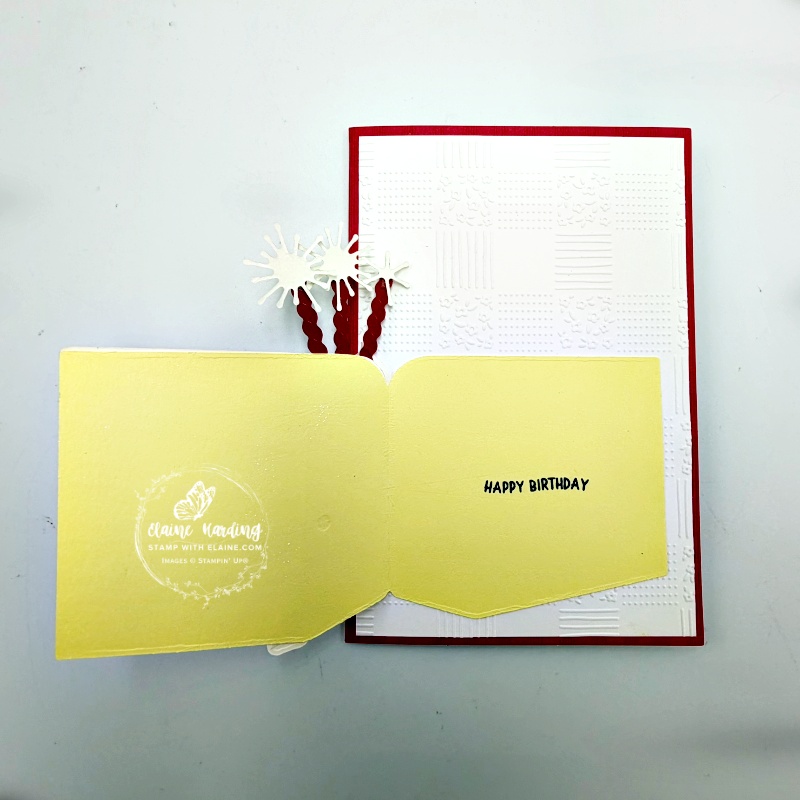
- Stamp “happy birthday” inside cake card.
Inside card
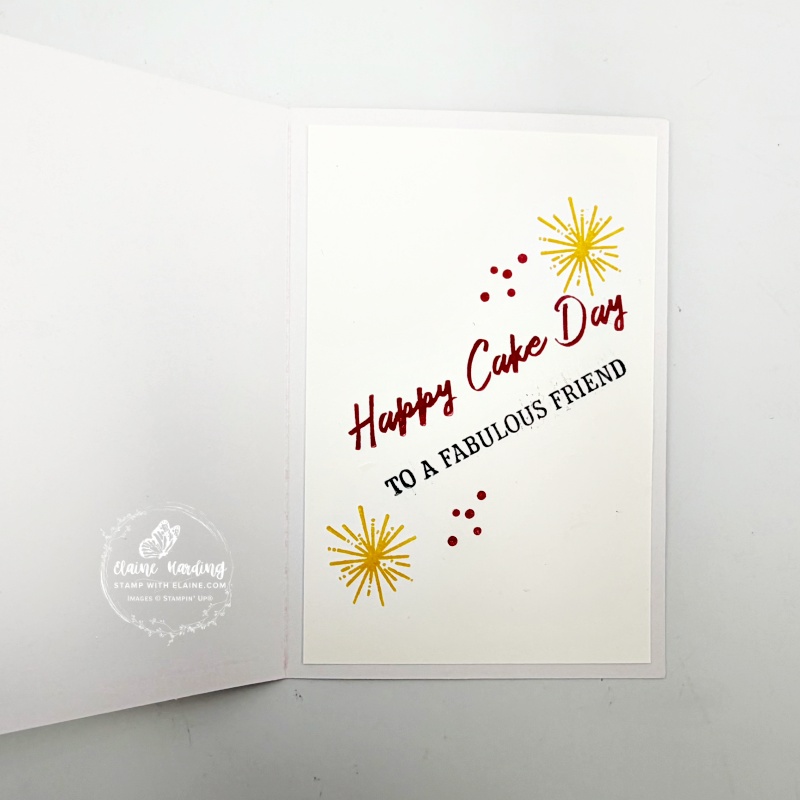
- Adhere the Basic White 3 ⅞” x 5 ⅞” (9.8 cm x 14.9 cm) piece to inside of card.
- Stamp “happy cake day” in Real Red ink
- Ink up “to a fabulous friend” from January’s Product of the month in Tuxedo Black Memento ink.
- Stamp sparkles and dots with Daffodil Delight and Real Red ink respectively.
Supply list
Listed below is the supply list. Just click on the picture to take you directly to the item in my online store.
Product List![Cake Day Bundle (English) [ 168007 ]](https://assets1.tamsnetwork.com/images/EC042017NF/168007s.jpg "Cake Day Bundle (English) [ 168007 ]")
![Cake Day Dies [ 167037 ]](https://assets1.tamsnetwork.com/images/EC042017NF/167037s.jpg "Cake Day Dies [ 167037 ]")
![Cake Day Photopolymer Stamp Set (English) [ 167033 ]](https://assets1.tamsnetwork.com/images/EC042017NF/167033s.jpg "Cake Day Photopolymer Stamp Set (English) [ 167033 ]")
![All In A Row Embossing Folder [ 166989 ]](https://assets1.tamsnetwork.com/images/EC042017NF/166989s.jpg "All In A Row Embossing Folder [ 166989 ]")
![Textured Stripes Mix & Match Cards & Envelopes [ 165357 ]](https://assets1.tamsnetwork.com/images/EC042017NF/165357s.jpg "Textured Stripes Mix & Match Cards & Envelopes [ 165357 ]")
![Basic White A4 Cardstock [ 166781 ]](https://assets1.tamsnetwork.com/images/EC042017NF/166781s.jpg "Basic White A4 Cardstock [ 166781 ]")
![Lemon Lolly A4 Cardstock [ 161729 ]](https://assets1.tamsnetwork.com/images/EC042017NF/161729s.jpg "Lemon Lolly A4 Cardstock [ 161729 ]")
![Very Vanilla A4 Cardstock [ 166785 ]](https://assets1.tamsnetwork.com/images/EC042017NF/166785s.jpg "Very Vanilla A4 Cardstock [ 166785 ]")
![Gold Foil Sheets [ 132622 ]](https://assets1.tamsnetwork.com/images/EC042017NF/132622s.jpg "Gold Foil Sheets [ 132622 ]")
![Daffodil Delight Classic Stampin' Pad [ 147094 ]](https://assets1.tamsnetwork.com/images/EC042017NF/147094s.jpg "Daffodil Delight Classic Stampin' Pad [ 147094 ]")
![Real Red Classic Stampin' Pad [ 147084 ]](https://assets1.tamsnetwork.com/images/EC042017NF/147084s.jpg "Real Red Classic Stampin' Pad [ 147084 ]")
![Versamark Pad [ 102283 ]](https://assets1.tamsnetwork.com/images/EC042017NF/102283s.jpg "Versamark Pad [ 102283 ]")
![Basics Wow! Embossing Powder [ 165679 ]](https://assets1.tamsnetwork.com/images/EC042017NF/165679s.jpg "Basics Wow! Embossing Powder [ 165679 ]")
![Embossing Additions Tool Kit [ 159971 ]](https://assets1.tamsnetwork.com/images/EC042017NF/159971s.jpg "Embossing Additions Tool Kit [ 159971 ]")
![Heat Tool - Uk Plug [ 129054 ]](https://assets1.tamsnetwork.com/images/EC042017NF/129054s.jpg "Heat Tool - Uk Plug [ 129054 ]")

- SHOP ONLINE – EARN 10% REWARDS ON ALL PURCHASES OVER £20
- PURCHASE A STARTER KIT : Get £155 worth of products for only £99. Choose from current catalogues and any specials available. Free Shipping. Read more
- Subscribe to my Video Tutorials – click here