
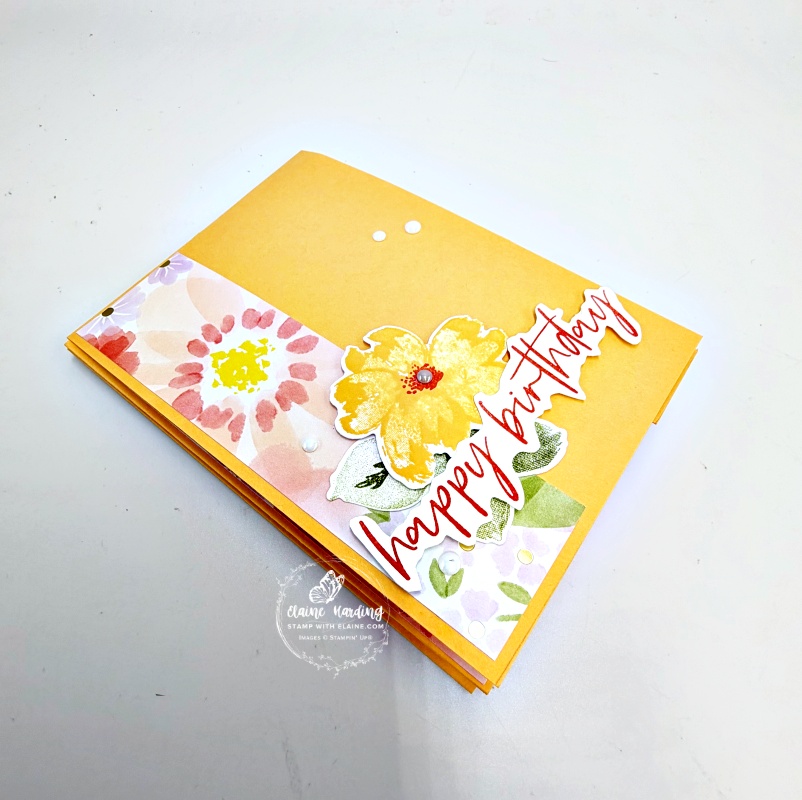
Fun fold card – Petals of Beauty. This is the card I made during a fun craft & chat session with some mystery stamping recently. I am not terribly savvy when it comes to websites so I subscribe to a fabulous group called Build & Bloom which is a digital agency supporting small businesses with their websites and tech run by the lovely Louise Simms who is the CEO. She kindly hosted the mystery stamping session too.
What is Mystery stamping.
Mystery stamping is just that. Everyone uses whatever they have in their stash. The host simply gives you measurements for the card stock and/or pattern paper to use and the rest is up to you. At the end of the session everyone will show what they’ve created so there is a whole variety of cards.
Petals of Beauty bundle
The bundle I used is from the November 2025 online exclusive called Petals of Beauty. I also used January’s Product of the month which you can purchase for £5 subject to a single qualifying order of £70 as a one time purchase only. It is a stamp set called Fabulous Sayings. The Designer Series Papers I used are new and are from the January-April 2026 Mini on page 25 and it’s from the Lovely & Beautiful Suite Collection.
Cutting guide
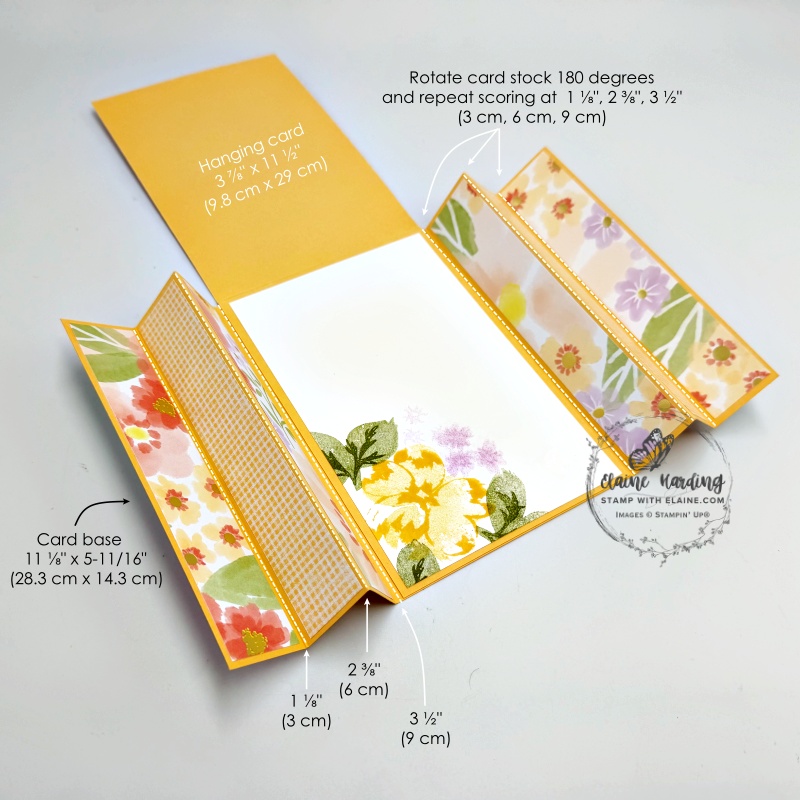
- Peach Pie card base : 11 ⅛” x 5-11/16″ (28.3 cm x 14.3 cm). On the long side score at 1 ⅛”, 2 ⅜”, and 3 ½” (3 cm, 6 cm, 9 cm). Rotate card stock 180 degrees and repeat scoring.
- Hanging card section Peach Pie : 3 ⅞” x 11 ½” (9.8 cm x 29 cm). On the long side score at 5 ¾” (14.5 cm)
- DSP strips for panels (Lovely & Beautiful 12 x 12 Specialty DSP) : 8 strips cut at 1″ x 5 ½” (2.5 cm x 14 cm)
- Front of hanging card : DSP cut at 1 ½” x 5 ½” (3.8 cm x 14 cm).
- Basic White : 3 ⅝” x 5 ½” (9.2 cm x 14 cm).
- Scrap of Basic White for stamping Sentiment and floral elements.
Assembling instructions
- Burnish Peach Pie card base as follows : first score line Valley fold, second score line Mountain fold and third score line Valley fold. Rotate card stock 180 degrees and repeat for opposite side.
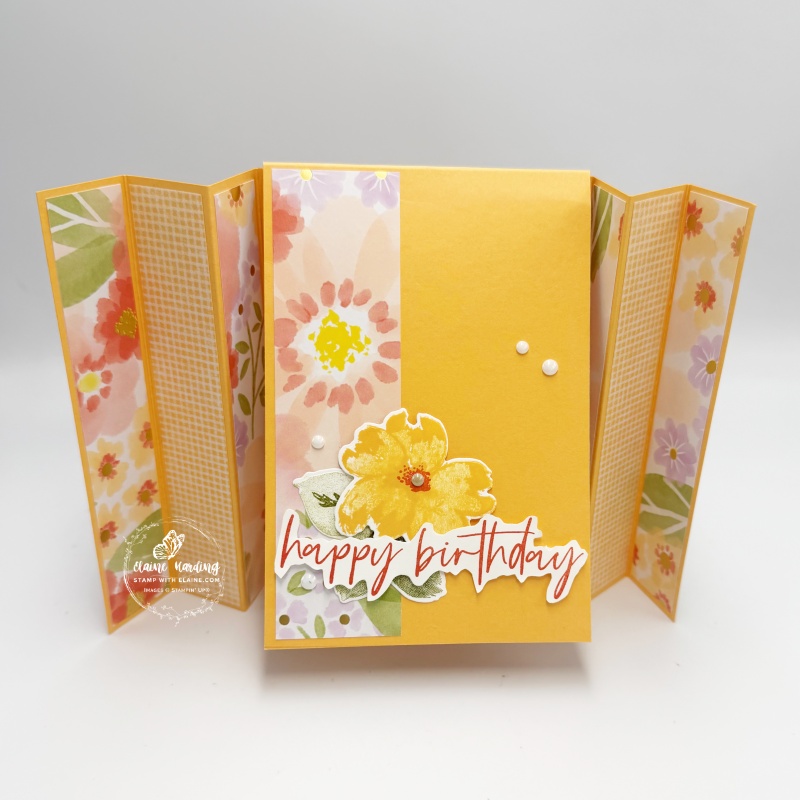
- Lay Peach Pie card base flat and adhere DSP strips. Alternate pattern A with the reverse side pattern B to the inside panels on both sides.
- Flip card over and adhere remaining pattern A to the outside first panels.
Preparing the Hanging card
- Stamp floral elements for the inside of the card in bottom left corner of Basic White piece. Stamp 2nd generation for the large flower in Peach Pie ink.
- Ink detailed stamp for same flower first generation Peach Pie ink. Do the same for the leaves in Old Olive ink and the cluster of flowers in Fresh Freesia.
- On Basic White card stock repeat stamping for large flower and leaves and die cut with corresponding Petals of Beauty dies.
- Stamp greeting in Calypso Coral from Fabulous Sayings (product of the month in January 26) and fussy cut. (refer to picture on the right above the Cutting Guide heading)
- Adhere the 1 ½” x 5 ½” (3.8 cm x 14 cm) DSP piece to front of hanging card leaving an even border at the top, bottom and left side.
- Apply dimensionals to back of large flower and adhere as pictured. Tuck leaves underneath and adhere.
- Add dimensionals to back of greeting and adhere on top of flower as shown.
- Lastly add Pearls of Beauty as pictured.
Supply list
Listed below is the supply list. Just click on the picture to take you directly to the item in my online store.
Product List![Petals Of Beauty Bundle (English) [ 167096 ]](https://assets1.tamsnetwork.com/images/EC042017NF/167096s.jpg "Petals Of Beauty Bundle (English) [ 167096 ]")
![Petals Of Beauty Photopolymer Stamp Set [ 167093 ]](https://assets1.tamsnetwork.com/images/EC042017NF/167093s.jpg "Petals Of Beauty Photopolymer Stamp Set [ 167093 ]")
![Petals Of Beauty Dies [ 167095 ]](https://assets1.tamsnetwork.com/images/EC042017NF/167095s.jpg "Petals Of Beauty Dies [ 167095 ]")
![Fabulous Sayings Photopolymer Stamp Set (English) [ 167972 ]](https://assets1.tamsnetwork.com/images/EC042017NF/167972s.jpg "Fabulous Sayings Photopolymer Stamp Set (English) [ 167972 ]")
![Lovely & Beautiful 12" X 12" (30.5 X 30.5 Cm) Specialty Designer Series Paper [ 166957 ]](https://assets1.tamsnetwork.com/images/EC042017NF/166957s.jpg "Lovely & Beautiful 12\" X 12\" (30.5 X 30.5 Cm) Specialty Designer Series Paper [ 166957 ]")
![Peach Pie A4 Cardstock [ 163800 ]](https://assets1.tamsnetwork.com/images/EC042017NF/163800s.jpg "Peach Pie A4 Cardstock [ 163800 ]")
![Basic White A4 Cardstock [ 166781 ]](https://assets1.tamsnetwork.com/images/EC042017NF/166781s.jpg "Basic White A4 Cardstock [ 166781 ]")
![Fresh Freesia Classic Stampin' Pad [ 155611 ]](https://assets1.tamsnetwork.com/images/EC042017NF/155611s.jpg "Fresh Freesia Classic Stampin' Pad [ 155611 ]")
![Peach Pie Classic Stampin Pad [ 163810 ]](https://assets1.tamsnetwork.com/images/EC042017NF/163810s.jpg "Peach Pie Classic Stampin Pad [ 163810 ]")
![Old Olive Classic Stampin' Pad [ 147090 ]](https://assets1.tamsnetwork.com/images/EC042017NF/147090s.jpg "Old Olive Classic Stampin' Pad [ 147090 ]")
![Calypso Coral Classic Stampin' Pad [ 147101 ]](https://assets1.tamsnetwork.com/images/EC042017NF/147101s.jpg "Calypso Coral Classic Stampin' Pad [ 147101 ]")
![Pearls Of Beauty [ 167098 ]](https://assets1.tamsnetwork.com/images/EC042017NF/167098s.jpg "Pearls Of Beauty [ 167098 ]")

- SHOP ONLINE – EARN 10% REWARDS ON ALL PURCHASES OVER £20
- PURCHASE A STARTER KIT : Get £155 worth of products for only £99. Choose from current catalogues and any specials available. Free Shipping. Read more
- Subscribe to my Video Tutorials – click here