
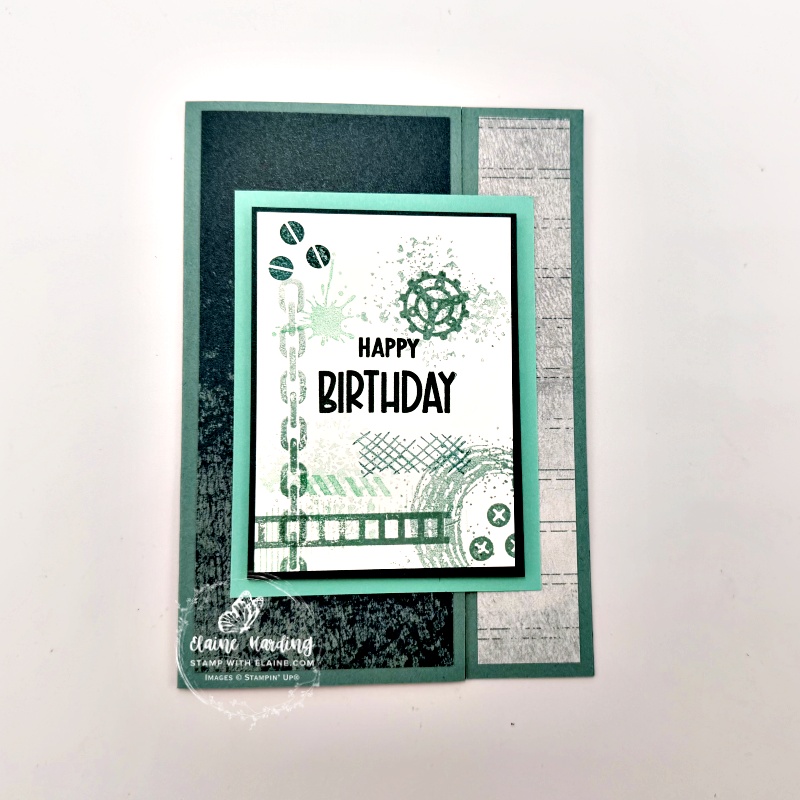
Quick easy birthday gift card. Craft the perfect edgy gift with the Gears & Textures Bundle. Create hardcore, mechanical-inspired cards and crafts with raw, urban style. It’s great for masculine cards. You can use gritty stamps for industrial textures and distressed effects and bold dies for gears, chains, and wire.
Focus on Gears & Textures stamp set
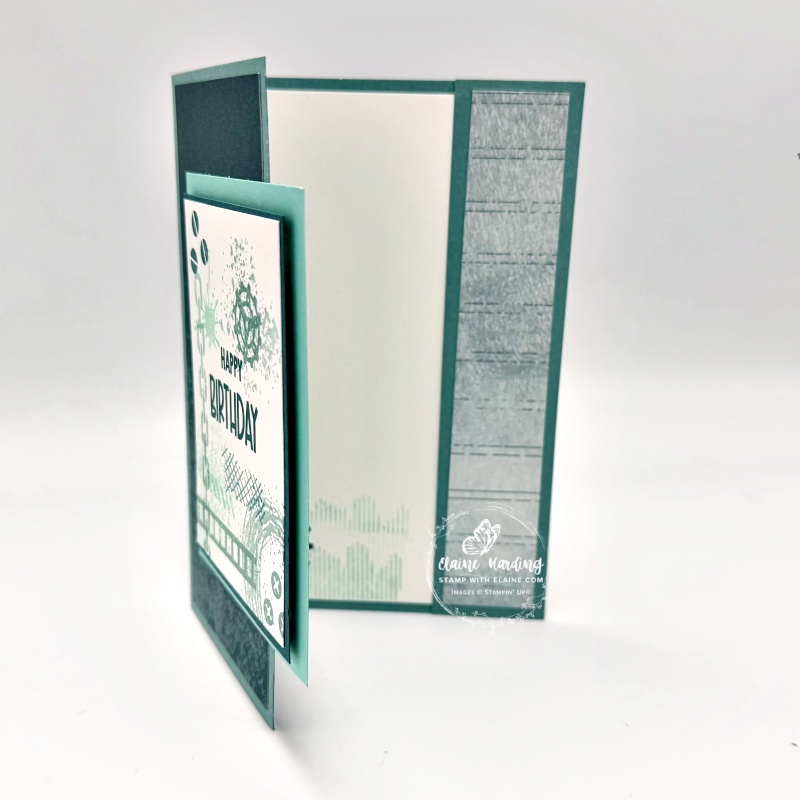
In today’s card, I omitted using the dies and will leave that for another project for another day. When you open the card, there is a 1 ¼” (3.5 cm) strip cut from the front of the card and adhered at the top, bottom and right side of the inside of the card to create a pocket. Quick and easy, right?
Cutting guide
- Card base : Lost Lagoon cut at 8″ x 5 ¾” (20 cm x 14.5 cm). Score on long side at 4″ (10 cm)
- Align right edge of card base to right of cutting groove at 1 ¼” (3.5 cm) and cut off a strip. Set aside.
- Basic White for stamping : 2 ½” x 3 ½” (6.5 cm x 9 cm)
- Pretty Peacock Mat layer#1 : 2 ⅝” x 3 ⅝” (7 cm x 9.5 cm)
- Coastal Cabana Mat layer #2 : 3″ x 4″ (7.5 cm x 10 cm)
Cutting guide for DSP and inside card
- Basic White inside layer 3 ¾” x 5 ½” (9.5 cm x 14 cm)
- DSP Pattern A for narrow Lost Lagoon strip : 1″ x 5 ½” (2.5 cm x 14 cm)
- Pattern B DSP for left side card front : 2 ½” x 5 ½” (6.5 cm x 14 cm)
Assembly instructions
- Stamp as desired on the Basic piece measuring 2 ½” x 3 ½” (6.5 cm x 9 cm) using Pretty Peacock, Lost Lagoon and Coastal Cabana inks. “Happy Birthday” is from “Reason to Celebrate” stamp set
- Apply adhesive to back and adhere to Pretty Peacock layer.
- Then apply dimensionals on back of Pretty Peacock layer and adhere to Coastal Cabana layer.
- Partially apply adhesive to top, bottom and left side of Coastal Cabana, centre and adhere to left side of card front.
Inside card

- Stamp in the bottom left corner on the Basic White layer. Adhere to inside of card leaving an even border on all 4 sides.
- Apply adhesive to the back of the strip at the top, bottom and left side. Flip it over so that the top is facing up.
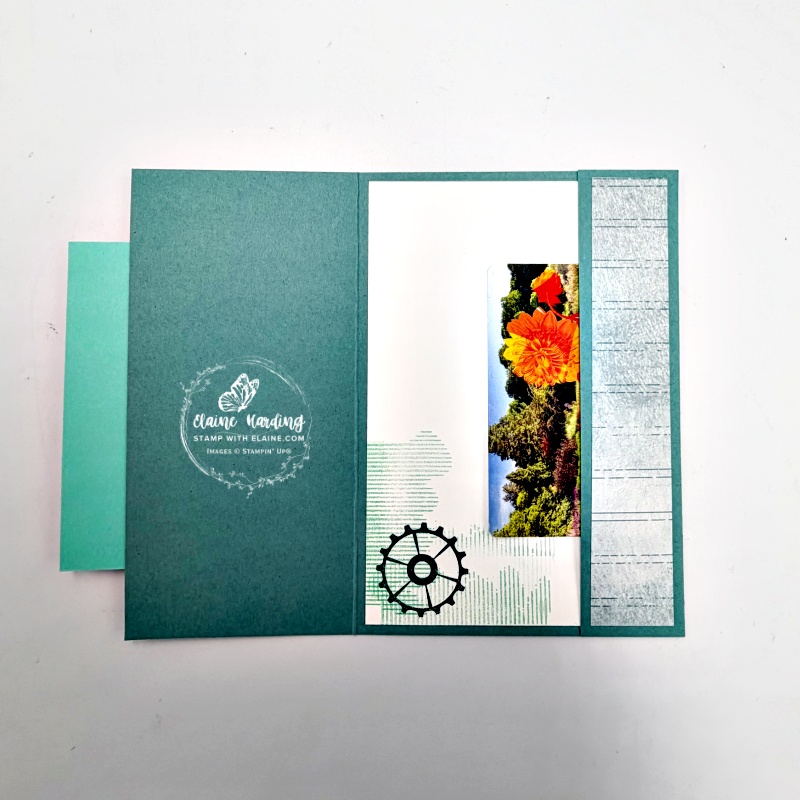
- Close front of card and butt up the 1 ¼” (3.5 cm) strip you cut from the card front and align it so that there are no gaps before adhering to inside of card as pictured.
- Slip your gift card into the pocket.
Supply list
Listed below is the supply list. Just click on the picture to take you directly to the item in my online store.
Product List![Gears & Textures Bundle (English) [ 166854 ]](https://assets1.tamsnetwork.com/images/EC042017NF/166854s.jpg "Gears & Textures Bundle (English) [ 166854 ]")
![Gears & Textures Dies [ 166853 ]](https://assets1.tamsnetwork.com/images/EC042017NF/166853s.jpg "Gears & Textures Dies [ 166853 ]")
![Gears & Textures Photopolymer Stamp Set [ 166851 ]](https://assets1.tamsnetwork.com/images/EC042017NF/166851s.jpg "Gears & Textures Photopolymer Stamp Set [ 166851 ]")
![Reason To Celebrate Photopolymer Stamp Set (English) [ 166905 ]](https://assets1.tamsnetwork.com/images/EC042017NF/166905s.jpg "Reason To Celebrate Photopolymer Stamp Set (English) [ 166905 ]")
![Nature Walk 12" X 12" (30.5 X 30.5 Cm) Designer Series Paper [ 166912 ]](https://assets1.tamsnetwork.com/images/EC042017NF/166912s.jpg "Nature Walk 12\" X 12\" (30.5 X 30.5 Cm) Designer Series Paper [ 166912 ]")
![Basic White A4 Cardstock [ 166781 ]](https://assets1.tamsnetwork.com/images/EC042017NF/166781s.jpg "Basic White A4 Cardstock [ 166781 ]")
![Card Stock A4 Coastal Cabana [ 131302 ]](https://assets1.tamsnetwork.com/images/EC042017NF/131302s.jpg "Card Stock A4 Coastal Cabana [ 131302 ]")
![Lost Lagoon A4 Cardstock [ 133686 ]](https://assets1.tamsnetwork.com/images/EC042017NF/133686s.jpg "Lost Lagoon A4 Cardstock [ 133686 ]")
![Pretty Peacock A4 Cardstock [ 150886 ]](https://assets1.tamsnetwork.com/images/EC042017NF/150886s.jpg "Pretty Peacock A4 Cardstock [ 150886 ]")
![Coastal Cabana Classic Stampin' Pad [ 147097 ]](https://assets1.tamsnetwork.com/images/EC042017NF/147097s.jpg "Coastal Cabana Classic Stampin' Pad [ 147097 ]")
![Lost Lagoon Classic Stampin' Pad [ 161678 ]](https://assets1.tamsnetwork.com/images/EC042017NF/161678s.jpg "Lost Lagoon Classic Stampin' Pad [ 161678 ]")
![Pretty Peacock Classic Stampin’ Pad [ 150083 ]](https://assets1.tamsnetwork.com/images/EC042017NF/150083s.jpg "Pretty Peacock Classic Stampin’ Pad [ 150083 ]")

- SHOP ONLINE – EARN 10% REWARDS ON ALL PURCHASES OVER £20
- PURCHASE A STARTER KIT : Get £155 worth of products for only £99. Choose from current catalogues and any specials available. Free Shipping. Read more
- Subscribe to my Video Tutorials – click here
Pingback: Masculine Shaker Valentine card - Stamp with Elaine