
Happy Mother’s Day card. Wishing all Mums past and present a Happy Mother’s Day. Today’s card is a trifold Mother’s Day card naturally as in the UK, 15 March marks Mothering Sunday. The Fragrant Flowers Bundle has been sitting on my desk for months and has yet to see daylight. Time to redress the balance!
So often we play with the new and forget the value of the old. I’ve used some forgotten papers like the 6″x 6″ (15.2 x 15.2 cm) Beautiful Bokeh Designer Series Paper which is still available. It has a hue of colours without any patterns so it is great for using as a backdrop for your stamped images.
Trifold card
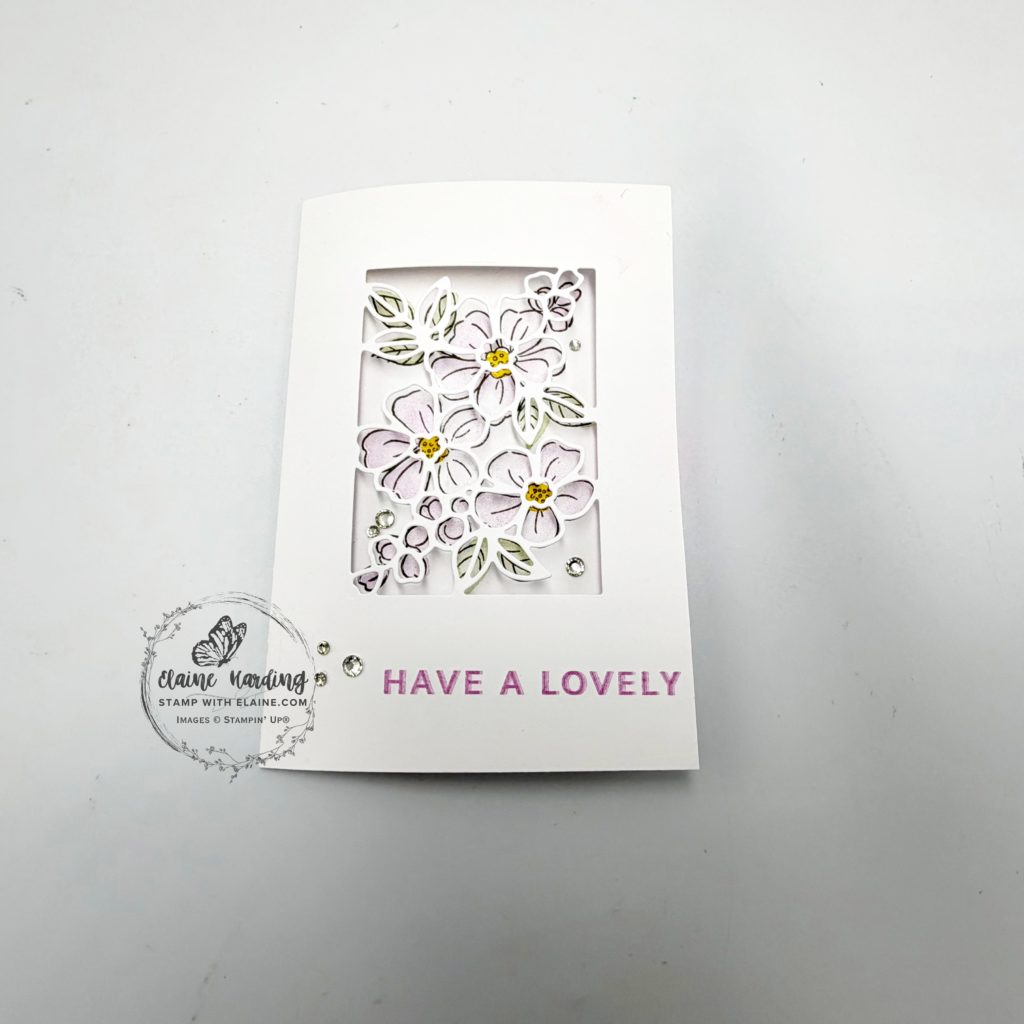
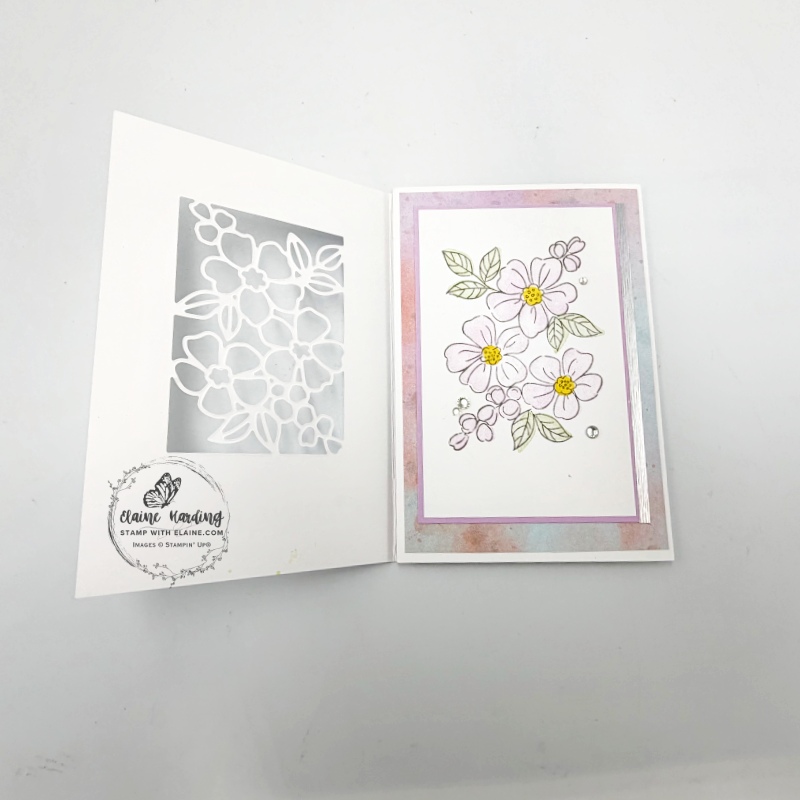
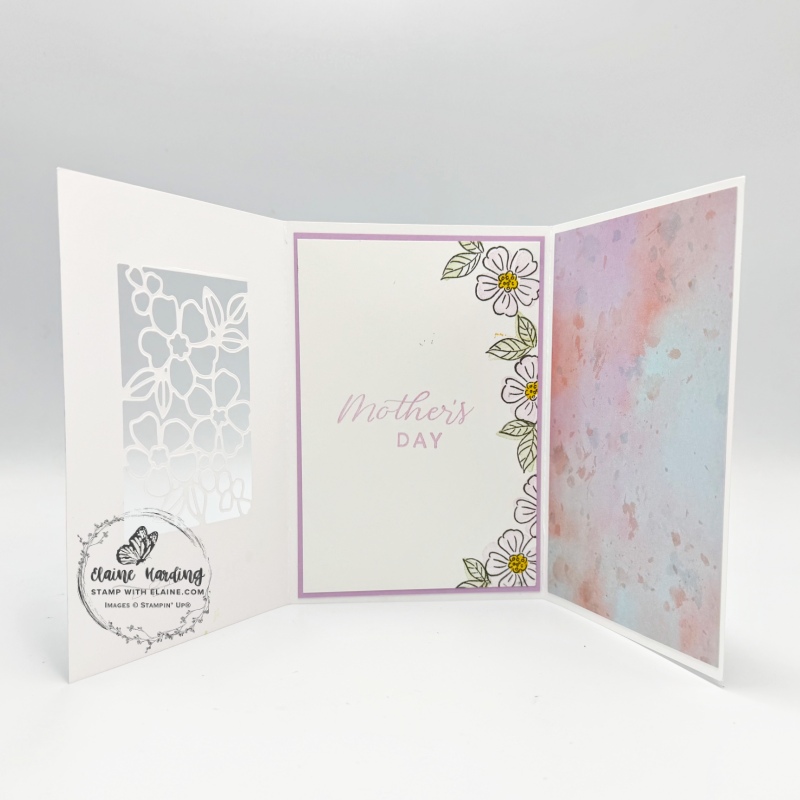
A trifold card consists of 3 panels. The picture on the left below, shows the card closed. In the middle picture when you open the card reveals the end panel folded toward the centre of the card. With the card fully open, it reveals the centre panel where you can pen your message.
Cutting guide
Card base
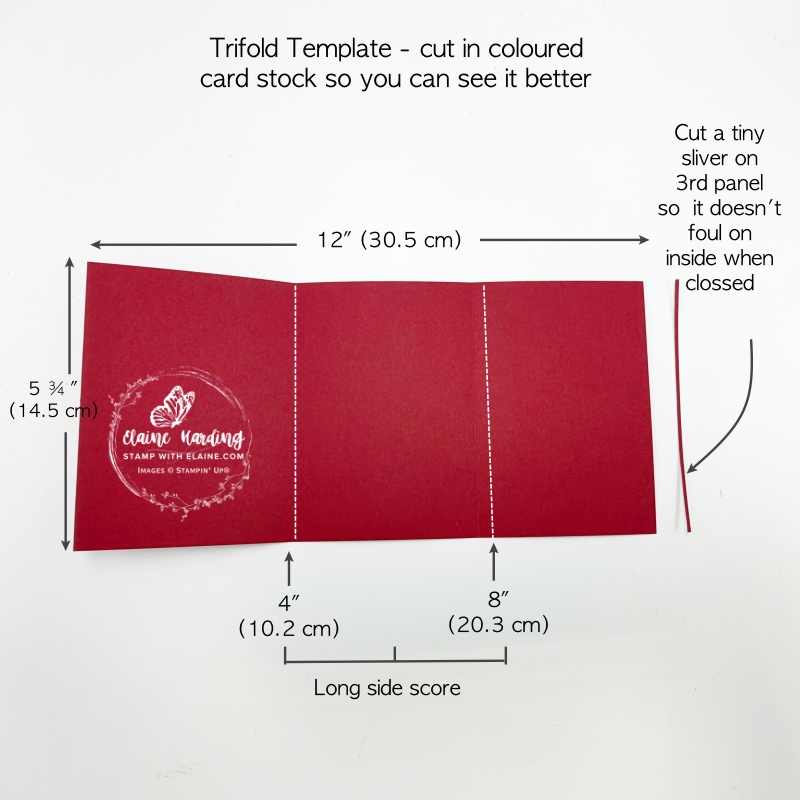
- Card base : Willow White cut at 5 ¾” x 12″ (14.5 cm x 30.5 cm). Long side score at 4″ and 8″ (10.2 cm and 20.3 cm).
- In order for the card to close properly without buckling, cut a small sliver on the right edge of 3rd panel.
- Basic White layer centre panel cut at 3 ⅝” x 5 ⅜” (9.2 cm x 13.7 cm)
- Cut Fresh Freesia layer for centre panel at 3 ¾” x 5 ½” (9.5 cm x 14 cm).
- Mat layer for stamped image in Fresh Freesia cut at 3 ⅛” x 4 ⅞” (8 cm x 12.5 cm).
- Silver foil strip cut at ⅛” x 4 ⅞” (0.3 cm x 12.5 cm).
- Beautiful Bokeh 6″x 6″ (15.2 cm x 15.2 cm) DSP – cut 2 pieces 3 ¾” x 5 ½” (9.5 cm x 14 cm).
- Willow White scrap : 5 ¼” x 6 ½” (13.3 cm x 16.5 cm) for stamping largest floral stamp.
Die cutting
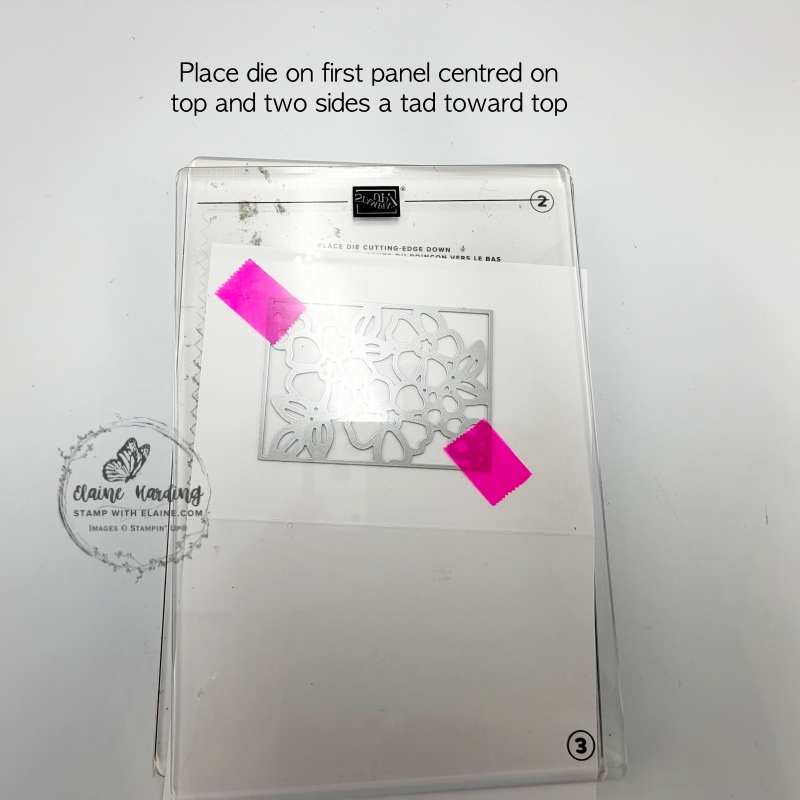
- Place Fragrant Flowers die on the first panel of trifold card equidistant on top and two sides.
- Secure with low tack tap to prevent it from going out of alignment on the cutting platform.
- To make your cutting sandwich, you need the Base Plate 1, Die Plate 2, Cutting platform 3, cardstock with die placed on top cutting side face down followed by a 2nd platform 3.
Stamping/aligning die cut front panel
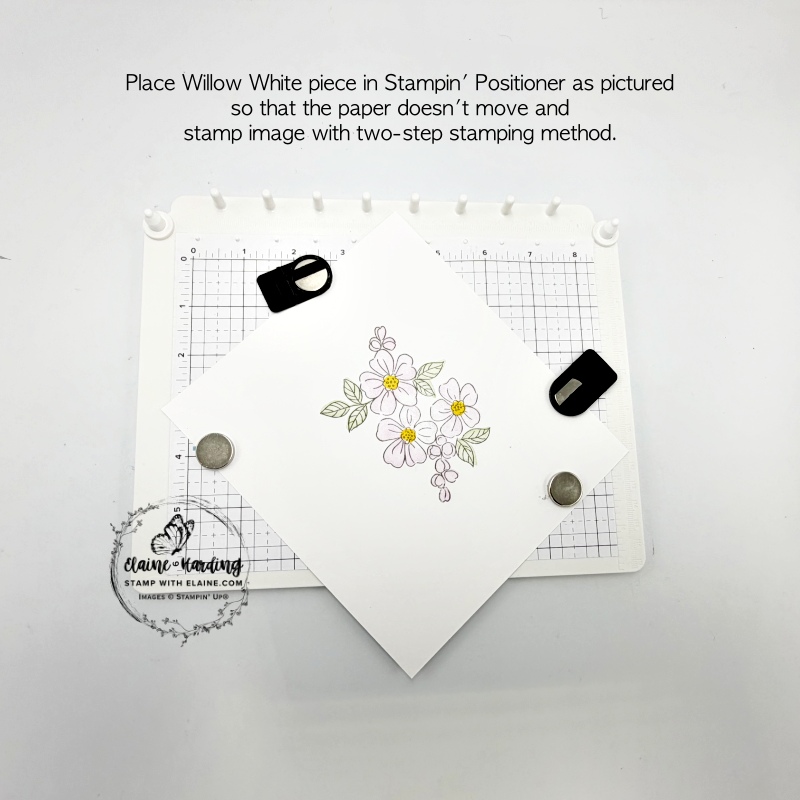
- Place large Willow White piece in Stampin’ Positioner and stamp the flowers with two-step stamping method. Linear image in Basic Grey ink, flowers in Fresh Freesia, flower centres in Daffodil Delight and the leaves in Soft Sea Foam ink.
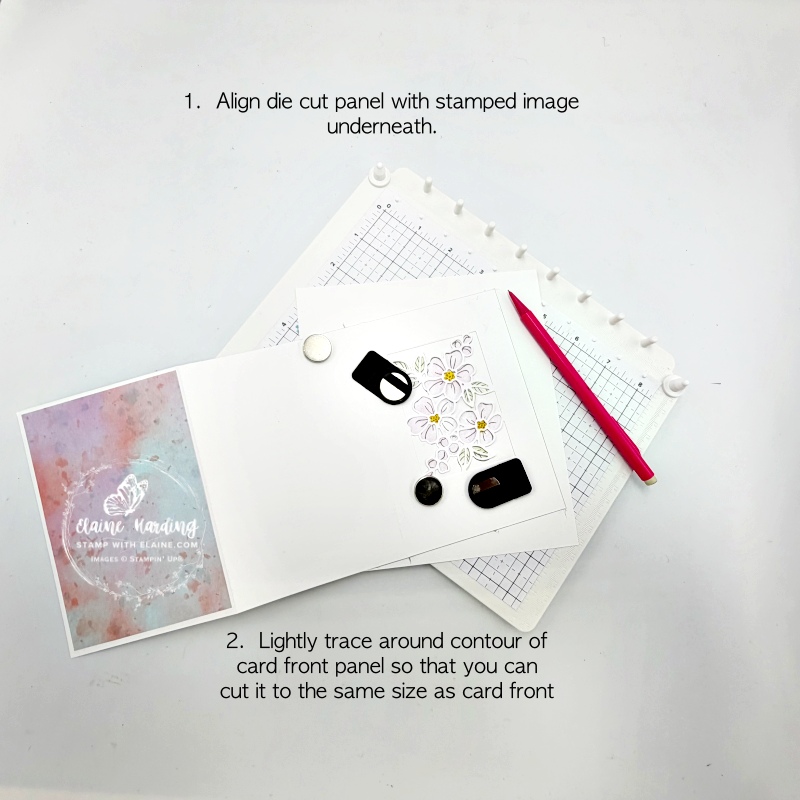
- Align front panel with stamped image and use low tack tape to secure it. Use a pencil to lightly trace around perimeter of card as shown in picture below.
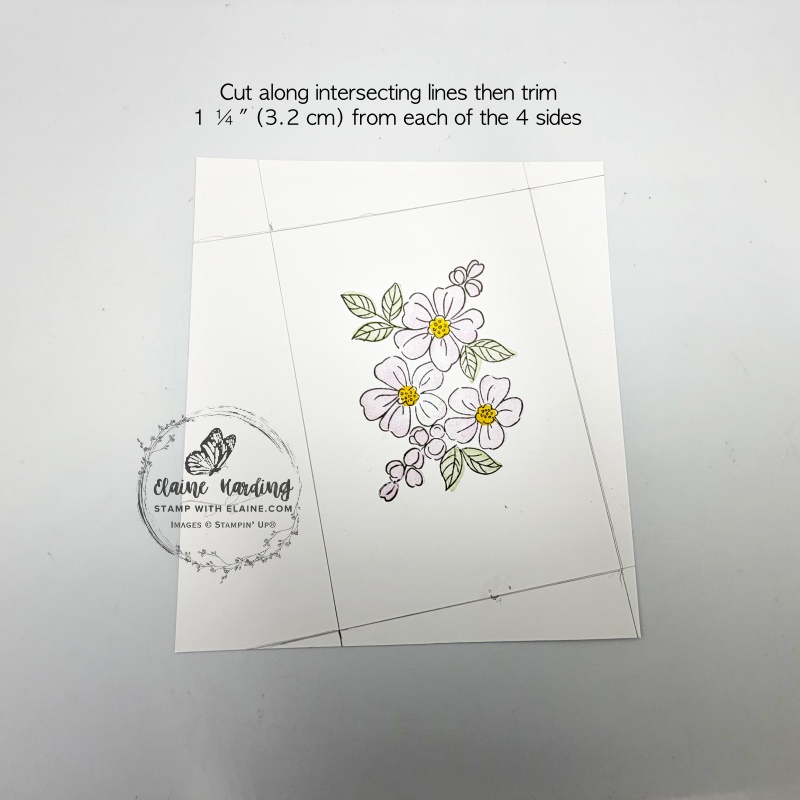
- Cut along pencil lines. Trim equally on all 4 sides so that the finished piece measures 3″ x 4 ⅝” (7.5 cm x 11 cm).
- Adhere trimmed stamped piece on to Fresh Freesia mat layer measuring 3 ⅛” x 4 ⅞” (8 cm x 12.5 cm).
How to attach stamped layer
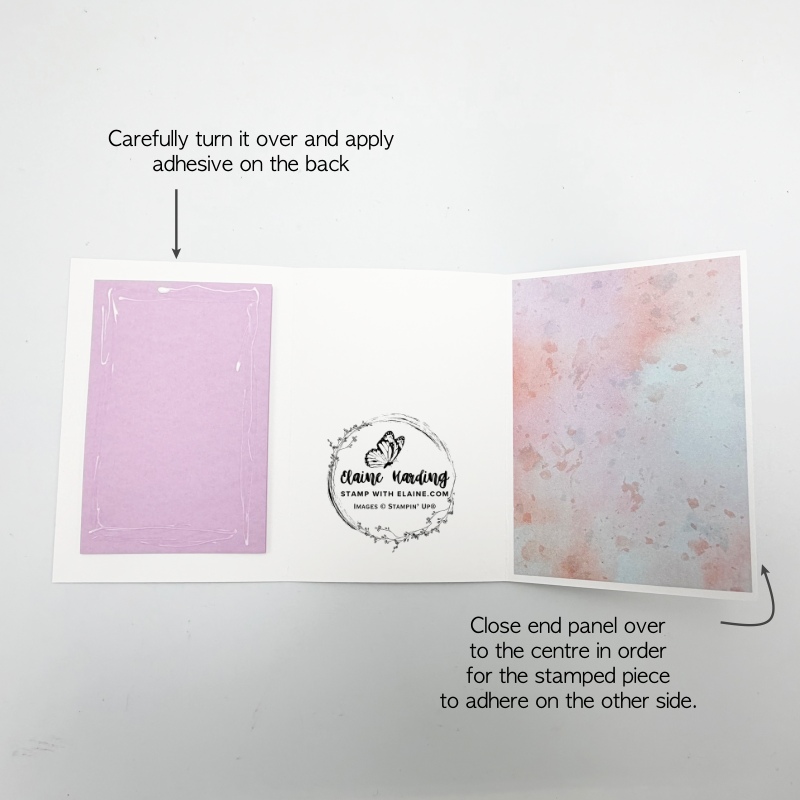
- Align stamped layer with die cut Fragrant Floral front panel piece – pictured on the left above. Carefully open card so that stamped piece is face down and the mat layer on the reverse is face up. Apply adhesive on this piece.
- Close the end panel toward the centre panel of card.
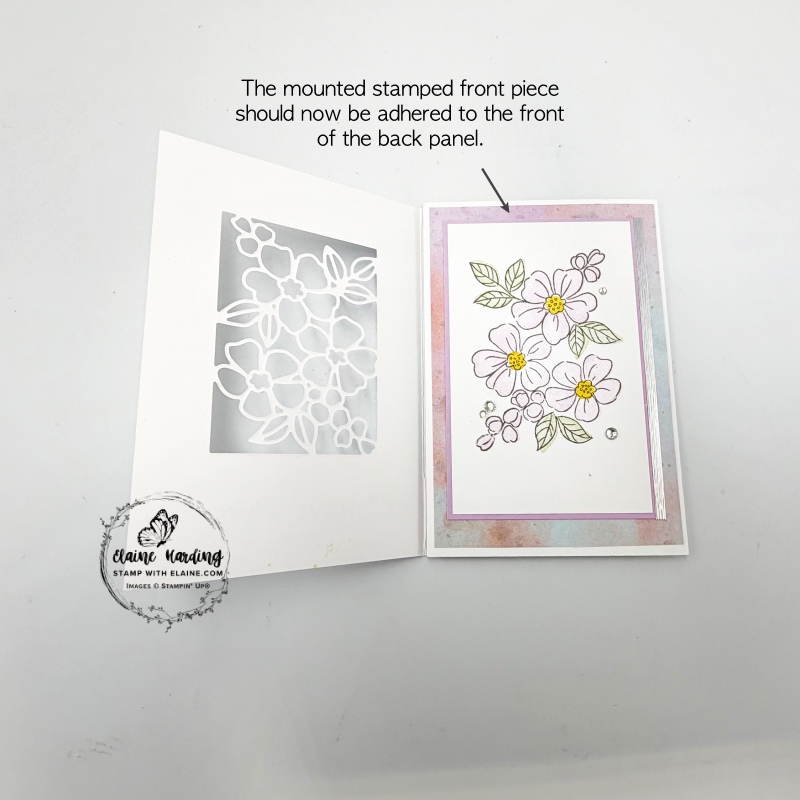
- Next close left panel on top of the end panel and the stamped image will stick on top of the end panel as pictured on the right above.
Finishing touches

- Lastly stamp “Have a lovely” on bottom right of front of card with Fresh Freesia ink.
- Adhere Fresh Freesia mat layer to centre panel of trifold card.
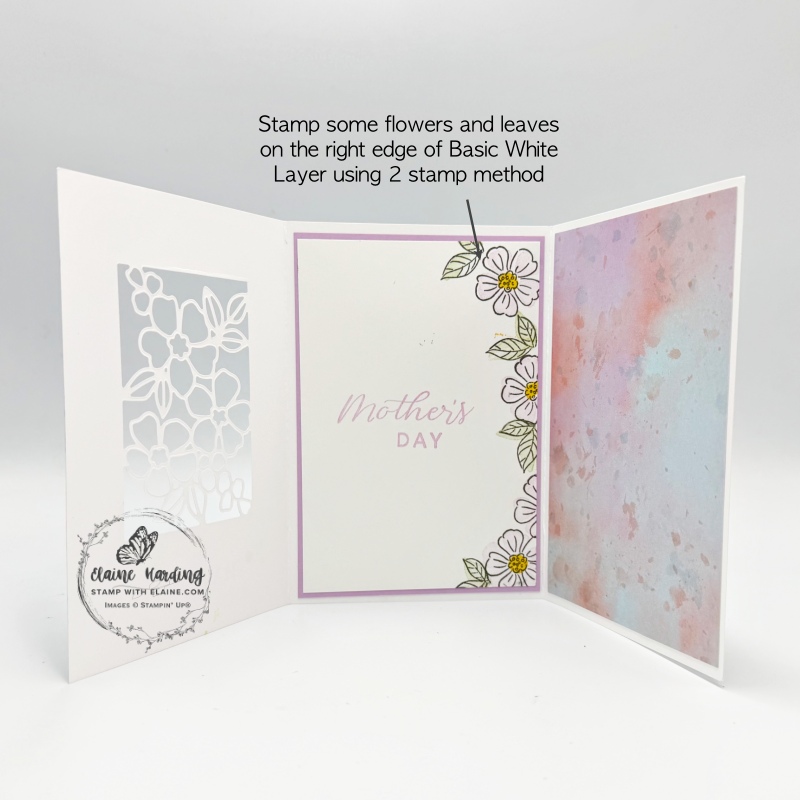
- Stamp a border of flowers randomly along right edge of Basic White 3 ⅝” x 5 ⅜” (9.2 cm x 13.7 cm) and use two-step stamping method to colour in the flowers and leaves then adhere to Fresh Freesia mat layer leaving an even border on all 4 sides.
- Close card and add some Rhinestone Basic jewels randomly to complete card.
Supply list
Listed below is the supply list. Just click on the picture to take you directly to the item in my online store.
Product List![Fragrant Flowers Bundle (English) [ 162379 ]](https://assets1.tamsnetwork.com/images/EC042017NF/162379s.jpg "Fragrant Flowers Bundle (English) [ 162379 ]")
![Family Ties Photopolymer Stamp Set (English) [ 166897 ]](https://assets1.tamsnetwork.com/images/EC042017NF/166897s.jpg "Family Ties Photopolymer Stamp Set (English) [ 166897 ]")
![Beautiful Bokeh 6" X 6" (15.2 X 15.2 Cm) Designer Series Paper [ 164607 ]](https://assets1.tamsnetwork.com/images/EC042017NF/164607s.jpg "Beautiful Bokeh 6\" X 6\" (15.2 X 15.2 Cm) Designer Series Paper [ 164607 ]")
![Silver 12" X 12" (30.5 X 30.5 Cm) Foil Sheets [ 163387 ]](https://assets1.tamsnetwork.com/images/EC042017NF/163387s.jpg "Silver 12\" X 12\" (30.5 X 30.5 Cm) Foil Sheets [ 163387 ]")
![White Willow 12" X 12" (30.5 X 30.5 Cm) Cardstock [ 166703 ]](https://assets1.tamsnetwork.com/images/EC042017NF/166703s.jpg "White Willow 12\" X 12\" (30.5 X 30.5 Cm) Cardstock [ 166703 ]")
![Basic White A4 Cardstock [ 166781 ]](https://assets1.tamsnetwork.com/images/EC042017NF/166781s.jpg "Basic White A4 Cardstock [ 166781 ]")
![Rhinestone Basic Jewels [ 144220 ]](https://assets1.tamsnetwork.com/images/EC042017NF/144220s.jpg "Rhinestone Basic Jewels [ 144220 ]")
![Basic Gray Classic Stampin' Pad [ 149165 ]](https://assets1.tamsnetwork.com/images/EC042017NF/149165s.jpg "Basic Gray Classic Stampin' Pad [ 149165 ]")
![Daffodil Delight Classic Stampin' Pad [ 147094 ]](https://assets1.tamsnetwork.com/images/EC042017NF/147094s.jpg "Daffodil Delight Classic Stampin' Pad [ 147094 ]")
![Fresh Freesia Classic Stampin' Pad [ 155611 ]](https://assets1.tamsnetwork.com/images/EC042017NF/155611s.jpg "Fresh Freesia Classic Stampin' Pad [ 155611 ]")
![Soft Sea Foam Classic Stampin' Pad [ 147102 ]](https://assets1.tamsnetwork.com/images/EC042017NF/147102s.jpg "Soft Sea Foam Classic Stampin' Pad [ 147102 ]")
![Small Blending Brushes [ 160518 ]](https://assets1.tamsnetwork.com/images/EC042017NF/160518s.jpg "Small Blending Brushes [ 160518 ]")

- SHOP ONLINE – EARN 10% REWARDS ON ALL PURCHASES OVER £20
- PURCHASE A STARTER KIT : Get £155 worth of products for only £99. Choose from current catalogues and any specials available. Free Shipping. Read more
- Subscribe to my Video Tutorials – click here