
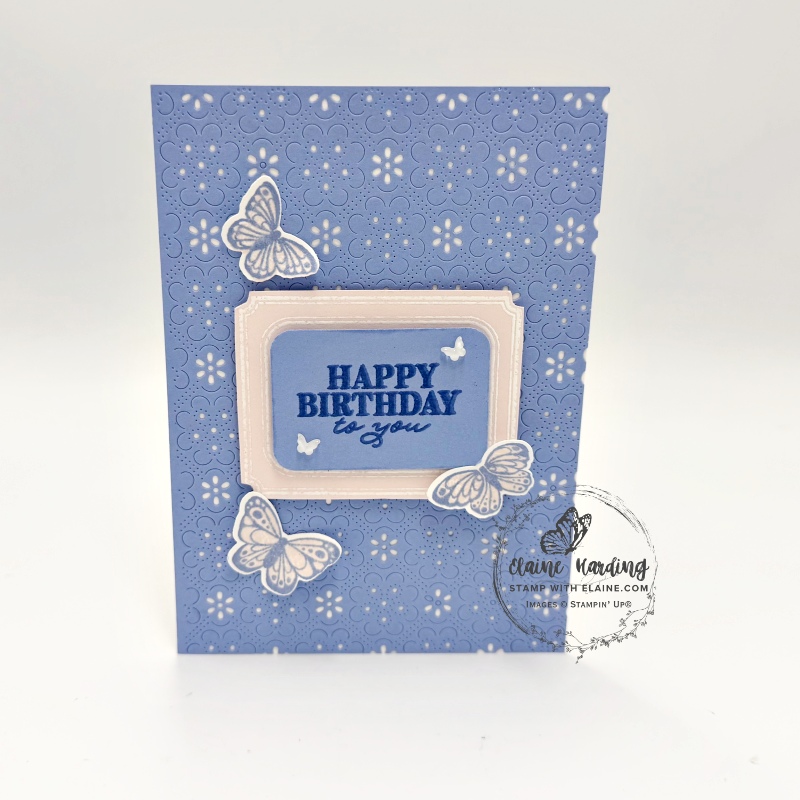
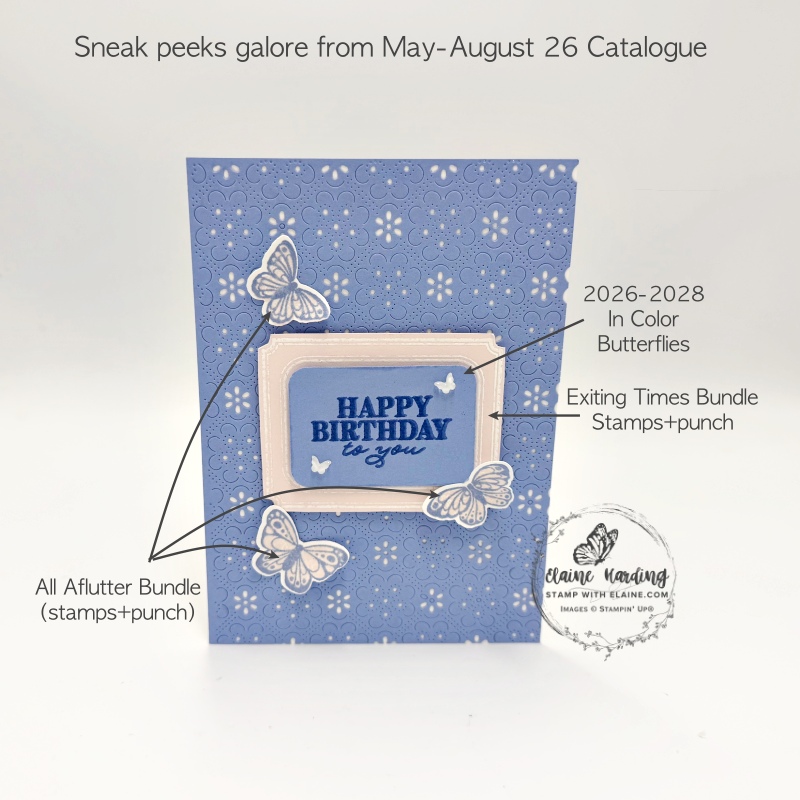
April Product of the month – this is the Eyelet Blooms Die. My product of the month just arrived, so I had to re-shuffle my posts around to include the Eyelet Blooms die before the end of April! I don’t normally post sneak peek this far in advance, but the All Aflutter Bundle and Exciting Times bundle both arrived at the same time so I jumped right in and created this birthday card.
I couldn’t keep my hands off these shiny new toys, so here’s the card incorporating ALL three!
Sneak peeks
I used the new 2026-2028 in Color card stock Hydrangea Hue for the card front and embossed it with the Product of the Month (POM) Eyelet Bloom Die. Then I white embossed the frame on Barely Blush card stock (another new In Color) with the Exciting Times stamp set. “Happy Birthday to you” was stamped in Hydrangea Hue first, then stamped again with Versamark and clear embossed to make the letters pop.
How to make card
- Card base : Basic White cut at 5 ¾” x 8 ¼” (14.5 cm x 21 cm) and folded in half.
- Hydrangea Hue card stock : cut at 4 ⅛” x 5 ¾” (10.5 cm x 14.5 cm) emboss with Eyelet Bloom die and adhere to card front.
- On a scrap of Barely Brush card stock, stamp frame with Versamark, sprinkle with White embossing powder and heat set. Fussy cut and adhere to centre of card with dimensionals.
- Use Stampin’ Positioner tool to stamp greeting with Hydrangea Hue ink first, clean stamp and this time ink and stamp with versamark ink. Sprinkle with clear embossing powder and heat set. Punch out with Rounded Rectangle punch.
- Align with centre of Barely Blush label and adhere with dimensionals.
Stamping butterflies
The All Aflutter stamp set has a coordinating punch and if you purchase both stamps and punch as a bundle, you can make a saving of 10%. The stamp set is a two step stamping set. A solid image stamp, followed by an intricate one to complete the image.
- Stamp the detailed image first in Hydrangea Hue ink.
- Fill in detailed image with solid image inked in Barely Blush ink.
- Die cut with corresponding die – the die will separate the image into 3 separate butterflies, small, medium and large. Adhere these with glue dots as pictured above.
- Use a Clear Wink of Stella glitter brush to apply glitter to all 3 butterflies and adhere to card with glue dots.
Embellishments
- 2026-2028 In color butterflies – select the white ones.
- Adhere on Hydrangea Hue label.
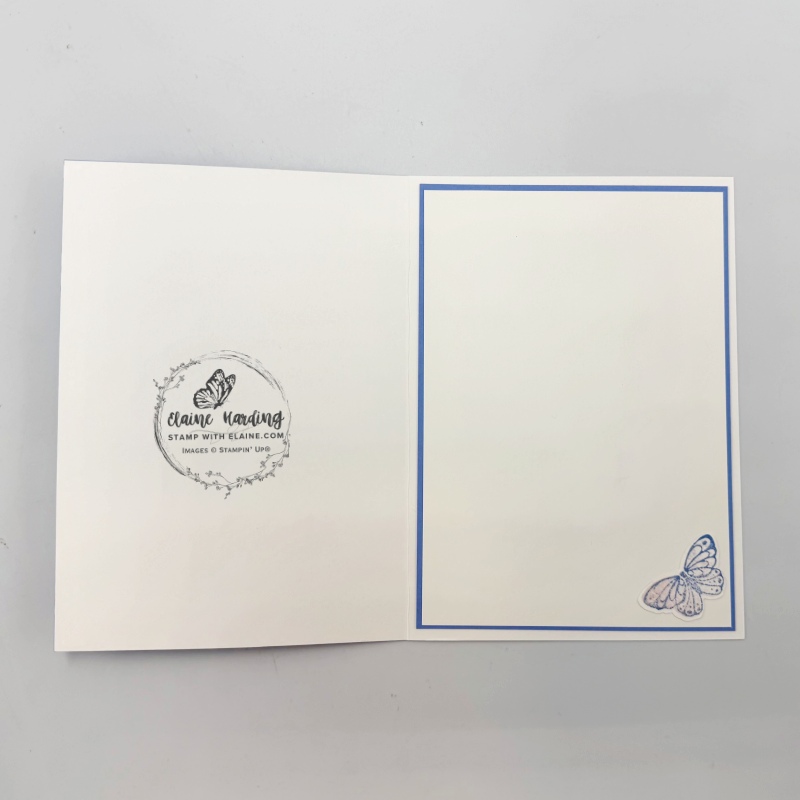
Inside card
- Hydrangea Hue layer : cut at 3 ⅞” x 5 ½” (10 cm x 14 cm)
- Basic White layer : cut at 3 ¾” x 5 ⅜” (9.5 cm x 13.5 cm)
- Stamp and punch out a butterfly to adhere in bottom right corner to complete card.
I will add the supply list when it becomes available on 5 May 2025.

- SHOP ONLINE – EARN 10% REWARDS ON ALL PURCHASES OVER £20
- PURCHASE A STARTER KIT : Get £155 worth of products for only £99. Choose from current catalogues and any specials available. Free Shipping. Read more
- Subscribe to my Video Tutorials – click here