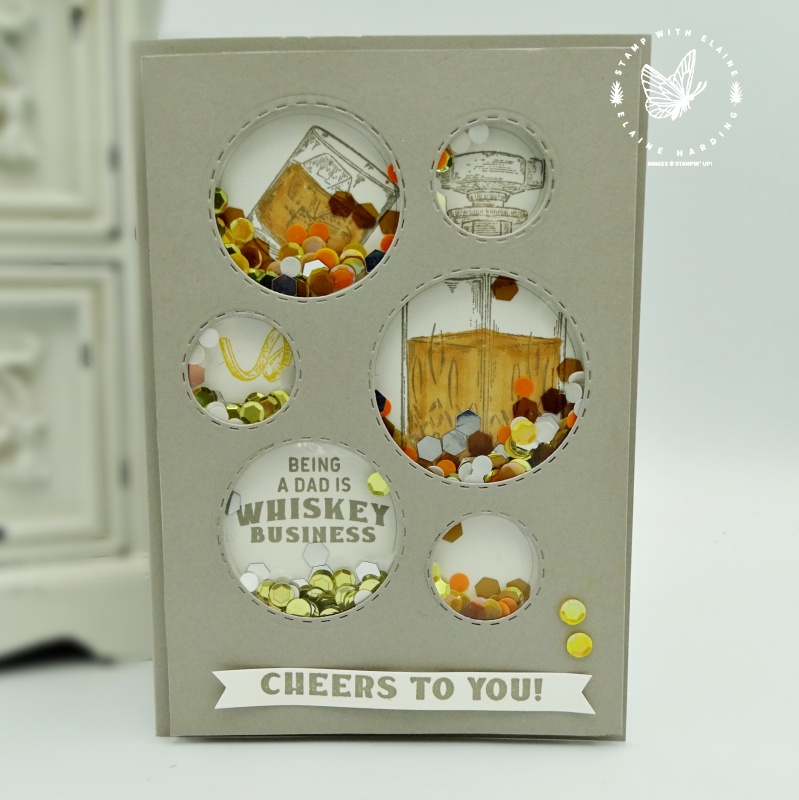
This Father’s Day Shaker Card is deceptively easy to make. The inspiration came from seeing a shaker card on Stampin’ Up!’s website and I wondered how they put their sequins into separate compartments. Stampin’ Up! used the Picture dies and as I have them, I decided to give it a go.

Creating the Shaker
There are 3 elements to create the Shaker. I cut 3 pieces the same size – the card front in Gray Granite, the window sheet, and the backing piece for stamping on in Basic white. To separate the shaker “chambers”, I used foam adhesive strips. They’re really a “must have” item especially if you’re making shaker cards.
The backing piece is in Basic White. You have to trace round the circles on the Basic White piece so as not to encroach on the “windows” when you adhere the foam adhesive strips to the backing piece.
I die cut the Gray Granite piece with the Picture die first, then used it as a template to trace the apertures on to the Basic White backing piece. Once that was done, I could then adhere the window sheet to the Gray Granite piece. This became the “lid” to enclose the sequins in each compartment.
Rather than me waffle on, here’s the video tutorial for valuable hints and tips!
If you’d like to see another card I made with the Picture dies click on the link HERE.
List of supplies
Product List
- SHOP ONLINE – EARN 10% REWARDS ON ALL PURCHASES OVER £20
- PURCHASE A STARTER KIT : Get £155 worth of products for only £99. Choose from current catalogues and any specials available. Free Shipping. Read more
- Subscribe to my Video Tutorials – click here


