
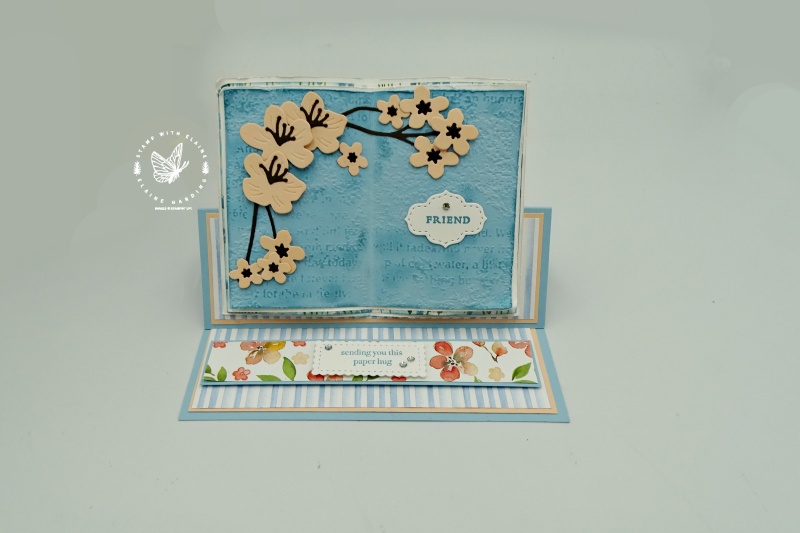
I’m thrilled to be able to share this Fancy Easel card with Forever Blossoms. Although I’d used the stamps and one of the dies, I neglected using the bendy branch die. It was perfect for using with an open book easel card.
This type of Open book easel card harks back to circa 2014 when “Bookatrix” score boards were all the rage. The cards were huge. I’m not a fan of over sized cards. At the time, there were also dies available but again they were designed for much larger cards.
Besides, neither the score board nor dies were in Stampin’ Up!’s product line. It occurred to me that you don’t need curvy lines to resemble pages of a book, you could just as easily simulate them with rectangular pieces of paper folded in half. Consequently I thought I’d have a crack at shrinking it down so it would fit into a C6 envelope. My prototype was created with the pretty Parisian Blossoms Specialty Designer Series Papers. One of the designs was just a whole sheet of script – ideal for the pages of the book. Unfortunately, by the time I made it, the papers had already retired so I could no longer use the content.
New Embossing folder
Hurrah! I’m happy to report that there is a new Timeworn Type 3D embossing folder in the latest July-December 2021 mini. I thought I could use this with “You’re a Peach” Designer Series Papers in lieu of the Parisian Blossoms paper to duplicate this project and share it with you at long last!
You can see why that scoreboard which was used to create open book type cards coined its name “Bookatrix”. Pieces of paper folded in half and propped up against an easel certainly resembles a book.
Cherry Blossom Dies
The long bendy branch gets an airing at last! I attached a self adhesive sheet to the back of a scrap of Early Espresso card stock before die cutting the bendy branch from the Cherry Blossom Die set. I’m a huge advocate of self-adhesive sheets especially for jobs like this.
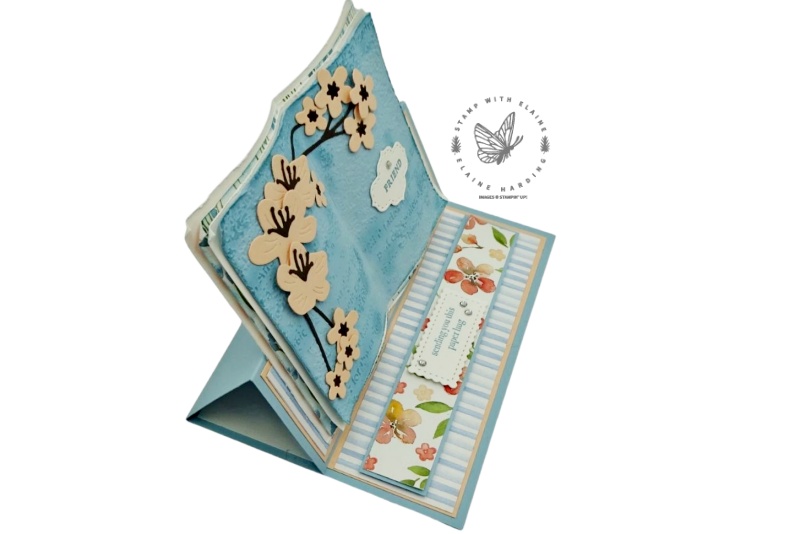
You can probably see how it props itself up from this side view. You can also see the leaves of the pages as well as the embossing with the Timeworn Type 3D embossing folder.
Additional Dies and Stamp set
I needed to balance out the card visually, but didn’t want to over power the page with anything big. I looked through my stash and the Stitched So Sweetly dies fitted the bill. The sentiments from “Through it Together” fitted into the smallest of the scalloped dies in the Stitched so Sweetly die set. This stamp set has a plethora of sentiments in different fonts. Some are script, some are in block capitals and some in type face, all small enough not to overwhelm the card.
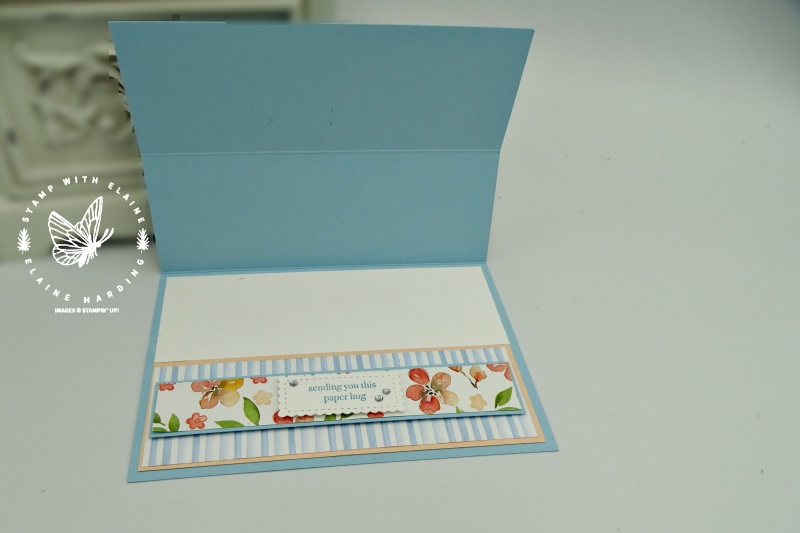
For inside the base card I added petal pink, and balmy blue mat layers and adhered different patterned papers from “You’re a peach” 12″ x 12″ DSP stack to compliment both.
Here are the measurements both in Imperial and Metric.
Measurements for card stock
Imperial
- Card Base in Balmy Blue: 5-7/8″ x 8-1/4″ Long side on top, score at 2-1/16″ and 4-1/8″
- Petal Pink for Easel section and inside bottom of card (Mat Layer 1) : 2 pieces cut 1-7/8″ x 5-5/8″
- DSP pattern 1 (Mat Layer 2) in for Easel section and inside bottom of card: 2 pieces cut at 1-3/4″ x 5-1/2″
- Balmy Blue – Easel Stopper (Mat 1) : 1″ x 5-3/8″
- DSP Pattern 2 – Easel Stopper (Mat 2) : 7-8″ x 5-1/4″
- Inside card: Basic White 2″ x 5-5/8″
- Basic White (Book Page 1): 3-7/8″ x 5-1/8″
- DSP Pattern 3 (Book Page 2): 3-3/4″ x 5″
- Basic White (Book Page 3) : 3-5/8″ x 4-7/8″
- Balmy Blue (Book Page 4) : 3-1/2″ x 4-3/4″
Metric
- Card Base in Balmy Blue: 14 cm x 20 cm, Long side on top, score at 5 cm and 10 cm
- Petal Pink for Easel section and inside bottom of card (Mat Layer 1) : 2 pieces cut 4.5 cm x 13.5 cm
- DSP pattern 1(Mat Layer 2) in for Easel section and inside bottom of card: 2 pieces cut at 4 cm x 13 cm
- Balmy Blue – Easel Stopper (Mat 1) : 2.5 cm x 12.5 cm
- DSP Pattern 2 – Easel Stopper (Mat 2) : DSP Pattern 2 cm x 12 cm
- Inside card: Basic White 5 cm x 13.5 cm
- Basic White (Book Page 1) : 9 cm x 12 cm
- DSP Pattern 3 (Book Page 2) : 8.5 cm x 11.5 cm
- Basic White (Book Page 3) : 8 cm x 11 cm
- Balmy Blue (Book Page 4) : 7.5 cm x 10.5 cm
Video tutorial
Dont’ worry, I’ve got you covered! I know all that paper to cut looks slightly daunting, but it isn’t really when you break it down. I’ve got a video tutorial to help through the stages. I hope you’ll be inspired to have a go!
")
")


 Designer Series Paper")


Coming soon!
My 12 week Countdown to Christmas projects starts on 24 September and I’m really excited about creating some festive projects! I’ve planned it so that it will finish in the 2nd week of December.
I’ve been trying to think outside the box thus far to use the stamps in a non-Christmas way, so it’s refreshing to be able to use it as it was intended!
Thanks for visiting!

- SHOP ONLINE – EARN 10% REWARDS ON ALL PURCHASES OVER £20
- PURCHASE A STARTER KIT : Get £155 worth of products for only £99. Choose from current catalogues and any specials available. Free Shipping. Read more
- Subscribe to my Video Tutorials – click here