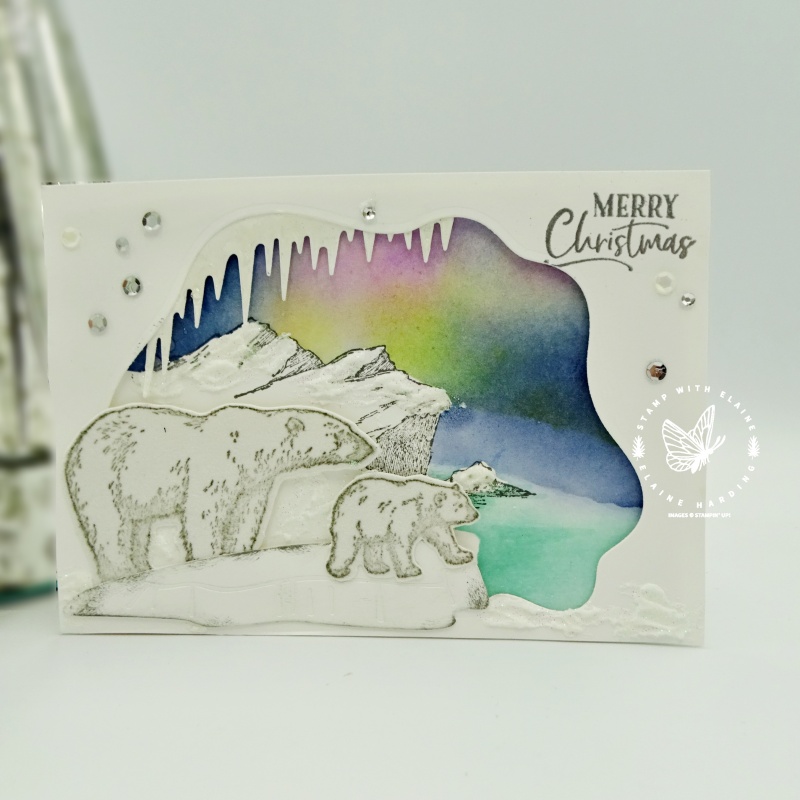
For today’s post, I made a diorama card with the Arctic Bears Bundle. First, though, just to say Happy Sunday to one and all.
We seem to be galloping toward the end of year! No stopping time, is there? As I pen this, I’ve already had my flu jab (late September). By the time this post is published, I would also have had my COVID booster so I’ll be all set for the winter!
Diorama layer
The cards I made with the Arctic Bears bundle were designed for posting as snail mail. If you missed it, you can see it HERE. I tried to keep those cards as flat as possible so it wouldn’t cost the earth to post.
For today’s card, there is only one single Diorama piece popped up on dimensionals – again trying to keep the bulk to a minimum so it can be posted if so desired. The Layering Diorama dies have been such a useful set and I’ve used them time and again.

Techniques
Masking technique – in order to mask the areas where you don’t want a stamped image or colour to appear, stamp the same image on a post-it note ensuring that you stamp where the sticky part of the post-it note is. Fussy cut the image just inside the line. Place this over image on your project so that when you use the blending technique to apply colour, the mask will cover the area you don’t want coloured.
For the blending technique, I used several inks to create the Aurora Borealis effect. I chose Night of Navy, Magenta Madness, Daffodil Delight and Pool Party. Pool Party was also used for the sea. Stampin’ Up!’s blending brushes are great for blending seamlessly between colours so that there are no harsh lines.
I made another Aurora Borealis blended card ages ago – click HERE to see it. It couldn’t be more different from today’s card!
Texture
In order to add texture without the bulk, I dug out my Shimmery White embossing paste. With the palette knives, I applied just a touch on the glaciers and the front of the Diorama layer.
One of the dies in the Polar Bears die set is a floating iceberg which I die cut and sponged round the edges with Basic Grey ink.
I wanted to show off the icicle die but didn’t want to add bulk, so I simply adhered it behind the Diorama layer. Then I used Crystal Effects for more texture on the icicles.
Finishing Touches
After going to all that effort to create the diorama scene, it did not seem appropriate to simply stamp the sentiment in Basic Grey ink. The Subtles Shimmer sequins has a mixture of matte silver, matte white, metallic silver, pearl white sequins. I used these as a finishing touch. So I thought I ought to emboss the sentiment in silver embossing powder to compliment the metallic silver sequins too.
Product ListThat’s all for today, thanks for popping by and enjoy the rest of your weekend.

- SHOP ONLINE – EARN 10% REWARDS ON ALL PURCHASES OVER £20
- PURCHASE A STARTER KIT : Get £155 worth of products for only £99. Choose from current catalogues and any specials available. Free Shipping. Read more
- Subscribe to my Video Tutorials – click here


