The theme for this month’s Tech 4 Stampers Blog Hop is Sale-a-bration. I chose the “Friendly Hello” stamp set and the Friendly Hello 12″ x 12″ (30.5 x 30.5 cm) Designer Series papers which is free with a £90 purchase.

Both the papers and the stamp set are lovely. In last month’s blog hop the brief was to case the catalogue. At the time the January-June 2022 mini had not yet launched. I was killing two birds with one stone and decided to post a “teaser” and a sneak peek using the long Slim Dies and the Friendly Hello stamp set. You can see the post HERE .

The Build & Bloom Stampers Blog hop (formerly Tech 4 Stampers)is a monthly subscription group run by Louise Sims. She mentors and enables members to understand IT jargon and equips them with a fountain of Technical knowledge to build or manage their own websites. It takes the mystery out of “tech” and I’ve certainly grown in confidence thanks to her expertise, patience and guidance. Not only that, I’ve met and made new friends with my fellow “Techs” and love the camaraderie within the group.

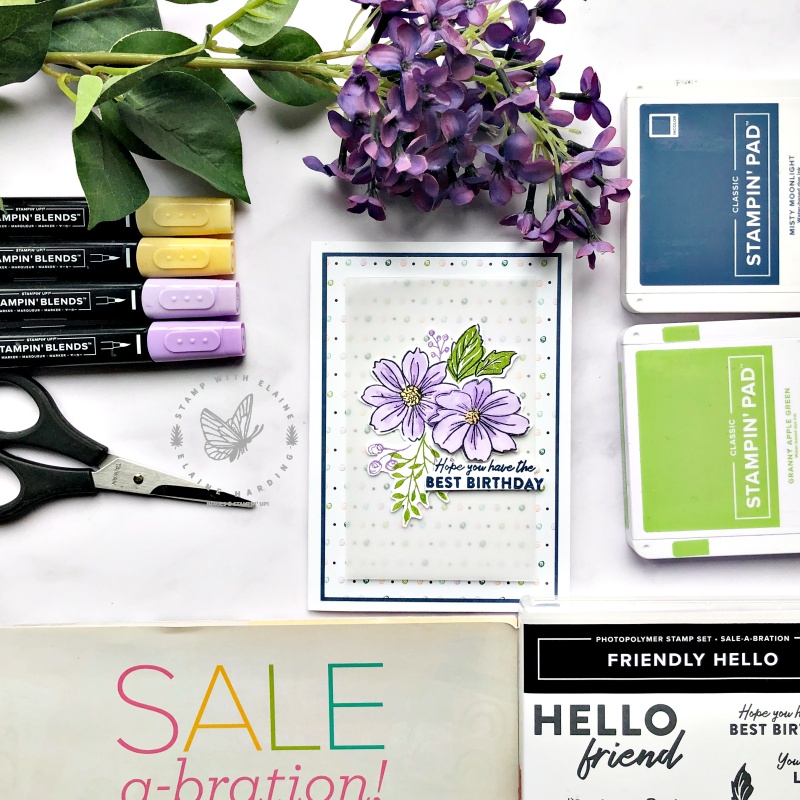
This time I’m using a simple layering technique and the floral stamp. You use a standard Basic White Thick card base, die cut Mat layers which decrease in size to show off the patterned papers to its best advantage.
My first mat layer is in Misty Moonlight, followed by the Friendly Hello DSP, and finally a piece of vellum which is opaque so you can still see the pretty paper underneath.
I stamped the floral images on Basic White card stock and coloured them in using Stampin’ Blends in Highland Heather, So Saffron. The other inks I used are Misty Moonlight, Granny Apple Green and Tuxedo Black Memento ink.
Other tweaks
To add dimension, I stamped a second flower, fussy cut and adhered it to the corresponding flower on a dimensional.
The smaller leaf stamp in the set does not have an outline. In order to make the design more cohesive, I used a black Stampin’ Write marker to trace the outline.
I stamped and fussy cut the sentiment in Misty Moonlight and adhered that with dimensionals just below the flowers.
Inside card
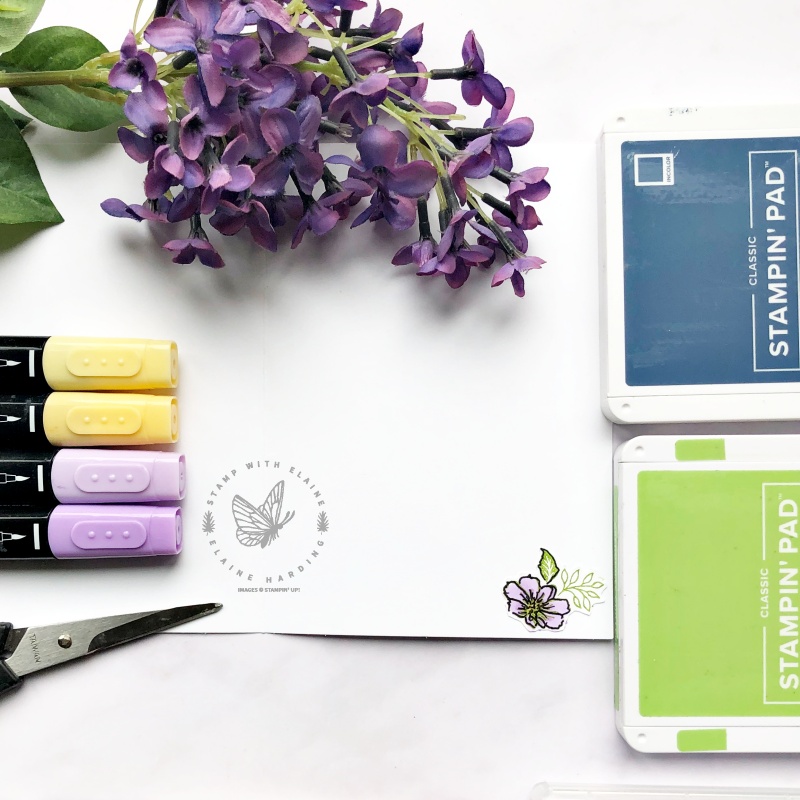
Unfortunately alcohol markers tend to bleed through the underside of the card stock. Instead of adding bulk to the card by inserting a whole card layer, I simply stamped a small floral image and coloured it with alcohol markers in the same hues, fussy cut it and adhered it to the bottom right corner.

Supply list
Listed below is the supply list. Just click on the picture to take you directly to the item in my online store.
Product ListThanks for visiting. I would love to know what you think of my project and would appreciate it if you could leave a comment. To visit the next person on the list and see their fabulous creations, simply click on the link below or before my name depending who you visited initially. Happy hopping!

- SHOP ONLINE – EARN 10% REWARDS ON ALL PURCHASES OVER £20
- PURCHASE A STARTER KIT : Get £155 worth of products for only £99. Choose from current catalogues and any specials available. Free Shipping. Read more
- Subscribe to my Video Tutorials – click here


Beautiful Card Elaine – I love the colours you have used & the vellum layer to soften the DSP.
Thank you Sara – loved yours too.
Elaine this is a fab card, I especially love how you have mixed up the colouring and the stamping too!
Thank you Heather, glad you’re back – loved your peekaboo card!