
It’s almost February, time to think about a Valentine card with watercolour wash as a background. Happy Sunday! Are you doing anything interesting today? Can’t believe we’re a whole month into the New Year which isn’t so new now and we’re galloping into February!
Have you tried Stampin’ Up!’s hybrid embossing folders? They allow you to cut and emboss at the same time, but you can also use it as just an embossing folder on its own. I love the fact that you have the option to die cut AND emboss at the same time, though.
The hybrid embossing folder incorporates a recessed groove for the die to sit in on the logo side of the embossing folder. It is 3D, so thicker than a standard embossing folder so you only require platform 1 and the grey platform 4 to run it though the Stampin’ Up!’s own brand of Stampin’ Cut & Emboss machine.
This is the first of quite a few cards I’ve created with this bundle. I will be posting a video tutorial with a more comprehensive dive into how the hybrid embossing folder and dies work together next week, so do pop back and visit!
Watercolour wash
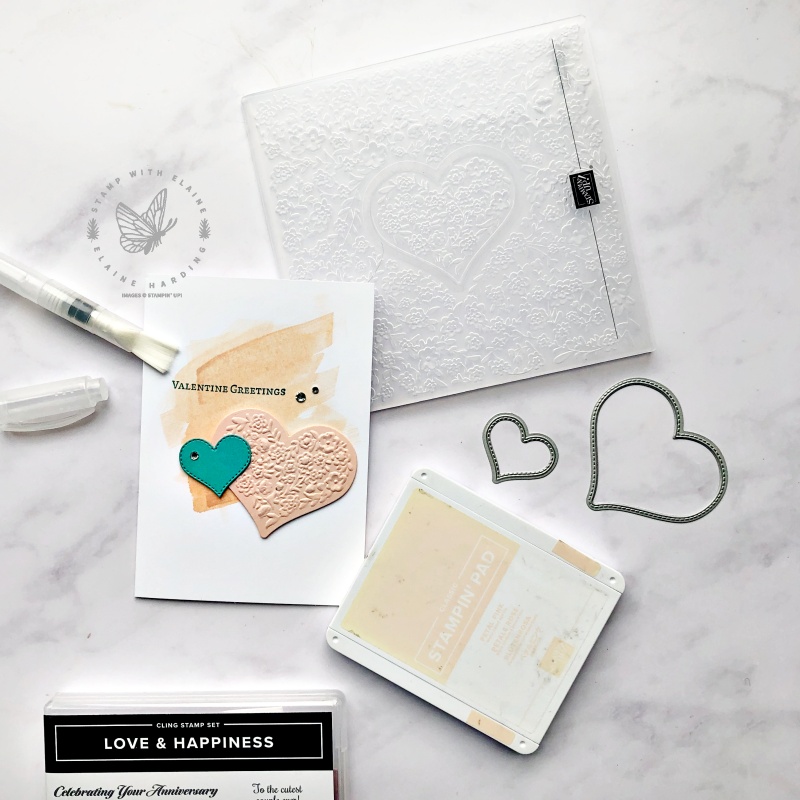
I’ve used Basic White thick for my card base because it will tolerate getting wet better than the Basic White. Use a medium size acrylic block to pick up ink from your ink pad to use as a palette. You can also squeeze the lid to transfer ink onto the lid and use that as your palette, if you prefer. My preference is to pick up ink with the acrylic block so I can keep the lids of my ink pads clean.
Stampin’ Up!’s water painters come in a pack of three with three different size brush tips – a fine, medium and large, flat brush tip. If you turn the reservoir clockwise, it loosens the barrel to put water in, then turn it anti-clockwise to tighten it.
I used the large flat tip, and I wet the tip first before picking up ink from the acrylic block then lay the colour down on the front of the card base in one direction rather than back and forth to prevent the paper pilling. Once you’re satisfied with how much area you want to cover, allow it to dry before proceeding further.
Die cuts
The larger die cut heart was actually a leftover piece from another card I’d created using the Bouquet of Love hybrid embossing folder. I die cut a smaller heart in Bermuda Bay and adhered both of these with dimensionals once the card had dried.
To finish the card, I stamped a sentiment from Love & Happiness in Bermuda Bay. Lastly, I added some Rhinestone Basic Jewels as a finishing touch.
Supply list
Listed below is the supply list. Just click on the picture to take you directly to the item in my online store.
Product List")
")


Thanks for visiting!

- SHOP ONLINE – EARN 10% REWARDS ON ALL PURCHASES OVER £20
- PURCHASE A STARTER KIT : Get £155 worth of products for only £99. Choose from current catalogues and any specials available. Free Shipping. Read more
- Subscribe to my Video Tutorials – click here